
Preserving vacation memories isn’t just about photos in a folder — it’s about creating something tangible, something that captures the feeling of the trip. A Vacation Collage Card Kit for Cricut offers everything you need to design layered, themed cards that are beautiful enough to display and personal enough to treasure.
Below, you’ll find five complete tutorials, each one with detailed steps from start to finish. Whether you’re reminiscing about a beach getaway, a mountain retreat, a road trip, a city adventure, or an international holiday, you’ll find a project that speaks to your travel story.
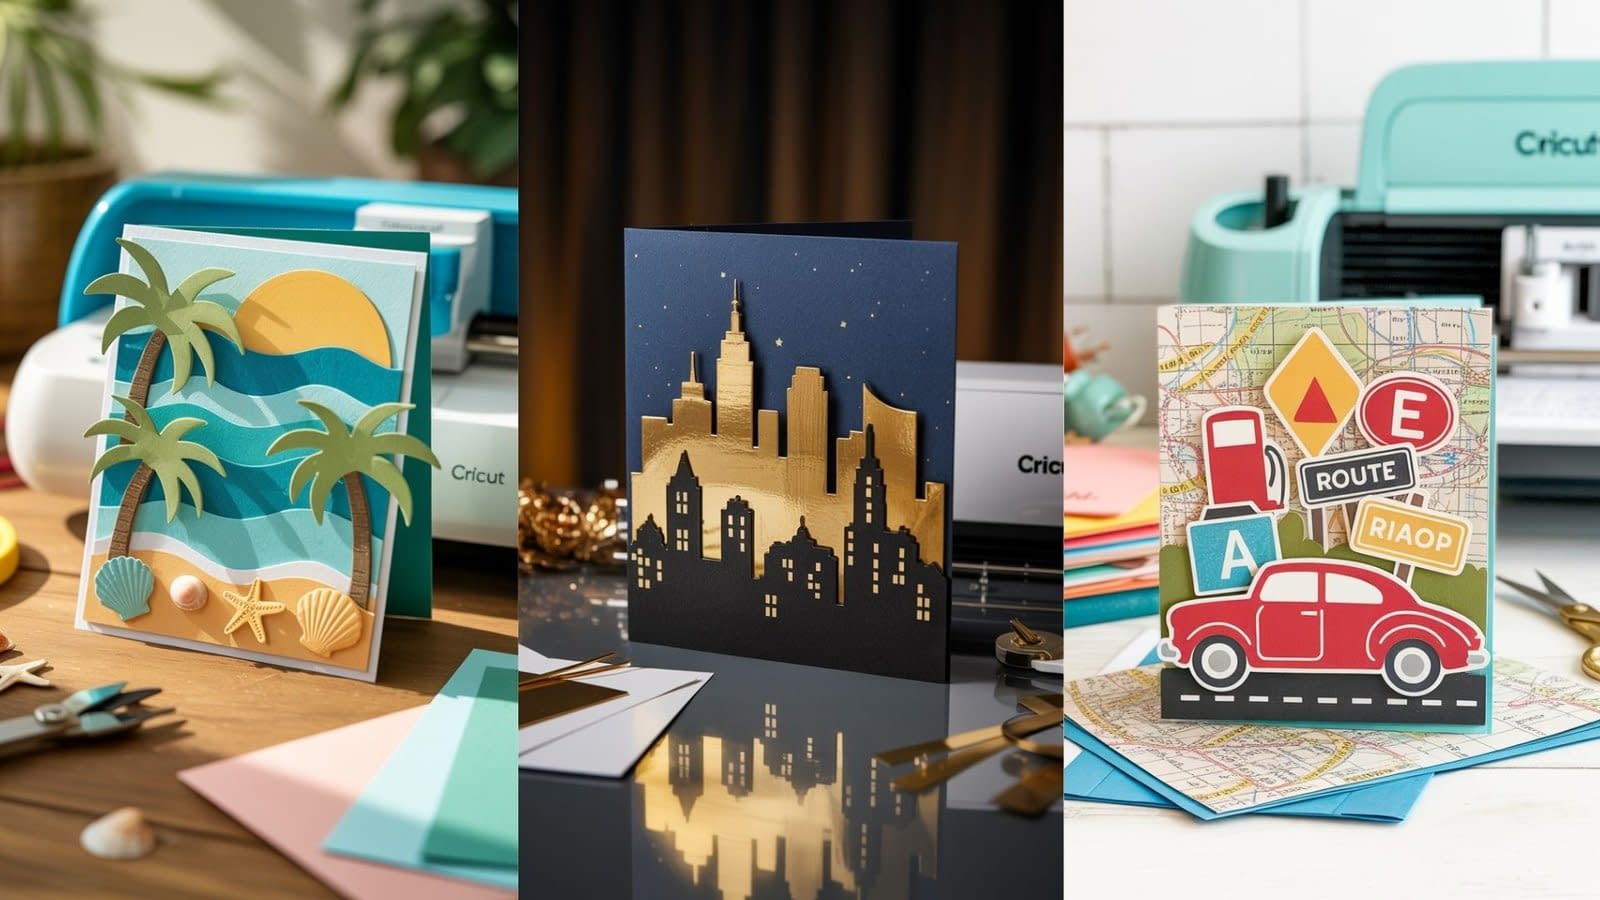
Tutorial 1: Tropical Paradise Vacation Collage Card

A layered beach scene with palm trees, waves, and sunshine — perfect for tropical getaways.
Materials & Tools
- Vacation Collage Card Kit for Cricut (tropical/beach-themed SVG set)
- Cricut Maker or Explore series
- StandardGrip (green) cutting mat
- Fine-point blade
- Cardstock (colors: turquoise, sand beige, palm green, sunny yellow, white)
- Adhesive foam dots for layering
- Glue or double-sided tape
- Optional: glitter cardstock for sun/water sparkle
- Cricut Design Space (desktop or mobile)
Cricut Design Setup
- Import the tropical SVG set into Design Space.
- Set card base size to 5×7 inches.
- Scale palm trees, wave layers, and sun to fit proportionally.
- Assign each layer to its color (turquoise for waves, green for palms, etc.).
- Use the “Attach” tool for grouped cuts.
Cutting Instructions
- Material setting: Medium Cardstock (80 lb)
- Blade: Fine-point blade
- Mat: StandardGrip (green)
- Cut all layers separately, keeping colors organized.
Assembly Steps
- Background Layer: Attach the turquoise wave layer to the card base.
- Palm Trees: Use foam dots to give them a 3D pop.
- Sun Layer: Glue the yellow sun behind the palm tree for depth.
- Accent Details: Add small shells or beach ball shapes from the kit.
Personalization Ideas
- Add your vacation destination name in Cricut-cut script font.
- Use glitter vinyl for the sun or water for extra shimmer.
- Print and cut a small beach photo to layer into the collage.
Tutorial 2: Mountain Escape Memory Collage Card

For ski trips, hiking adventures, or cabin getaways, this card features snowy peaks, trees, and layered clouds.
Materials & Tools
- Vacation Collage Card Kit for Cricut (mountain/wilderness SVG set)
- Cricut Maker or Explore series
- LightGrip (blue) mat for intricate cuts
- Cardstock (colors: sky blue, snow white, forest green, brown)
- Metallic cardstock for accents
- Foam adhesive squares
- Cricut fine-point pen for text
Cricut Design Setup
- Import mountain scene SVG into Design Space.
- Create layers: background sky, snow-covered mountains, foreground trees.
- Add a cloud layer with “Print Then Cut” option if desired.
- Position elements within a 6×6 inch square layout.
Cutting Instructions
- Material setting: Light Cardstock (60 lb) for delicate layers.
- Use LightGrip mat for easier removal.
- Cut mountains, trees, and clouds separately.
Assembly Steps
- Glue the blue sky layer to your card base.
- Add snow-capped mountains with foam squares for depth.
- Layer trees in the foreground, overlapping slightly.
- Add clouds last for a floating effect.
Personalization Ideas
- Write “Alaska 2024” or “Rocky Mountain Trip” using Cricut pens.
- Include a mini photo framed in cardstock to sit at the bottom corner.
- Use silver metallic cardstock for snow highlights.
Tutorial 3: Road Trip Adventure Collage Card

A fun, colorful design featuring a map background, a car silhouette, and iconic roadside elements.
Materials & Tools
- Vacation Collage Card Kit for Cricut (road trip SVG set)
- Cricut Maker, Explore, or Joy
- StandardGrip mat
- Printable sticker paper (for road signs)
- Cardstock in bright colors (red, yellow, blue, black)
- Double-sided tape
- Cricut fine-point blade
Cricut Design Setup
- Import road trip SVGs into Design Space.
- Use a vintage car or campervan shape as the centerpiece.
- Create a background using a printed map image — import it as “Print Then Cut.”
- Add road sign graphics and scale appropriately.
Cutting Instructions
- Map: Print Then Cut on sticker paper.
- Car: Cut from bold-colored cardstock.
- Signs: Print Then Cut for realism.
Assembly Steps
- Apply the map background to the card base.
- Place the car silhouette slightly tilted for a dynamic look.
- Add road signs with foam tape for layering.
- Include small embellishments like suitcases or gas pumps.
Personalization Ideas
- Mark your actual travel route on the printed map with a pen or vinyl cut.
- Use metallic vinyl for car trim details.
- Add “Summer Road Trip 2025” in a retro font.
Tutorial 4: City Lights Travel Collage Card

Perfect for New York, Paris, Tokyo, or any cityscape memory — this design focuses on skylines and night lights.
Materials & Tools
- Vacation Collage Card Kit for Cricut (cityscape SVG set)
- Cricut Maker or Explore series
- Black, navy, and gold foil cardstock
- StandardGrip mat
- Cricut foil transfer tool (optional)
- Adhesive foam dots
Cricut Design Setup
- Import skyline SVG into Design Space.
- Choose a multi-layer design: black silhouette + gold foil light accents.
- Size to 5×7 inches.
- Add a text overlay with your city name.
Cutting Instructions
- Skyline: Black cardstock.
- Light accents: Gold foil cardstock (or use foil transfer tool).
- Background: Deep navy cardstock for night sky.
Assembly Steps
- Glue navy background to the base.
- Layer skyline silhouette on top.
- Add gold foil details — either cut or transferred.
- Optionally add stars with a white gel pen.
Personalization Ideas
- Use a small printed photo of a landmark integrated into the skyline.
- Add foil text for the trip date.
- Include holographic vinyl for a neon sign effect.
Tutorial 5: Around-the-World Collage Card
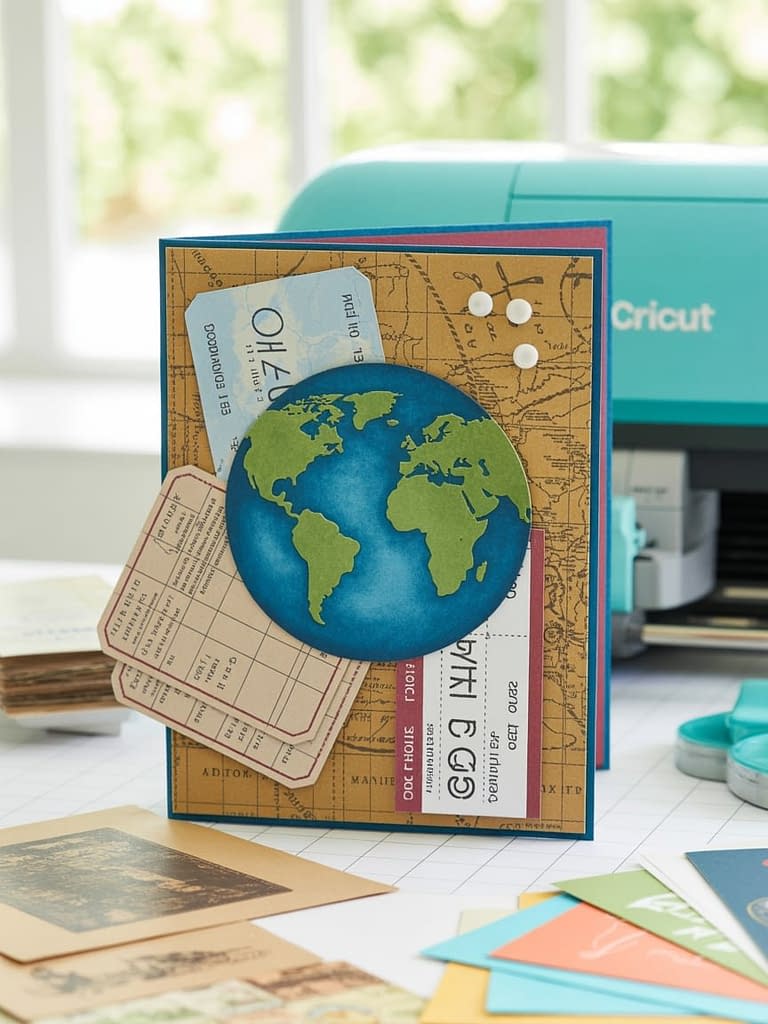
A global travel design with layered passport stamps, globe cutouts, and airline tickets.
Materials & Tools
- Vacation Collage Card Kit for Cricut (world travel SVG set)
- Cricut Maker, Explore, or Joy
- Printable sticker paper for passport stamps
- Cardstock (tan, navy, and vintage map print)
- Glue stick and foam tape
- Fine-point blade
Cricut Design Setup
- Import globe SVG, ticket shapes, and stamps.
- Set card size to 6×6 inches for more room.
- Print Then Cut passport stamps for authenticity.
- Layer globe pieces in different colors for depth.
Cutting Instructions
- Globe: Blue for oceans, green/tan for continents.
- Tickets: Tan cardstock with printed text overlay.
- Stamps: Print Then Cut on sticker paper.
Assembly Steps
- Attach vintage map print as your base.
- Place globe in the center using foam dots.
- Arrange tickets and stamps around the globe like a travel scrapbook.
- Add a small tag with your trip title.
Personalization Ideas
- Highlight countries you visited with metallic markers.
- Add a photo inside the globe cutout.
- Use real ticket stubs for authenticity.
Final Thoughts
A Vacation Collage Card Kit for Cricut is more than just a craft — it’s a way to preserve your travel story through texture, layers, and color. These five tutorials give you ready-to-make projects, each one fully customizable to your trips and style. Whether you prefer sandy beaches, snowy mountains, bustling cities, or epic road trips, there’s a collage card here that will help you capture the magic of your adventures in a beautiful keepsake.


