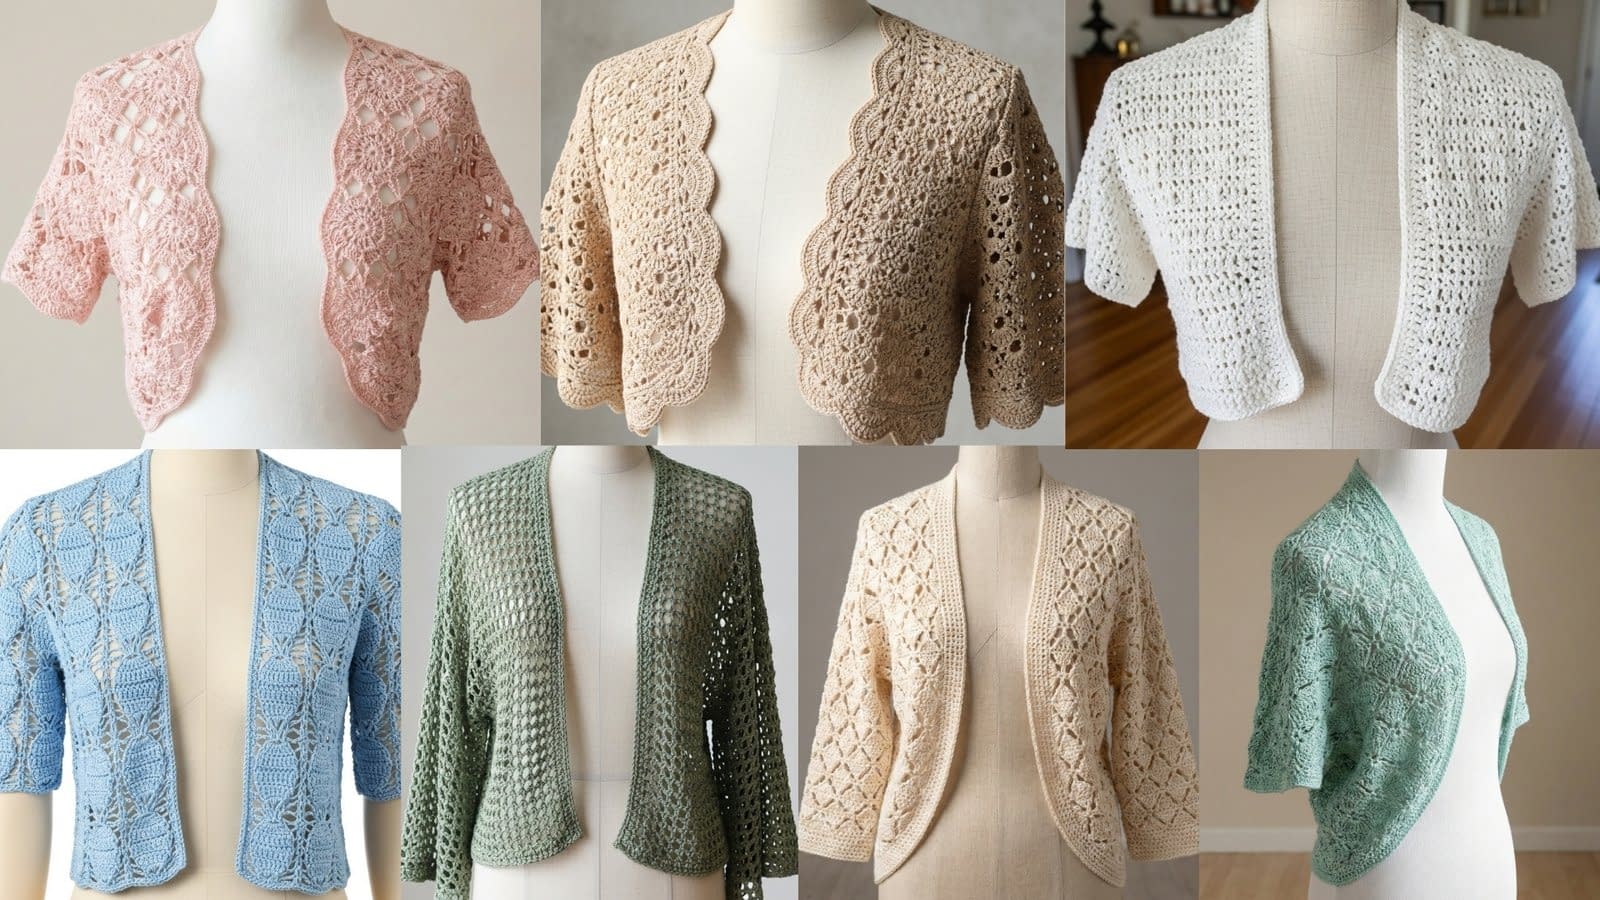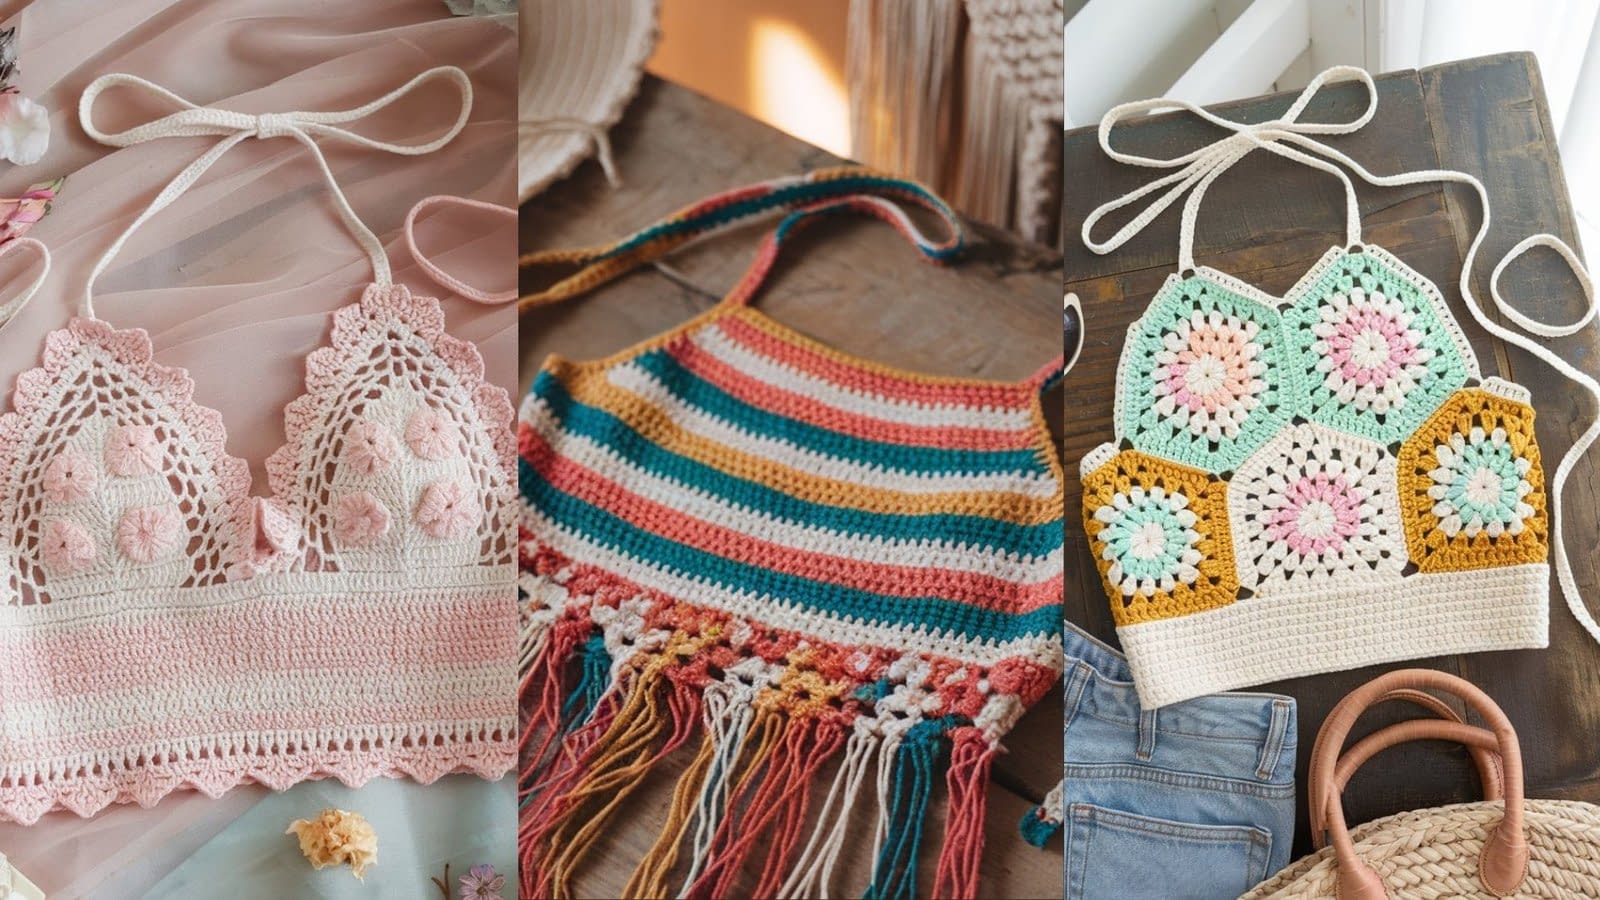
When summer arrives, there’s nothing better than slipping into something light, breathable, and stylish. Crochet halter tops are the perfect blend of handmade charm and modern fashion—easy to pair with jeans, skirts, or even over swimsuits. Whether you’re a beginner just learning the basics or an experienced crocheter looking for a fun new project, halter tops are a rewarding make.
In this post, I’ll walk you through 5 detailed crochet halter top patterns, each with clear step-by-step instructions, materials lists, and helpful tips. You’ll find something for every skill level, from beginner-friendly tops with simple stitches to more intricate designs with shaping and decorative details. By the end, you’ll not only have patterns to try but also inspiration for customizing them with your own yarn choices, colors, and finishing touches.
1. Classic Summer Crochet Halter Top Pattern
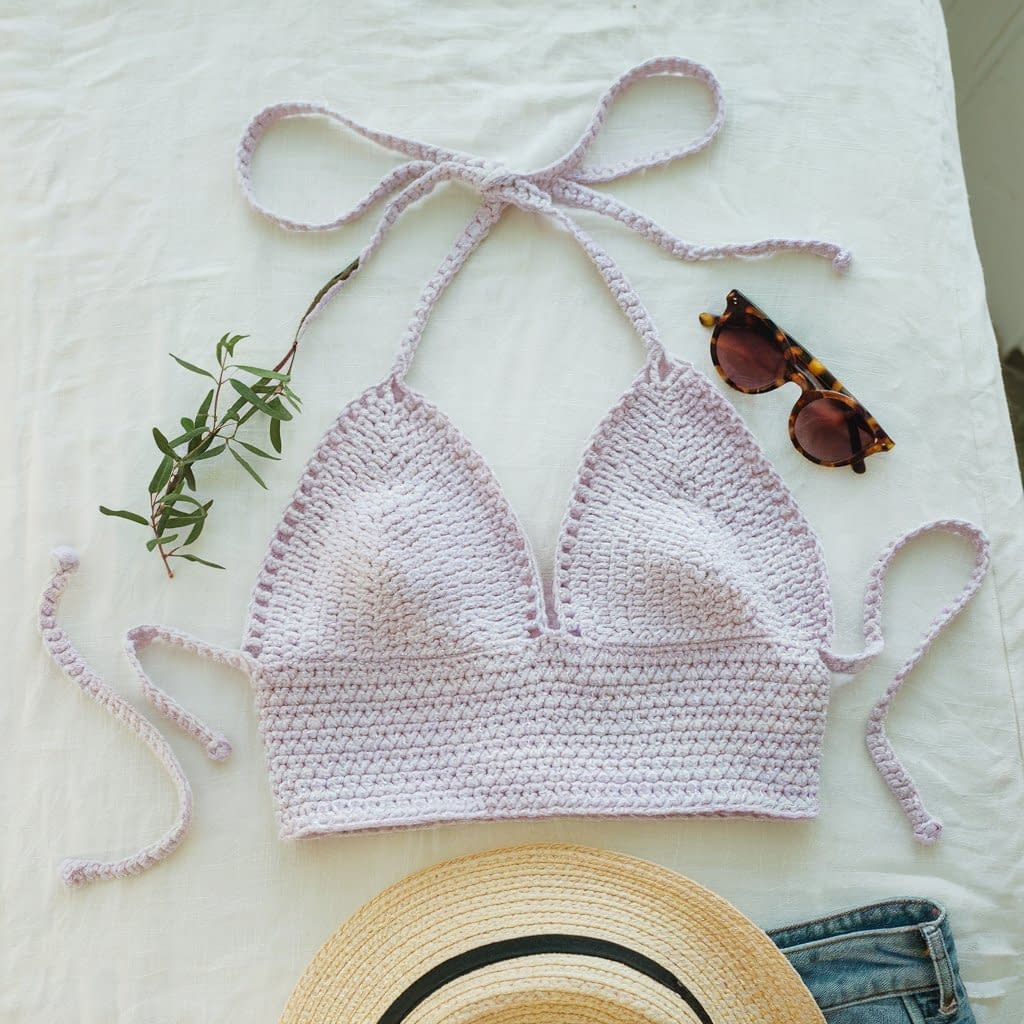
Skill level: Beginner–Intermediate (basic stitches + simple shaping)
Finished size: Adjustable (standard pattern fits bust 32–36″, adjust by chaining more or fewer stitches)
Materials
- Worsted weight (#4) cotton yarn in your preferred color (approx. 200–250 yds)
- Crochet hook: 4.0 mm (G)
- Yarn needle & scissors
- Stitch markers (helpful for keeping cups symmetrical)
Notes
- The halter is worked in two triangle cups joined together, with an underbust band and ties.
- Cotton yarn is recommended for comfort and breathability.
- You can easily adjust coverage by adding more rows to the cups or length to the band.
Step-by-Step Instructions
Triangle Cups (make 2)
- Foundation:
- Ch 12.
- Row 1: Dc in 4th ch from hook, dc across. (10 dc)
- Row 2 (Start shaping):
- Ch 3, turn. Dc in First St.
- Dc across until last st. In the last st: (2 dc, ch 1, 2 dc).
- This creates the “point” at the top of the triangle.
- Row 3:
- Ch 3, turn. Dc in each st until you reach the ch-1 space from the previous row.
- In ch-1 space: (2 dc, ch 1, 2 dc).
- Continue dc to the end.
- Repeat Rows:
- Keep repeating Row 3 until the triangle measures the desired height (usually 6–7″ for S/M, 8–9″ for L/XL).
Tip: Place a stitch marker in the ch-1 space so you never lose track of the “increase point.”
Joining the Cups
- Lay both cups side by side.
- With working yarn, join at bottom of left cup, chain 10–15 (adjust depending on how wide you want the gap), then slip stitch into bottom of right cup.
- This forms the underbust join.
Underbust Band
- Row 1: Ch 2, hdc across the bottom of the first cup, across the chain, then across the bottom of the second cup.
- Row 2–4: Ch 2, hdc in each st across. Continue until the band feels sturdy.
Straps
- At the top of each triangle, attach yarn. Ch 80–100 (depending on how long you want ties).
- Repeat for the second cup.
- At each end of the underbust band, attach yarn, ch 60–80 for back ties.
Finishing Touches
- Weave in all ends securely.
- Lightly block to even out stitches.
- Try it on and adjust ties for fit.
Variations & Customization
- Edging: Add a shell stitch or picot edging around cups.
- Color blocking: Work half the cup in one color and half in another for a bold look.
- Extra coverage: Add more rows to cups or extend the underbust band for crop-top length.
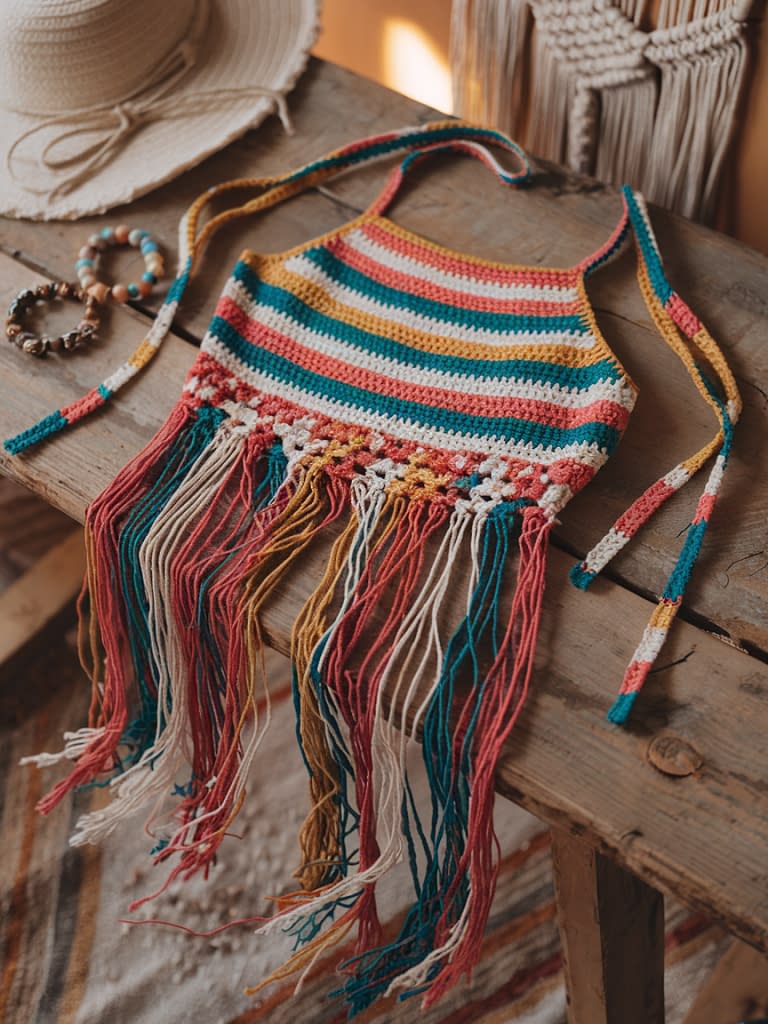
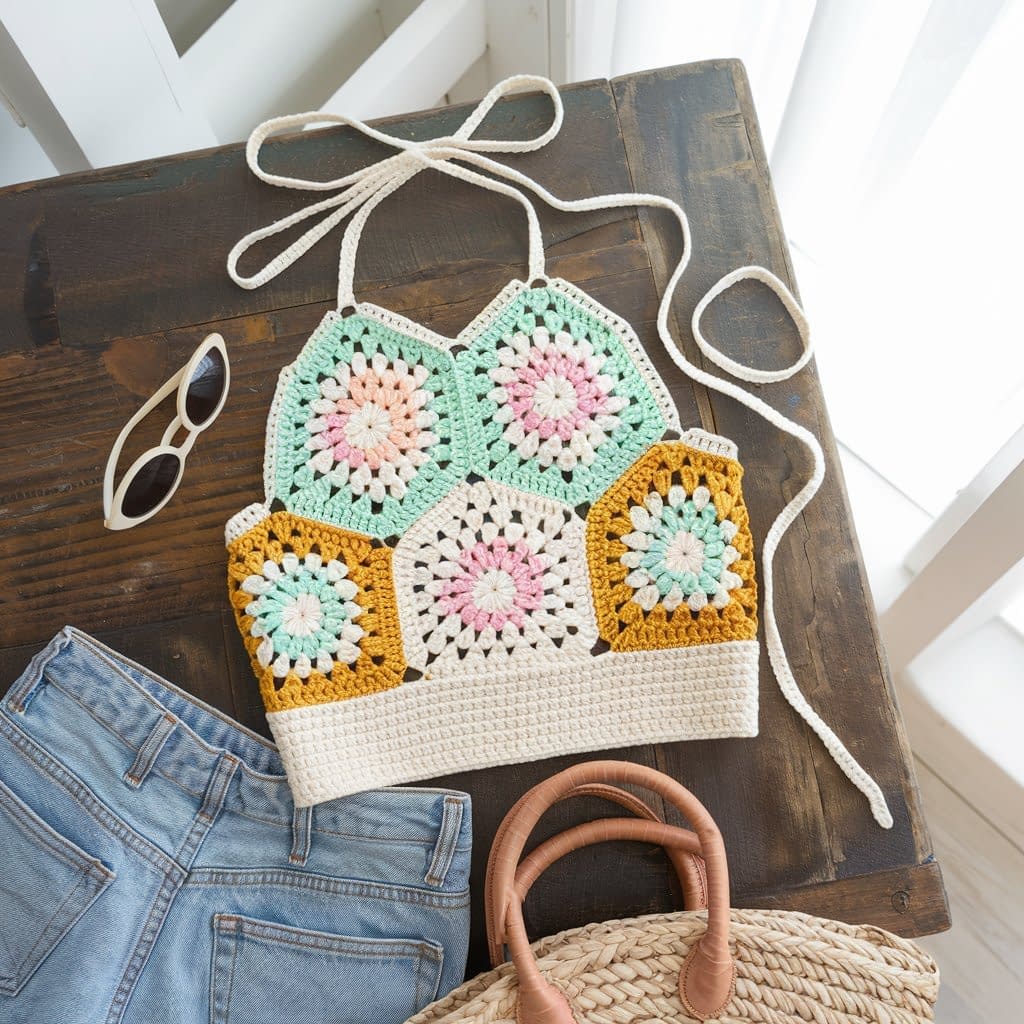
2. Boho-Inspired Granny Square Halter Top
Skill level: Intermediate (granny square basics, joining panels, shaping)
Finished size: Adjustable — pattern below builds a Small/Medium (bust 32–36″). Make more or fewer squares to size up/down. See sizing notes below.
Materials
- DK or light worsted cotton yarn (approx. 400–700 yds, depending on the number of squares and length)
- Crochet hook: 3.5 mm (E) or 4.0 mm (G) — choose the hook that gives the recommended gauge for your yarn and desired drape
- Yarn needle, scissors, stitch markers
- Optional: small beads or sequins for center decoration, blocking mats, and pins
Notes (before you start)
- This design is built from granny squares joined into a halter shape. You control coverage by the number and size of squares.
- The sample layout below uses 6 medium granny squares (two for the bust, two below, two on the sides/underbust). Adjust by adding rows to the squares for larger sizes.
- Gauge (approximate): 3 rounds of classic granny square ≈ 3.5″ square with DK yarn and 3.5 mm hook. Make a test square to confirm.
Granny Square (Make 6–8; pattern makes a medium square — make larger by adding rounds)
Round 1 (center):
- Ch 4, join with sl st to form a ring.
- Ch 3 (counts as first dc). Work 2 dc, ch 2, 3 dc into ring. (This makes the first corner.)
- Ch 1, 3 dc, ch 2, 3 dc into ring — repeat 3 more times so you have four corner clusters separated by ch-1 spaces.
- Join with sl st to the top of the ch-3. Fasten off or continue to Round 2.
Round 2 (form larger square):
- Join contrasting colors in any ch-2 corner space. Ch 3. (counts as dc)
- Work 2 dc, ch 2, 3 dc into the same corner space.
- Ch 1, in next ch-1 space work 3 dc (this is the side). Ch 1.
- In the next corner ch-2 space: 3 dc, ch 2, 3 dc. Repeat around: side cluster, corner cluster, until you return to the starting point.
- Join with sl st. Fasten off or continue.
Round 3 (optional for larger square):
- Join color, ch 3, work 2 dc, ch 2, 3 dc into corner; ch 1, 3 dc into each side cluster across, ch 1 between side clusters, corner cluster in ch-2 space. Repeat. Join and fasten off.
Tip: Keep rounds even — always work corner clusters exactly into the ch-2 corner space. Count clusters along each side (you should have the same number on every side).
Assembly & Shaping
Layout suggestion for S/M:
- Row 1 (top/bust): two squares side-by-side (join along one side, right sides facing).
- Row 2: two squares below, joined to the lower edge of row 1 squares (this creates a front panel).
- Side panel/s: Use one square on each side if you want wraparound coverage.
Joining method (visible join or invisible join):
- For a neat, flat join, use whip stitch or mattress stitch with matching yarn and tapestry needle, sewing from WS to RS so seam appears invisible.
- For boho texture, slip-stitch join through both loops, or use a contrasting color join to make a decorative ridge.
Forming the halter shape:
- After joining squares into a front panel, decide where the neckline will be. If you want more coverage, overlap the two top squares slightly.
- Along the top outer corners of the top two squares, attach yarn and chain for neck ties: Ch 100–140 (or measure over shoulders and add length for bows). Fasten off.
- At the underbust lower corners, chain 80–120 for back ties or join band (instructions below).
Underbust Band (optional — more secure than long ties)
- With RS facing, join yarn across the bottom edge of the joined squares. Ch 2 (counts as hdc), work hdc evenly across the bottom, including across the seam/chains between squares — aim for 3–6 rows of hdc to make a stable band.
- If you prefer an elasticized band, work in back loops only (BLO) for each row so the band cups stretch slightly.
Finishing & Edging
- Add a simple border around the whole top: join yarn at one corner and work 1 round of sc evenly, placing (sc, ch 1, sc) in corner ch-2 spaces to keep corners flat.
- Add fringe along the bottom row: cut yarn pieces 6–8″ long, fold in half, and pull through edge sts every other stitch. Trim evenly.
Troubleshooting
- Squares don’t line up: Check that each square has the same number of rounds and that you joined corners consistently. Undo join and realign counts.
- Neck ties too short/long: Make ties longer and knot to check the length before finishing ends. You can always trim later.
- Top gaps or gaping unite at the center: Add a small triangle insert or extra granny half-square to cover the gap.
Variations
- Make larger squares (add 1–2 rounds) for fuller coverage or fewer squares for a biker-shorts style crop.
- Use beads in the centers of some squares for a boho shimmer.
- Sew a soft cotton lining to the inside of the top for extra support.
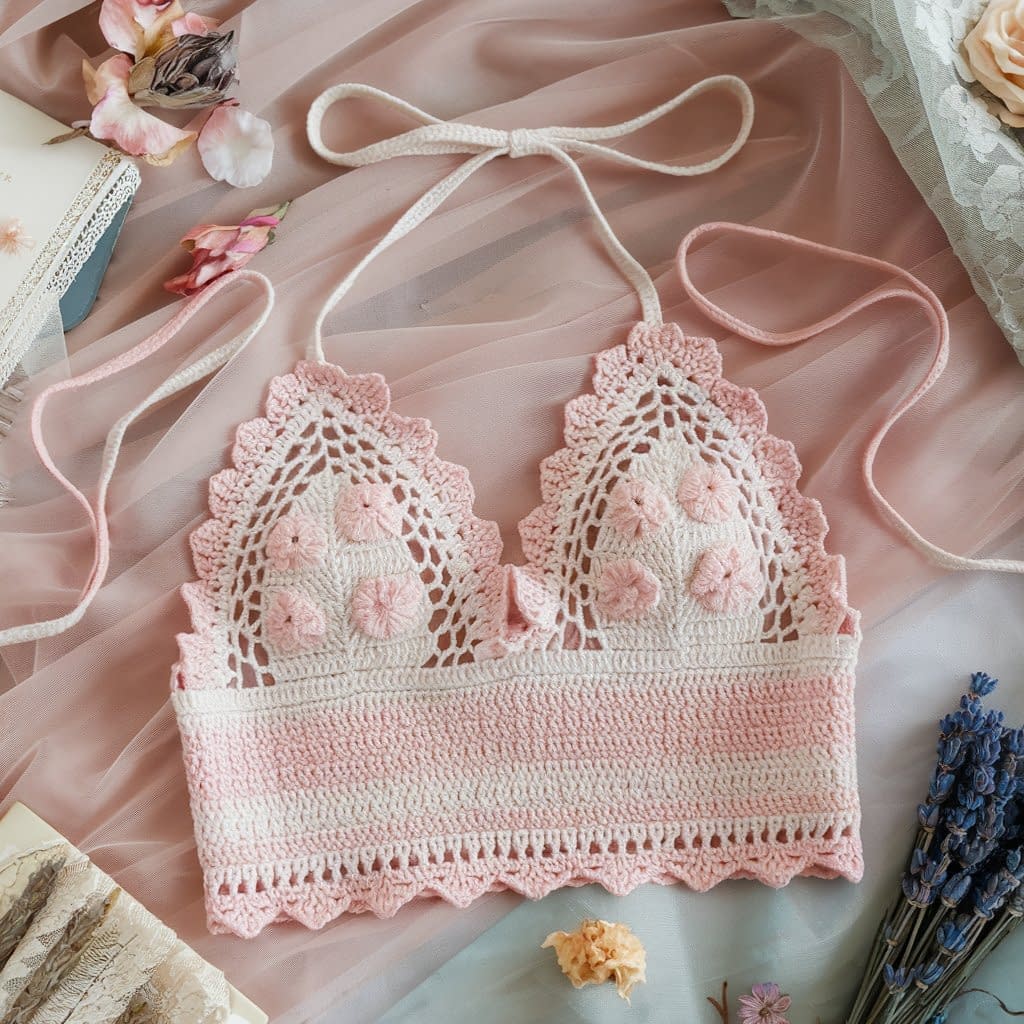
3. Lacy Summer Festival Halter Top (Shell & Chain Lace)
Skill level: Intermediate–Advanced (lace stitch patterns and shaping)
Finished size: Sample fits S/M (bust 32–36″). Add or reduce lace repeats to resize; measurements included at the end.
Materials
- Fingering or sport-weight cotton or linen blend (approx. 350–600 yds depending on length)
- Crochet hook: 3.0 mm (D) or 3.5 mm (E) for softer lace drape
- Yarn needle, blocking pins, tapestry needle, stitch markers
Notes
- Lace is forgiving but shows tension. Make a gauge swatch: 24 dc × 10 rows = 4″ is a rough guideline for fingering weight with a 3.0 mm hook — do your own swatch.
- This pattern uses shell stitches and chain arches to create a drapey, open fabric ideal for summer festivals.
Lace Stitch Pattern (multiple of 8 + 1)
Row A (Foundation Lace Row — worked flat):
- Ch 65 (or desired width — should measure approx. 12–14″ across for one cup before shaping). Add 1 for balance.
- Row 1: Dc in 4th ch from hook (counts as dc), ch 2, skip 2 ch, 5 dc in next ch (shell), skip 2 ch, ch 2, dc in next ch — repeat across. End with dc in the last ch. Turn.
Row B (Arch row):
- Ch 3, turn. Skip first 2 dc, sc in next dc, ch 3, sk 2 dc, sc in center of shell (3rd dc of shell). Repeat across so you create small chain arches between shells. End with ch 1, dc in turning chain.
Row C (Shell stabilization):
- Ch 3, turn. Work (2 dc, ch 2, 2 dc) into each chain-3 arch from Row B (this forms a shell into the arch). Continue across. Turn.
Repeat Rows A–C until the body length (measured from underbust to top of bust) is about 5–6″ for S/M.
Making the Triangle Cups (Make 2)
Cup foundation (lacy triangle):
- Ch 8, join to form a short ring (or ch 6 and start foundation chain if you prefer). Work in rows with a shell increases at the edges to create triangular growth. Use the lace stitch above, but work short rows increasing at each end: at each row end, add (2 dc, ch 2, 2 dc) into the last arch to form corner increases.
- Continue until cup measures ~7–8″ tall (or desired cup height). Keep tension even; lace can skew if increases are missed.
Alternative cup method: Make cups by crocheting flat rectangle in lace stitch, fold into triangle and seam the long side to create cup shape — this gives neater line for lace.
Joining Cups to Body Panel
- Crochet a body panel in lace stitch (in the round or flat) that wraps under the bust and covers the front torso. The two cups are attached to the top of the body panel: place cups with RS facing out, align centers, and whip stitch or slip-stitch them to the panel, being careful to match lace motifs so shells sit aligned.
- For a cleaner join, work a round of sc along the top edge of the body panel and join the cups into the sc round.
Neck and Back Ties
- Create fine, decorative ties by making a chain-scord: chain desired length (80–120), then sl st back along that chain for a twisted cord look. Attach at the triangle corners.
- For adjustable straps, add small wooden bead toggles on ties so you can slide and set the halter length.
Finishing & Blocking
- Lace benefits from wet-blocking to open up motifs and even stitch placement. Soak the top gently in lukewarm water, press out excess water with a towel, pin to shape on a blocking mat, and allow to dry fully. This helps shells sit flat and the lace look professional.
Troubleshooting
- Lace pulling or puckering: Check that you maintained consistent ch-space counts; if shells are inconsistent, frog back to the last even row.
- Cups uneven: Use stitch markers on each cup’s center and edge to track increases; count stitches every 4–6 rows.
- Body too open for support: Add a row of dc inside to stabilize band under bust.
Variations
- Add a thin lining or sewn-in shelf bra for added support.
- Work the top slightly longer and attach a scalloped hem for a tunic version.
- Embellish shell centers with tiny seed beads for sparkle.
4. Crop-Style Crochet Halter with Ribbed Band
Skill level: Beginner–Intermediate (working in back loops, simple shaping)
Finished size: Sample fits bust 32–36″. Band is snug and ribbed to stay in place — add rows for fuller coverage.
Materials
- Worsted cotton yarn (approx. 300–500 yds)
- Crochet hook: 4.5 mm (7) for looser rib, or 4.0 mm for firmer band
- Yarn needle, stitch markers, measuring tape
Notes
- This pattern focuses on a sturdy, ribbed underbust band worked in back loops only (BLO) with a lighter cup built onto it. The rib provides stretch and structure like a knit rib.
- If you want a fitted crop length, measure the band snugly around the ribcage and subtract 1–2″ for stretch.
Ribbed Band (worked flat and seamed or in rounds)
Option A — Flat then seam (recommended for control):
- Chain to length: measure around your ribcage under bust and chain that many sts plus 1. Example: for a 32″ ribcage with gauge 5 sc = 1″, chain 160 (this is an example — use your own gauge). Don’t fasten off.
- Row 1: Sc in 2nd ch from hook and across working in back loop only (BLO). Turn.
- Rows 2–12: Ch 1, sc BLO across. Repeat until band height ~3–4″, depending on how much rib you want. Fasten off, leaving a long tail for seaming. Fold the band so the short ends meet and sew with mattress stitch to form a tube.
Option B — In the round:
- Ch to desired length, join, then sc BLO in rounds for 3–4″ (this will produce less obvious rib but still elastic).
Tip: Working in BLO creates ridges similar to ribbing. If you’d prefer more elasticity, use hdc BLO.
Attaching Cups to a Band
Cup construction (worked from the band up):
- With the RS of the band facing you and stitch markers at the center front, join yarn at the desired cup start point (left side of center). Ch 3 (counts as dc).
- Row 1 (cup base): Dc across approx. 10–14 stitches (this forms the lower base of the triangle). Turn.
- Row 2: Ch 3, dc in first st, continue until last st, and place (2 dc, ch 1, 2 dc) in last st to increase corner. Turn.
- Row 3+: Continue increasing at the outside edge only (if you want an asymmetrical cup) or at both edges to form an even triangle — choose two-sided increases for a centered triangle. Continue until cup reaches desired height (6–8″). Fasten off, leaving 12″ tail.
Make a second cup mirroring the first so both are symmetrical.
Joining cups to the band (if not worked directly):
- Align cups on the RS of the band with a space in between equal to your center front preference (for more coverage, bring cups slightly closer). Whip stitch cups to the band along the lower edge. Use matching yarn and small, even stitches.
Straps & Back Closure
- Neck ties: Attach yarn to the top outer corner of each cup. Ch 80–120 and fasten off. For extra comfort, plait chains into braided ties or make a chain-scord for more strength.
- Back ties or strap: You can leave the band fixed and create back ties at band ends (ch 60–90) or attach a small set of buttons and buttonholes in the band for a cleaner closure. To make buttonholes, leave a gap of ch-space when forming the band and secure buttonhole placement at 1″ intervals.
Finishing & Edge Treatment
- Work 1 round of sc around cups and band junction for reinforcement. Add a decorative picot or shell edge around cups if desired.
- Weave in ends and block lightly.
Troubleshooting
- Band too loose: Remove a row or two and retest, or work an additional row in hdc for stability.
- Cups gape at the center: Decrease the space between cups when joining or add a center tie that pulls cups together.
- Rib too tall/short: Unpick or add rows to reach the desired band height—measure on the body as you go.
Variations
- Long crop version: add 4–8 extra rows to the band and body, turning the piece into a short top.
- Add a cuffed hem or fringe to the bottom for a summer boho look.
- Make the rib in a contrasting color for visual interest.
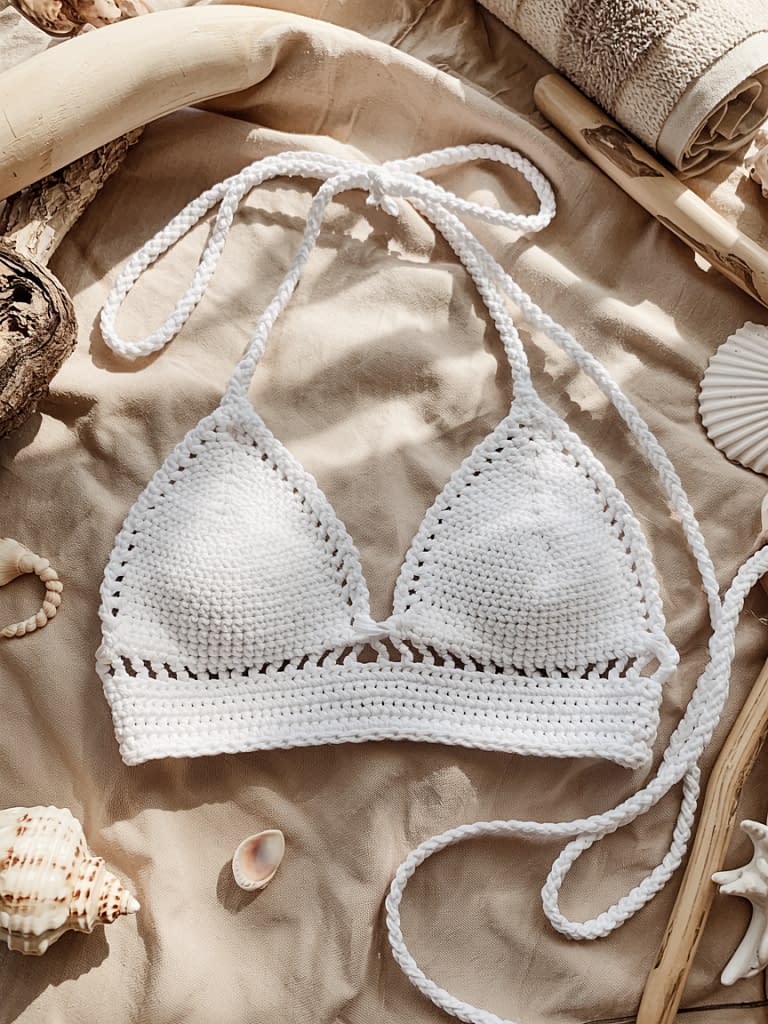
5. Open-Back Mesh Halter Top (Beach & Swim Cover)
Skill level: Intermediate (mesh stitch and shaping, working in rounds optional)
Finished size: Sample fits Small/Medium. Mesh makes it breathable — size by adding mesh repeats.
Materials
- Sport or light worsted cotton yarn (approx. 300–550 yds)
- Crochet hook: 3.5 mm (E) or 4.0 mm (G), depending on yarn weight and openness desired
- Yarn needle, stitch markers, optional drawstring cord
Notes
- Mesh halters are airy and work well as beach cover-ups. The mesh stitch is simple: (dc, ch 1, skip 1) across to create open diamonds. Use a slightly smaller hook for more structure if you plan to wear it as a top rather than a cover-up.
Foundation Band (Bottom edge)
- Ch 90 (or measure around ribcage + 2–3″ for negative ease and chain accordingly). Join with sl st to work in the round, taking care not to twist.
- Round 1: Ch 2 (counts as hdc), hdc evenly around in each ch; join with sl st. (This stabilizes the bottom.)
- Round 2: Ch 3, dc in same st, ch 1, skip next st, dc in next st — repeat around to form mesh base. Join. This establishes the mesh repeat.
Mesh Body (work until just under bust)
- Round 3: Ch 3, dc in next st, ch 1, sk 1 repeat — the pattern should line up so chain spaces form diamonds. Continue for 6–10 rounds depending on desired body length.
- To stabilize side seams where cups will attach, work an extra round of dc along the side panels where cups will be sewn.
Bust Triangles (Make 2)
Worked flat to maintain shaping:
- Ch 10. Row 1: Dc in 4th ch from hook and across to end to form a small rectangle. (7 dc)
- Row 2: Ch 3, turn. Dc across, placing (2 dc, ch 1, 2 dc) in the last stitch to increase one edge and make the triangle grow.
- Row 3+: Continue working rows with increases at the outer edge and at the inner edge every other row to form a symmetric triangle. Introduce mesh stitch into the cup after the width base is established: work dc, then ch 1, skip 1 for an open effect. Continue until cup height ~7–8″ or desired coverage. Fasten off, leaving a long tail.
Alternative: Make cups by crocheting in mesh stitch and folding into a triangle to seam the center back.
Attachment & Open-Back Construction
- Lay the mesh body panel flat and place cups on the front so the tips meet the center front seam, or leave a 1–2″ gap for a center decorative tie. Pin in place.
- With tapestry needle and matching yarn, sew cups to mesh body along the lower and side edges only, leaving the upper outer cup edges free for tie attachment. Use small, neat stitches to avoid puckering.
Open back treatment:
- Instead of a full back band, leave the back open and attach two side straps from each underbust side to tie across the back, creating a crisscross open back. Measure the body before finishing ties.
Straps, Ties & Drawstrings
- Neck ties: Attach a chain from each top outer cup and tie behind the neck. For a thicker strap, make three chains and braid or do a sc-row along the chain to thicken.
- Underbust tie option: Thread a narrow chain cord through the underbust mesh row and tie at the back. This allows an adjustable fit and is great for swim cover-ups.
Finishing & Embellishment
- Add small tassels at the ends of ties for beachy style. Wrap tassel tops with a few wraps of yarn and sew in place.
- For more structure, add a hidden elastic strip sewn into the underbust row.
Troubleshooting
- Mesh sagging: Switch to a slightly smaller hook to close the mesh or add a row of dc every 6–8 mesh rounds for stability.
- Cups don’t sit properly: Ensure cup base width matches the row where you attach to the body. Add a few extra rows to widen or narrow before sewing.
- Open back too loose: Add additional tie points or a back band to make the top sit snugly.
Final notes for all patterns
- Sizing: Always measure the wearer and compare to the sample finished sizes. Add or subtract rows/stitches incrementally and re-measure frequently.
- Blocking: Most cotton and linen yarns benefit from gentle blocking to even stitches and improve drape. Be cautious with synthetic blends that may not respond to wet blocking.
- Support options: If you need more support for larger sizes, add a sewn-in shelf bra, a lining, or bra cups that can be inserted.