
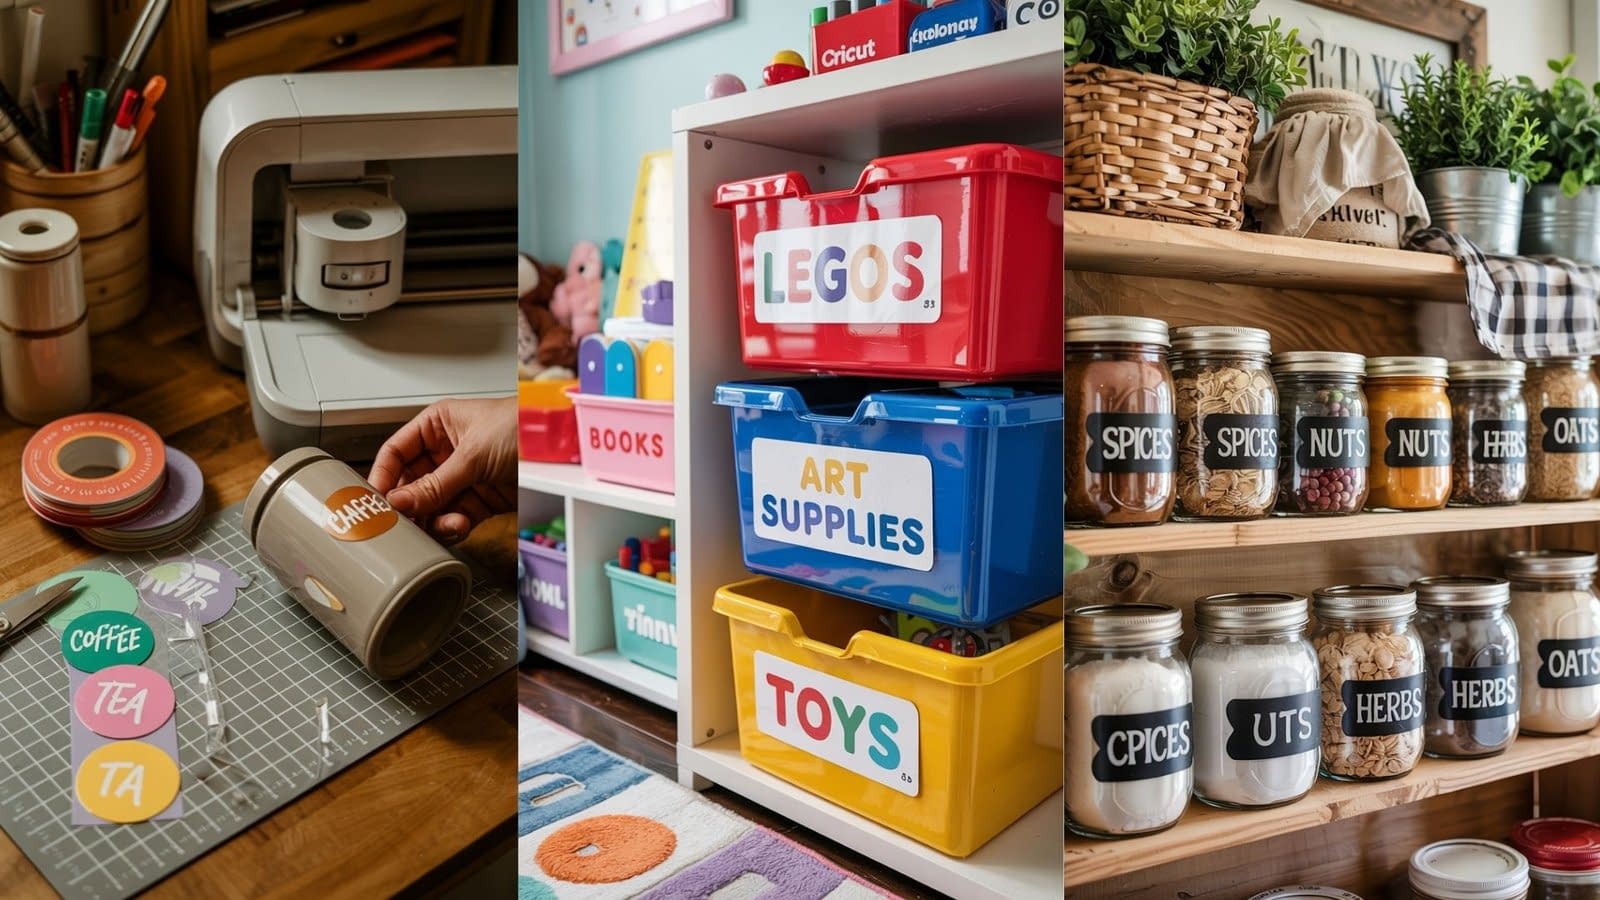
Organizing your space becomes a joy when your storage is neat, stylish, and personalized. With Cricut, you can craft your own Cricut Vinyl Label Set DIY in endless ways—perfect for kitchens, offices, gifts, or even business branding. In this detailed guide, you’ll not only learn the basics of Cricut vinyl labels but also explore five complete DIY tutorials, each focusing on a different type of label project.
Tutorial 1: Pantry Jar Vinyl Labels

Pantry organization is one of the most popular Cricut label projects. Sleek vinyl labels instantly make jars and containers look tidy and stylish.
Materials Needed
- Permanent matte vinyl (black or white for contrast)
- Transfer tape
- Cricut cutting mat
- Weeding tools
- Glass or plastic jars
Steps
- Open Cricut Design Space and create text labels for common pantry items (e.g., Flour, Sugar, Pasta, Coffee).
- Choose a bold, legible font for easy readability.
- Cut the designs onto permanent vinyl.
- Weed the extra vinyl and apply transfer tape.
- Clean jar surfaces with rubbing alcohol.
- Apply the labels carefully and smooth with a scraper.
Pro Tip: Keep label sizes consistent for a uniform look across all jars.
Tutorial 2: Office Supply Labels

Keep your desk or craft room clutter-free with customized office supply labels.
Materials Needed
- Removable vinyl (for flexibility if you reorganize often)
- Cricut Joy or Explore machine
- Transfer tape
- Plastic or metal storage bins
Steps
- In Cricut Design Space, type out label names like “Pens,” “Files,” “Sticky Notes,” “Receipts.”
- Use simple sans-serif fonts for a clean, professional vibe.
- Cut the vinyl and weed away excess.
- Use transfer tape to apply labels to bins, drawers, or folders.
- Smooth and peel away tape slowly.
Pro Tip: Add small icons (like a paperclip or pencil symbol) next to the words for a more playful office design.
Tutorial 3: Kids’ Toy Bin Labels

Make cleanup fun for kids by labeling toy bins with both words and images.
Materials Needed
- Colorful permanent vinyl sheets
- Cricut Design Space graphics (e.g., car, teddy bear, puzzle piece)
- Transfer tape
- Large plastic toy bins
Steps
- In Cricut Design Space, pair text (e.g., “Cars”) with matching icons.
- Choose bold, playful fonts kids can easily recognize.
- Cut designs in bright vinyl colors.
- Weed and transfer onto toy bins.
- Show kids how to match toys with their labeled bins.
Pro Tip: Use removable vinyl if you want to swap designs as kids’ interests change.
Tutorial 4: Bathroom & Skincare Labels

Bring elegance to your bathroom by labeling soap bottles, skincare jars, or cotton ball containers.
Materials Needed
- Waterproof permanent vinyl (black, white, or metallic)
- Transfer tape
- Glass or ceramic containers
Steps
- In Design Space, create minimalist text labels such as “Shampoo,” “Conditioner,” “Lotion.”
- Select a modern, thin-line font for a spa-inspired aesthetic.
- Cut the vinyl and weed carefully (thin fonts require patience).
- Apply with transfer tape to each bottle or jar.
- Smooth and press firmly to ensure adhesion against moisture.
Pro Tip: Metallic gold or silver vinyl gives a luxurious hotel-style look.
Tutorial 5: Gift & Event Labels
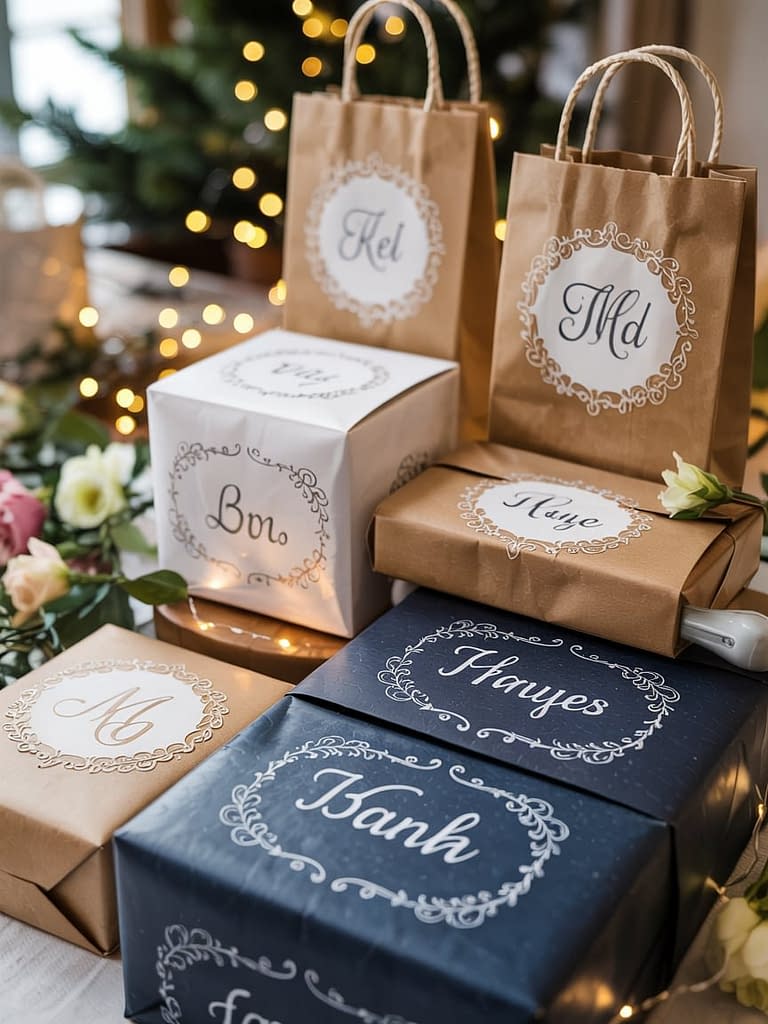
Personalized labels elevate gift-giving and special events. Perfect for birthdays, weddings, or holidays.
Materials Needed
- Removable glossy vinyl (for temporary use)
- Transfer tape
- Gift bags, boxes, or wine bottles
Steps
- Open Cricut Design Space and design custom names, dates, or monograms.
- Choose decorative fonts or add flourishes for an elegant touch.
- Cut designs onto vinyl and weed carefully.
- Apply transfer tape and stick labels to gift packaging or event favors.
- Remove transfer tape and admire your professional finish.
Pro Tip: For weddings, match vinyl label fonts with the event’s invitation typography for a coordinated design.
Which Cricut Vinyl Label Set DIY Will You Try First?
These five Cricut Vinyl Label Set DIY tutorials show just how versatile Cricut vinyl projects can be. From pantry organization to gift personalization, Cricut labels add both functionality and beauty to everyday life. Once you’ve tried one project, you’ll find yourself inspired to create entire sets for every room in your home—or even start crafting for friends, family, or customers.
With the right vinyl, a bit of creativity, and your Cricut machine, the possibilities are limitless.


