
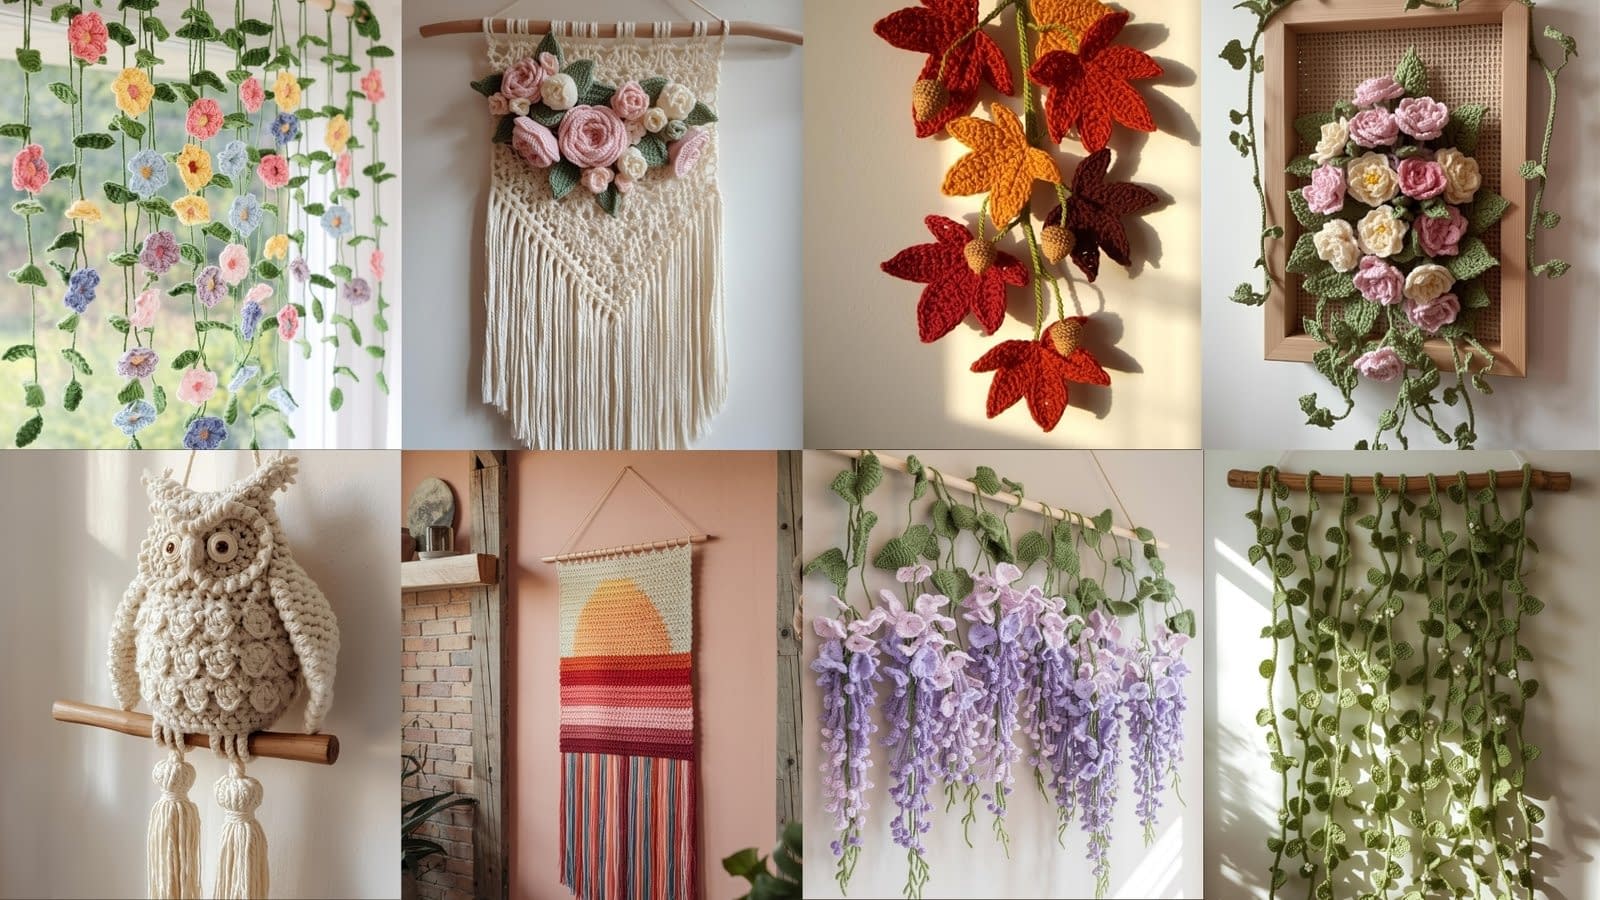
There’s something timeless and heartwarming about decorating your home with handmade crochet pieces. Crochet wall hangings, in particular, have become a beloved way to express creativity, bring color and texture to bare walls, and celebrate the beauty of each season. Whether it’s a floral garland that mimics spring blossoms, a leafy branch that captures the warmth of autumn, or a cozy macramé owl adding rustic charm to a reading corner — every stitch tells a story.
In this post, you’ll find 8 beautifully detailed crochet wall hanging patterns DIY tutorials, each designed to be both enjoyable and achievable. Some are inspired by nature — cascading wisteria, falling leaves, or wildflower garlands — while others bring a modern boho or macramé-inspired touch. Each pattern includes clear step-by-step instructions, material lists, and helpful notes to make your crochet journey smooth and rewarding.
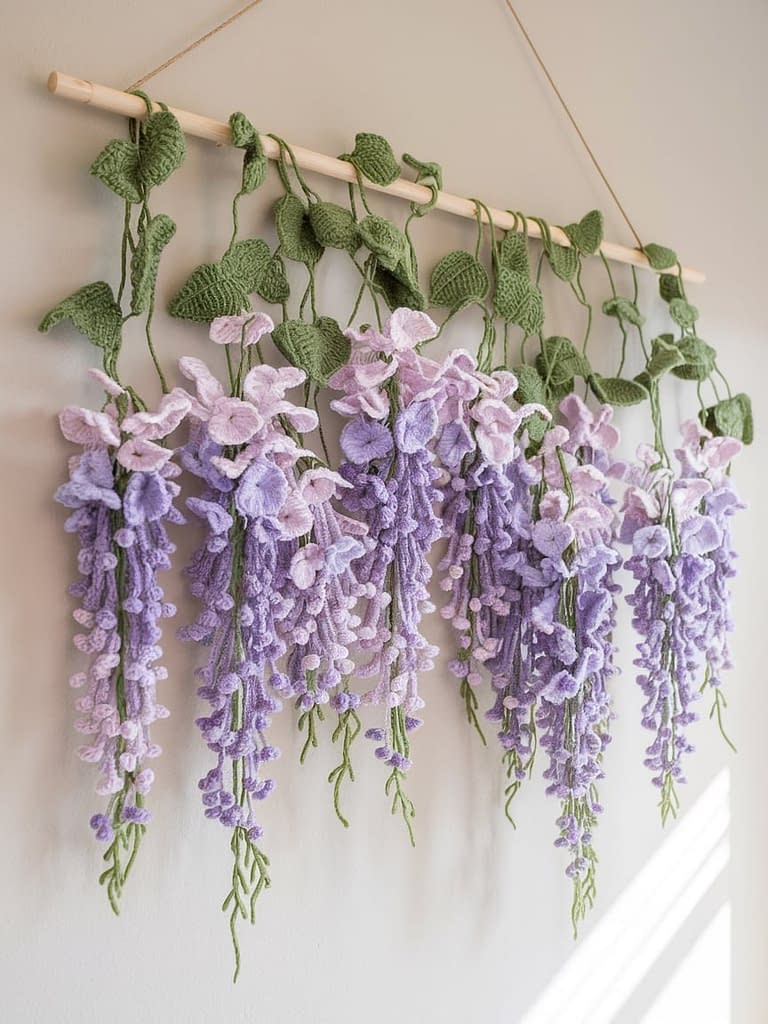
Pattern 1: Crochet Wisteria Blossom Wall Hanging
Overview:
This crochet wall hanging captures the soft cascading beauty of wisteria vines in full bloom. Each flower cluster flows gently downward from a crocheted branch, creating a romantic, elegant decoration perfect for bedrooms, living rooms, or cozy craft corners.
Materials Needed:
- Light weight (Category 3) yarn in lavender, light purple, white, and green
- 4.0 mm crochet hook
- Wooden dowel or natural stick (about 12–14 inches long)
- Yarn needle for sewing and weaving ends
- Scissors
Step-by-Step Instructions:
Step 1: Create the Hanging Branch
- Begin with green yarn.
- Make a slip knot and create a foundation of 60 chains.
- Work one single crochet into the second chain from the hook.
- Continue to make one single crochet into each chain across.
- Turn your work, then create another row of single crochet stitches.
- Fasten off and weave in the ends.
- Tie or stitch the top edge securely to your wooden dowel.
Step 2: Crochet the Wisteria Blossoms
- Use lavender yarn for the petals.
- Make a slip knot and chain 25 for each flower strand.
- Into the third chain from the hook, work one double crochet stitch.
- Work one double crochet into each of the next four chains.
- Skip one chain, then slip stitch into the next chain.
- Repeat this petal pattern (five double crochet stitches, skip one, slip stitch into next) until the end of the chain.
- This creates a natural cascading effect.
- Make several strands in different shades (lavender, white, and light purple) for depth and realism.
Step 3: Attach the Blossoms to the Branch
- Cut strands of green yarn about 10 inches long.
- Tie or sew each flower strand along the crocheted branch.
- Stagger their lengths to imitate real hanging vines.
- Optionally, add a few green leaf motifs between clusters for a natural finish.
Step 4: Final Touches
- Attach yarn loops or decorative ribbon at both ends of the dowel for hanging.
- Trim any excess threads.
- Steam-block lightly to relax the yarn and let the blossoms drape naturally.
Result:
A stunning, delicate wall hanging full of texture and soft movement—perfect for spring or romantic home décor.
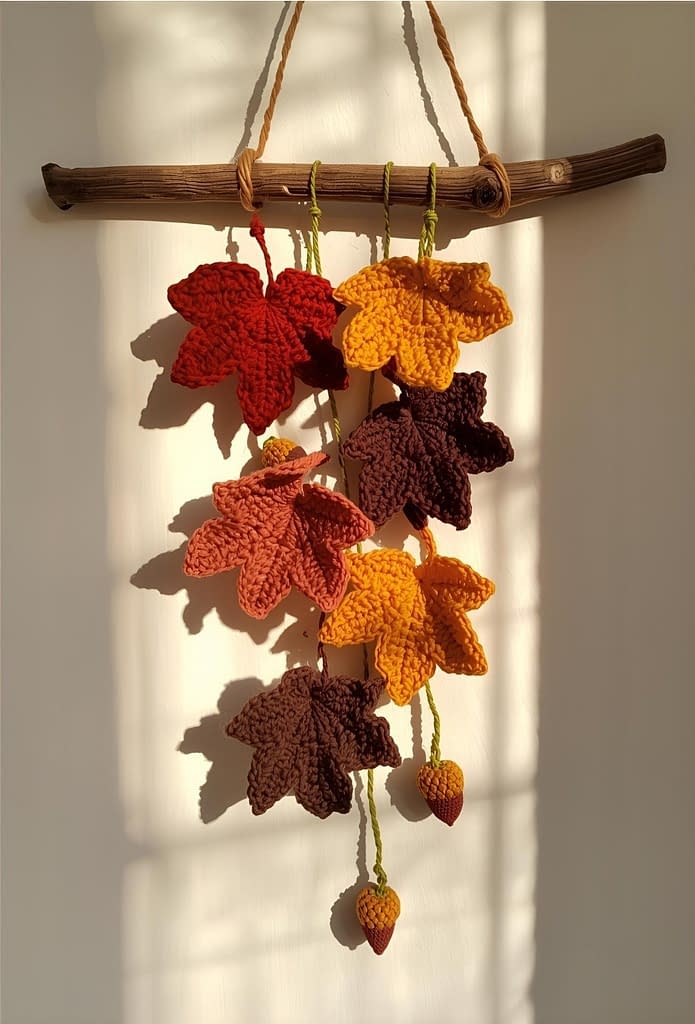
Pattern 2: Autumn Leaf & Acorn Branch Wall Hanging
Overview:
Celebrate the beauty of fall with this cozy crochet wall hanging featuring colorful leaves and small acorns. It’s a wonderful way to bring nature indoors, using earthy tones like rust, mustard, olive, and brown.
Materials Needed:
- Worsted weight yarn in shades of burnt orange, golden yellow, olive green, brown, and beige
- 4.5 mm crochet hook
- Small branch (around 14 inches long)
- Yarn needle and scissors
- Hot glue gun (optional for securing acorns)
Step-by-Step Instructions:
Step 1: Crochet the Leaves
- Start with orange yarn.
- Make a slip knot and create 10 chains.
- Work one single crochet into the second chain from the hook.
- Make one half double crochet into the next stitch, one double crochet into each of the next two stitches, then one treble crochet into the next.
- Work one double crochet, one half double crochet, and one single crochet into the next three stitches.
- Slip stitch into the last chain.
- Without cutting the yarn, rotate the leaf to work along the opposite side of the foundation chain.
- Mirror the same stitch pattern along the other edge to complete the leaf shape.
- Fasten off, leaving a tail for sewing.
- Repeat this process in different colors until you have 8–10 leaves.
Step 2: Crochet the Acorns
- With beige yarn, create a magic ring.
- Inside the ring, make six single crochet stitches and pull the ring tight.
- Continue working in rounds, increasing by one stitch every second round until you have about twelve stitches.
- Switch to brown yarn for the acorn cap.
- Make one round of single crochet, then one round of slip stitches to form the cap edge.
- Fasten off and stuff lightly if desired.
Step 3: Assemble the Wall Hanging
- Arrange the leaves and acorns along the branch.
- Use yarn or thin jute twine to tie them at varying lengths.
- For a more organic effect, alternate the colors and adjust the spacing.
- Once arranged, secure the branch with a hanging loop.
Result:
A rustic and earthy display of autumn warmth—perfect for cozy living spaces or seasonal décor.
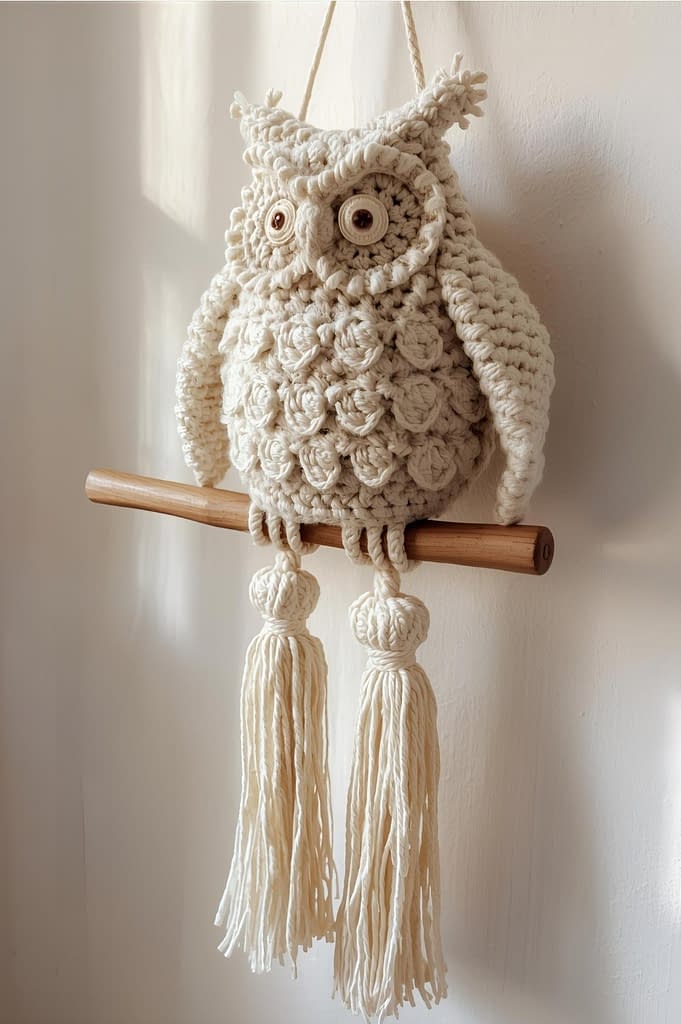
Pattern 3: Macramé Owl Crochet Wall Hanging
Overview:
This pattern blends classic macramé style with crochet charm. The result is a wise and whimsical owl with textured feathers, large round eyes, and soft tassels hanging below.
Materials Needed:
- Cotton yarn or macramé cord in white, cream, and light brown
- 5.0 mm crochet hook
- Two small wooden rings for the eyes
- Wooden dowel or stick for hanging
- Yarn needle and scissors
Step-by-Step Instructions:
Step 1: Crochet the Owl Base
- With cream yarn, make a slip knot and chain 6.
- Join to form a ring with a slip stitch.
- Chain two and work twelve half double crochet stitches into the ring.
- Slip stitch to join.
- For the next round, work two half double crochet stitches into each stitch (for a total of twenty-four).
- Continue increasing gradually in each round until your circle measures about 6 inches across. This will form the owl’s body.
Step 2: Create the Eyes
- Insert a small wooden ring and wrap white yarn around it until fully covered.
- Repeat for the second ring.
- Sew both rings onto the upper section of the owl’s body.
- Use light brown yarn to stitch around the inner circle of each eye for added detail.
Step 3: Add the Beak and Wings
- For the beak: With brown yarn, make a small triangle by chaining 4 and working one single crochet in the second chain, one half double crochet in the next, and one double crochet in the last stitch.
- Fasten off and sew it just below the eyes.
- For the wings: Chain 10, then work one single crochet, one half double crochet, and one double crochet across. Taper the edges by reducing stitches toward the end to give them a curved look.
- Sew both wings symmetrically along the sides.
Step 4: Add Feathers and Tassels
- Cut several strands of yarn about 8 inches long.
- Use a lark’s head knot to attach them along the bottom edge, forming the owl’s feathers.
- Trim them to your desired length.
- Optionally, brush out the yarn strands to create a fluffy macramé effect.
Step 5: Attach to Dowel and Hang
- Sew or tie the top of the owl firmly onto a wooden dowel.
- Add a yarn loop or cord to the dowel for hanging.
Result:
A charming crochet wall hanging with macramé character, perfect for nurseries, cozy reading corners, or rustic home décor.
Pattern 4: Hanging Garden Crochet Vine Garland
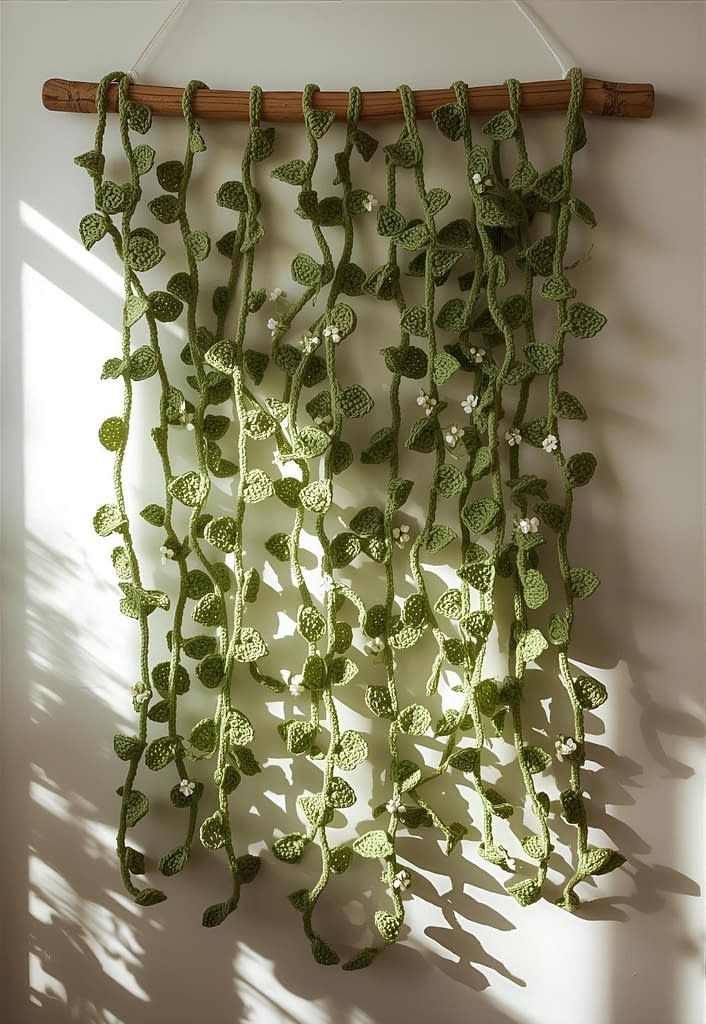
Overview:
This Hanging Garden Crochet Vine Garland brings the beauty of cascading flowers indoors. The piece features long green vines dotted with tiny white blooms that look like they are swaying in the breeze. Perfect for window frames, headboards, or craft rooms, it gives your home a refreshing, botanical touch.
Materials Needed:
- Fine or light weight yarn in green (for vines) and white (for flowers)
- 3.5 mm crochet hook
- Yarn needle
- Scissors
- Wooden dowel, curtain rod, or driftwood stick for hanging
Step-by-Step Instructions:
Step 1: Create the Vine Base
- Using green yarn, make a slip knot and create a foundation of 200 chains.
- Work one single crochet stitch into the second chain from the hook.
- Continue making one single crochet stitch into every chain until the end.
- This creates one long vine.
- For a fuller hanging, make at least five to six vines in different lengths (some 150 chains, others 200 or even 250 chains).
Step 2: Add Leaves Along the Vines
- To make each leaf, attach green yarn anywhere along a vine.
- Chain seven.
- Work one single crochet into the second chain from the hook, one half double crochet into the next, one double crochet into the next two, then one half double crochet and one single crochet into the last chain.
- Slip stitch into the same point on the vine to complete the leaf.
- Repeat this leaf pattern every three inches along the vine to create a natural look.
Step 3: Crochet the Small White Flowers
- With white yarn, make a magic ring.
- Chain one, then work five single crochet stitches into the ring.
- Pull tight to close and slip stitch into the first stitch.
- For petals, chain two and make one half double crochet and one double crochet into the same stitch. Slip stitch into the next stitch.
- Repeat this process all around to create five petals.
- Fasten off, leaving a short tail for sewing.
- Make as many flowers as desired — about fifteen to twenty looks lovely.
Step 4: Attach the Flowers
- Sew or tie the flowers at random points along the vines.
- You can group two or three flowers together for a clustered effect.
- Space them evenly so the garland looks full but not crowded.
Step 5: Assemble the Garland Hanging
- Tie or sew each vine to your dowel or branch.
- Adjust the length so that they hang at slightly different levels for a natural cascading look.
- Add a yarn or jute cord loop at the top for hanging.
Result:
A light, airy wall hanging that looks like a curtain of blossoms — elegant, fresh, and calming, suitable for spring and summer home décor.
Pattern 5: Framed Crochet Flower Bouquet Wall Hanging
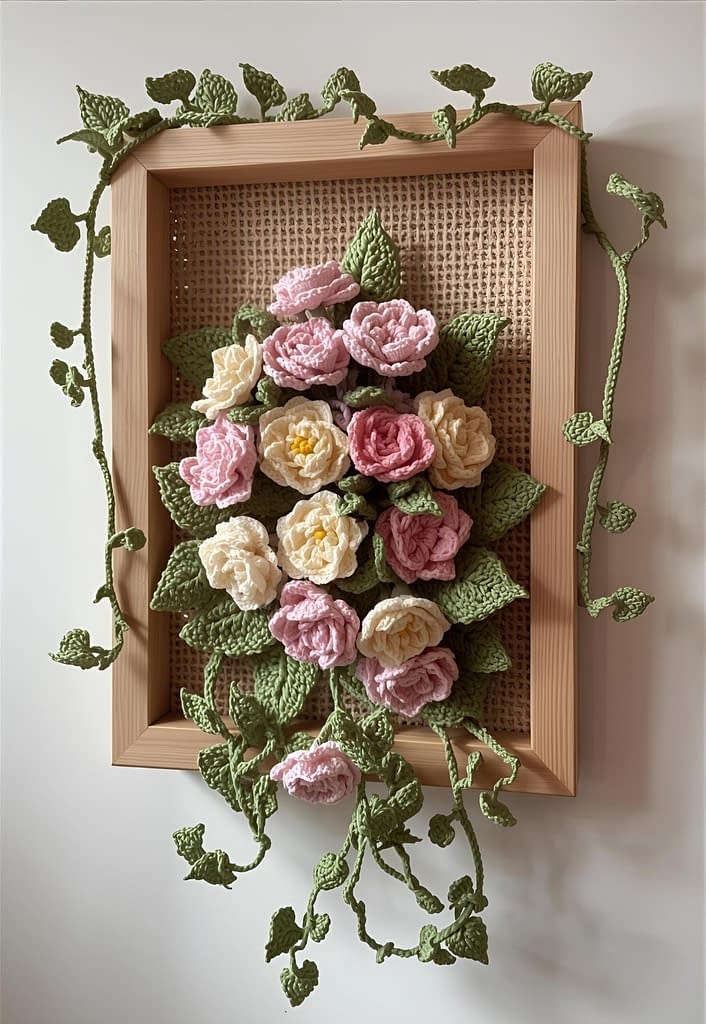
Overview:
This design combines crochet flowers with a framed display, giving the feel of preserved blooms behind glass. It’s perfect for bedrooms, living rooms, or as a handmade gift. The project blends texture, color, and creativity in a modern decorative style.
Materials Needed:
- Worsted weight yarn in assorted flower colors (pink, lavender, white, yellow, blue) and green for stems and leaves
- 4.0 mm crochet hook
- Embroidery or tapestry needle
- Small wooden or plastic frame (8×10 inches or similar)
- Cardboard backing
- Hot glue or fabric glue
- Scissors
Step-by-Step Instructions:
Step 1: Crochet the Flower Petals
- Choose your first color.
- Make a magic ring and chain one.
- Work ten single crochet stitches into the ring, then pull it tight and join with a slip stitch.
- For each petal, chain two, then make one half double crochet and one double crochet into the same stitch. Slip stitch into the next stitch.
- Repeat around the circle to create five petals.
- Fasten off and weave in ends.
- Make several flowers in different colors and sizes for a full bouquet effect.
Step 2: Make the Leaves and Stems
- With green yarn, chain fifteen.
- Work one single crochet into the second chain from the hook, one half double crochet into the next, and one double crochet into the following chain.
- Continue decreasing back down with one half double crochet and one single crochet into the remaining stitches.
- Slip stitch into the last chain and fasten off.
- Make about six to eight leaves.
- For stems, use green yarn or embroidery thread, or crochet simple long chains that can be glued in place later.
Step 3: Arrange the Bouquet in the Frame
- Cut a piece of cardboard to fit your frame.
- Wrap it with plain or textured fabric for a clean background.
- Use hot glue or fabric glue to attach the stems first, positioning them so they converge at the bottom like a tied bouquet.
- Glue leaves and flowers on top, overlapping slightly to add depth.
- Optionally, tie a small ribbon or lace bow where the stems meet.
Step 4: Finishing Touches
- Place the cardboard inside the frame and secure it.
- If your frame has glass, remove it to keep the 3D texture visible.
- Hang or display it on a shelf.
Result:
A stunning crochet flower art piece that looks timeless and delicate — just like a bouquet that never fades.
Pattern 6: Boho Rose & Tassel Crochet Wall Hanging
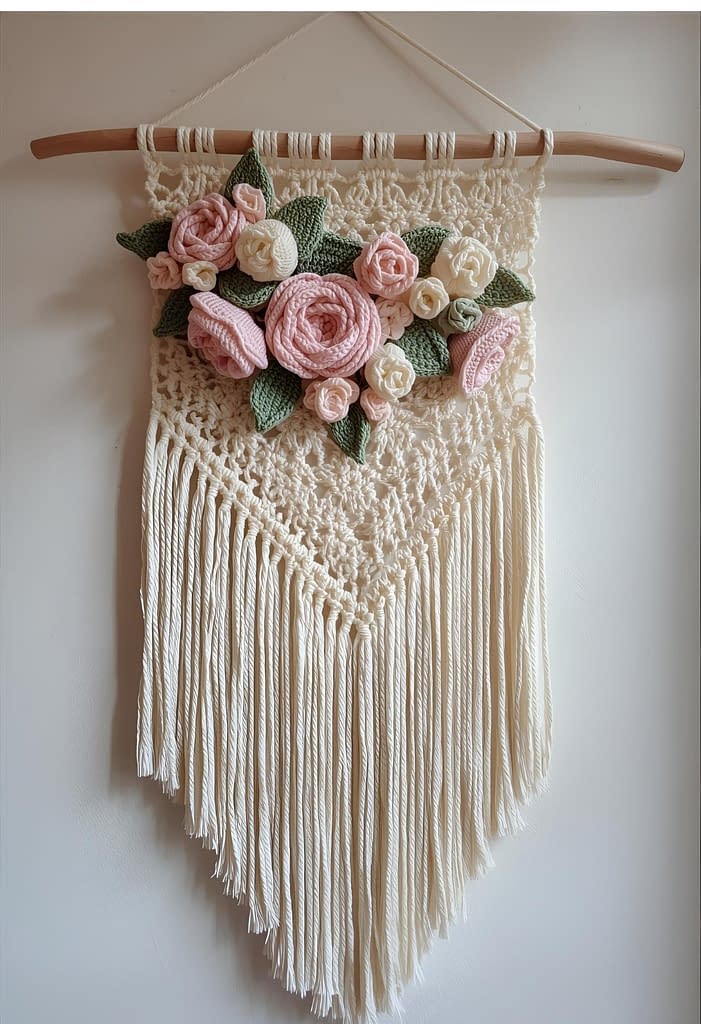
Overview:
This bohemian-style wall hanging blends romantic roses with airy lacework and soft tassels. The mix of crochet flowers, textures, and fringe makes it an elegant accent for living rooms, studios, or bedrooms with a rustic or vintage aesthetic.
Materials Needed:
- Cotton yarn in blush pink, cream, and sage green
- 4.0 mm crochet hook
- Wooden dowel or branch (about 12–16 inches long)
- Yarn needle and scissors
- Small crochet lace doily (optional, or crochet one yourself)
Step-by-Step Instructions:
Step 1: Crochet the Roses
- With pink yarn, chain 51.
- Work one single crochet into the second chain from the hook.
- Continue with the following pattern across the chain: (skip one stitch, work five double crochet stitches into the next, skip one stitch, slip stitch into the next).
- Repeat this sequence until you reach the end of the chain.
- You will have a long ruffled strip.
- Starting from one end, roll the strip into a spiral, shaping it into a rose.
- Sew the base securely to hold the shape.
- Make three to five roses in soft pink and cream shades.
Step 2: Make the Green Leaves
- With sage green yarn, chain eight.
- Work one single crochet in the second chain, one half double crochet in the next, one double crochet in the following two, one half double crochet in the next, and one single crochet in the last.
- Slip stitch into the base to form the leaf.
- Make several leaves to go with your roses.
Step 3: Create the Lace Background
- If you are using a ready-made crochet doily, skip this step.
- To crochet a simple lace piece, chain sixty.
- Work one double crochet into the fourth chain from the hook.
- Chain one, skip one stitch, double crochet into the next stitch. Repeat across.
- Continue for about ten rows, then fasten off.
- The pattern should look airy and open, resembling lace.
Step 4: Make the Tassels
- Cut several lengths of cream yarn about twelve inches long.
- Group six strands together and fold them in half.
- Pull the looped end through the bottom of the lace panel and pass the tails through the loop to create a knot.
- Repeat along the bottom edge until the entire width is filled with tassels.
- Trim them evenly for a neat finish.
Step 5: Assemble Everything
- Attach your lace panel to the dowel using yarn ties or by sewing the top edge.
- Arrange and sew the crochet roses and leaves across the upper portion of the lace panel.
- Let the tassels hang freely.
- Add a hanging cord or jute rope to the dowel for display.
Result:
A romantic, bohemian-inspired crochet wall hanging with soft texture, cascading tassels, and pastel floral accents — perfect for adding warmth and artistry to any wall.
Pattern 7: Wildflower String Curtain Crochet Wall Hanging
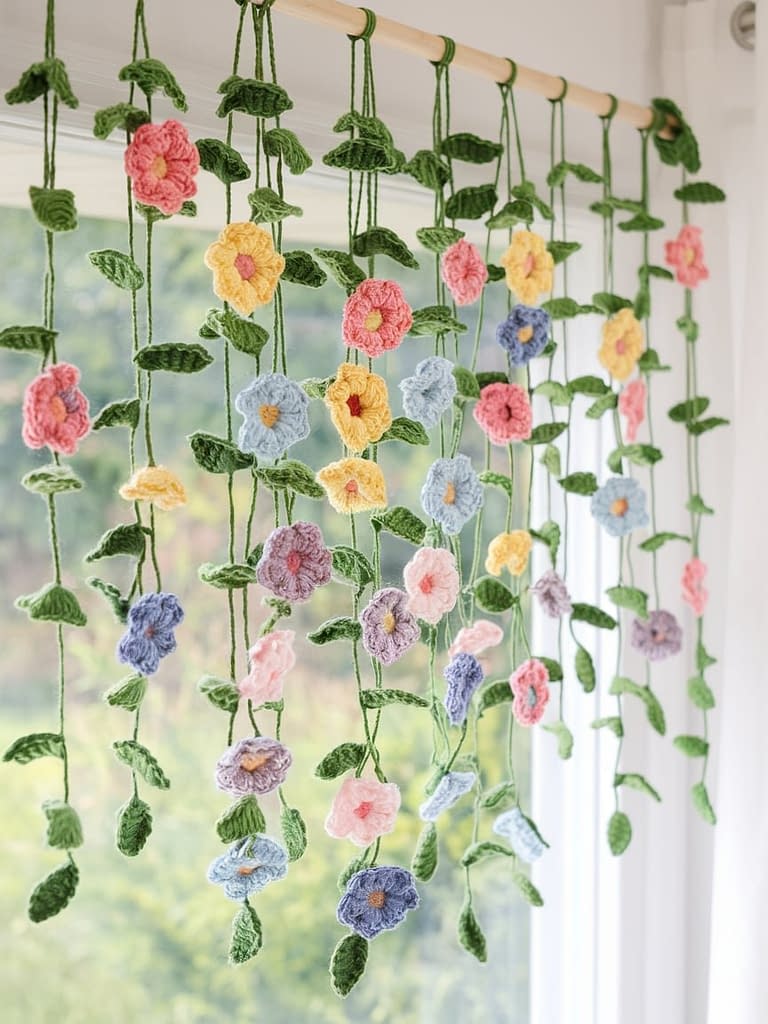
Overview:
The Wildflower String Curtain Crochet Wall Hanging is an elegant project that combines simplicity with beauty. Long crochet strands decorated with colorful wildflowers hang gracefully like a delicate curtain. This piece adds charm and texture to windows, open doorways, or as a statement wall decoration in your craft room or living space.
Materials Needed:
- Light weight cotton or acrylic yarn in green (for vines)
- Small amounts of yarn in pastel shades such as pink, lavender, yellow, white, and blue (for flowers)
- 3.5 mm crochet hook
- Wooden dowel, curtain rod, or natural tree branch
- Yarn needle and scissors
Step-by-Step Instructions:
Step 1: Create the Base Vines
- With green yarn, make a slip knot and create a foundation of 150 to 200 chains depending on the desired length.
- Work one single crochet stitch into the second chain from the hook.
- Continue working one single crochet stitch into each chain until the end.
- Fasten off and weave in the ends neatly.
- Repeat this process to create at least ten to twelve vines of various lengths for a more natural, layered appearance.
Step 2: Crochet Small Wildflowers
- Choose your first color. Make a magic ring and pull up a loop.
- Chain one, then work six single crochet stitches into the ring. Pull the ring closed tightly.
- To create petals, chain two, make one half double crochet and one double crochet into the same stitch, and slip stitch into the next stitch.
- Repeat this petal sequence around until you have five petals.
- Fasten off and weave in the yarn tails.
- Make several flowers in different colors — around thirty to forty will create a lovely wildflower field effect.
Step 3: Attach Flowers to Vines
- Lay out all the vines on a flat surface.
- Using a yarn needle, sew the flowers at random intervals along the vines, alternating colors for a balanced mix.
- For a natural look, attach some flowers closer together and others spaced further apart.
- Add a few extra leaves if desired by crocheting small leaf shapes using green yarn: chain seven, then work one single crochet, one half double crochet, one double crochet, one half double crochet, and one single crochet back down the chain. Slip stitch to finish.
Step 4: Assemble the Curtain Hanging
- Tie each vine securely to the wooden dowel or branch using simple knots.
- Make sure the vines hang at different lengths to create an organic flow.
- Attach a long piece of yarn or rope to the ends of the dowel for hanging.
- Hang the curtain near a window or wall to allow the vines and flowers to drape naturally.
Result:
A vibrant and romantic wildflower curtain that looks like a blooming meadow suspended in the air. The movement of the vines adds a whimsical touch, making this project a showpiece for any home.
Pattern 8: Sunset Horizon Boho Crochet Wall Hanging
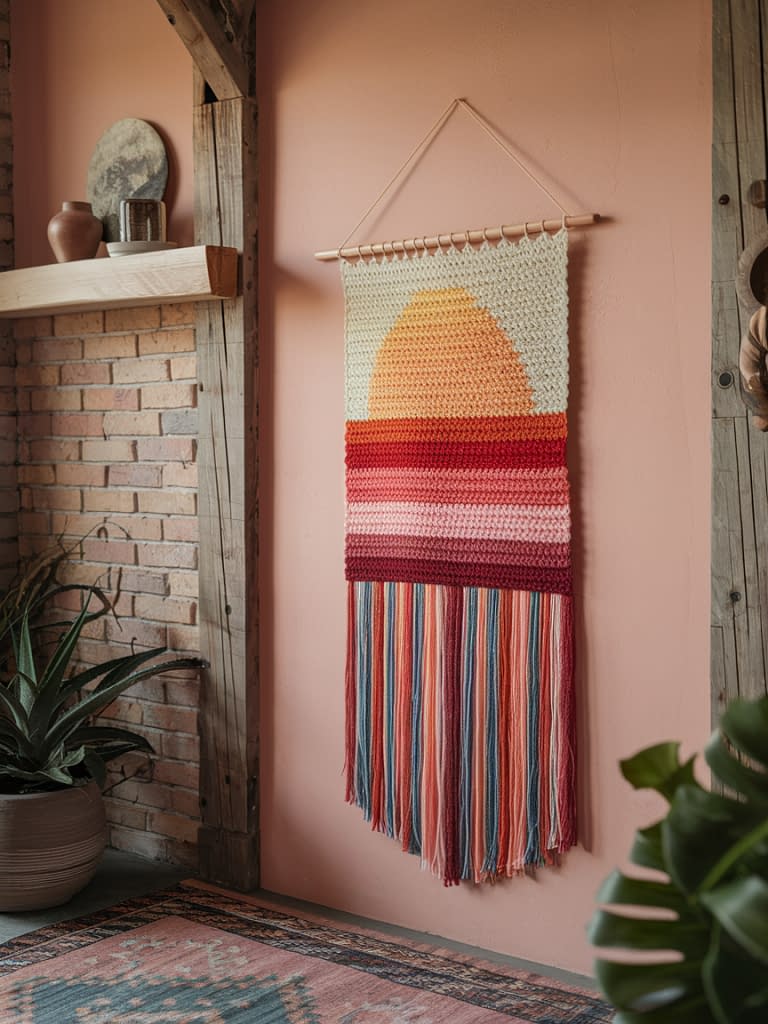
Overview:
The Sunset Horizon Boho Crochet Wall Hanging captures the warmth of a setting sun through a beautiful gradient of colors and layered textures. Using simple crochet stitches and fringe detailing, this design brings a cozy, artistic touch to your wall, perfect for bedrooms or reading nooks.
Materials Needed:
- Medium weight yarn in gradient shades: soft yellow, peach, coral, pink, and deep orange
- 4.0 mm crochet hook
- Wooden dowel or natural branch (about 14 inches long)
- Yarn needle
- Scissors
Step-by-Step Instructions:
Step 1: Create the Gradient Base Panel
- Begin with the lightest color (soft yellow). Make a slip knot and chain sixty.
- Work one single crochet stitch into the second chain from the hook.
- Continue one single crochet stitch in each chain across the row.
- Turn your work and chain one.
- Repeat rows of single crochet stitches until you complete six rows.
- Change to the next color (peach). Continue in the same stitch pattern for another six rows.
- Repeat this process, changing colors gradually through coral, pink, and ending with deep orange.
- Once finished, fasten off and weave in all yarn tails neatly.
- You should now have a rectangular piece with beautiful horizontal stripes resembling a sunset gradient.
Step 2: Add a Textured Row for Depth
- Using the darkest color (deep orange), attach yarn to the bottom of your panel.
- Chain two and make one half double crochet stitch across the entire bottom row to create a slightly raised edge.
- This textured stripe gives visual weight and defines the base of your sunset.
Step 3: Add Fringe for the Horizon Effect
- Cut several pieces of yarn in your darkest shade about twelve inches long.
- Fold each strand in half.
- Insert the crochet hook into the bottom edge of the wall hanging, pull the looped end through, and pass the tails through the loop to form a secure knot.
- Repeat across the entire bottom edge.
- Trim the fringe evenly, leaving it about six inches long.
Step 4: Mount the Panel on the Dowel
- At the top of your panel, fold over the first inch of fabric to form a sleeve.
- Sew along the edge using the yarn needle, leaving space to slide the dowel through.
- Insert the dowel and secure it in place.
- Add a hanging cord or rope to the ends of the dowel for easy display.
Result:
A breathtaking gradient crochet wall hanging that mirrors the calm of a sunset. The soft textures and natural tones make it perfect for creating a peaceful and artistic atmosphere.
Conclusion
Crochet wall hangings are more than just decorations — they are woven stories of creativity, patience, and personal expression. Every knot, loop, and stitch captures a moment of handmade artistry, turning simple yarn into something meaningful.
It’s the delicate Wisteria Blossom design, the charming Wildflower Curtain, or the bold Sunset Horizon piece, each pattern in this collection offers an opportunity to relax, create, and decorate with intention.
You can personalize these projects by experimenting with different color palettes, adjusting the lengths, or even combining multiple ideas into one statement piece. They also make heartfelt handmade gifts for friends and family — each one unique, filled with warmth, and crafted with care.
When displayed, these crochet wall hangings bring a sense of comfort and beauty to your home, reflecting the love and creativity that went into making them. So gather your yarn, prepare your favorite hook, and let your imagination guide you as you create your very own gallery of handmade wall art.


