
Knitting a shawl is one of the most satisfying projects you can take on—it’s versatile, expressive, and functional. Among the many shawl styles, color block knit shawls stand out for their bold, modern charm and endless creative possibilities. Whether you prefer soft neutrals, vivid contrasts, or gentle ombrés, color blocking allows you to play with texture and tone while keeping the project approachable for any skill level.
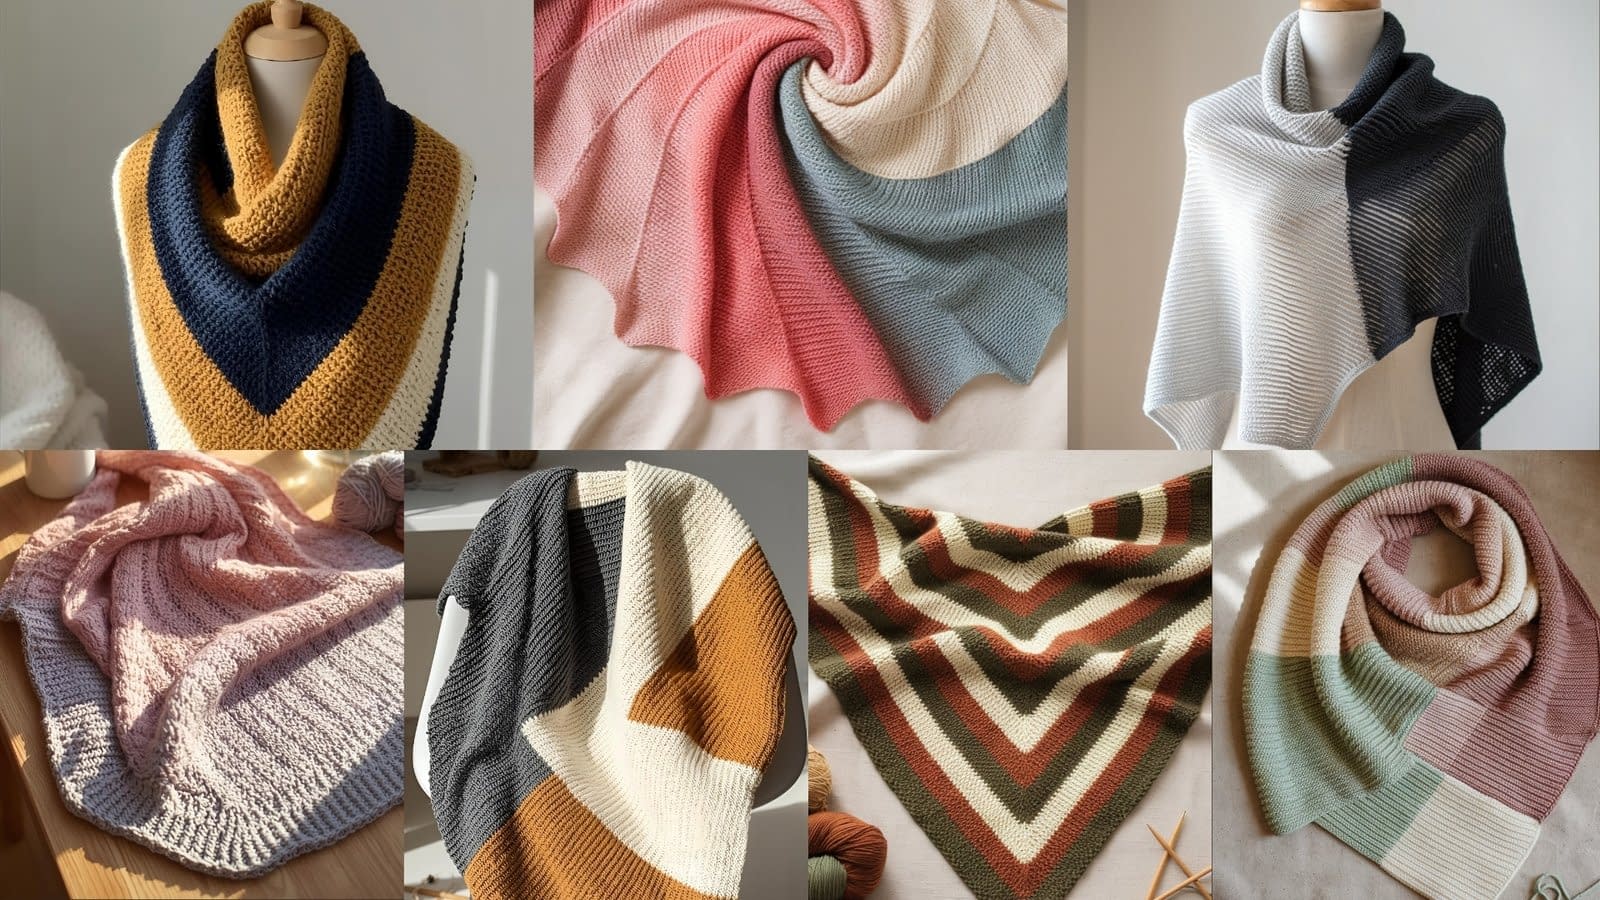
In this post, we’ll explore 7 Color Block Knit Shawl Patterns, each offering a unique balance of design, comfort, and creativity. You’ll find everything from simple garter-stitch shawls to more structured, elegant wraps. Each section includes a step-by-step guide, tips for achieving crisp color transitions, and suggestions for yarn, shaping, and finishing.
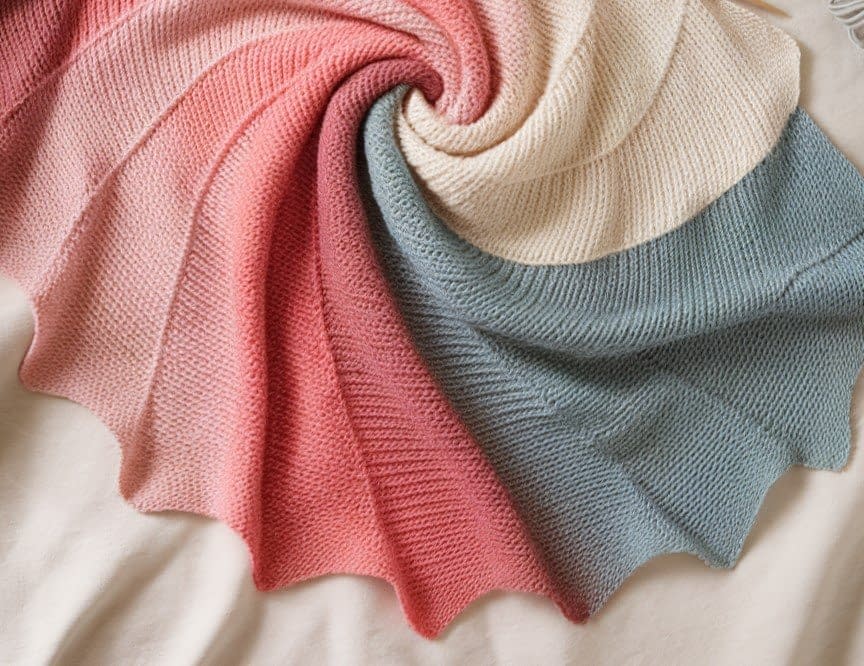
1. Bold Stripes Triangle Shawl
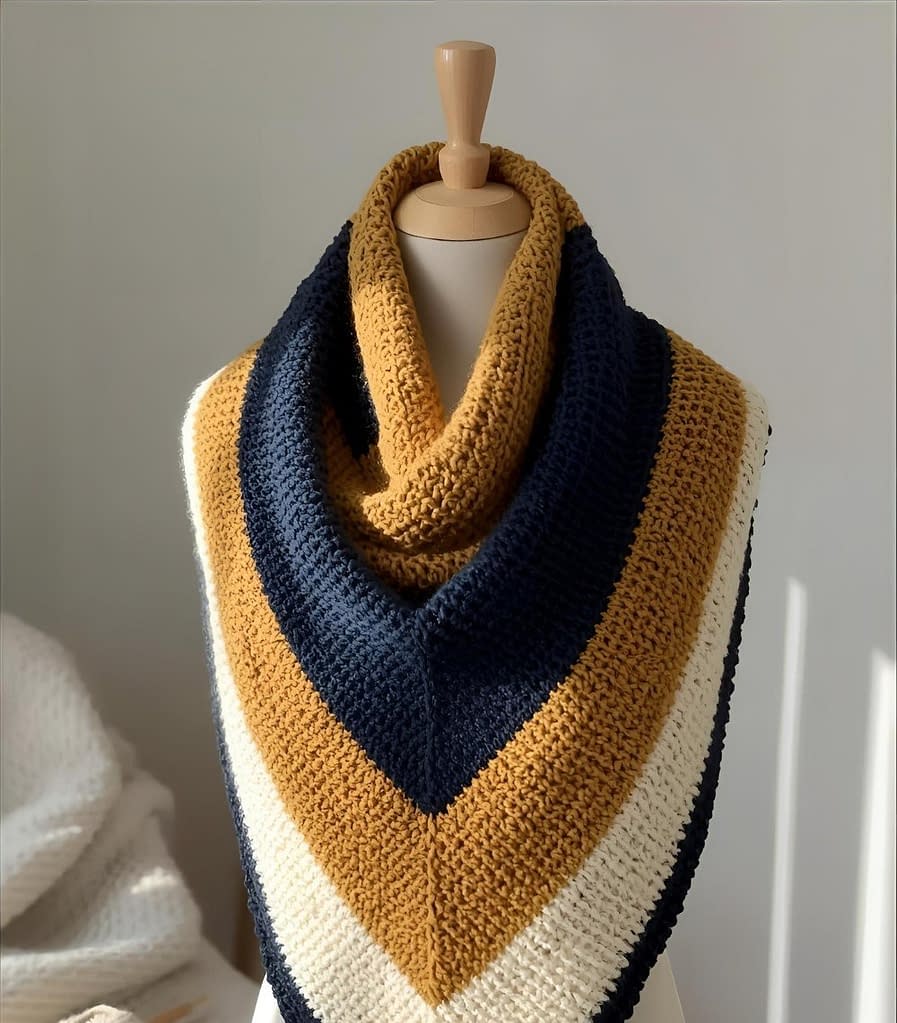
Knitting a shawl is one of the most enjoyable and rewarding projects you can take on. The Bold Stripes Triangle Shawl is a perfect introduction to color block knitting, allowing you to experiment with bold, modern stripes while learning essential shaping techniques. This shawl is versatile, cozy, and stylish, making it an accessory you will wear often or gift proudly.
Materials You Will Need
Before you start, gather the following materials:
- Worsted weight yarn (also called medium weight, #4) in three contrasting colors: Color A (first stripe), Color B (second stripe), and Color C (third stripe)
- Knitting needles: Circular needles United States size 8 (5 millimeters), 32 inches long or longer
- Tapestry needle for weaving in ends
- Scissors
Optional materials:
- Blocking mats and pins to shape the shawl
- Stitch markers to mark increases if desired
Finished Size
The completed shawl will measure approximately 60 inches wide by 30 inches deep, though you can adjust the size by adding extra rows or using thicker or thinner yarn.
Skill Level
This shawl is suitable for beginner to intermediate knitters. It involves basic stitches (knit and yarn over), increases, and color changes. No advanced lace or complex techniques are required.
Understanding the Pattern
The Bold Stripes Triangle Shawl is worked from the top center outwards, growing into a triangle shape. The edges increase by one stitch on each side per row, while the center increases with a yarn over. Color changes are made after completing a set number of rows to create bold stripes.
Step-By-Step Instructions
Step 1: Cast On
- Using Color A, cast on three stitches.
- Knit one row to set the base of the shawl.
Tip: Do not cast on too tightly. You want a flexible edge that will allow the triangle to grow evenly.
Step 2: Set Up the Triangle
To shape the triangle, you will increase three stitches every right-side row: one at each edge and one in the center.
Right-side (RS) row pattern:
- Knit the first stitch.
- Yarn over (this creates the center increase).
- Knit to the last stitch.
- Knit the last stitch.
Wrong-side (WS) row pattern:
- Knit all stitches.
Tip: Always knit the wrong-side rows to maintain a simple stockinette texture.
Step 3: Continue Increasing
- Repeat Right-side / Wrong-side rows until your first color block is approximately 5 inches deep.
- Count your rows carefully to maintain consistency between stripes.
Step 4: Change Colors
To create a bold stripe, switch to Color B:
- Finish the last row of Color A.
- Join Color B by knitting the first stitch with the new color.
- Continue the same RS / WS increase pattern for the next block, knitting approximately 20 rows (or your desired stripe height).
Tip: When joining a new color, leave a 6-inch tail to weave in later. Keep the yarn tension loose at the color transition to prevent puckering.
Step 5: Add the Third Color
- After completing the second color block, switch to Color C.
- Continue knitting the triangle, maintaining the same increase pattern.
- Knit until the shawl reaches your desired size (approximately 60 inches wide and 30 inches deep).
Step 6: Bind Off
- When the shawl reaches the desired size, bind off loosely to allow the edges to stretch.
- Use a stretchy bind-off technique:
- Knit the first two stitches.
- Pass the first stitch over the second stitch as usual, but do not pull tightly.
- Continue across the row until all stitches are bound off.
Tip: A loose bind-off ensures that the edges of your shawl do not pucker and drape nicely.
Step 7: Finishing
- Weave in all yarn tails using a tapestry needle.
- Gently wash the shawl in lukewarm water and mild soap if desired.
- Block the shawl on a flat surface using blocking mats and pins:
- Stretch the triangle evenly.
- Pin the edges to maintain a crisp triangle shape.
- Allow the shawl to dry completely.
Additional Tips
- Even Tension: Keep your knitting tension consistent to avoid uneven edges.
- Color Planning: Choose colors that contrast well for bold stripes or complementary colors for a softer look.
- Optional Embellishments: Add fringe or tassels to the two wide ends of the shawl for a playful, finished look.
- Swatching: Knit a small swatch to check your gauge and see how the color transitions look before committing to the full shawl.
2. Color Fade Rectangular Wrap
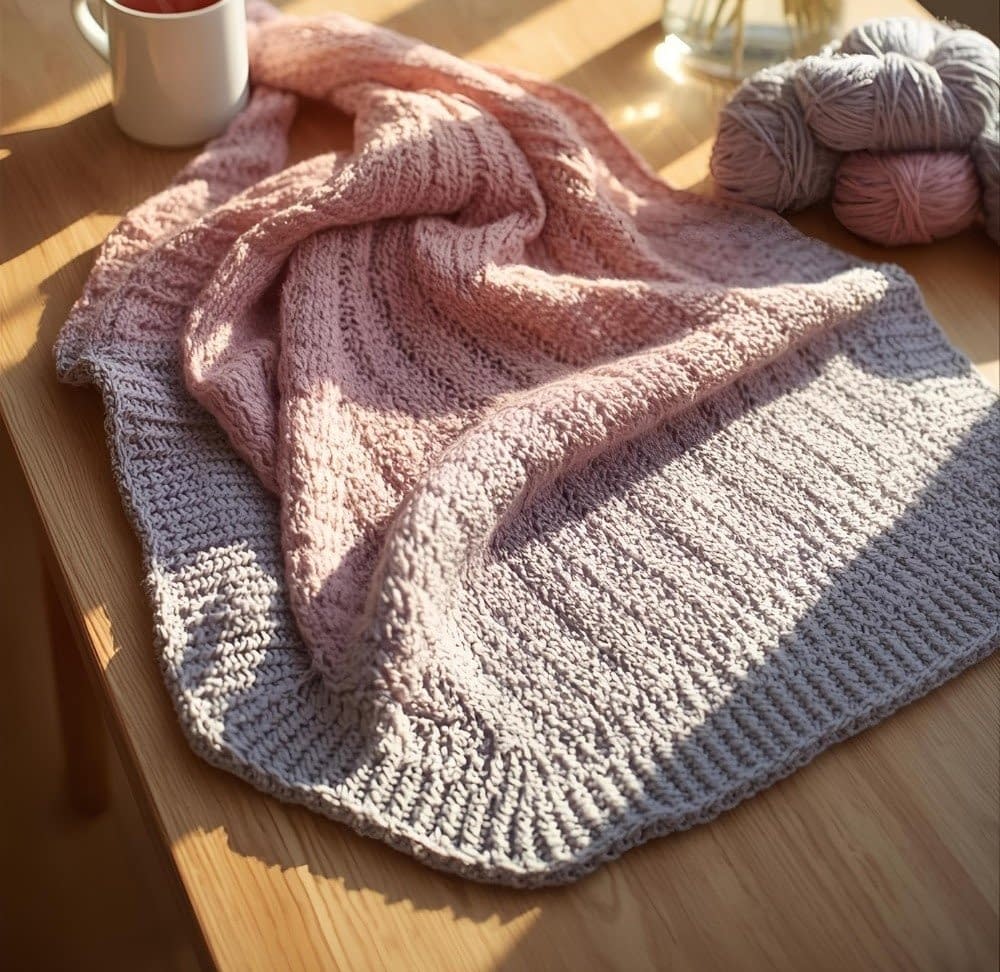
The Color Fade Rectangular Wrap is an elegant shawl that uses soft gradient color transitions to create a subtle ombré effect. It is ideal for knitters who want a stylish, versatile piece that drapes beautifully around the shoulders. This shawl is rectangular, so it is easy to wear and provides extra warmth.
Materials You Will Need
Before beginning, gather all materials to ensure a smooth knitting process:
- Fingering weight yarn in 4–5 colors forming a gradient, from light to dark or vice versa
- Circular knitting needles United States size 6 (4 millimeters), at least 32 inches long
- Tapestry needle for weaving in ends
- Scissors
- Blocking mats and pins (optional, for shaping at the end)
Optional: Stitch markers to mark row counts for color changes
Finished Size
- Approximately 18 inches wide by 70 inches long, though you can customize the width or length by adjusting the number of stitches or rows.
Skill Level
- Beginner to intermediate:
- Only requires basic knitting (knit stitch) and color blending techniques, making it perfect for knitters who want a visually striking wrap without complex stitch patterns.
Step-By-Step Instructions
Step 1: Cast On
- Using your darkest color (Color A), cast on 80 stitches using your preferred cast-on method.
- Knit the first row to stabilize the edge.
Tip: Keep your cast-on loose to allow the edges to stretch without puckering. This will help your shawl drape nicely once complete.
Step 2: Knit the Base Section
- Work in garter stitch (knit every row) for approximately 6 inches.
- This solid section will act as the foundation for the gradient fade.
Tip: Make sure to maintain even tension throughout these rows. If some stitches are tighter than others, the edges may curve or the fabric may ripple.
Step 3: Create a Smooth Color Transition
To achieve the gradient effect, you will blend colors gradually:
- Begin alternating rows between the current color (Color A) and the next color in your gradient (Color B).
- Row 1: Color A
- Row 2: Color B
- Row 3: Color A
- Row 4: Color B
- Repeat this alternating sequence for approximately 10 rows.
- After alternating, drop Color A and continue knitting solely with Color B for 6–8 inches, depending on how wide you want the color block.
Tip: Carry the unused yarn along the side loosely to prevent holes or tight tension at the color change.
Step 4: Repeat for Remaining Colors
- Continue this gradual blending process through the rest of your yarn colors.
- Adjust the number of alternating rows based on how gradual or dramatic you want each transition to appear.
- You can experiment by blending three colors simultaneously for a very soft, painterly fade.
Step 5: Check the Width and Length
- Measure your wrap periodically to ensure it will meet your desired dimensions.
- Adjust the number of rows in the final color block if necessary to achieve the full length of the shawl.
Step 6: Bind Off
- Once the shawl reaches your desired length, bind off loosely using a stretchy bind-off method:
- Knit the first two stitches.
- Pass the first stitch over the second stitch without pulling too tight.
- Continue across the row until all stitches are bound off.
Tip: A loose bind-off ensures your edges will drape naturally and maintain the rectangular shape.
Step 7: Finishing and Blocking
- Weave in all yarn tails using a tapestry needle.
- Wash the shawl gently in lukewarm water with mild soap.
- Lay it flat on blocking mats or a clean surface.
- Use pins to gently shape the rectangle, ensuring straight edges.
- Allow the shawl to dry completely before wearing.
Tip: Blocking will also help the color transitions appear seamless and the wrap to lay perfectly flat.
Optional Variations
- Textured Sections: Alternate rows of stockinette and garter stitch for subtle texture differences within each color block.
- Fringe or Tassels: Add fringe to the short ends of the shawl to give it a bohemian feel.
- Soft Ombré: Combine more than two yarn colors in the blending rows to create a soft, seamless ombré effect.
Tips for Success
- Even tension is key: Avoid pulling the yarn too tight during color changes.
- Plan your color order: Place contrasting colors far apart and harmonious shades next to each other for a polished look.
- Weave in as you go: Reduces the number of loose ends at the end.
3. Chevron Color Block Shawl

The Chevron Color Block Shawl is designed for knitters who want bold visual movement in their shawl. The chevron shape creates dramatic zigzag stripes, making it a statement piece while remaining comfortable and wearable.
This tutorial will guide you through casting on, working the chevron stitch pattern, changing colors, shaping the shawl, binding off, and finishing, all in full detail.
Materials
- DK weight yarn in four colors
- Knitting needles United States size 7 (4.5 millimeters)
- Stitch markers
- Tapestry needle
- Scissors
Optional: Blocking mats for shaping the zigzag edges
Finished Size
Approximately 60 inches wide by 25 inches deep, though you can adjust by adding more chevron repeats or increasing stitch count.
Skill Level
- Intermediate: Requires knitting, yarn overs, knit two together (K2tog), slip-slip-knit (SSK), and basic color changes.
Step-By-Step Instructions
Step 1: Cast On
- Using your first color, cast on 9 stitches.
- Knit one row to stabilize the edge.
Tip: A loose cast-on allows the zigzag edges to expand naturally.
Step 2: Set Up Chevron Pattern
The chevron pattern is created using increases and decreases on each row:
Right-Side Row Pattern:
- Knit two stitches together (K2tog) at the beginning for the first decrease.
- Knit 4 stitches.
- Yarn over (YO) to create a small increase.
- Knit 1 stitch.
- Yarn over (YO).
- Knit 4 stitches.
- Slip, slip, knit (SSK) at the end for the second decrease.
Wrong-Side Row Pattern:
- Knit all stitches to maintain the garter stitch base.
Tip: Place a stitch marker in the center stitch if you want perfect alignment of the peaks.
Step 3: Repeat Chevron Rows
- Continue repeating Right-Side / Wrong-Side rows until you reach the height of your first color block (approximately 12 rows).
- Check that the zigzag peaks are aligned and consistent.
Step 4: Color Changes
- Switch to the next color after completing the desired number of rows in the current color block.
- Knit the first row with the new color, maintaining the chevron pattern.
- Continue repeating chevron rows for the second color block.
Tip: Carry the previous color loosely along the edge if the stripe is only a few rows wide.
Step 5: Repeat for Remaining Colors
- Continue changing colors as desired, creating bold contrasting chevron stripes.
- Adjust the number of rows per color to vary the stripe width for a dynamic look.
Step 6: Bind Off
- Once the shawl reaches the desired width and length, bind off loosely to maintain flexible zigzag edges.
- Weave in all ends carefully, hiding them in the garter stitch ridges.
Step 7: Finishing and Blocking
- Lay the shawl flat on blocking mats or a clean surface.
- Use pins to shape the zigzag edges, emphasizing the peaks and valleys.
- Gently stretch each peak so the chevron shape is crisp and well-defined.
- Allow the shawl to dry completely before wearing.
Optional Variations
- Textured Chevron: Alternate knit and purl rows within each block for subtle texture differences.
- Ombre Chevron: Use a gradient yarn instead of solid colors for a smooth fade effect.
- Fringe or Tassels: Add fringe along the two wide edges for extra flair.
Tips for Success
- Always count rows carefully to maintain even stripes.
- Keep increases and decreases consistent at the edges to preserve the chevron shape.
- Use stitch markers to mark peaks and valleys for easier pattern following.
4. Two-Tone Diagonal Knit Shawl: Full Step-By-Step Tutorial

The Two-Tone Diagonal Knit Shawl is a modern, eye-catching shawl with a striking diagonal color split. It is perfect for knitters who want a bold statement piece using only two colors. Its simple shape makes it beginner-friendly, while the diagonal design adds elegance and versatility.
This tutorial will guide you through casting on, shaping the triangle, switching colors, binding off, and finishing, with detailed tips for a flawless result.
Materials You Will Need
- Bulky weight yarn in two contrasting colors (Color A and Color B)
- Knitting needles, United States size 10 (6 millimeters)
- Tapestry needle for weaving in ends
- Scissors
Optional:
- Blocking mats and pins to shape the triangle
- Stitch markers to mark increases or center stitch
Finished Size
- Adjustable depending on the number of rows and desired width.
- Typical finished size: 60 inches wide by 30 inches deep.
Skill Level
- Beginner: Requires only knit stitches, basic increases, and yarn overs.
Step-By-Step Instructions
Step 1: Cast On
- Using Color A, cast on 3 stitches.
- Knit one row to stabilize the edge.
Tip: Keep your cast-on loose to allow the edges to stretch naturally as the shawl grows.
Step 2: Shape the Triangle
- The shawl is worked from the top center outward.
- Right-side (RS) rows:
- Knit the first stitch.
- Yarn over (YO) to create a center increase.
- Knit to the last stitch.
- Knit the last stitch.
- Wrong-side (WS) rows: Knit all stitches.
Tip: The YO in the center ensures a smooth, visible diagonal line where the two colors will meet.
Step 3: Continue Increasing
- Repeat RS/WS rows, increasing one stitch at each edge and one in the center per right-side row.
- Continue until the shawl reaches half of the desired depth.
Tip: Use a stitch marker in the center if you want to maintain symmetry during increases.
Step 4: Switch Colors
- When the shawl reaches halfway, switch to Color B:
- Knit the first stitch of the next row with the new color.
- Leave a 6-inch tail for weaving in later.
- Begin decreasing to form the diagonal edge:
- Knit the first stitch.
- Knit two together (K2tog) at the beginning.
- Knit across until the last three stitches.
- Slip, slip, knit (SSK) the last two stitches.
Tip: Decreasing along the edges while keeping the center YO creates the perfect diagonal split.
Step 5: Complete the Triangle
- Continue decreasing rows until only three stitches remain.
- Knit the final row and bind off loosely.
Step 6: Finishing
- Weave in all yarn ends with a tapestry needle.
- Block the shawl diagonally to highlight the color split:
- Pin the center line straight.
- Stretch the edges gently for a crisp triangle shape.
- Allow the shawl to dry completely.
Optional Variations
- Alternate Textures: Introduce garter stitch or seed stitch in one color block for subtle texture contrast.
- Add Fringe: Attach fringe along the bottom edge of each color block for a playful look.
- Adjustable Size: Cast on more or fewer stitches to make the shawl larger or smaller.
Tips for Success
- Keep tension even to maintain a clean diagonal line.
- Use contrasting colors for maximum visual impact.
- Check row count when switching colors to keep symmetry.
5. Modular Block Shawl: Full Step-By-Step Tutorial
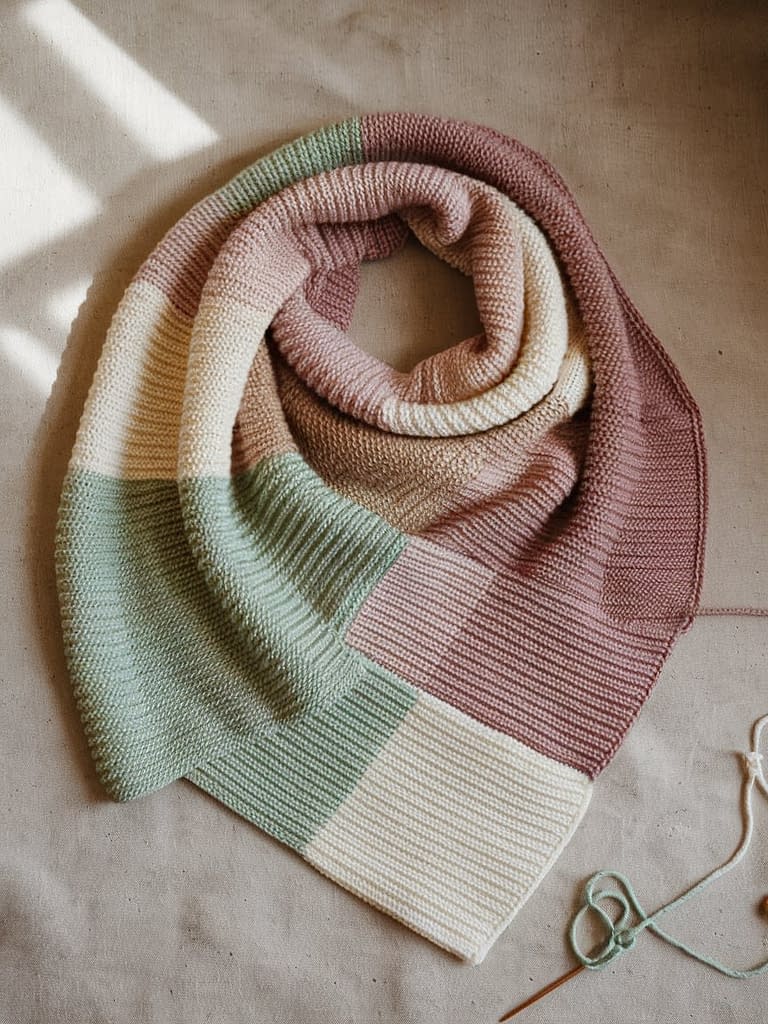
The Modular Block Shawl is a fun, creative project that combines multiple individual blocks or squares into one large, stylish shawl. Each square can be a different color, giving you full control over color blocking and pattern. This modular design is perfect for knitters who enjoy variety and want a patchwork-style statement piece.
Materials You Will Need
- Worsted or DK weight yarn in multiple colors
- Knitting needles, United States size 7 or 8 (4.5–5 millimeters)
- Tapestry needle for joining blocks and weaving in ends
- Scissors
Optional:
- Stitch markers to help line up blocks
- Blocking mats to shape the finished shawl
Finished Size
- Adjustable depending on the number of blocks you knit.
- Typical finished size: 60 inches wide by 28 inches deep.
Skill Level
- Intermediate: Requires basic knitting, joining squares, and color management.
Step-By-Step Instructions
Step 1: Knit the First Square
- Using your first color, cast on 20 stitches.
- Work in garter stitch (knit every row) until the square is approximately 6 inches tall.
- Bind off loosely, leaving a long tail for joining.
Tip: A consistent square size is crucial for a neat modular shawl. Use a ruler to measure as you knit.
Step 2: Join the Next Square
- Pick up stitches along the edge of the first square using a new color.
- Knit the next square in the same garter stitch pattern.
- Repeat for as many squares as desired to form a row of blocks.
Tip: Keep your tension loose at the joins to avoid puckering.
Step 3: Add More Rows
- Once the first row is complete, start the second row by knitting additional squares along the bottom edge of the first row.
- Continue building the shawl row by row, alternating colors or repeating a pattern.
Tip: For a more dynamic look, stagger the colors so no two identical colors are adjacent.
Step 4: Optional Color Arrangements
- Randomized Patchwork: Use a random order of colors for a playful look.
- Gradient Effect: Arrange blocks in light-to-dark order for a soft gradient across the shawl.
- Alternating Patterns: Add textured stitches (seed stitch, garter, stockinette) for variation.
Step 5: Add a Border (Optional)
- Once all blocks are joined, add a garter stitch border around the entire shawl:
- Pick up stitches evenly along all edges.
- Knit several rows (4–6) in garter stitch.
- Bind off loosely.
Tip: The border gives the shawl a polished, finished look and stabilizes the edges.
Step 6: Finishing and Blocking
- Weave in all ends carefully along the seams and edges.
- Lay the shawl flat on blocking mats.
- Pin the edges and corners to shape each block evenly.
- Allow the shawl to dry completely before wearing.
Tips for Success
- Keep blocks consistent in size for a professional finish.
- Weave in ends as you go to reduce finishing time.
- Use stitch markers to ensure neat alignment of each block.
6. Half-Pi Color Block Shawl: Full Step-By-Step Knitting Tutorial
The Half-Pi Color Block Shawl is a semicircular shawl that drapes beautifully around the shoulders. Its gradual color blocks create a striking visual effect, making it ideal for knitters who want a combination of elegance and practicality. The semicircular shape allows the shawl to sit naturally over the shoulders, making it versatile for everyday wear.
This tutorial will guide you through casting on, working semicircular increases, managing color blocks, binding off, and finishing, with detailed tips for a professional-looking result.
Materials You Will Need
- Fingering or sport weight yarn in three complementary colors (Color A, B, and C)
- Circular knitting needles, United States size 6 (4 millimeters), at least 32 inches long
- Tapestry needle for weaving in ends
- Scissors
- Blocking mats and pins (for shaping)
Optional: Stitch markers to help track increase points
Finished Size
- Approximately 60 inches wide by 28 inches deep.
- The size can be adjusted by adding or reducing rounds for each color block.
Skill Level
- Intermediate: Requires garter stitch, increases, managing multiple colors, and blocking semicircular shapes.
Step-By-Step Instructions
Step 1: Cast On
- Using Color A, cast on 5 stitches.
- Knit two rows to stabilize the edge.
Tip: Keep the cast-on loose; semicircular shapes require flexible edges to expand evenly.
Step 2: Establish Semicircular Increases
- Right-side row (RS) pattern:
- Knit the first stitch.
- Yarn over (YO) to increase.
- Knit across the row.
- Yarn over at the last stitch for a second increase.
- Wrong-side row (WS): Knit all stitches to maintain garter stitch.
Tip: The YOs at the beginning and end of each RS row create the semicircle shape naturally.
Step 3: Continue Increasing
- Work RS and WS rows alternately, increasing at both edges until the shawl reaches the desired width for the first color block (approximately 6–8 inches).
- Place a stitch marker at the center stitch if desired, to ensure the shawl maintains symmetry as it grows.
Step 4: Add Color Blocks
- Switch to Color B:
- Knit the first row with the new color.
- Leave a 6–8 inch tail for weaving in later.
- Continue increasing rows as before for Color B until the block reaches desired width.
- Switch to Color C and repeat the same process for the final color block.
Tip: Alternate slightly longer and shorter blocks to create a more dynamic, asymmetrical look.
Step 5: Optional Textures
- Introduce seed stitch or garter stitch variations in each color block to add subtle texture.
- For example: knit 2, purl 2 in the middle section of Color B while keeping garter stitch edges.
Tip: Keep the textures consistent within the block to maintain a professional finish.
Step 6: Bind Off
- Once the shawl reaches the desired semicircular size, bind off loosely:
- Knit two stitches, pass the first over the second, continue across the row.
- Weave in all yarn tails carefully.
Tip: A loose bind-off ensures the semicircular edge drapes naturally without curling.
Step 7: Blocking
- Lay the shawl flat on blocking mats.
- Pin the top edge to shape a perfect semicircle.
- Smooth and stretch the outer curve gently.
- Allow it to dry completely.
Optional Variations
- Fringe or tassels: Add fringe along the curved edge for a boho look.
- Gradient yarn: Replace solid colors with gradient yarn to create soft fading arcs.
- Textured borders: Add a simple lace or ribbed border along the semicircle for extra detail.
Tips for Success
- Use even tension to prevent the semicircle from skewing.
- Plan your colors to create striking contrasts or harmonious transitions.
- Check stitch count regularly to ensure symmetry.
7. Modern Blocked Asymmetrical Shawl: Full Step-By-Step Knitting Tutorial

The Modern Blocked Asymmetrical Shawl is a contemporary shawl with clean, bold color blocks and an asymmetrical triangular shape. It is ideal for knitters who want a modern, stylish accessory that is simple to make yet visually striking. This shawl pairs well with both casual and formal outfits and can be customized with fringe or textured edges.
Materials You Will Need
- Light worsted weight yarn in three complementary colors
- Knitting needles, United States size 8 (5 millimeters)
- Tapestry needle for weaving in ends
- Scissors
- Blocking mats and pins for shaping
Optional: Stitch markers for tracking increases
Finished Size
- Approximately 70 inches wide by 24 inches deep, asymmetrical triangle.
- Can be adjusted by casting on more or fewer stitches and adding more rows.
Skill Level
- Beginner to intermediate: Requires garter stitch, increases, color changes, and asymmetrical shaping.
Step-By-Step Instructions
Step 1: Cast On
- Cast on 4 stitches using Color A.
- Knit the first row to stabilize the edge.
Tip: Loose cast-on allows the triangle to expand evenly.
Step 2: Establish Asymmetrical Shape
- Right-side row (RS):
- Knit the first stitch.
- Yarn over (YO) at the beginning and end of the row for edge increases.
- Knit to the last stitch.
- Wrong-side row (WS): Knit all stitches.
Tip: This creates a gradually increasing triangular shape that will form the asymmetrical design.
Step 3: Continue Increases
- Work RS and WS rows alternately, increasing at both edges for a dramatic triangular expansion.
- Continue until half of the desired width is reached.
Tip: Keep your tension even to avoid uneven edges.
Step 4: Change Colors
- Switch to Color B for the next section:
- Knit the first row with the new color.
- Continue RS/WS increases as before.
- Repeat with Color C for the final section, ensuring distinct color blocks.
Tip: Use slightly longer blocks for your main color and shorter blocks for accents to create modern asymmetry.
Step 5: Optional Texture
- Incorporate seed stitch, garter stitch ridges, or lace rows in one color block to add interest.
- Maintain consistency within the block for a polished look.
Step 6: Bind Off
- Once the shawl reaches the desired asymmetrical size, bind off loosely.
- Weave in all yarn tails carefully to prevent unraveling.
Tip: A loose bind-off ensures the asymmetrical edges drape naturally without curling.
Step 7: Finishing and Blocking
- Lay the shawl flat on blocking mats.
- Pin the top edge straight and shape the triangle to highlight the asymmetry.
- Smooth edges and adjust the angles as needed.
- Allow the shawl to dry completely.
Optional Variations
- Fringe or Tassels: Add along the long edge for a modern boho look.
- Bold Color Combos: Use high-contrast colors for a striking visual impact.
- Textured Border: Add garter or seed stitch edging to frame the shawl.
Tips for Success
- Check your stitch count frequently to maintain symmetry.
- Keep color transitions clean by carrying yarn loosely or weaving in as you go.
- Plan your block sizes and placement for a polished modern effect.
Conclusion
Color block knit shawls are timeless pieces that combine simplicity with artistic flair. Whether you choose sharp geometric contrasts or gentle blended tones, these patterns invite creativity and comfort into your knitting routine. Each design above—ranging from triangle shapes to modular constructions—offers flexibility for both beginners and seasoned knitters to experiment with color and texture.
By following these 7 Color Block Knit Shawl Patterns, you’ll not only craft stunning accessories but also gain valuable techniques for shaping, joining, and finishing that can be applied to countless other projects. So grab your favorite yarn colors, cast on your first stitches, and let your creativity flow into something truly beautiful and cozy.


