
Butterflies have always been a symbol of transformation, beauty, and freedom. When crafted from paper and arranged thoughtfully on your wall, they can bring a sense of movement and serenity to your home decor. And if you own a Cricut cutting machine, creating your own butterfly wall art becomes not only simple but incredibly fun and rewarding.
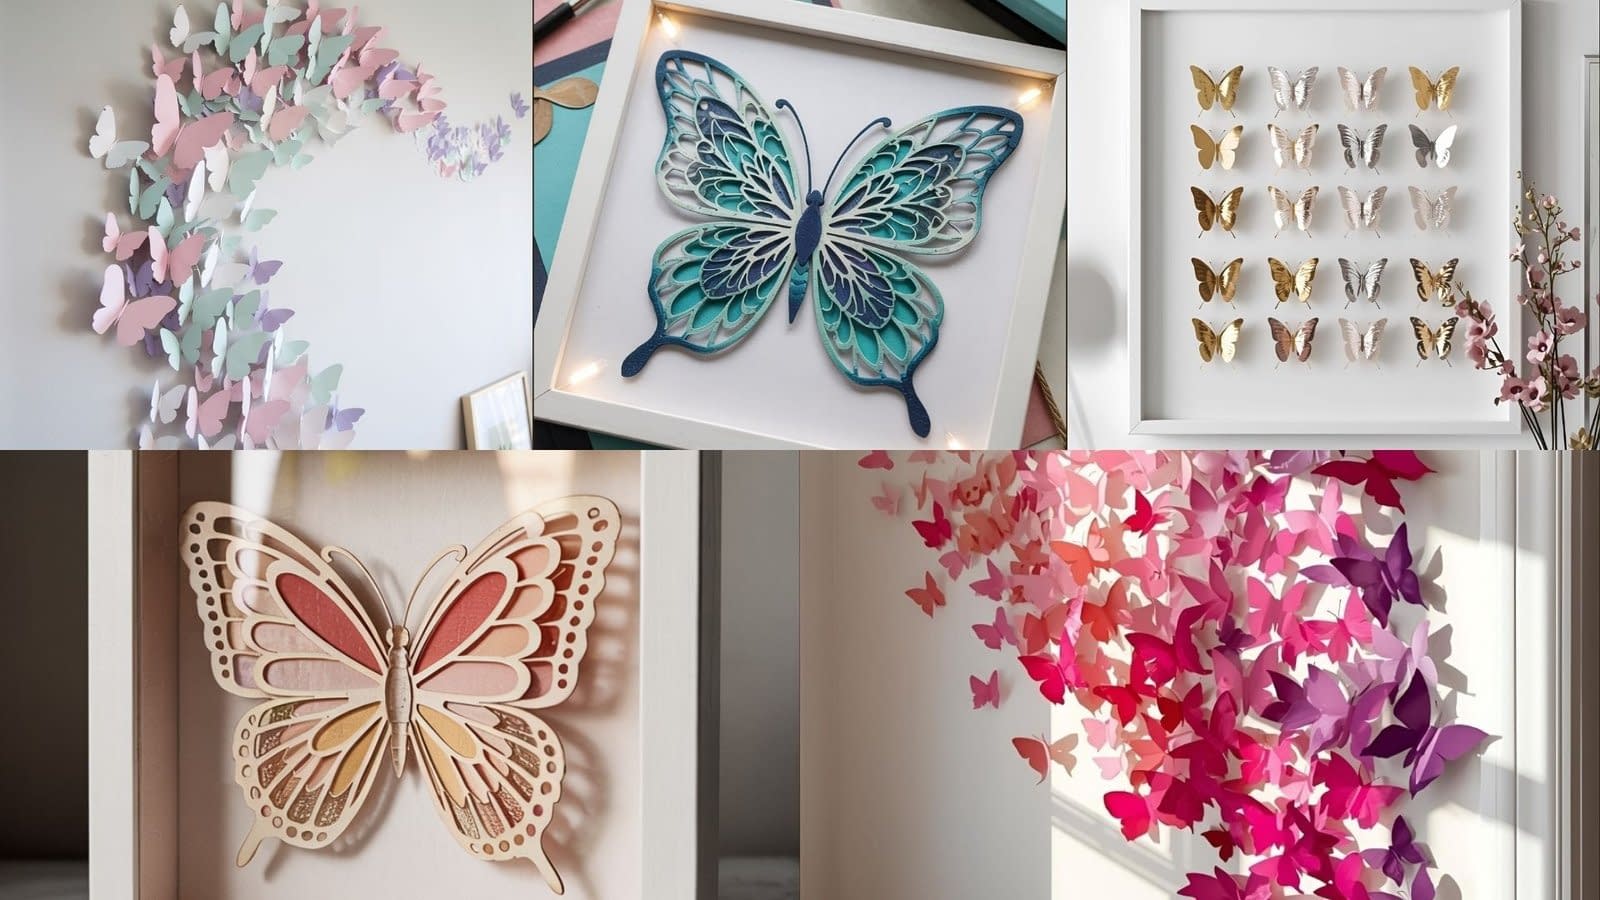
In this detailed guide, we’ll cover 5 Cricut Paper Butterfly Wall Art Tutorials, ranging from minimalist single-color designs to layered 3D pieces that seem to flutter right off the wall. Whether you’re decorating a nursery, bedroom, office, or craft room, these tutorials will help you create breathtaking art that reflects your creativity and personality.
Why Cricut Paper Butterfly Wall Art Is So Popular
Cricut machines have revolutionized the way crafters approach DIY projects. With precision cutting, customizable templates, and easy material handling, you can achieve a professional look even at home. Paper butterfly wall art is one of the most loved Cricut crafts because it:
- Adds instant charm and texture to plain walls.
- Requires minimal materials—just cardstock, glue, and a cutting machine.
- Offers endless customization in color, size, and design.
- Is beginner-friendly but can be adapted for more advanced designs.
The best part? You can use these butterflies for more than just walls—think photo backdrops, nursery mobiles, shadow boxes, and greeting cards.
Now let’s go step-by-step through five beautiful Cricut paper butterfly wall art tutorials you can try today.
Tutorial 1: Classic 3D Paper Butterfly Wall Art

Overview
This timeless design focuses on creating elegant 3D butterflies that seem to lift off the wall. Perfect for minimalist or modern interiors, this style relies on layering and arranging butterflies in a gentle motion pattern.
Materials
- Cricut Maker or Cricut Explore series
- Cardstock (preferably 65 lb or heavier)
- Foam adhesive dots or glue
- Butterfly SVG files
- Cutting mat (LightGrip)
- Tweezers and a bone folder
Steps
- Choose Your Design File
Find or create a butterfly SVG file with wing details. Cricut Design Space offers several free and paid butterfly templates, or you can download custom ones from crafting marketplaces like Etsy. - Adjust the Size
Resize your butterflies according to your wall space. For a balanced layout, combine small (2-inch) and large (5-inch) butterflies. - Select Your Paper
Choose colors that complement your wall—soft pastels for nurseries, metallic gold or silver for a chic look, or bright colors for a fun, lively design. - Cut the Butterflies
Place cardstock on your mat and let the Cricut do the cutting. Always test cut one design to ensure clean edges. - Shape the Wings
Use a bone folder or gently fold the wings upward to create a 3D effect. - Arrange and Attach
Lay the butterflies on the floor first to plan the layout. You can create a heart shape, a flying trail, or an abstract scatter pattern. Attach them to the wall with foam dots for depth or removable glue dots for flexibility.
Design Tip
Combine different paper finishes—like glitter, matte, and metallic—to add subtle contrast even if using a single color palette.
Tutorial 2: Layered Butterfly Shadow Box

Overview
A layered butterfly shadow box turns simple paper into a framed piece of art. This design looks great as a centerpiece or as part of a gallery wall.
Materials
- Cricut machine
- Multi-colored cardstock (at least 4–6 shades)
- Shadow box frame (8×8 or 12×12 inches)
- Double-sided foam tape
- Butterfly layered SVG design
- Glue and tweezers
Steps
- Find a Layered Butterfly SVG File
Look for multi-layered butterfly templates—each layer adds dimension. - Import to Cricut Design Space
Upload your file, then assign each layer a different color. Adjust the size to fit your frame. - Cut the Layers
Use different cardstock colors for each layer. Soft gradients (like light pink to dark rose) work beautifully for a soft, realistic effect. - Assemble the Butterfly
Starting from the bottom layer, attach each layer using small foam dots to maintain depth between layers. - Mount in Shadow Box
Attach the finished butterfly to the center of your backing cardstock, then insert it into the frame.
Design Tip
Try creating a collection of three shadow boxes with butterflies in varying colors or wing patterns for a stunning wall series.
Tutorial 3: Butterfly Explosion Wall

Overview
If you want a dramatic, statement-making wall, this butterfly explosion design is for you. It gives the illusion of butterflies bursting from one side of the wall and scattering in flight.
Materials
- Cricut Maker or Explore
- Cardstock (variety of colors or ombre shades)
- Removable mounting tape
- Large and small butterfly SVG templates
Steps
- Choose Color Theme
Select a gradient palette—like light pink to deep magenta or white to navy blue—for a natural flow effect. - Cut Multiple Sizes
Cut at least 50–80 butterflies in different sizes. Use smaller ones at the edges and larger ones near the center for perspective. - Arrange on the Wall
Start by clustering butterflies in one corner or behind furniture (like a headboard), then scatter them outward. - Stick Them Gradually
Attach using removable mounting tape, slightly bending the wings for movement.
Design Tip
Use metallic or glitter paper for some of the butterflies to create highlights that shimmer when light hits them.
Tutorial 4: Layered Mandala Butterfly Art

Overview
This design combines the elegance of butterflies with the intricate detail of mandalas. The result is a sophisticated piece that works beautifully as framed wall decor or a gift.
Materials
- Cricut machine
- Mandala butterfly SVG
- Cardstock in 5–7 coordinating colors
- Foam dots
- Frame or canvas board
Steps
- Upload Mandala SVG File
Import a detailed mandala butterfly design into Design Space. - Organize Layers
Each mandala layer should have a distinct color that complements the others. You can use tones from the same color family for a harmonious look. - Cut and Weed
Carefully cut each layer. For intricate designs, use a Cricut weeding tool to remove excess pieces. - Assemble Layers
Stack layers from largest to smallest, applying foam dots in between for a raised, dimensional finish. - Mount for Display
Frame your finished butterfly or glue it onto a painted canvas for an artistic look.
Design Tip
Add a soft LED backlight behind the frame to create a glowing 3D shadow effect that enhances the mandala details.
Tutorial 5: Minimalist Metallic Butterfly Grid

Overview
For a clean, modern aesthetic, a minimalist metallic butterfly grid works beautifully. This design uses symmetry and shine to create an elegant wall display.
Materials
- Cricut machine
- Metallic cardstock (gold, silver, or rose gold)
- Ruler and pencil
- Foam adhesive dots or double-sided tape
- Square frame or plain wall space
Steps
- Create Uniform Butterflies
Choose one elegant butterfly SVG design and cut 12–20 identical pieces using metallic cardstock. - Plan the Grid
Mark equal spacing on your wall or backing board using a ruler. Align butterflies in straight rows and columns for a modern look. - Mount Butterflies
Use foam dots to lift each butterfly slightly off the surface, giving depth to the flat layout. - Add Finishing Touches
You can mount the grid inside a deep frame for a polished, gallery-style effect.
Design Tip
For a sophisticated touch, alternate between matte and glossy metallic finishes or subtly mix silver and gold tones.
Tips for Perfect Cricut Paper Butterfly Wall Art
- Use Quality Cardstock – Heavier paper gives structure and prevents wings from sagging over time.
- Mix Sizes and Textures – Combining various butterfly sizes and paper finishes adds realism and depth.
- Plan Before You Stick – Always lay out your design first to visualize flow and balance.
- Maintain Consistency – Stick to a color theme that complements your existing decor.
- Experiment with Arrangements – Try spirals, hearts, letters, or wave patterns for a unique look.
Creative Variations to Try
- Ombre Effect: Arrange butterflies in a gradient color flow.
- Floral Combination: Add Cricut-cut flowers between butterflies for spring-inspired decor.
- Photo Frame Border: Create a flying trail of butterflies around a family photo collage.
- Ceiling Mobile: Suspend butterflies with clear thread to create a floating effect.
Final Thoughts
Creating Cricut Paper Butterfly Wall Art is a rewarding craft that brings a sense of creativity and tranquility into your home. Whether you prefer minimalist metallic grids, whimsical explosion patterns, or layered mandala butterflies, each design offers a unique way to express your style.
These 5 Cricut Paper Butterfly Wall Art Tutorials are not only beautiful projects but also a reflection of how simple paper, when guided by imagination and a Cricut machine, can transform an ordinary wall into a personal work of art.


