
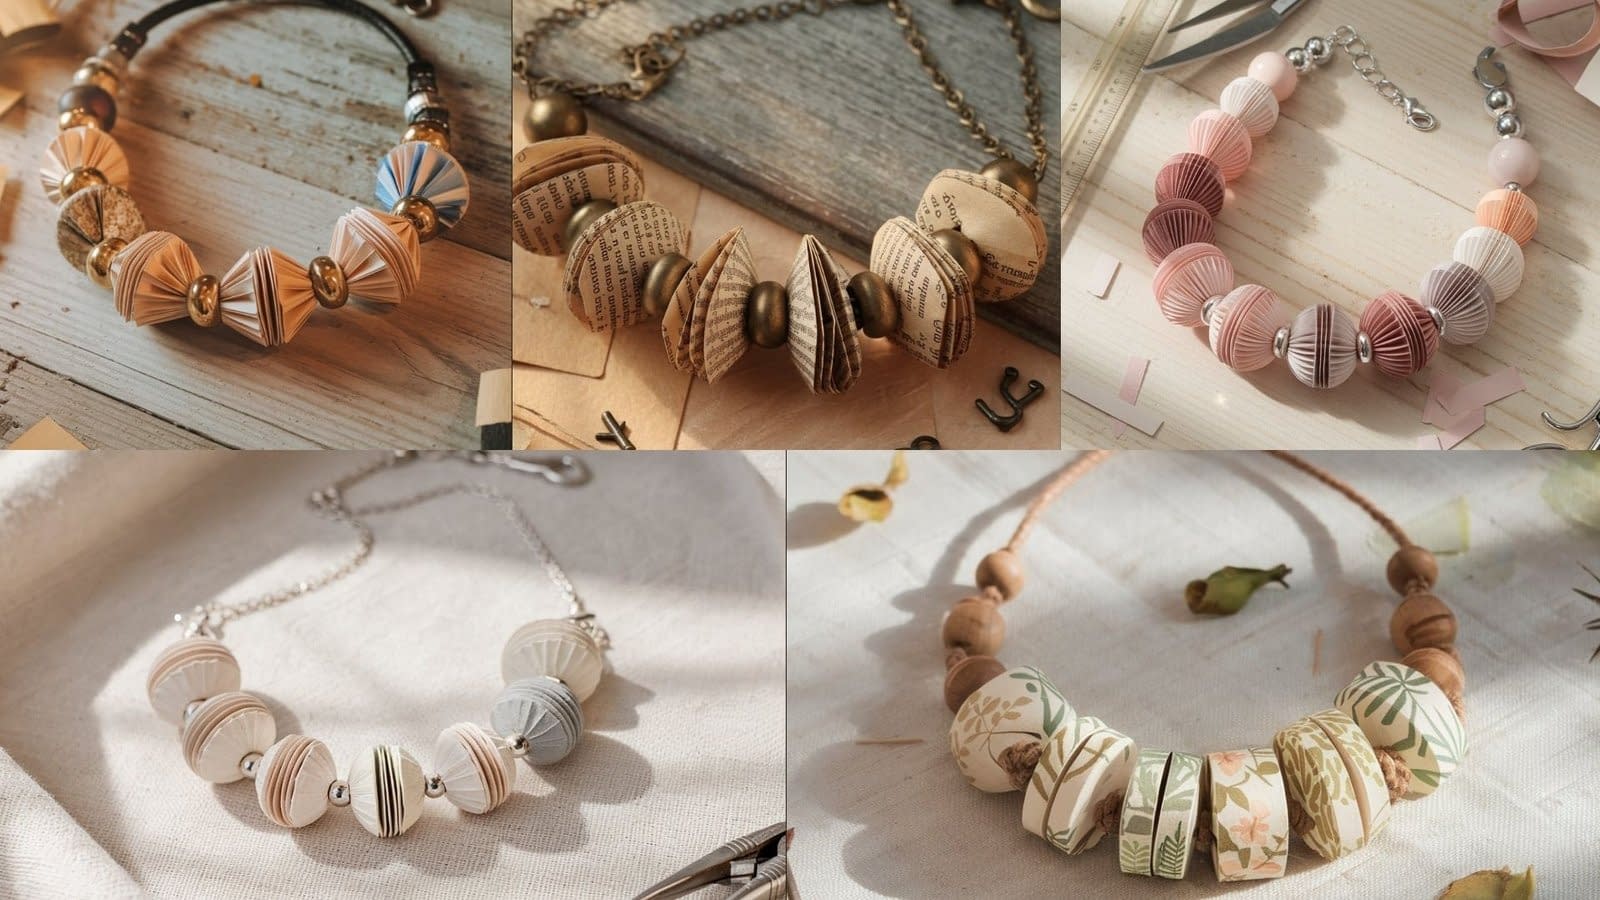
Creating a 5 Paper Bead Necklace isn’t just a fun craft project—it’s an artistic way to transform something simple into something elegant. Using only paper, glue, and a bit of creativity, you can make stunning, lightweight beads that look as good as glass or ceramic. Paper bead necklaces have been around for centuries, and today they’re celebrated for their eco-friendly appeal and versatility in design.
This guide will take you through everything you need to know—from choosing the right paper and tools to assembling five different paper bead necklace styles. Whether you’re a beginner or an experienced crafter, you’ll find practical tips, techniques, and ideas to help you design a necklace that’s as personal as it is beautiful.
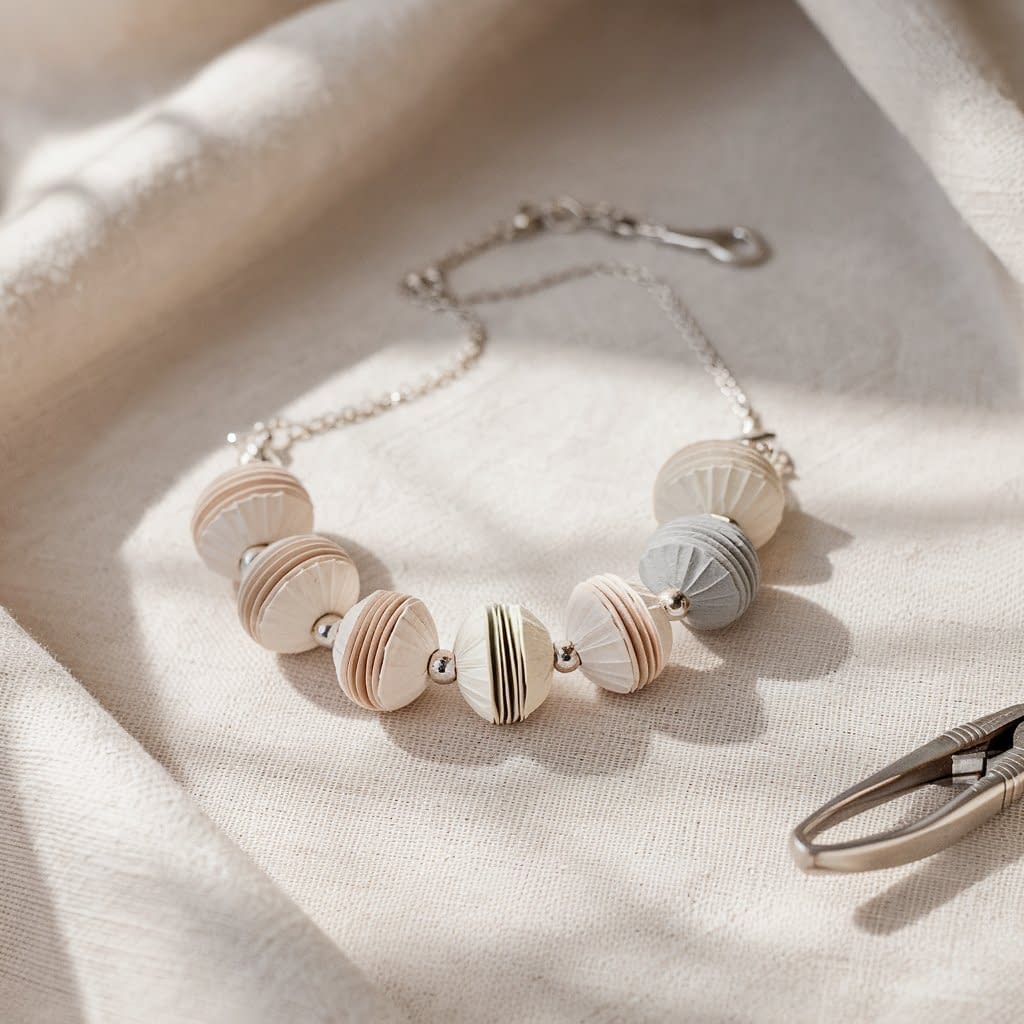
1. Classic Minimalist Paper Bead Necklace Tutorial
Materials
- Medium-weight scrapbook paper or colored printer paper (neutral tones like beige, white, black, or gray)
- Ruler, pencil, and cutting mat
- Craft knife or scissors
- Bead roller tool or toothpick
- Clear-drying glue (Mod Podge or tacky glue)
- Gloss varnish or Mod Podge sealant
- Beading wire or nylon cord
- 5 paper beads (handmade)
- 6–10 small metallic spacer beads
- 2 crimp beads
- Lobster clasp or toggle clasp
- Jump rings
- Needle-nose pliers
- Wire cutters
Step-by-Step Instructions
- Cut Paper Strips:
- Measure 1-inch-wide and 12-inch-long triangular strips.
- Cut cleanly for even bead rolling.
- Roll the Beads:
- Place the wide end on the bead roller and roll toward the narrow end.
- Apply glue near the tip to secure.
- Seal the Beads:
- Coat with gloss varnish; dry upright on a foam block.
- Apply two coats for shine.
- Prepare the Layout:
- Arrange 5 paper beads with metallic spacers in between on your beading board.
- String the Necklace:
- Attach one clasp end with a crimp bead.
- Thread: spacer – paper bead – spacer (repeat 5 times).
- Attach the other clasp end with a crimp bead.
- Adjust Length:
- Trim excess wire and ensure beads are centered.
- Finish:
- Tighten crimps, polish beads, and test clasp strength.
Design Tips
- Keep bead size consistent for a clean look.
- Use metallic paper for subtle shimmer.
- Match clasp and spacer colors (e.g., silver or gold) for cohesion.
Variations
- Replace spacers with small wooden beads for an earthy tone.
- Use matte sealant for a natural finish.
- Make a choker version with shorter wire.
Care Guidance
- Keep dry; moisture weakens paper structure.
- Wipe with a soft cloth only.
- Store flat in a jewelry box away from sunlight.
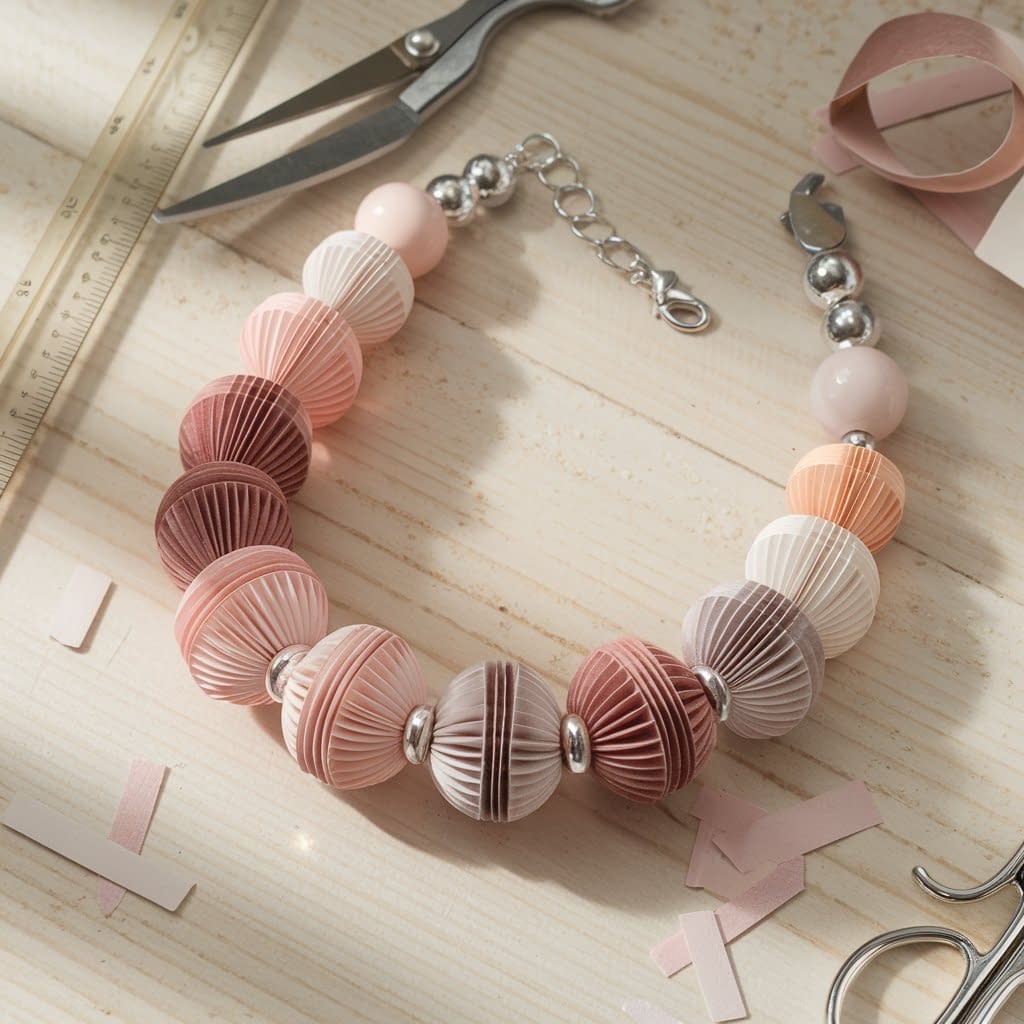
2. Gradient Color Paper Bead Necklace Tutorial
Materials
- Scrapbook paper in five gradient shades of one color (light to dark)
- Ruler and cutting tools
- Bead roller tool
- Glue stick or tacky glue
- Gloss Mod Podge or clear sealer
- Beading wire or nylon cord
- Spacer beads (silver or transparent)
- Crimp beads and lobster clasp set
- Pliers and wire cutters
Step-by-Step Instructions
- Select Shades:
- Choose five tones of the same color family (e.g., pale pink to deep rose).
- Cut Paper Strips:
- 1-inch base, 10-inch length for even-sized beads.
- Roll and Glue:
- Roll each strip tightly and glue at the tip.
- Label them 1–5 from lightest to darkest.
- Seal the Beads:
- Apply clear gloss evenly; let dry for 2–3 hours.
- Plan Arrangement:
- Lay beads from light to dark for a smooth ombré transition.
- String Beads:
- Attach clasp end first, then thread beads in color order with spacers.
- Light → mid-light → medium → dark-medium → darkest.
- Secure and Trim:
- Add final clasp, crimp, and trim wire ends neatly.
Design Tips
- Ensure gradient flow is smooth—avoid sharp color jumps.
- Pair with transparent or metallic spacers to emphasize color fading.
- Keep total necklace length between 16–18 inches for balance.
Variations
- Try two-color gradients (e.g., blue to green).
- Use pearl-finish paper for a soft sheen.
- Alternate direction for mirrored ombré effect.
Care Guidance
- Avoid perfumes or lotions near the beads.
- Clean with a dry microfiber cloth.
- Keep in a pouch when not in use.
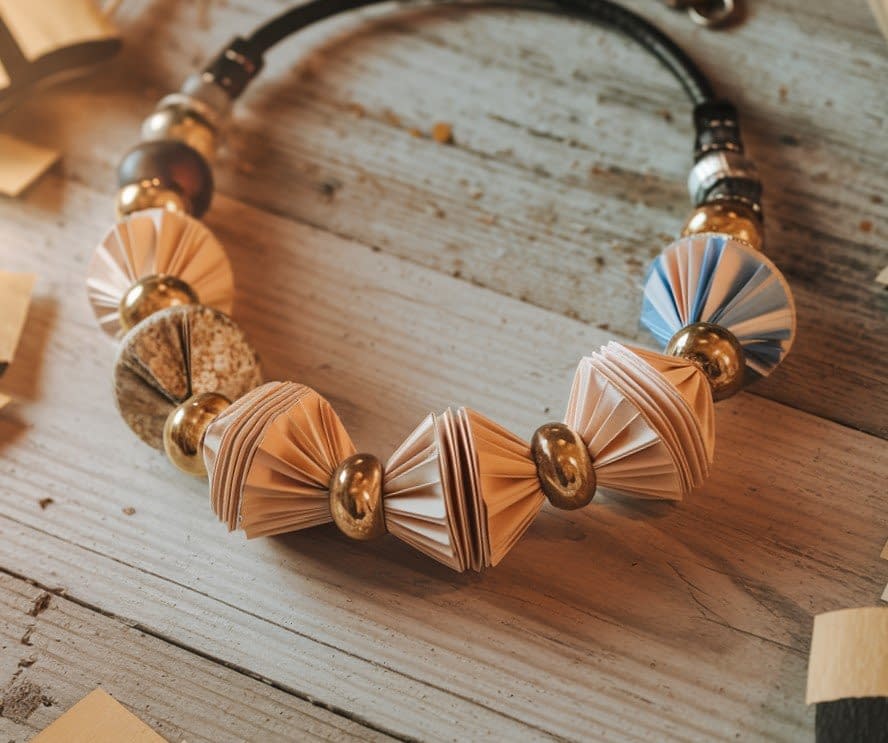
3. Mixed Media Paper Bead Necklace Tutorial
Materials
- Patterned magazine or wrapping paper
- Metallic foil or glitter paper (for accent beads)
- Bead roller tool
- Craft glue
- Clear varnish
- Beading wire or leather cord
- Assorted spacer beads (metal, wood, glass)
- 5 paper beads (center focus)
- Crimp beads and clasp set
- Round-nose pliers
Step-by-Step Instructions
- Select Paper:
- Choose bold prints and mix with metallic paper for contrast.
- Cut Strips:
- 1-inch base × 12-inch length for statement-sized beads.
- Roll Beads:
- Roll paper strips tightly; add glue as you go for secure hold.
- Add Accent Layers:
- Wrap thin metallic strips around dried beads for texture.
- Seal Beads:
- Apply two coats of clear varnish; allow to dry fully.
- Layout Design:
- Alternate textures: paper bead → metal bead → wooden bead → repeat.
- Assemble Necklace:
- Start with the clasp end, add beads in sequence, end with the final clasp.
- Check Balance:
- Ensure even spacing and centered focal bead.
Crafting Techniques
- Mix different bead materials to create depth.
- Use contrasting finishes (glossy vs matte).
- Combine textures strategically—avoid overcrowding the design.
Design Tips
- Keep five paper beads as focal points only.
- Add metallic accents near the center for visual weight.
Variations
- Use fabric-covered beads for added dimension.
- Create asymmetrical placement for modern appeal.
Care Guidance
- Store separately to prevent scratching between materials.
- Avoid bending or pressure on larger beads.
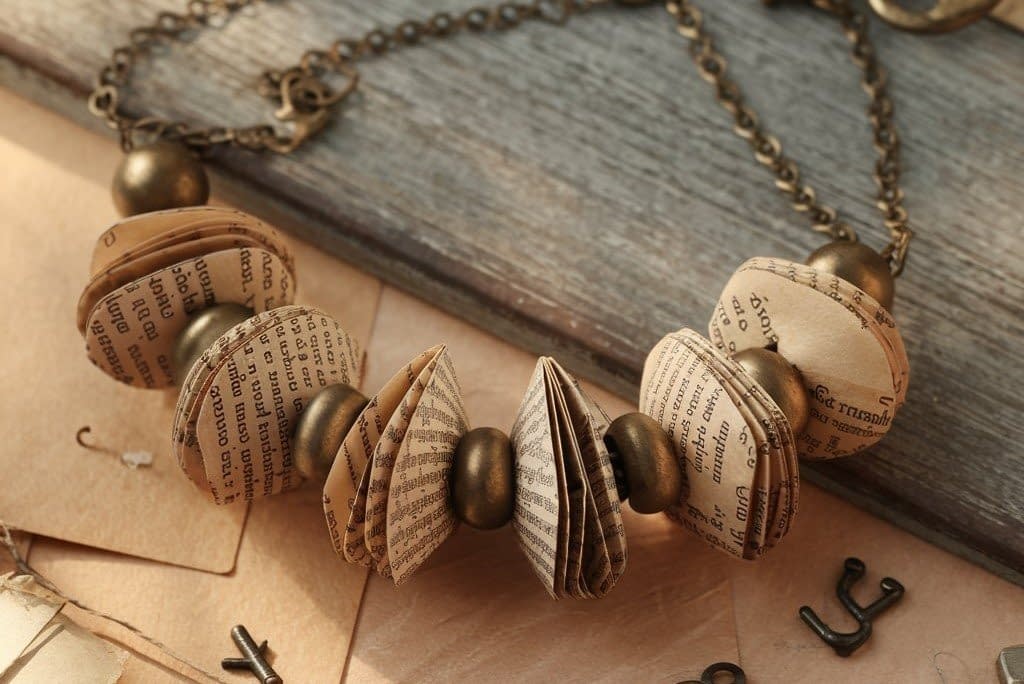
4. Vintage-Inspired Paper Bead Necklace Tutorial
Materials
- Old book pages, sheet music, or antique map prints
- Tea or coffee (for aging paper)
- Ruler, cutting knife, and mat
- Toothpick or bead roller tool
- Mod Podge or PVA glue
- Matte sealer
- Bronze or antique gold chain
- Jump rings, lobster clasp
- Bronze spacer beads
Step-by-Step Instructions
- Prepare Paper:
- If using white paper, brush with tea or coffee for aged effect; dry completely.
- Cut Strips:
- ¾-inch base, 10-inch length for delicate beads.
- Roll Beads:
- Roll around a toothpick, glue the tip firmly.
- Seal:
- Apply matte varnish for vintage finish; let dry.
- Assemble Layout:
- Combine 5 paper beads with bronze spacers between them.
- String on Chain:
- Use headpins to attach beads to chain links or string directly on wire.
- Add Clasp:
- Secure ends with jump rings and lobster clasp.
Crafting Techniques
- Lightly distress bead edges with sandpaper for worn look.
- Apply sepia-toned varnish for authenticity.
Design Tips
- Keep the color palette warm and muted.
- Pair with brass accents for a cohesive antique theme.
Variations
- Add tiny charms (keys, clocks, feathers) between beads.
- Use script or vintage-style print paper for romantic tones.
Care Guidance
- Avoid water; moisture may remove the aged stain.
- Keep away from direct sunlight to prevent fading.
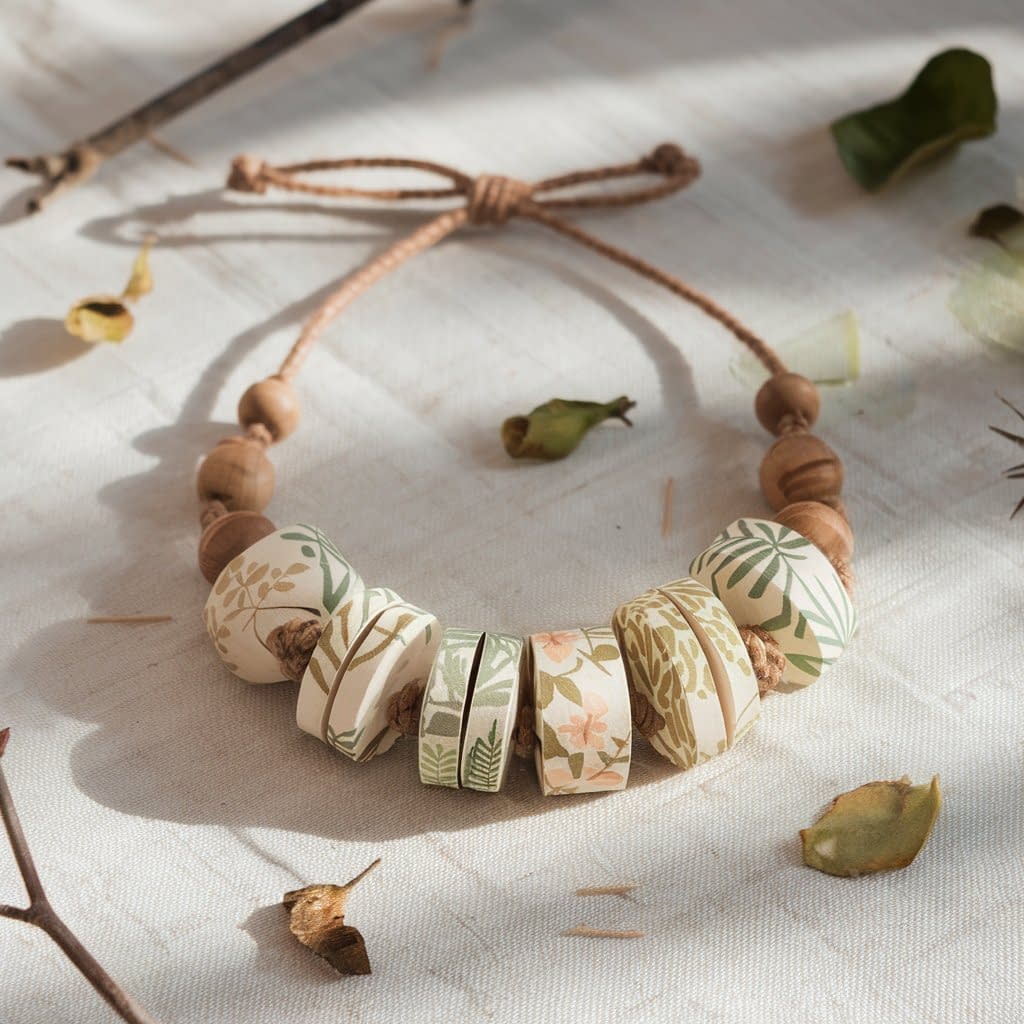
5. Nature-Inspired Paper Bead Necklace Tutorial
Materials
- Floral or leaf-patterned scrapbook paper
- Hemp cord or cotton string
- Wooden or clay spacer beads
- Toothpick or skewer
- Glue and Mod Podge
- Clear satin sealer
- Scissors, ruler, and pencil
- Clasp and jump rings
Step-by-Step Instructions
- Choose Paper:
- Select natural prints in greens, browns, or soft florals.
- Cut Strips:
- 1-inch base, 11-inch length for slightly elongated beads.
- Roll Beads:
- Roll tightly on skewer; glue tip securely.
- Seal:
- Apply satin sealer for subtle sheen and water resistance.
- Layout Design:
- Arrange: wooden bead → paper bead → wooden bead → repeat 5 times.
- String on Hemp Cord:
- Thread beads in order and tie knots between each for rustic charm.
- Attach Clasp:
- Secure cord ends with jump rings and clasp using strong glue.
Crafting Techniques
- Use natural textures and avoid overly glossy finishes.
- Add a touch of gold paint to edges for depth.
Design Tips
- Mix bead sizes for a more organic pattern.
- Keep overall look balanced and nature-toned.
Variations
- Use recycled paper bags for eco-minimalist style.
- Add small wooden pendants or pressed leaf charms.
Care Guidance
- Avoid exposure to moisture or oils.
- Store in a fabric pouch to preserve the cord’s texture.
Final Thoughts
The 5 Paper Bead Necklace is more than just a piece of jewelry—it’s a creative statement. Each bead tells a story, whether it’s made from recycled magazines or vintage paper. With a bit of patience and creativity, you can craft something truly personal, eco-friendly, and stylish.
Paper bead jewelry allows you to express your individuality while caring for the environment. Whether you’re making it for yourself or as a handmade gift, every necklace is unique—crafted not just with paper, but with imagination and heart.


