
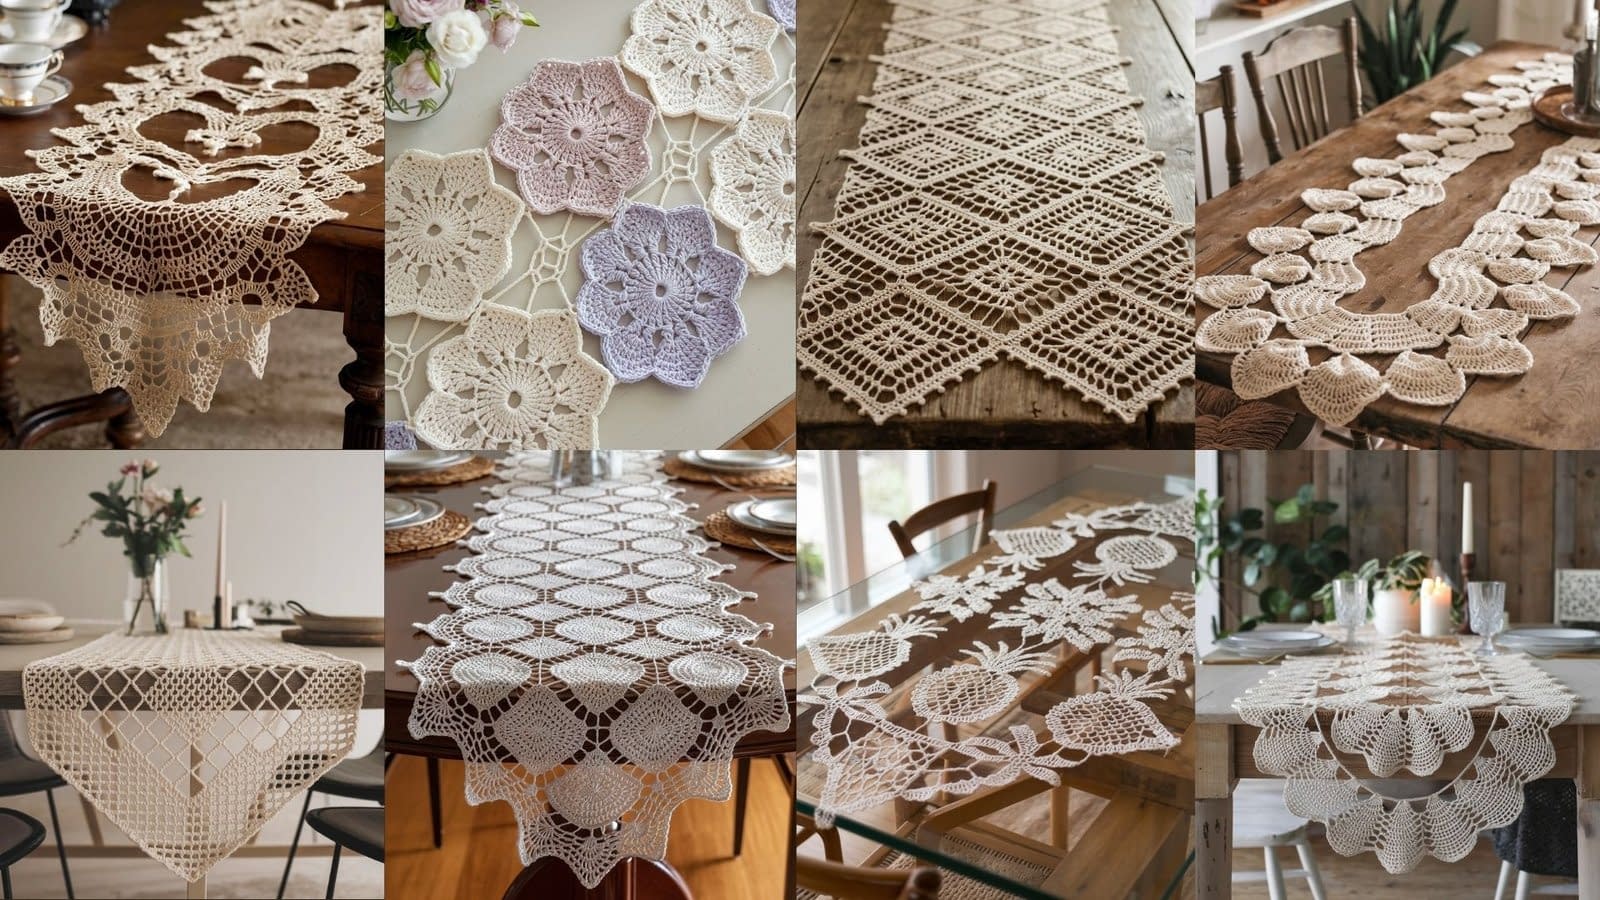
Decorating your dining table with a beautiful crochet table runner instantly adds a touch of elegance and charm to any space. Whether it’s for a family dinner, a holiday celebration, or just a cozy everyday look, a lacy crochet runner can transform your table into a centerpiece. These runners are not only functional but also a lovely way to showcase your crochet skills.
In this post, we’ll explore 8 stunning lacy crochet table runner patterns, each with detailed step-by-step instructions, materials, and tips to make them perfect for your home. Whether you’re a beginner or an experienced crocheter, you’ll find inspiration and guidance to create something truly special.
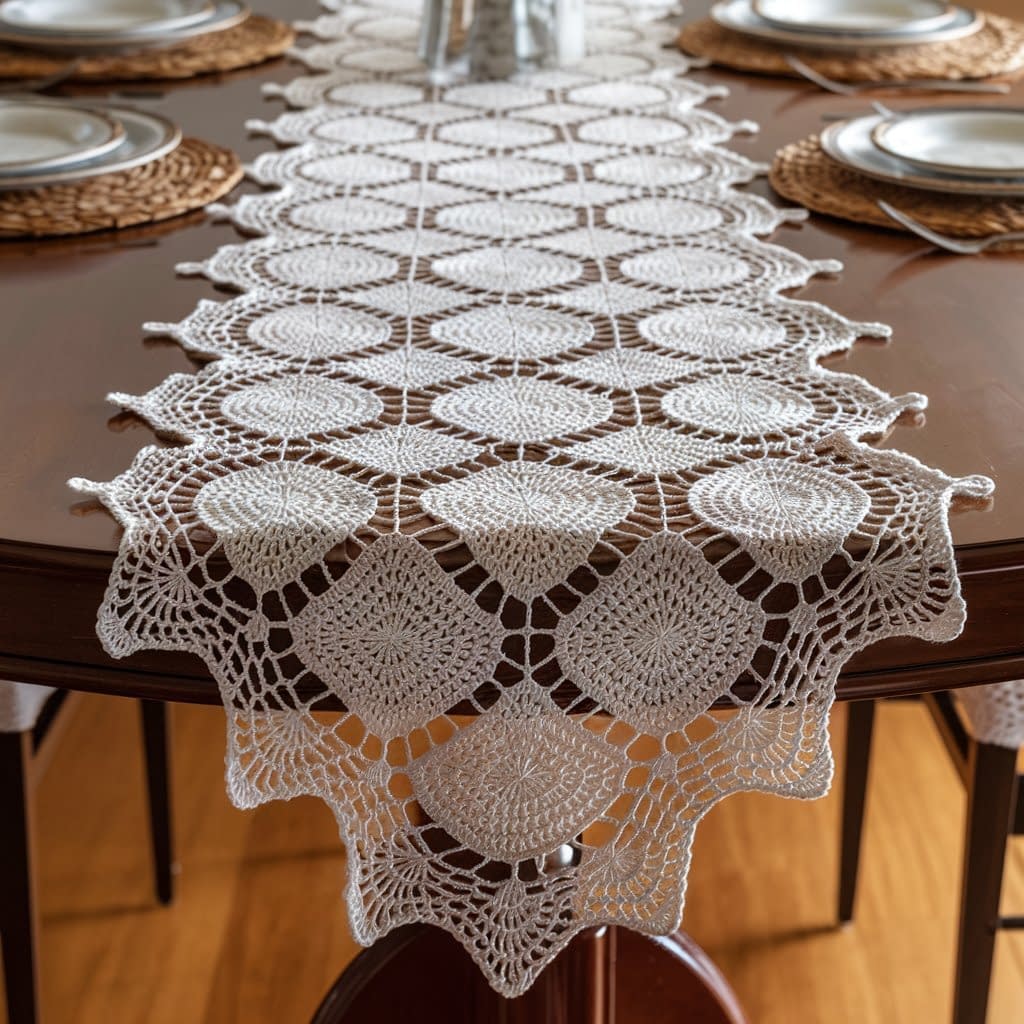
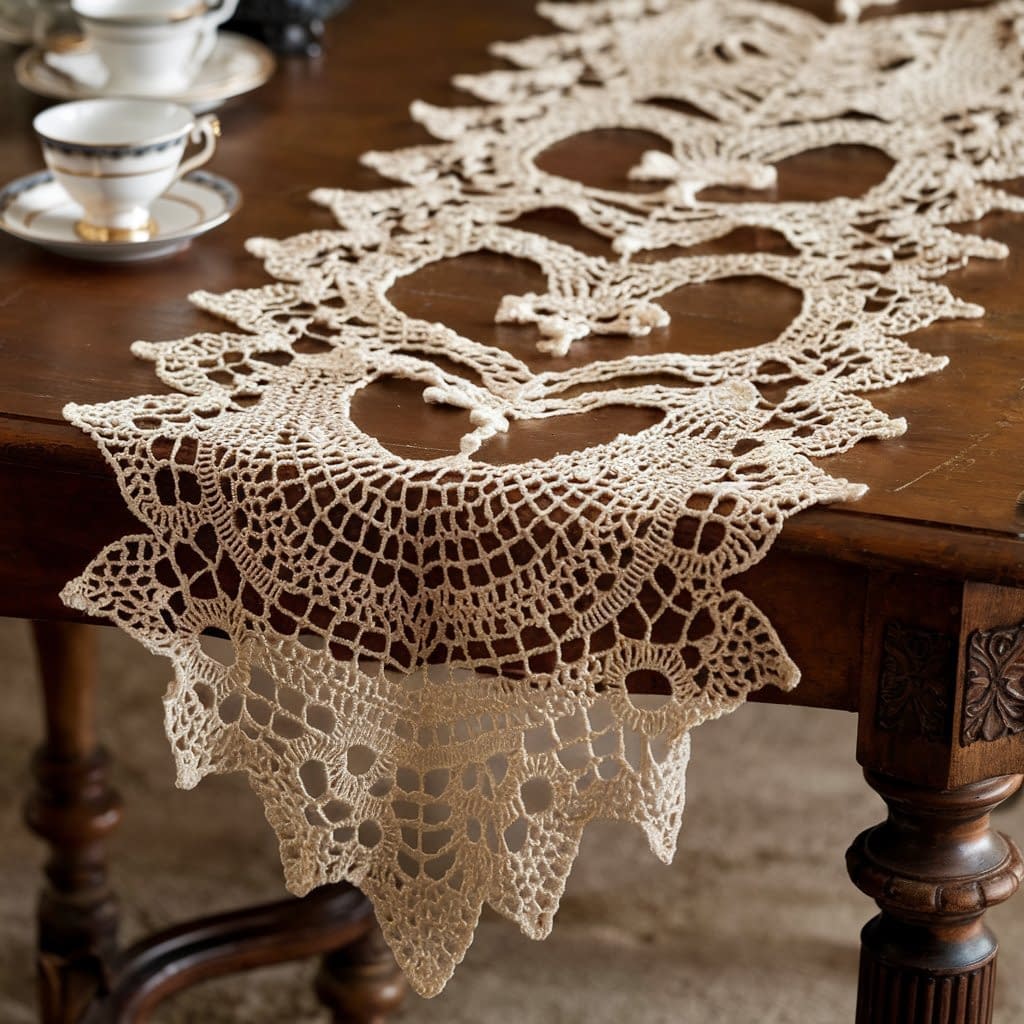
1. Classic Lace Table Runner
Skill Level: Beginner–Intermediate (basic stitches with lace pattern)
Finished Size: About 12″ wide × 60″ long (adjustable for your table)
Materials:
- Worsted weight (#4) cotton yarn (approx. 500–600 yards, depending on length)
- Crochet hook 4.0 mm (G)
- Yarn needle, scissors
- Blocking pins (optional, for finishing)
Notes:
- This runner uses simple lace motifs that repeat across the width and length.
- Keep your tension even so the lace lays flat.
- Cotton yarn works best to show the lace pattern clearly.
Step-by-Step Instructions
Foundation Chain:
1. Chain 61 (or any multiple of 10 + 1 for your preferred width).
Row 1:
2. Single crochet (SC) in the 2nd chain from hook and in each chain across. You should have 60 SC.
3. Chain 1, turn your work.
Row 2 (Start Lace Pattern):
4. Chain 4 (counts as 1 treble crochet (TR) + chain 1).
5. Skip the next stitch, TR in the following stitch, chain 1.
6. Repeat skip 1 st, TR in next st, ch 1 across the row. Turn.
Row 3:
7. Chain 3 (counts as double crochet (DC)).
8. DC in each chain-1 space from the previous row. Chain 1 between DCs. Turn.
Rows 4–12:
9. Repeat Rows 2–3 until your runner reaches the desired length.
10. Each repeat forms a delicate lace motif that opens up nicely as the runner grows.
Edging:
11. Work a row of SC evenly along all edges. For extra elegance, you can add a scalloped or picot edging:
– Picot: SC in next stitch, ch 3, sl st in first ch of the chain. Repeat around edges.
Assembly & Finishing
- After completing all rows, weave in all yarn ends with a yarn needle.
- Block the runner to open up the lace pattern and make the edges straight.
- Lay the runner flat and pin if necessary. Spritz lightly with water and allow it to dry.
Tips & Variations
- Length adjustment: Simply continue repeating the lace rows until the desired length.
- Color variation: Alternate yarn colors every few rows for subtle stripes.
- Texture variation: Switch some rows to half-double crochet (HDC) for a slightly denser lace effect.
- Decorative fringe: Add tassels or crochet edging at each end for extra charm.
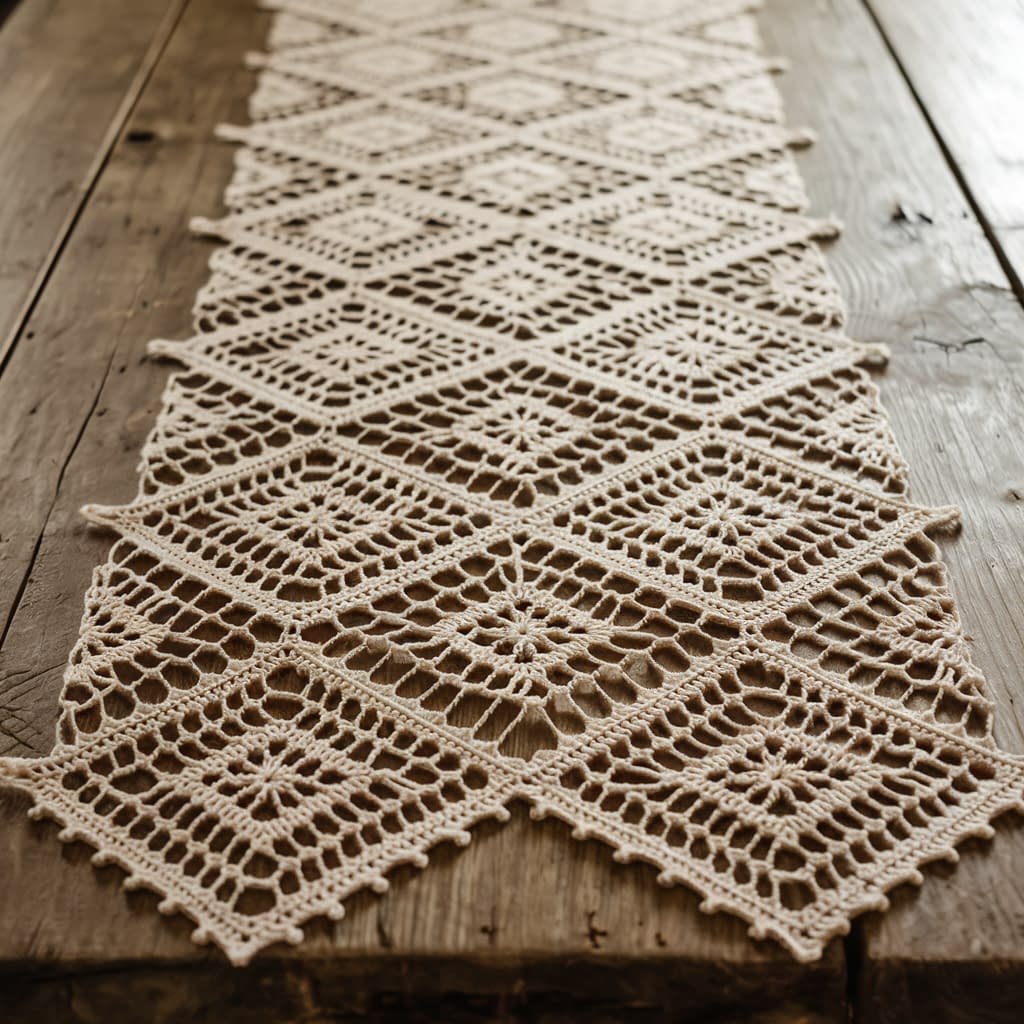
2. Diamond Lace Table Runner
Skill Level: Intermediate
Finished Size: About 14″ wide × 70″ long
Materials:
- Fingering or sport weight cotton yarn (approx. 600–700 yards)
- Crochet hook 3.5 mm (E)
- Yarn needle, scissors
- Blocking pins
Notes:
- Diamond motifs create a geometric lace design.
- This pattern requires counting stitches carefully to maintain the diamond shapes.
- Blocking is essential to give the runner a neat, crisp finish.
Step-by-Step Instructions
Foundation Chain:
1. Chain 71 (or multiple of 14 + 1 to adjust width).
Row 1:
2. Double crochet (DC) in 4th chain from hook.
3. Chain 2, skip 2 chains, DC in next chain. Repeat across the row.
4. Turn.
Row 2:
5. Chain 3 (counts as DC).
6. DC in each chain-2 space from the previous row. Chain 2 between DCs.
7. Repeat across the row. Turn.
Diamond Motif Rows (Rows 3–7):
8. Begin creating the diamond pattern:
- Row 3: Chain 3, DC cluster of 3 in the first DC space, chain 2, DC in next chain-2 space, repeat.
- Row 4: Chain 3, DC in each DC cluster space and chain-2 space across.
- Row 5: Repeat Row 3 to build diamond height.
- Rows 6–7: Repeat pattern to form multiple rows of diamond motifs.
Repeat Diamond Rows:
9. Continue the diamond motif repeats until the runner reaches the desired length.
Edging:
10. Work 1–2 rows of SC or shell stitch around the perimeter. For added elegance, consider a picot or scalloped edge:
– Scallop: 5 DC in next stitch, skip 2, SC in next stitch, repeat.
Assembly & Finishing
- Weave in all yarn ends with a yarn needle.
- Block the runner carefully to straighten the diamonds and ensure lace lies flat.
- Use pins to maintain shape during drying.
Tips & Variations
- Length adjustment: Add more diamond repeats for longer tables.
- Color: Use soft neutral shades or subtle gradients for an elegant look.
- Texture: Try alternating rows with HDC or TR for a slightly denser lace pattern.
- Motif spacing: Ensure consistent spacing between diamonds for a uniform design.
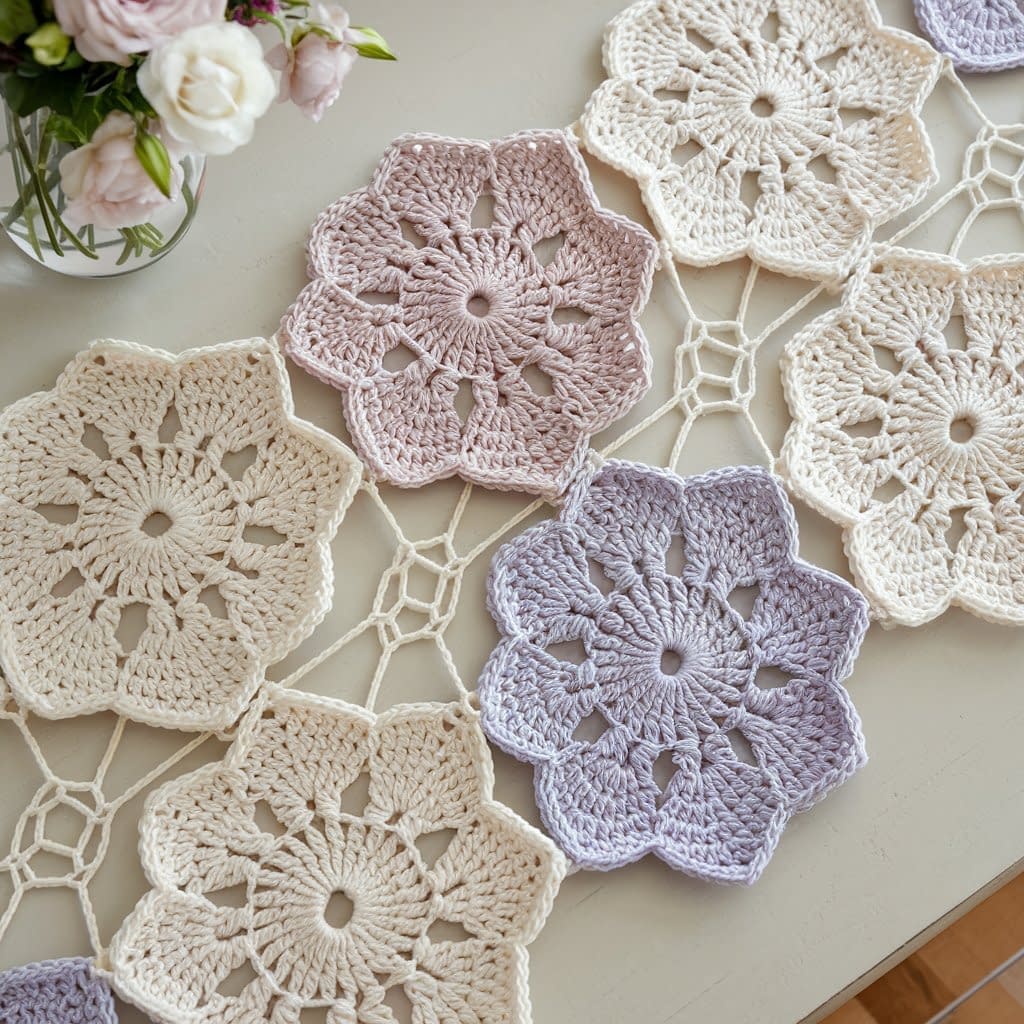
3. Floral Lace Table Runner
Skill Level: Intermediate (requires working with motifs and joining)
Finished Size: Approx. 14″ wide × 65″ long (adjustable by adding or removing motifs)
Materials:
- Lightweight cotton yarn (#2) – about 650–700 yards
- Crochet hook 3.0 mm (D)
- Yarn needle, scissors
- Blocking board and pins
Notes:
- This runner is made of repeated floral motifs that are joined together as you go.
- Each motif is worked in the round, then connected to create the runner’s shape.
- Blocking is essential to make the floral design crisp and even.
Step-by-Step Instructions
Floral Motif (make approx. 30–40, depending on runner length):
- Round 1: With yarn, make a magic ring. Ch 3 (counts as DC), work 11 DC into ring. Join with sl st to top of ch-3. (12 DC total)
- Round 2: Ch 4 (counts as DC + ch 1), DC in next DC, ch 1. Repeat around. Join. (12 DC + 12 ch-1 spaces)
- Round 3 (Petals): In next ch-1 space: work (SC, HDC, 3 DC, HDC, SC). This forms 1 petal. Repeat in each ch-1 space. Join with sl st. (12 petals)
- Round 4: Slip stitch to center of first petal. Ch 5, sl st into center of next petal (behind petals). Repeat around to form joining loops. Join.
Join-As-You-Go Method:
- On the last round of each motif, instead of completing all ch-5 loops, connect motifs by slip stitching into the loops of adjacent motifs.
- Arrange motifs in 2–3 rows wide and as long as needed for your table.
Edging:
- Once motifs are joined, work SC evenly around the entire runner.
- Optional: Add a picot or scallop border for a refined finish.
Assembly & Finishing
- Weave in yarn tails with a needle.
- Pin the runner on a blocking board, ensuring all floral motifs are stretched evenly.
- Lightly spray with water and let dry completely.
Tips & Variations
- Wider runner: Join motifs in 3–4 rows wide instead of 2.
- Color play: Make each flower a different pastel shade for a spring theme, or stick with white/cream for a traditional lace look.
- Edging option: Crochet a lace border with chain loops for added delicacy.
4. Shell Lace Table Runner
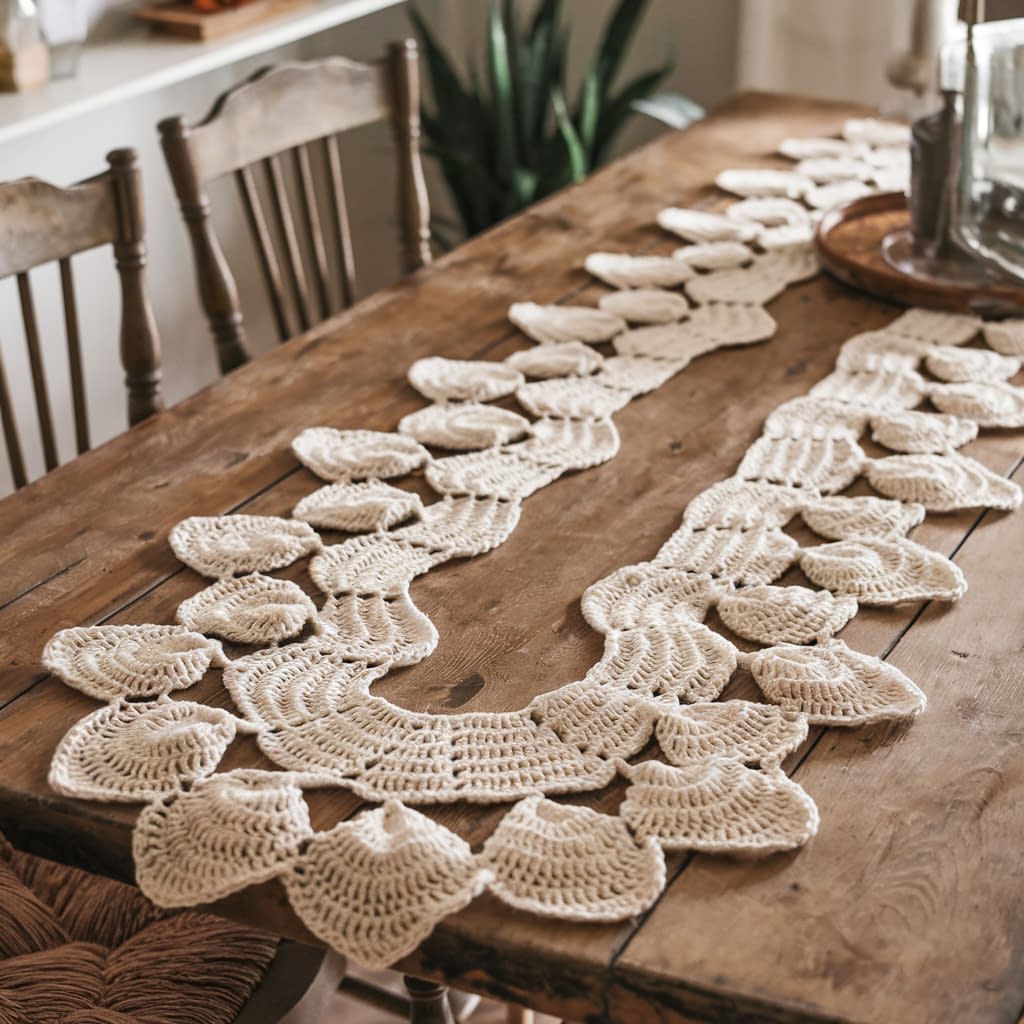
Skill Level: Beginner–Intermediate (basic shells and chains)
Finished Size: About 12″ wide × 72″ long
Materials:
- Worsted weight cotton yarn (#4) – approx. 500–600 yards
- Crochet hook 4.5 mm (7)
- Yarn needle, scissors
- Blocking pins (optional)
Notes:
- This pattern uses the shell stitch, which creates an elegant scalloped lace effect.
- Shells are made of 5 DC grouped together in the same stitch/space.
- This runner is worked in rows from end to end.
Step-by-Step Instructions
Foundation Chain:
1. Chain 61 (multiple of 6 + 1).
Row 1:
2. SC in 2nd ch from hook. Skip 2 ch, 5 DC in next ch (shell made), skip 2 ch, SC in next ch. Repeat across. Turn.
Row 2:
3. Ch 3 (counts as DC). 2 DC in same SC. Skip next shell, SC in center DC of next shell, skip 2 DC, 5 DC in next SC. Repeat across, ending with 3 DC in last SC. Turn.
Row 3:
4. Ch 1, SC in first DC. Skip 2 DC, 5 DC in next SC, skip 2 DC, SC in next DC. Repeat across. Turn.
Row 4–100+ (or until desired length):
5. Repeat Rows 2–3 alternately to create a repeating shell lace pattern.
Edging:
6. Work SC evenly around all edges.
7. For a decorative look, add a scalloped edge: (SC in first st, skip 1, 5 DC in next st, skip 1, SC in next st) repeat around.
Assembly & Finishing
- After reaching the desired length, fasten off and weave in ends.
- Block the runner to open up the shells and straighten the edges.
Tips & Variations
- Narrower width: Start with fewer foundation chains (reduce by multiples of 6).
- Wider runner: Add more starting chains.
- Color changes: Alternate yarn colors every few rows for striped lace shells.
- Texture variation: Try using thinner thread and smaller hook for a finer lace finish.
5. Pineapple Lace Table Runner
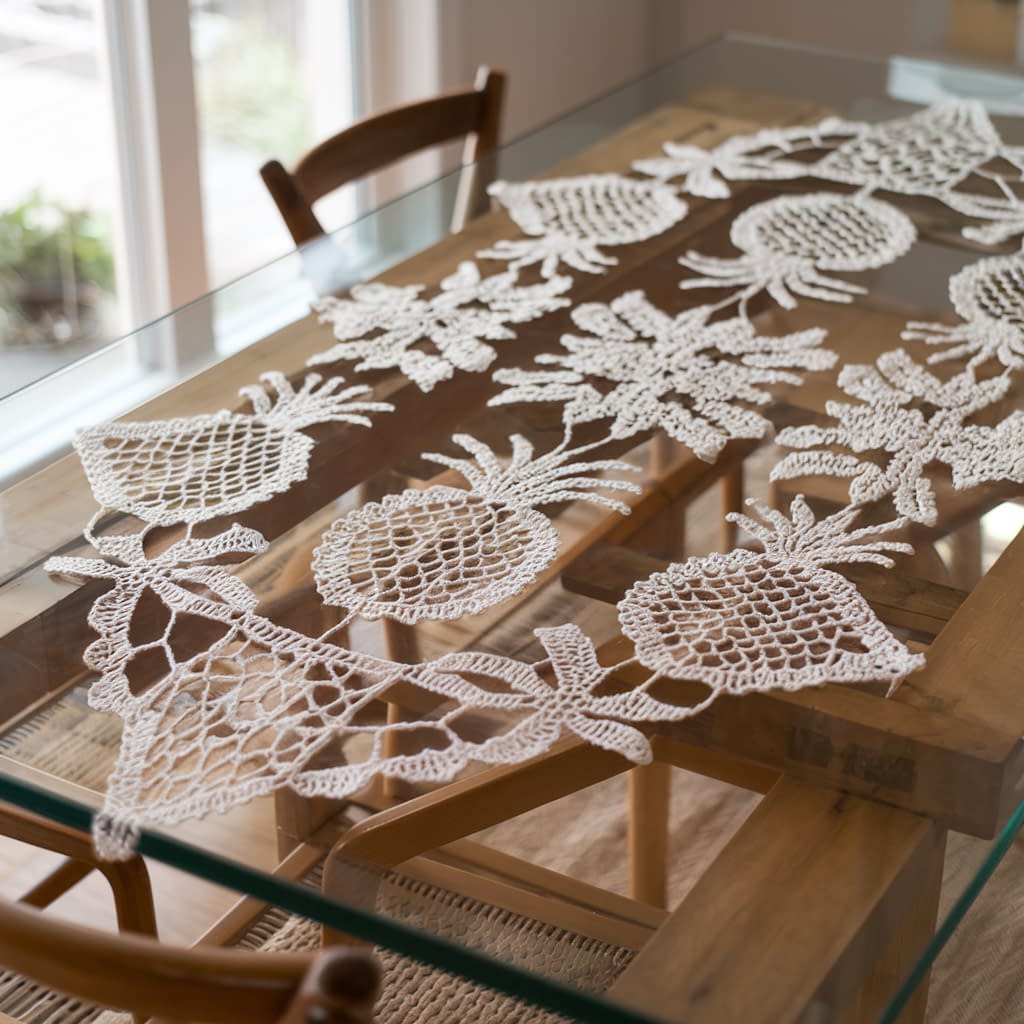
Skill Level: Intermediate–Advanced (requires following lace repeats and stitch placement carefully)
Finished Size: About 14″ wide × 68″ long
Materials:
- Size 10 crochet thread (approx. 800 yards)
- Steel crochet hook 1.75 mm
- Yarn needle, scissors
- Blocking board & pins
Notes:
- The pineapple motif is a classic lace design, made with a combination of chain spaces and decreasing shells.
- This runner is worked lengthwise and requires blocking to open the lace.
- Patience with stitch counts is key for even motifs.
Step-by-Step Instructions
Foundation Chain:
- Chain 85 (multiple of 14 + 1).
Row 1:
2. DC in 5th ch from hook (counts as 1 DC + ch 1 + 1 DC). Ch 2, skip 2 ch, DC in next ch, ch 2, skip 2 ch, (DC, ch 1, DC) in next ch. Repeat across. Turn.
Row 2:
3. Ch 3 (counts as DC), DC in same space. Ch 2, DC in next DC, ch 2, (DC, ch 1, DC) in next ch-1 space. Repeat across. Turn.
Row 3:
4. Start pineapple base: Ch 3, DC in same space. Ch 3, skip next DC, SC in ch-2 space, ch 3, (DC, ch 1, DC) in next ch-1 space. Repeat across. Turn.
Row 4–10:
5. Work lace repeats: each pineapple grows taller by chaining 3 spaces, with decreasing stitches on sides.
- Example Row: Ch 3, DC in same space, ch 3, SC in center of previous ch space, ch 3, (DC, ch 1, DC) in next space. Repeat.
- Continue rows until pineapples are fully formed (about 6–7 rows per motif).
Row 11+:
7. Repeat rows 3–10 until runner reaches desired length. Each repeat forms a new row of pineapples.
Edging:
8. Work SC evenly around, then add pineapple-shaped edging: (Ch 5, skip 2 sts, SC in next st) repeat across for a looped finish.
Assembly & Finishing
- Weave in ends securely.
- Block carefully, pinning each pineapple tip outward to enhance the lacy shape.
- Let dry fully before use.
Tips & Variations
- Width adjustment: Add/remove multiples of 14 at foundation chain.
- Color play: Try white or cream for a vintage look, or soft pastels for a modern twist.
- Thread option: Use thicker cotton yarn for a chunkier runner.
6. Fan Lace Table Runner
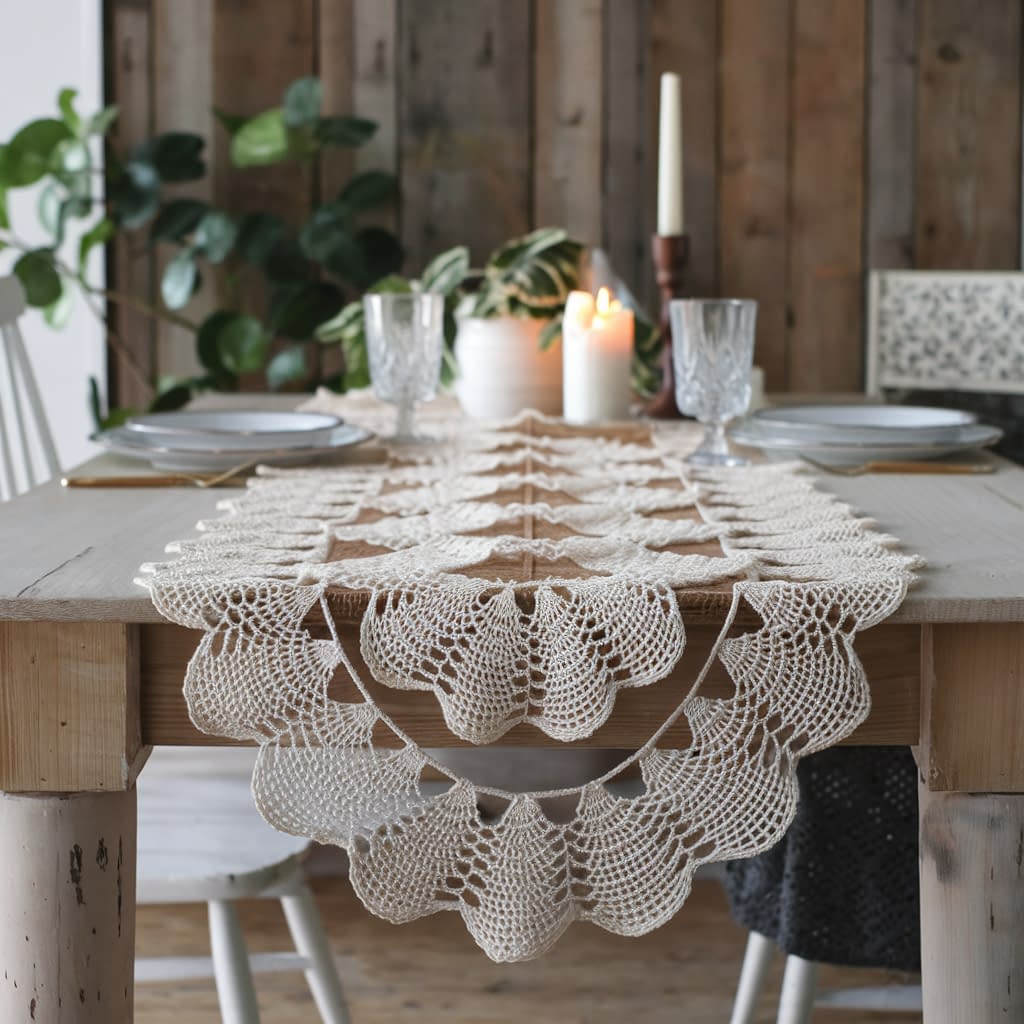
Skill Level: Beginner–Intermediate
Finished Size: About 12″ wide × 60″ long
Materials:
- Sport weight cotton yarn – approx. 550 yards
- Crochet hook 3.5 mm (E)
- Yarn needle, scissors
- Blocking board & pins (optional)
Notes:
- Fan stitches are clusters of DC worked together to form a semi-circle lace.
- The runner is worked in long rows with repeating fans.
- Very forgiving and a good pattern for beginners who want lace practice.
Step-by-Step Instructions
Foundation Chain:
- Chain 58 (multiple of 12 + 10).
Row 1:
2. SC in 2nd ch from hook and in each chain across. Turn.
Row 2 (Start Fans):
3. Ch 3 (counts as DC). Skip 3 sts, 7 DC in next st (fan made), skip 3 sts, DC in next st. Repeat across. Turn.
Row 3:
4. Ch 3 (counts as DC). Work 3 DC in space between first 2 DC of fan below, ch 2, 3 DC in same space. Skip to next DC between fans, DC in top. Repeat across. Turn.
Row 4:
5. Ch 1, SC in each st across to anchor fans. Turn.
Rows 5–50+:
6. Repeat Rows 2–4 for desired length of runner.
Edging:
7. Work SC evenly along sides. For a decorative border: in each fan, work 9 DC, then SC between fans. This creates scalloped edges.
Assembly & Finishing
- Weave in yarn ends.
- Gently block to open up fans and enhance the lacy arches.
Tips & Variations
- Make wider: Add extra multiples of 12 in starting chain.
- Two-tone effect: Use one color for fans and another for the single crochet rows.
- Thinner thread: Makes the fans look more delicate and lace-like.
7. Diamond Mesh Table Runner
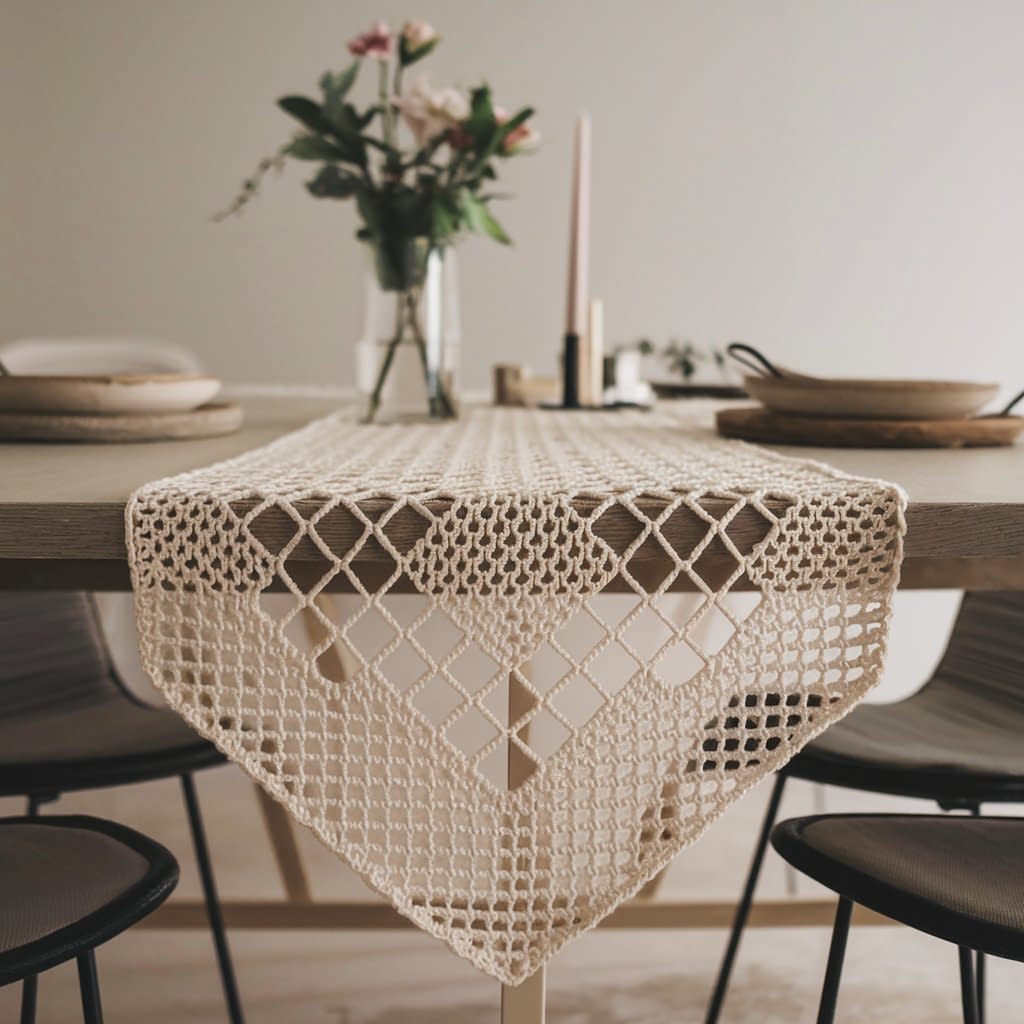
Skill Level: Beginner–Intermediate
Finished Size: About 14″ wide × 64″ long
Materials:
- Worsted-weight cotton yarn, approx. 700 yards
- Crochet hook 4 mm (G/6)
- Yarn needle, scissors
- Blocking pins (optional but recommended)
Notes:
- This runner is worked lengthwise in rows.
- The mesh is created using chains and double crochets that form diamond-shaped openings.
- This is a repetitive and meditative pattern, great for beginners learning lace-style crochet.
Step-by-Step Instructions
Foundation Chain:
1. Chain 76 (multiple of 6 + 4 for balance).
Row 1:
2. DC in 6th ch from hook, ch 2, skip 2 ch, DC in next ch. Repeat across. Turn.
Row 2:
3. Ch 4 (counts as DC + ch 1), skip next DC, DC in next ch-2 space. Ch 2, DC in next DC, ch 2, DC in next ch-2 space. Repeat across. Turn.
Row 3:
4. Ch 4, DC in first ch-2 space. Ch 2, DC in next DC, ch 2, DC in next ch-2 space. Repeat across. Turn.
Rows 4–60+:
5. Continue repeating Rows 2–3 until desired length is achieved. Diamonds will appear as the mesh builds up.
Edging:
6. SC evenly along all edges, placing 3 SC in each corner. For a decorative finish, you may add a picot edging: (SC, ch 3, SC in same st, skip 2 sts) repeat around.
Assembly & Finishing
- Weave in yarn ends.
- Lightly block to open the diamond mesh and even out the tension.
Tips & Variations
- Make it wider: Add multiples of 6 to your foundation chain.
- Delicate version: Use size 10 crochet thread with a 1.75 mm hook.
- Rustic version: Try jute or linen yarn for a farmhouse-style runner.
8. Victorian Lace Table Runner
Skill Level: Intermediate–Advanced
Finished Size: About 16″ wide × 70″ long
Materials:
- Size 10 crochet thread, approx. 950 yards
- Steel crochet hook 1.75 mm
- Yarn needle, scissors
- Blocking board & pins (highly recommended)
Notes:
- This design is inspired by vintage lace motifs.
- It uses clusters, picots, and arches for a delicate Victorian feel.
- Blocking is essential for the lace to open and keep its intricate form.
Step-by-Step Instructions
Foundation Chain:
- Chain 100 (multiple of 10).
Row 1:
2. SC in 2nd ch from hook and across. Turn.
Row 2:
3. Ch 5 (counts as DC + ch 2), skip 2 sts, DC in next st. Ch 2, skip 2 sts, DC in next st. Repeat across. Turn.
Row 3:
4. Ch 3, DC in same st. Ch 3, skip 1 DC, cluster (3 DC together) in next ch-2 space, ch 3, DC in next DC. Repeat across. Turn.
Row 4:
5. Ch 1, SC in first st. Ch 5, SC in top of cluster, ch 5, SC in next DC. Repeat across. Turn.
Row 5:
6. Ch 3, (2 DC, ch 2, 2 DC) in first ch-5 space. Ch 3, (2 DC, ch 2, 2 DC) in next ch-5 space. Repeat across. Turn.
Rows 6–80+:
7. Repeat Rows 2–5 for the length of runner. This creates a flowing lace with diamond arches and clusters.
Final Edging:
8. Work SC evenly around. On long edges, add Victorian scallops: (5 DC in one st, skip 2, SC in next st) repeat to end.
Assembly & Finishing
- Weave in all loose ends.
- Pin runner to blocking board, stretching arches and scallops into shape.
- Steam or spray lightly with water to set stitches.
Tips & Variations
- For a true heirloom look: Crochet in white or ecru thread.
- Shorter runner: Reduce foundation chain in multiples of 10.
- Add beads: Thread small seed beads into ch-5 arches for a decorative touch.
Conclusion
These 8 lacy crochet table runner patterns offer a variety of styles, from delicate pineapples and floral motifs to geometric diamonds and wave designs. With clear step-by-step instructions, tips, and finishing guidance, you can create elegant handmade runners for your home or gifts. Take your time, block your finished runners, and enjoy the satisfaction of bringing beauty and charm to your dining space.


