
Amigurumi, the Japanese art of crocheting small stuffed animals and characters, has become one of the most beloved crafts among crocheters worldwide. What makes amigurumi so charming is not only their cuteness but also their versatility—these little creations can be used as ornaments, desk decorations, or thoughtful handmade gifts.
Mini amigurumi animals, in particular, are perfect projects for both beginners and experienced crocheters. Their small size means they work up quickly, use minimal yarn, and let you experiment with colors and shapes without committing to a large project. Each one can be customized, from yarn textures to embroidered expressions, making every finished piece unique.
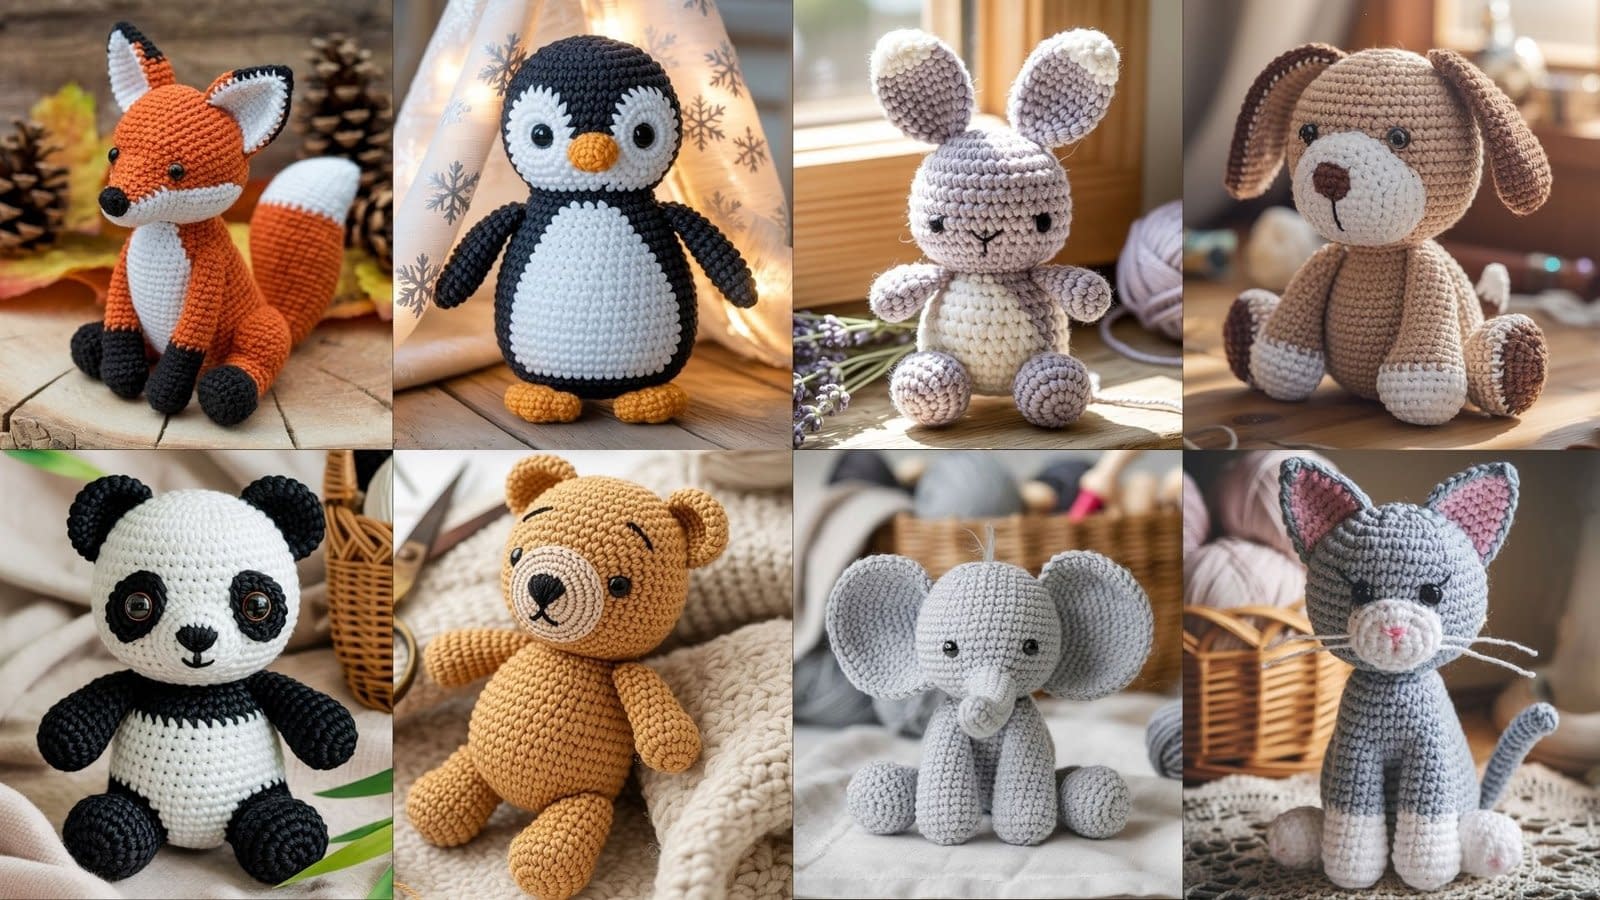
In this post, we’ll cover 8 Mini Amigurumi Animals with detailed, step-by-step instructions. Each pattern will include:
- Skill level (so you know what to expect)
- Finished size
- Materials you’ll need
- Step-by-step instructions with shaping and finishing
- Tips, variations, and decoration ideas
1. Mini Amigurumi Bunny

Skill Level: Beginner–Intermediate (basic shaping + attaching parts)
Finished Size: About 3″ tall (without ears); size may vary depending on yarn/hook
Materials:
- Worsted weight (#4) yarn: white, cream, or pastel (main color), pink (for inner ears & nose)
- Crochet hook: 3.5 mm (E) or 4.0 mm (G)
- Safety eyes (6 mm) OR black embroidery thread
- Yarn needle & scissors
- Polyester fiberfill stuffing
Notes:
- Work in continuous rounds (use a stitch marker to mark the first stitch of each round).
- Stuff firmly but not overly tight to avoid gaps.
- Always leave long tails when finishing off parts to make sewing easier.
Instructions
Head + Body (worked together in one piece):
- Round 1: Magic ring, 6 sc into ring. (6)
- Round 2: 2 sc in each st around. (12)
- Round 3: (sc 1, inc) repeat around. (18)
- Rounds 4–7: sc in each st around. (18)
- Round 8: (sc 1, dec) repeat around. (12)
- Round 9: sc in each st around. (12)
➝ Insert safety eyes between Rounds 3–4, spaced about 4 stitches apart. - Round 10: (dec) repeat around. (6)
➝ Stuff firmly before closing. - Fasten off, weave yarn through last stitches, pull tight to close.
Ears (make 2):
- With pink yarn, ch 7.
- Row 1: sc in 2nd ch from hook, sc across. (6)
- Row 2: ch 1, turn, sc across. (6)
- Switch to white yarn, work sc around entire edge to make a neat oval.
- Fasten off, leaving a tail for sewing.
Arms (make 2):
- With main color, ch 6.
- Row 1: sc in 2nd ch from hook, sc across. (5)
- Roll slightly into a tube, whip stitch closed.
- Fasten off with long tail.
Assembly:
- Sew ears on top of the head, angled slightly outward.
- Attach arms to the side of the body, right under the head.
- Embroider a small pink triangle nose between the eyes and tiny straight lines for whiskers.
Variations:
- Make pastel bunnies in different colors (pink, lavender, mint) for spring or Easter.
- Add a small bow or ribbon around the neck.
- Create a tiny pom-pom and sew it to the back as a bunny tail.
2. Mini Amigurumi Bear

Skill Level: Beginner (easy shaping, few parts)
Finished Size: About 3.5″ tall
Materials:
- Worsted weight (#4) yarn: brown, tan, or pastel colors
- Crochet hook: 3.5–4.0 mm
- Safety eyes (6–8 mm) or embroidery thread
- Black yarn or thread for nose/mouth
- Stuffing, yarn needle, scissors
Notes:
- This pattern is worked in rounds for head and body together.
- Always sew parts securely since this can be used as a toy.
- For a softer look, use lighter pastel shades instead of brown.
Instructions
Head + Body:
- Round 1: Magic ring, 6 sc. (6)
- Round 2: 2 sc in each st around. (12)
- Round 3: (sc 1, inc) repeat around. (18)
- Round 4: (sc 2, inc) repeat around. (24)
- Rounds 5–8: sc around. (24)
- Round 9: (sc 2, dec) repeat around. (18)
- Round 10: (sc 1, dec) repeat around. (12)
➝ Place safety eyes between Rounds 5–6, about 5 stitches apart. - Stuff head firmly.
- Round 11: sc in each st around. (12)
- Round 12: (inc in each st) around. (24)
- Rounds 13–15: sc in each st around. (24)
- Round 16: (sc 2, dec) repeat around. (18)
- Round 17: (sc 1, dec) repeat around. (12)
➝ Stuff body firmly. - Round 18: dec around. (6) Fasten off, close hole.
Ears (make 2):
- Magic ring, 6 sc into ring. (6)
- Round 2: 2 sc in each st around. (12)
- Round 3: sc around. (12)
- Fasten off, leaving a tail.
Arms (make 2):
- Magic ring, 6 sc. (6)
- Rounds 2–4: sc around. (6)
- Fasten off, leaving tail. Lightly stuff.
Legs (make 2):
- Magic ring, 6 sc. (6)
- Round 2: (sc 1, inc) repeat around. (9)
- Rounds 3–4: sc around. (9)
- Fasten off with long tail. Stuff lightly.
Assembly:
- Sew ears to the top sides of the head.
- Attach arms to upper body and legs at the bottom.
- Embroider a small black oval nose and a straight line mouth under it.
Variations:
- Add a ribbon or bow tie around the bear’s neck.
- Use pastel colors for a baby shower gift.
- Make a tiny scarf in contrasting yarn for a winter bear.
3. Mini Amigurumi Cat
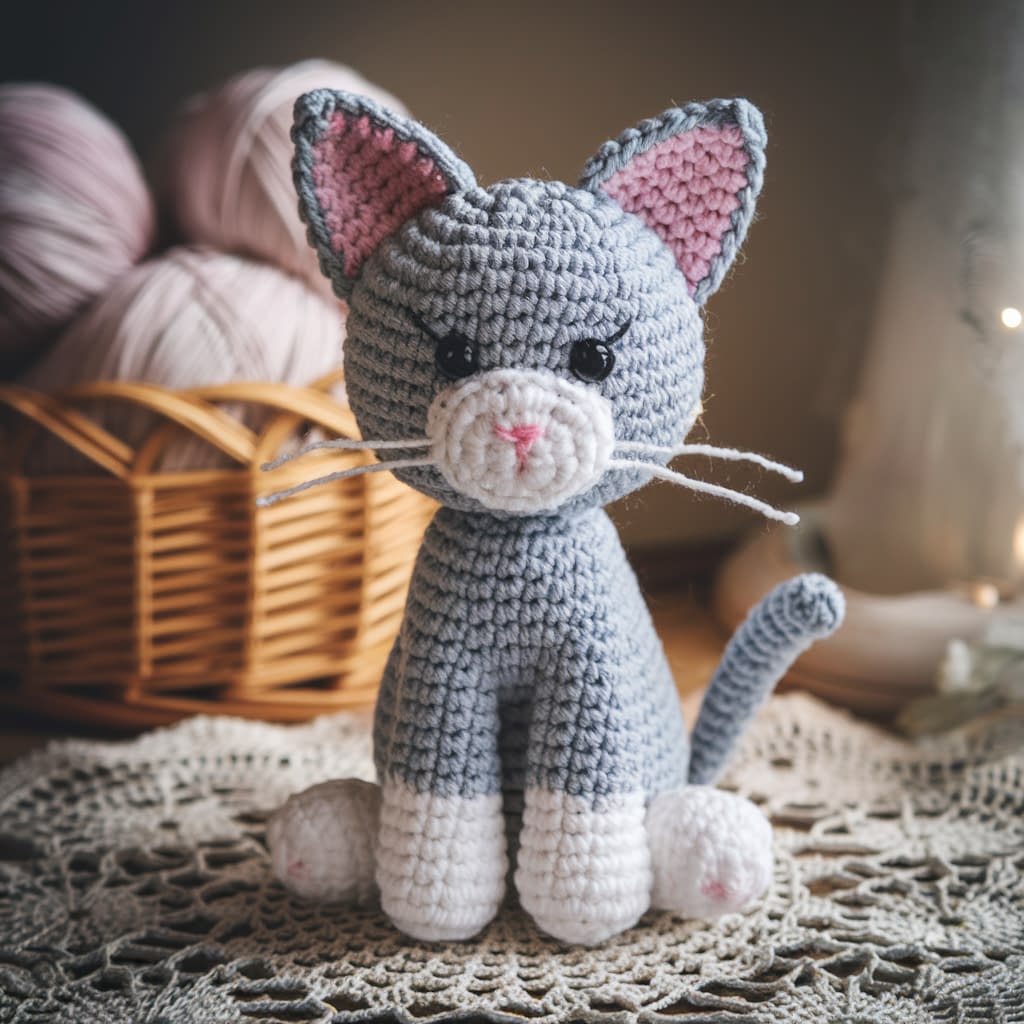
Skill Level: Intermediate (requires shaping + adding details like ears and tail)
Finished Size: About 3.5″ long (without tail)
Materials:
- Worsted weight (#4) yarn: gray, black, or striped/variegated yarn for a tabby effect
- Small scrap of pink yarn for nose/inner ears
- Crochet hook: 3.5 mm (E) or 4.0 mm (G)
- Safety eyes (6 mm) or embroidery thread
- Stuffing, scissors, yarn needle
Notes:
- Worked in continuous rounds.
- Tail and ears are sewn separately.
- Use a stitch marker to avoid losing your place.
Instructions
Head + Body (worked in one piece):
- Round 1: Magic ring, 6 sc. (6)
- Round 2: 2 sc in each st. (12)
- Round 3: (sc 1, inc) repeat. (18)
- Round 4: (sc 2, inc) repeat. (24)
- Rounds 5–9: sc around. (24)
➝ Insert safety eyes between Rounds 4–5, about 5 sts apart. - Round 10: (sc 2, dec) repeat. (18)
- Round 11: sc around. (18)
- Round 12: (sc 1, dec) repeat. (12)
➝ Begin stuffing. - Round 13: sc around. (12)
- Round 14: (dec) repeat. (6)
➝ Finish stuffing, fasten off, close hole.
Ears (make 2):
- Magic ring, ch 2 (counts as first dc), 2 dc into ring, ch 2, sl st into ring.
- Pull tight to form a small pointed triangle.
- Fasten off, leaving a tail.
Arms (make 2):
- Magic ring, 6 sc. (6)
- Rounds 2–3: sc around. (6)
- Fasten off, leave tail, lightly stuff.
Tail:
- Ch 15.
- Row 1: sc in 2nd ch from hook, sc across. (14)
- Fasten off with tail for sewing.
Assembly:
- Sew ears to the top of the head, slightly angled outward.
- Attach arms at the sides.
- Sew the tail at the back center bottom.
- Embroider a tiny pink triangle for the nose and add three whisker lines on each side.
Variations:
- Use self-striping yarn to make a tabby cat.
- Add black patches for a tuxedo cat.
- Crochet a tiny collar with a yellow yarn “bell.”
4. Mini Amigurumi Elephant

Skill Level: Intermediate (simple shaping + trunk + big ears)
Finished Size: About 4″ tall (including ears)
Materials:
- Worsted weight (#4) yarn: gray (main)
- Small scrap of white yarn for tusks (optional)
- Crochet hook: 4.0 mm (G)
- Safety eyes (8 mm)
- Stuffing, yarn needle, scissors
Notes:
- Work in continuous rounds.
- Shape comes from simple increases/decreases.
- Ears and trunk are made separately and sewn on.
Instructions
Head + Body (one piece):
- Round 1: Magic ring, 6 sc. (6)
- Round 2: 2 sc in each st. (12)
- Round 3: (sc 1, inc) repeat. (18)
- Round 4: (sc 2, inc) repeat. (24)
- Rounds 5–9: sc in each st around. (24)
➝ Insert safety eyes between Rounds 6–7, spaced wide apart. - Round 10: (sc 2, dec) repeat. (18)
- Round 11: sc around. (18)
- Round 12: (sc 1, dec) repeat. (12)
➝ Stuff firmly. - Round 13: dec around. (6)
➝ Close and fasten off.
Ears (make 2):
- Ch 7.
- Row 1: sc in 2nd ch from hook, sc across. (6)
- Row 2: ch 1, turn, 2 sc in first st, sc 4, 2 sc in last st. (8)
- Row 3: ch 1, turn, 2 sc in first st, sc across, 2 sc in last st. (10)
- Row 4: ch 1, turn, sc across. (10)
- Fasten off, leaving long tail. Shape should be a small rounded rectangle.
Trunk:
- Ch 8.
- Round 1: sc in 2nd ch from hook, sc across. (7)
- Rounds 2–5: sc across. (7)
- Fasten off, leaving a tail for sewing. Slightly curve while sewing.
Arms (make 2):
- Magic ring, 6 sc. (6)
- Rounds 2–3: sc around. (6)
- Fasten off, leaving tail. Lightly stuff.
Legs (make 2):
- Magic ring, 6 sc. (6)
- Round 2: (sc 1, inc) repeat. (9)
- Rounds 3–4: sc around. (9)
- Fasten off, stuff lightly.
Assembly:
- Attach the big ears to each side of the head. Position them wide and flat.
- Sew the trunk in the middle of the face, slightly downward.
- Attach arms on sides, legs at the bottom of the body.
- Optional: embroider tusks using white yarn.
Variations:
- Use pastel blue or pink yarn for a baby elephant look.
- Add a small crochet blanket over its back using a contrasting color.
- Make extra-large ears by adding a couple more rows to the ear pattern.
5. Mini Amigurumi Penguin
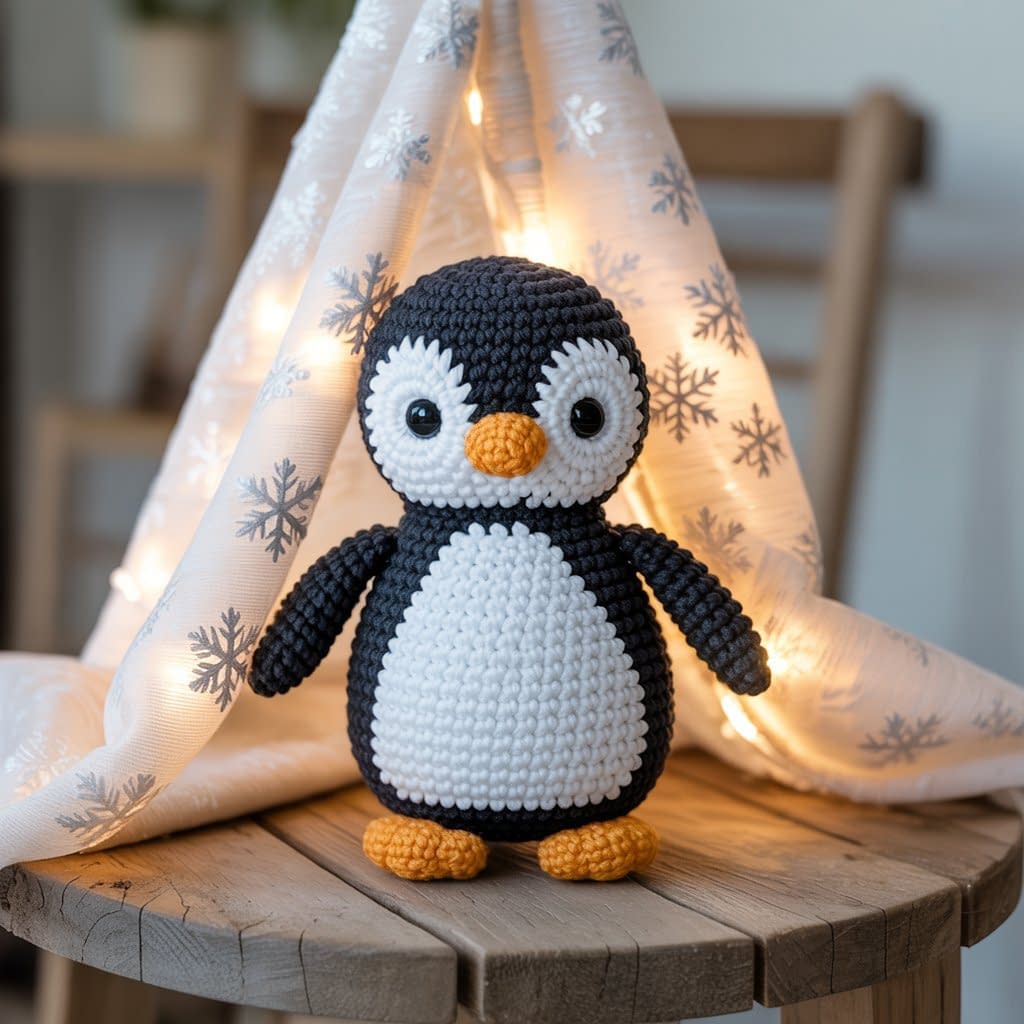
A tiny, chubby penguin with a round belly and little wings.
Skill Level: Beginner–Intermediate (basic shaping + color changes).
Finished Size: Approx. 3.5–4″ tall.
Materials:
- Worsted weight yarn: black (main), white (belly), orange (beak & feet).
- Crochet hook: 3.5–4.0 mm.
- 6 mm safety eyes.
- Yarn needle, stuffing, scissors.
Pattern
Head & Body (worked in one piece)
- Round 1: With black, magic ring, 6 sc (6)
- Round 2: 2 sc in each st (12)
- Round 3: (1 sc, inc) repeat 6 times (18)
- Round 4: (2 sc, inc) repeat 6 times (24)
- Rounds 5–8: Sc around (24)
- Switch to white yarn:
- Rounds 9–12: Sc around (24)
- Round 13: (2 sc, dec) repeat 6 times (18)
- Round 14: (1 sc, dec) repeat 6 times (12)
- Insert safety eyes between Rounds 6–7 (black section), about 5 stitches apart.
- Stuff firmly.
- Round 15: Dec around (6), fasten off, weave in.
Wings (make 2)
- Round 1: With black, magic ring, 6 sc (6)
- Round 2: Sc around (6)
- Round 3: (2 sc, inc) repeat 2 times (8)
- Rounds 4–5: Sc around (8), fasten off, leave tail.
Feet (make 2)
- Round 1: With orange, ch 4.
- Row 1: Sc in 2nd ch from hook, sc in next 2 sts (3).
- Row 2: Ch 1, turn, sc across (3).
- Fasten off, leave tail.
Beak
- Round 1: With orange, magic ring, 4 sc (4)
- Round 2: Sc around (4), fasten off, leave tail.
Assembly
- Sew wings to sides of body (white section).
- Attach beak between eyes.
- Sew feet at the bottom front of body.
- Add optional blush with embroidery thread or pastel.
6. Mini Amigurumi Fox

A woodland fox with a white belly and a fluffy tail.
Skill Level: Intermediate (basic shaping + sewing pieces).
Finished Size: Approx. 4″ tall.
Materials:
- Worsted weight yarn: orange (main), white (belly, tail tip, muzzle), black (ears, paws).
- Crochet hook: 3.5–4.0 mm.
- 6 mm safety eyes.
- Yarn needle, stuffing, scissors.
Pattern
Head
- Round 1: With orange, magic ring, 6 sc (6)
- Round 2: 2 sc in each st (12)
- Round 3: (1 sc, inc) repeat 6 times (18)
- Round 4: (2 sc, inc) repeat 6 times (24)
- Rounds 5–8: Sc around (24)
- Round 9: (2 sc, dec) repeat 6 times (18)
- Round 10: (1 sc, dec) repeat 6 times (12)
- Insert safety eyes between Rounds 6–7, about 5 stitches apart.
- Stuff firmly.
- Round 11: Dec around (6), fasten off, close hole.
Ears (make 2)
- Round 1: With black, magic ring, 4 sc (4)
- Round 2: (1 sc, inc) repeat 2 times (6)
- Switch to orange.
- Round 3: (2 sc, inc) repeat 2 times (8)
- Round 4: Sc around (8), fasten off, leave tail.
Body
- Round 1: With orange, magic ring, 6 sc (6)
- Round 2: 2 sc in each st (12)
- Round 3: (1 sc, inc) repeat 6 times (18)
- Rounds 4–7: Sc around (18)
- Switch to white yarn:
- Round 8: Sc around (18)
- Round 9: (1 sc, dec) repeat 6 times (12)
- Round 10: Sc around (12), stuff.
- Round 11: Dec around (6), fasten off, close.
Arms (make 2)
- Round 1: With black, magic ring, 6 sc (6)
- Switch to orange.
- Rounds 2–4: Sc around (6), fasten off, stuff lightly.
Legs (make 2)
- Round 1: With black, magic ring, 6 sc (6)
- Round 2: (1 sc, inc) repeat 3 times (9)
- Switch to orange.
- Rounds 3–4: Sc around (9), fasten off, stuff lightly.
Tail
- Round 1: With orange, magic ring, 6 sc (6)
- Round 2: (1 sc, inc) repeat 3 times (9)
- Rounds 3–6: Sc around (9)
- Switch to white yarn.
- Rounds 7–8: Sc around (9), fasten off, stuff lightly.
Muzzle
- Round 1: With white, magic ring, 6 sc (6)
- Round 2: (1 sc, inc) repeat 3 times (9)
- Round 3: Sc around (9), fasten off, leave tail.
- Embroider a small black nose before attaching.
Assembly
- Sew ears to top of head.
- Attach muzzle under the eyes.
- Sew head to body.
- Attach arms, legs, and tail.
- Embroider mouth and whisker dots if desired.
7. Mini Amigurumi Dog
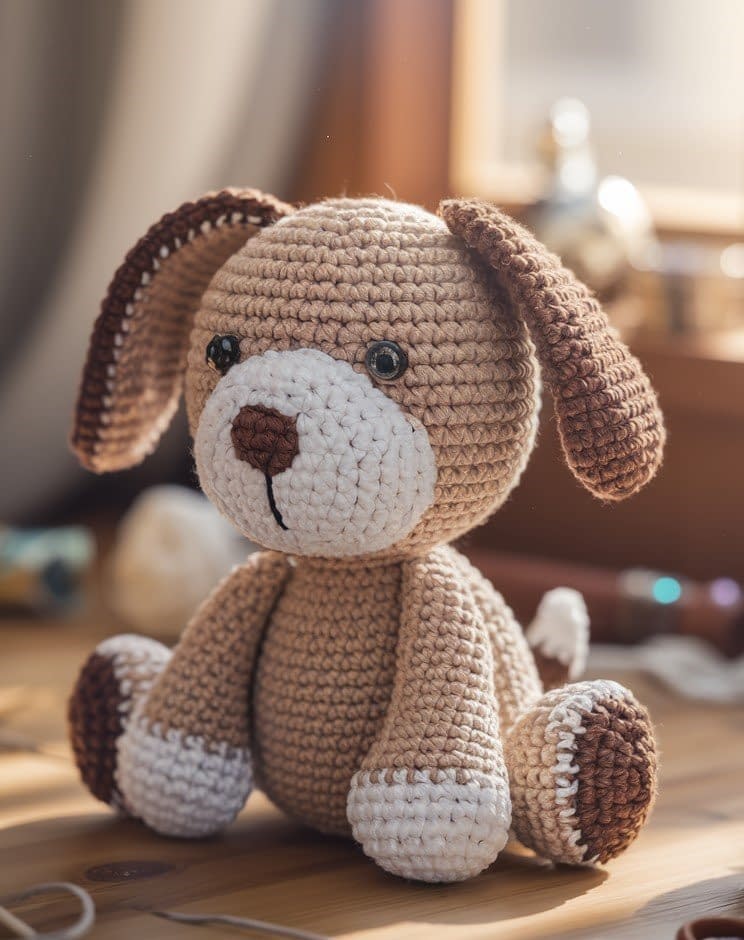
A floppy-eared little puppy, perfect for gifting.
Skill Level: Beginner–Intermediate (basic shaping, sewing parts).
Finished Size: Approx. 3.5–4″ tall.
Materials:
- Worsted weight yarn: beige/light brown (main), darker brown (ears/patch), white (snout & paws)
- Crochet hook: 3.5–4.0 mm
- 6 mm safety eyes
- Yarn needle, stuffing, scissors
Pattern
Head
- Round 1: With beige, magic ring, 6 sc (6)
- Round 2: 2 sc in each st (12)
- Round 3: (1 sc, inc) repeat 6 times (18)
- Round 4: (2 sc, inc) repeat 6 times (24)
- Rounds 5–8: Sc around (24)
- Round 9: (2 sc, dec) repeat 6 times (18)
- Round 10: (1 sc, dec) repeat 6 times (12)
- Insert safety eyes between Rounds 6–7, about 5 stitches apart.
- Stuff firmly.
- Round 11: Dec around (6), fasten off, weave in.
Ears (make 2)
- Round 1: With dark brown, magic ring, 6 sc (6)
- Round 2: (1 sc, inc) repeat 3 times (9)
- Rounds 3–6: Sc around (9)
- Flatten piece, fasten off, leave tail.
Body
- Round 1: With beige, magic ring, 6 sc (6)
- Round 2: 2 sc in each st (12)
- Round 3: (1 sc, inc) repeat 6 times (18)
- Rounds 4–7: Sc around (18)
- Round 8: (1 sc, dec) repeat 6 times (12)
- Round 9: Sc around (12), stuff.
- Round 10: Dec around (6), fasten off, weave in.
Arms (make 2)
- Round 1: With beige, magic ring, 6 sc (6)
- Rounds 2–4: Sc around (6), change to white.
- Round 5: Sc around (6), fasten off, stuff lightly.
Legs (make 2)
- Round 1: With white, magic ring, 6 sc (6)
- Round 2: (1 sc, inc) repeat 3 times (9)
- Round 3: Sc around (9), switch to beige.
- Rounds 4–5: Sc around (9), fasten off, stuff lightly.
Tail
- Round 1: With beige, magic ring, 6 sc (6)
- Rounds 2–4: Sc around (6), fasten off, leave tail.
Snout
- Round 1: With white, magic ring, 6 sc (6)
- Round 2: (1 sc, inc) repeat 3 times (9)
- Round 3: Sc around (9), fasten off, leave tail.
- Embroider black nose at top center.
Assembly
- Sew ears to each side of the head.
- Attach snout centered between the eyes.
- Sew head to body.
- Attach arms, legs, and tail.
- Add a patch with dark brown yarn (optional).
- Embroider a smile or mouth.
8. Mini Amigurumi Panda
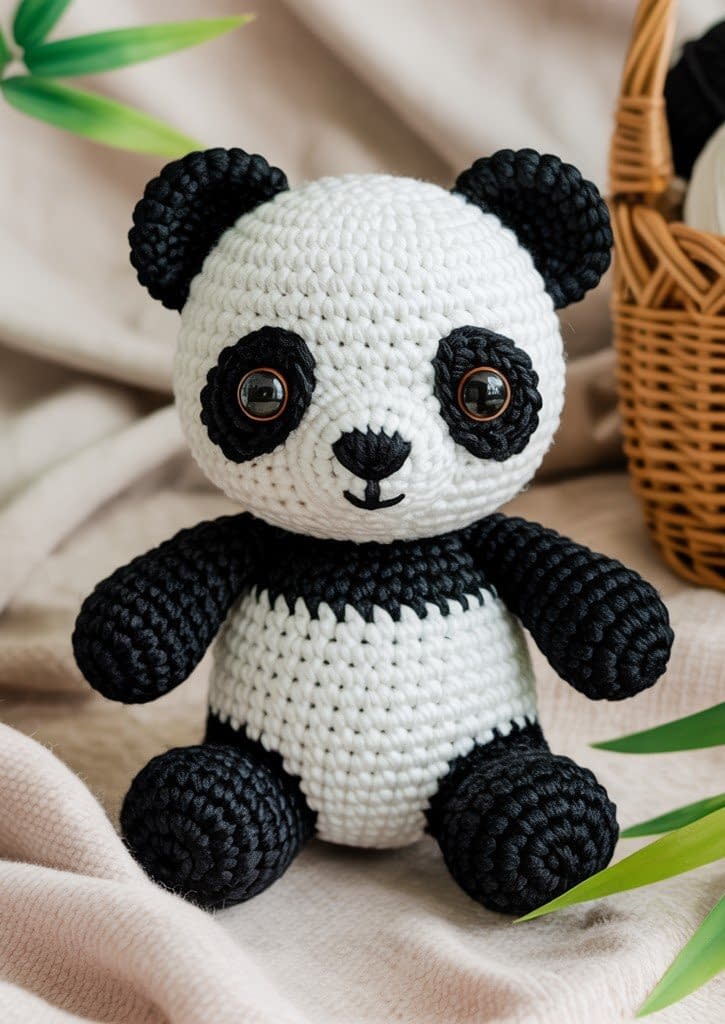
A round and cuddly panda with black patches, tiny ears, and a chubby belly.
Skill Level: Intermediate (color changes & sewing required).
Finished Size: Approx. 3.5–4″ tall.
Materials:
- Worsted weight yarn: white (main), black (ears, arms, legs, eye patches)
- Crochet hook: 3.5–4.0 mm
- 6 mm safety eyes
- Yarn needle, stuffing, scissors
Pattern
Head
- Round 1: With white, magic ring, 6 sc (6)
- Round 2: 2 sc in each st (12)
- Round 3: (1 sc, inc) repeat 6 times (18)
- Round 4: (2 sc, inc) repeat 6 times (24)
- Rounds 5–8: Sc around (24)
- Round 9: (2 sc, dec) repeat 6 times (18)
- Round 10: (1 sc, dec) repeat 6 times (12)
- Stuff firmly.
- Round 11: Dec around (6), fasten off, weave in.
Ears (make 2)
- Round 1: With black, magic ring, 6 sc (6)
- Round 2: (1 sc, inc) repeat 3 times (9)
- Round 3: Sc around (9), fasten off leaving tail.
Body
- Round 1: With white, magic ring, 6 sc (6)
- Round 2: 2 sc in each st (12)
- Round 3: (1 sc, inc) repeat 6 times (18)
- Round 4: (2 sc, inc) repeat 6 times (24)
- Rounds 5–7: Sc around (24)
- Round 8: (2 sc, dec) repeat 6 times (18)
- Round 9: (1 sc, dec) repeat 6 times (12)
- Round 10: Sc around (12), stuff.
- Round 11: Dec around (6), fasten off, close.
Arms (make 2)
- Round 1: With black, magic ring, 6 sc (6)
- Rounds 2–4: Sc around (6), fasten off, stuff lightly.
Legs (make 2)
- Round 1: With black, magic ring, 6 sc (6)
- Round 2: (1 sc, inc) repeat 3 times (9)
- Rounds 3–4: Sc around (9), fasten off, stuff lightly.
Eye Patches (make 2)
- Round 1: With black, magic ring, 6 sc (6), sl st to join, fasten off, leave tail.
Tail
- Round 1: With white, magic ring, 6 sc (6), fasten off, leave tail.
Assembly
- Attach ears to top of head.
- Sew black eye patches to face, place safety eyes through patches into the head.
- Sew head to body.
- Attach arms, legs, and tail.
- Embroider small black nose & mouth.
Conclusion
Mini amigurumi animals are not just fun to crochet—they’re incredibly versatile projects that can be finished in just a few hours. From a playful bunny to a wise owl, each of these patterns lets you practice basic crochet techniques while creating something adorable and meaningful.
You can turn them into ornaments, children’s toys, or thoughtful handmade gifts. Experiment with yarn colors, embroidery details, and accessories like bows or scarves to give your mini animals unique personalities.


