
When the air turns crisp and leaves begin to fall, there’s nothing cozier than bringing a touch of handmade warmth into your home. Knit pumpkins are one of the easiest and most charming DIY projects you can make for autumn. Whether you’re a beginner knitter picking up your needles for the first time or an experienced maker looking for creative seasonal projects, these soft, squishy pumpkins are perfect for adding rustic fall vibes to your table, mantel, or entryway.
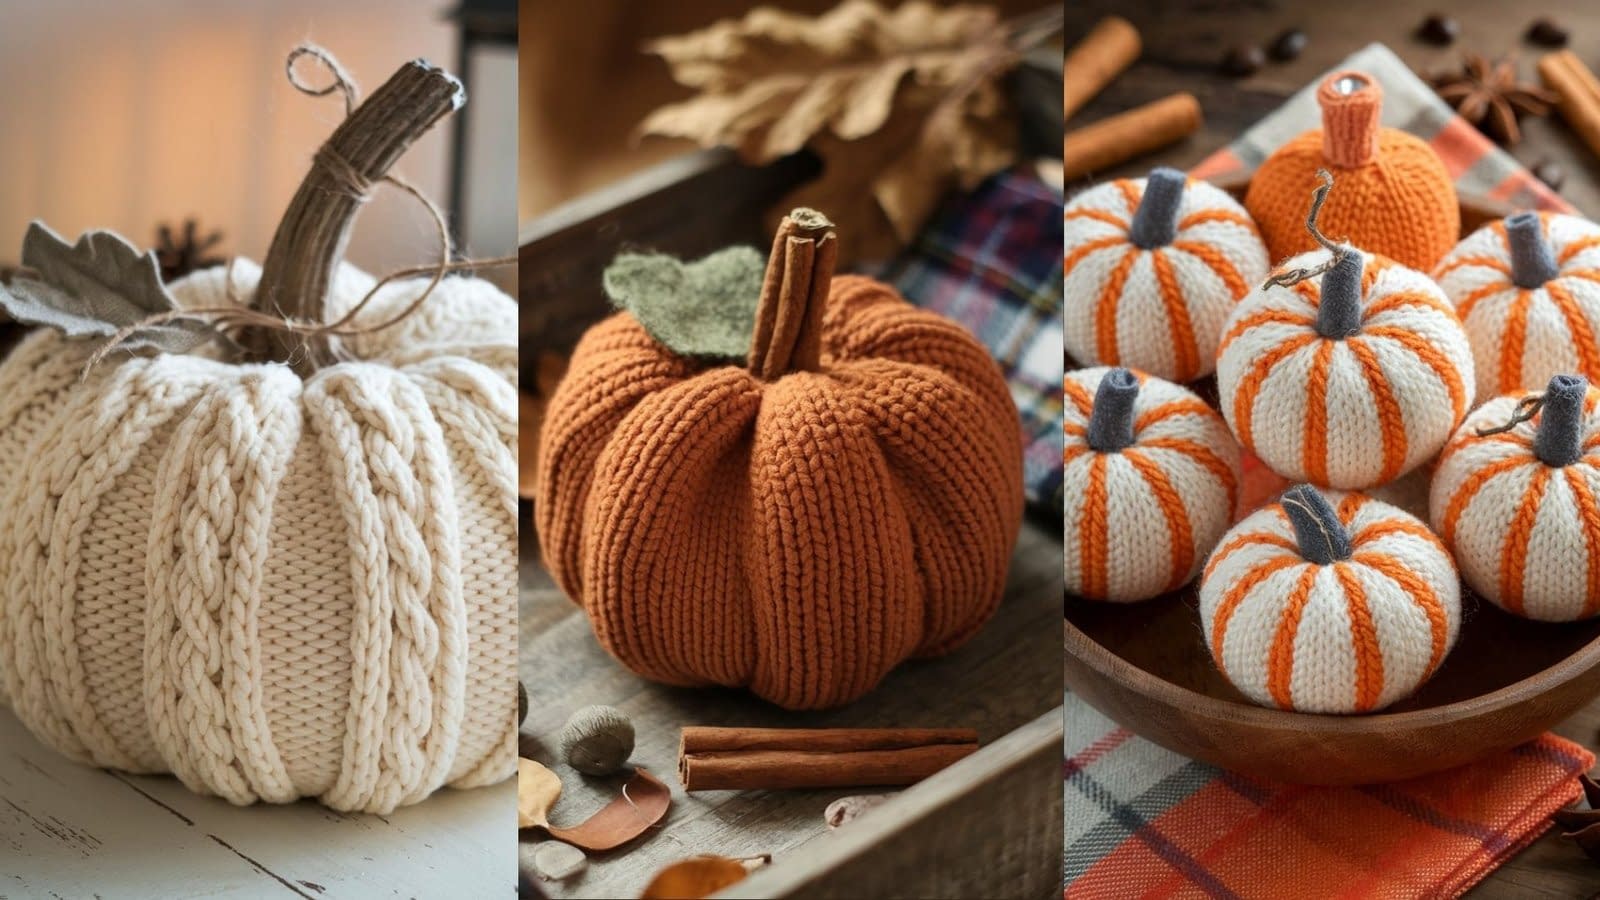
In this guide, I’ll walk you through three different knit pumpkin patterns — from a simple ribbed version to a textured cable design and even a fun mini striped pumpkin. Each pattern comes with detailed instructions, helpful tips, materials guidance, and optional variations so you can customize them to match your fall decor style.
1. Classic Ribbed Knit Pumpkin
Skill Level & Finished Size
- Skill level: Beginner (basic knit and purl stitches)
- Finished size: About 4–6″ wide × 3–4″ tall (adjustable by yarn weight and number of rows)
Materials Needed
- Worsted weight (#4) yarn (acrylic, cotton, or wool) – orange or any fall color
- Knitting needles: US size 7–9 (4.5–5.5 mm) straight or circular
- Yarn needle for seaming
- Scissors
- Fiberfill stuffing (polyfill or scrap yarn)
- Cinnamon stick, twig, or knit i-cord for stem
- Optional: jute twine, felt leaves, hot glue
Alternatives: Use bulky yarn (#5 or #6) with larger needles for oversized pumpkins.
Notes on Construction
This pumpkin is knit as a flat rectangle in stockinette with ribbed edges, then seamed into a tube. The gathered top and bottom create the pumpkin’s round shape.
Step-by-Step Pattern
- Cast On: CO 36 stitches (or any multiple of 4 for easy ribbing).
- Rows 1–6: K2, P2 across (creates ribbed edging).
- Rows 7–40: Work in stockinette stitch (knit 1 row, purl 1 row) until your piece measures about 9–10″ wide.
- Final Rows 41–46: Repeat K2, P2 ribbing.
- Bind Off: BO loosely in ribbing pattern.
Assembly
- Fold rectangle in half with right sides facing.
- Seam the short sides together to form a tube.
- With yarn needle, weave around one opening and pull tightly to close.
- Stuff with fiberfill.
- Gather the other opening and pull closed.
- To create pumpkin segments, thread yarn from top to bottom through the center and pull tight 4–6 times around to shape.
- Add a cinnamon stick or twig as the stem.
Tips for Success
- Keep ribbing tight to prevent curling.
- Don’t overstuff — slightly soft pumpkins look more natural.
Optional Variations
- Knit stripes with alternating colors.
- Add embroidery or duplicate stitch designs.
- Make oversized pumpkins with chunky yarn.
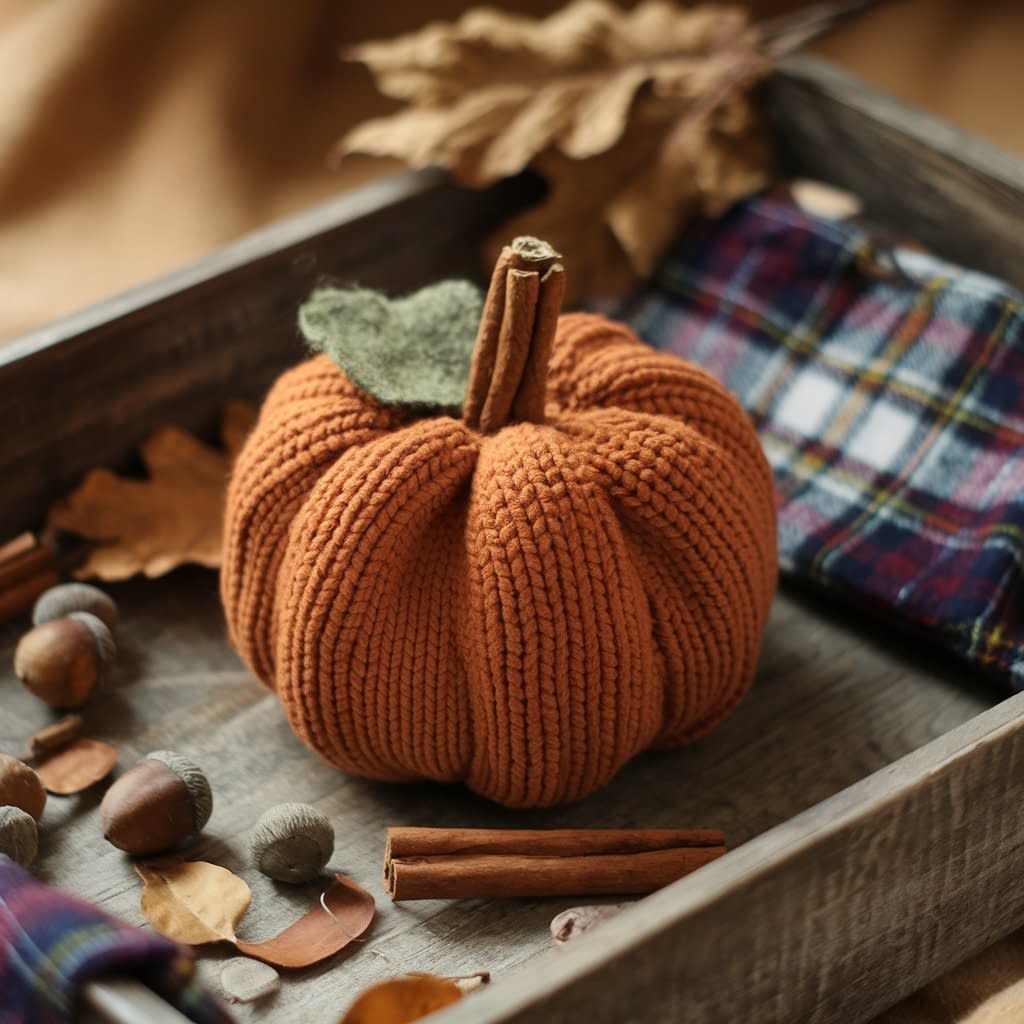
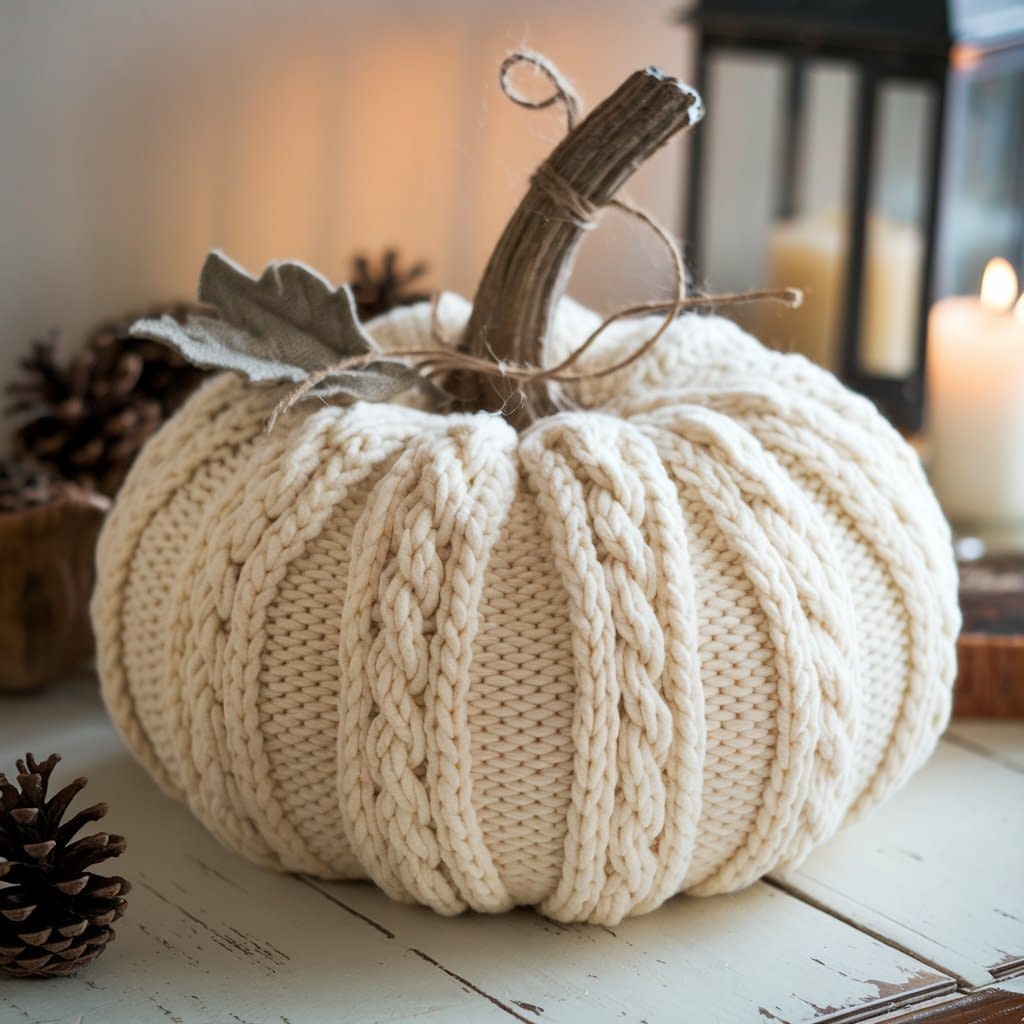
2. Chunky Cable Knit Pumpkin
Skill Level & Finished Size
- Skill level: Advanced Beginner to Intermediate (basic cables required)
- Finished size: About 7–8″ wide × 5–6″ tall
Materials Needed
- Bulky weight (#5) yarn – rust, mustard, or cream for autumn vibes
- Knitting needles: US size 10 (6 mm)
- Cable needle
- Yarn needle, scissors
- Fiberfill stuffing
- Twig, cork, or leather strap for stem
Notes on Construction
This pumpkin is knit flat with cable panels to create beautiful texture. It’s then seamed, stuffed, and shaped just like the classic pumpkin.
Step-by-Step Pattern
- Cast On: CO 40 stitches.
- Rows 1–4: K2, P2 across.
- Pattern Setup:
- Row 5 (RS): K2, P2, C6F (slip 3 to cable needle, hold in front, K3, then K3 from cable needle), P2 repeat across, end K2.
- Row 6 (WS): K2, P2, knit the knits and purl the purls.
- Continue Cable Pattern: Work rows 5–12 for pattern repeat.
- Work until piece measures ~12″ long.
- Final Rows: Work 4 rows of K2, P2.
- Bind Off: BO loosely in pattern.
Assembly
- Seam short sides together into a tube.
- Gather bottom edge and secure tightly.
- Stuff firmly with fiberfill.
- Gather top edge, secure, and shape.
- Add stem and optional felt leaves.
Tips for Success
- Use a cable needle with a notch to prevent stitches slipping.
- Block lightly before seaming for neater cables.
Optional Variations
- Try smaller cables for subtle texture.
- Knit in cream for farmhouse chic look.
- Add a twisted i-cord stem.
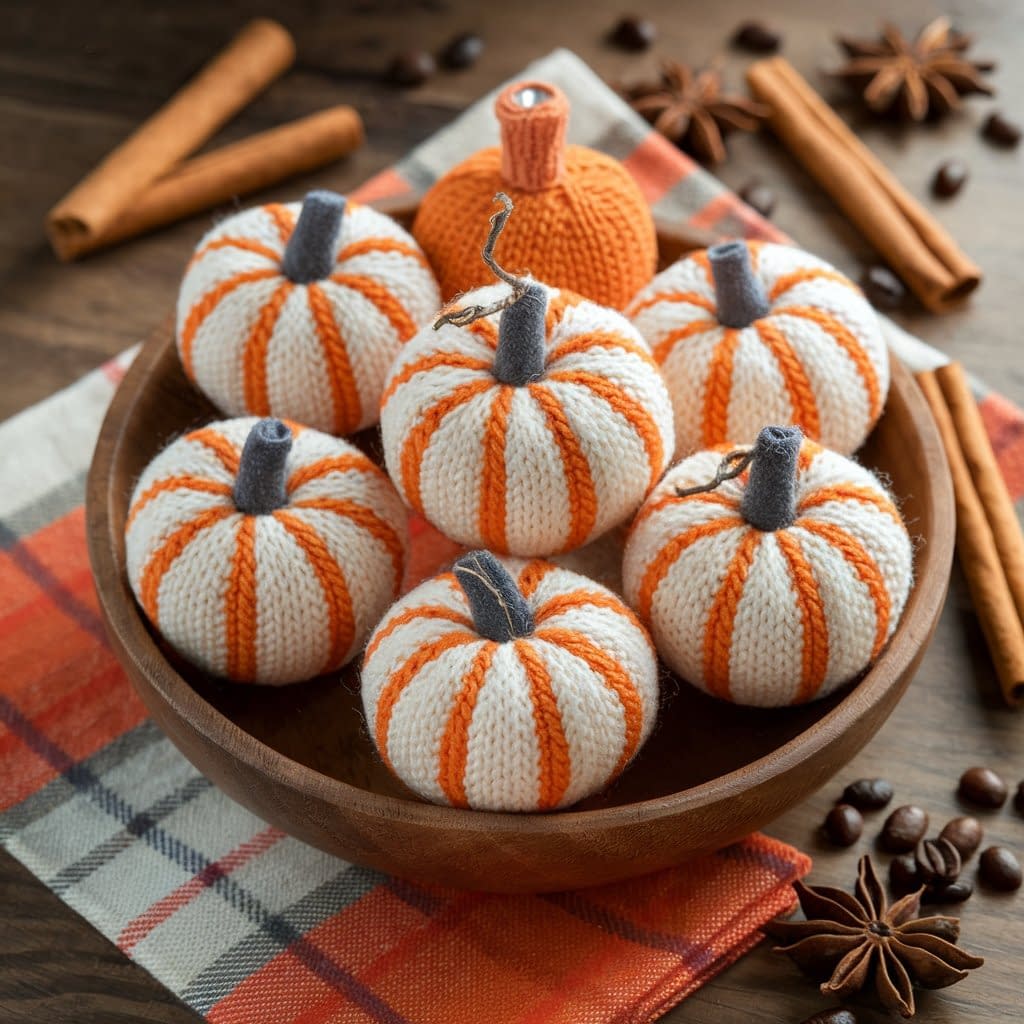
3. Mini Striped Knit Pumpkin
Skill Level & Finished Size
- Skill level: Beginner–Intermediate
- Finished size: About 2–3″ wide × 2″ tall (perfect for accents or garlands)
Materials Needed
- DK weight yarn (#3) – two contrasting fall colors (orange + white, mustard + gray, etc.)
- Needles: US size 6 (4 mm)
- Small amount of fiberfill
- Yarn needle, scissors
- Small twig, button, or cork for stem
Notes on Construction
These mini pumpkins are worked flat in striped stockinette and seamed into tiny spheres. Great stash-buster project!
Step-by-Step Pattern
- Cast On: CO 24 stitches.
- Rows 1–4: K2, P2 ribbing.
- Row 5–24: Work 2 rows in Color A, 2 rows in Color B (stockinette).
- Final Rows 25–28: K2, P2 ribbing.
- Bind Off in ribbing.
Assembly
- Seam short edges together.
- Gather bottom edge tightly.
- Stuff lightly with fiberfill.
- Gather top and close.
- Add stem and decorate.
Tips for Success
- Keep color changes at edges to hide seams.
- Don’t overstuff — keep them squishy.
Optional Variations
- Use metallic yarn for glam pumpkins.
- Attach to string for a pumpkin garland.
- Sew tiny felt leaves for extra detail.
Conclusion
Knitting pumpkins is one of the most rewarding (and addictive!) fall projects. They’re quick to make, endlessly customizable, and perfect for cozy home decor or handmade gifts. With these three patterns — the classic ribbed pumpkin, the chunky cable pumpkin, and the mini striped pumpkin — you have options for every skill level and style.
Whether you display them in a rustic wooden bowl, line your mantel, or gift them to friends, these squishy knit pumpkins will bring a warm handmade touch to your autumn season. So grab your yarn and needles, settle into your favorite chair with a pumpkin spice latte, and start creating your own knitted pumpkin patch today!


