
Gift-giving is not just about the present itself—it’s also about the thought and care put into the details. A beautifully wrapped package with a unique, handmade gift tag instantly feels more personal and heartfelt. That’s where Cricut comes in. With its precision cutting, endless design possibilities, and ability to work with different materials, Cricut machines make it easy to create custom gift tags that are far more memorable than store-bought ones.
In this post, we’ll walk through 7 Cricut gift tag ideas that range from classic elegance to playful and festive designs. Each idea includes inspiration, materials you’ll need, step-by-step instructions, and creative variations so you can make them uniquely yours. Whether you’re preparing for Christmas, birthdays, weddings, or special occasions, these Cricut gift tags will give your presents a professional yet handmade finish.
What You Need to Get Started with Cricut Gift Tags
Before diving into the ideas, let’s cover the basics. Having the right tools and materials will make the crafting process smooth and enjoyable.
Essential Tools and Supplies
- Cricut Machine (Cricut Maker, Explore Air 2, or Cricut Joy)
- Standard Grip or Light Grip Mat (depending on material)
- Cricut Design Space software (to design or use pre-made templates)
- Cardstock, Kraft Paper, or Specialty Paper
- Vinyl (permanent or removable, depending on the project)
- Glue or double-sided tape
- Ribbon, twine, or string for attaching the tags
- Optional embellishments: foil, glitter cardstock, washi tape, stickers, or pens for writing
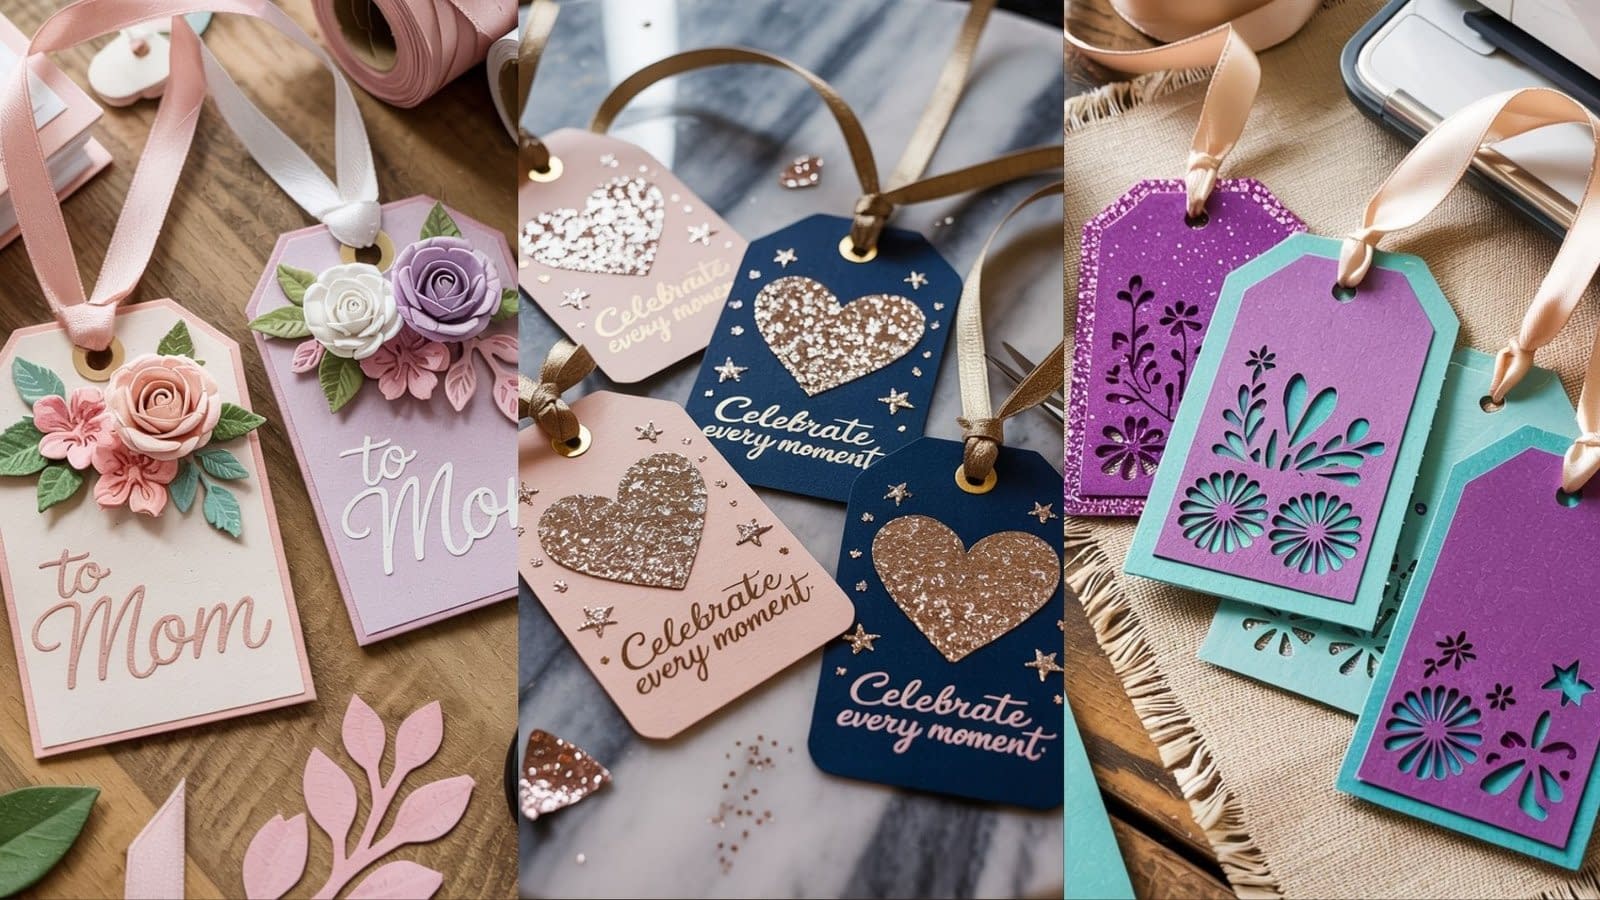
1. Layered Floral Gift Tags
Flowers instantly add beauty and charm. With Cricut, you can cut layered floral accents to decorate your tags.
Materials:
- Cardstock in soft pastel or bold colors
- Pre-cut or Cricut-cut flower shapes (roses, daisies, hibiscus, etc.)
- Glue, double-sided tape
- Satin ribbon or twine
How to Make:
- Cut a simple rectangular or scalloped tag base in cardstock.
- Cut small floral pieces in contrasting cardstock.
- Layer the flowers at the corner of the tag using glue.
- Add a name or message with Cricut pens or adhesive vinyl.
- Thread ribbon through the hole and finish.
Perfect For: Mother’s Day, birthdays, wedding gifts.
2. Bold Typography Print Tags

Crisp fonts and fun phrases make tags stand out, just like the bright printed ones in your reference.
Materials:
- White or light cardstock
- Inkjet printer (for Print Then Cut)
- Cricut machine
How to Make:
- Design bold messages in Design Space like “Made with Love” or “Enjoy Your Day”.
- Print them in colorful typography on cardstock using Print Then Cut.
- Let Cricut cut them out with clean edges.
- Add ribbon or twine for finishing.
Perfect For: Birthdays, teacher gifts, thank-you favors.
3. Intricate Cut-Out Flower & Pattern Tags
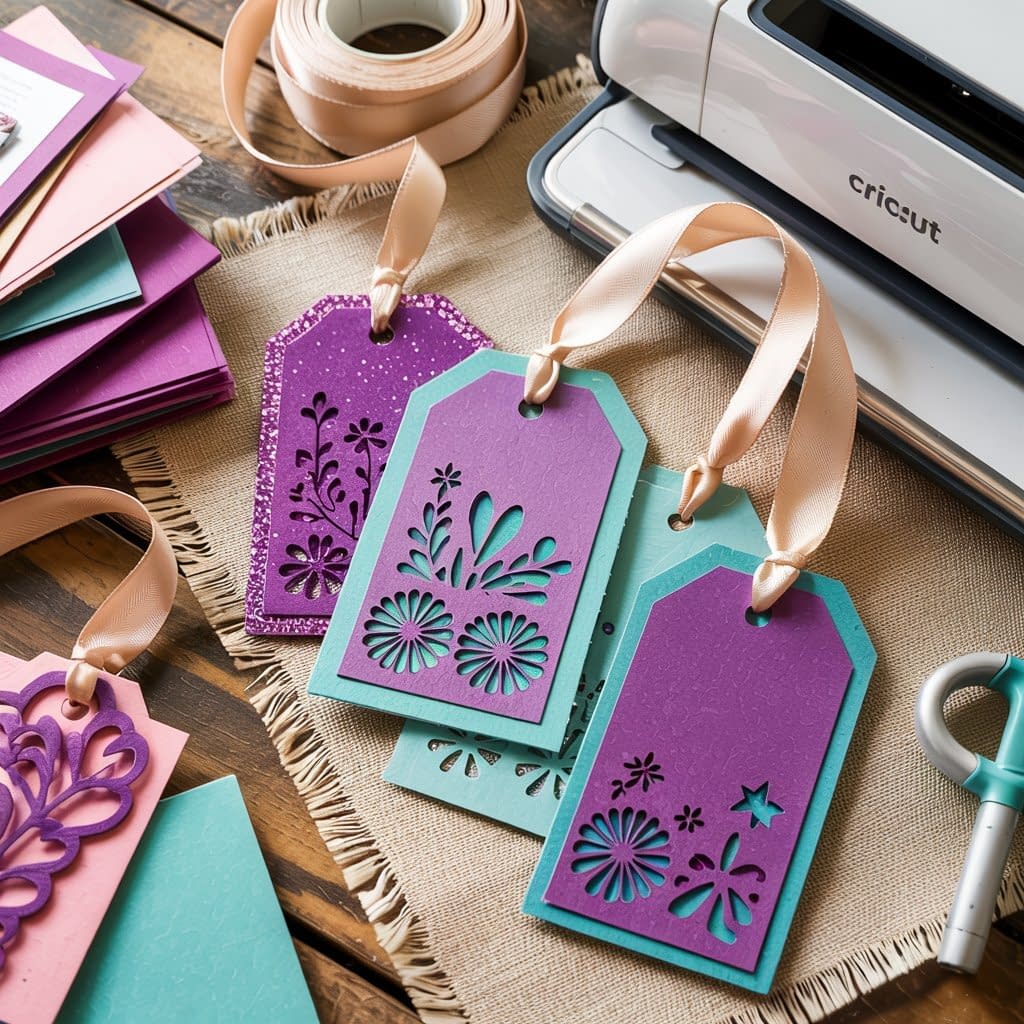
These are all about the negative space effect, where the design is cut out from the tag.
Materials:
- Solid-colored cardstock (bright or pastel)
- Cricut Light Grip Mat
- Ribbon or jute string
How to Make:
- Pick a cut-out design (flowers, stars, abstract patterns).
- Cut it into the tag shape with Cricut.
- Optionally, back it with glitter or patterned cardstock for contrast.
- Add string to finish.
Perfect For: Baby showers, spring parties, thoughtful handmade gifts.
4. Double-Layer Contrast Tags
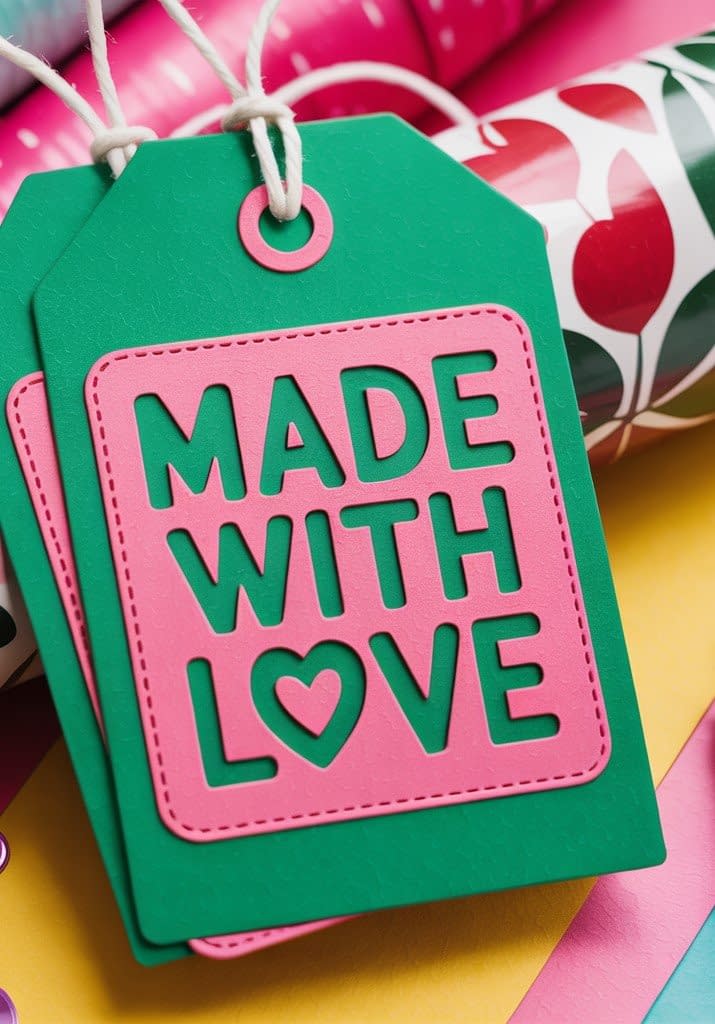
Use layering to add both depth and vibrant contrast, similar to the “Made With Love” style in your inspiration image.
Materials:
- Two colors of cardstock (e.g., green and pink)
- Glue or tape
- Cricut pens or vinyl for lettering
How to Make:
- Cut a solid base tag in one color.
- Cut a slightly smaller tag with words or shapes cut out (like hearts, stars, or circles).
- Layer the smaller tag on top of the base for contrast.
- Write or add text on the top layer.
Perfect For: Birthdays, graduation gifts, Father’s Day or Mother’s Day.
5. Illustrated Doodle Tags
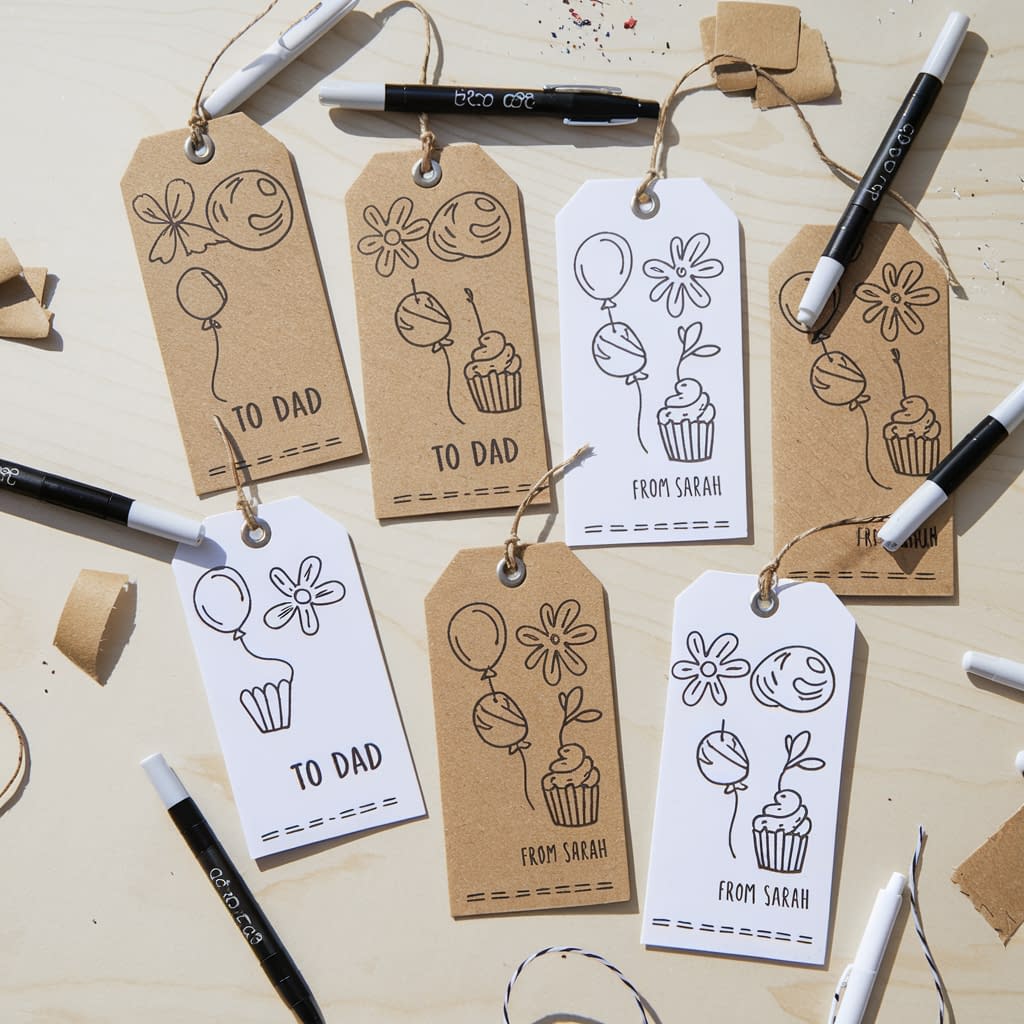
Instead of cut-outs, Cricut pens can draw playful doodles right on your tags.
Materials:
- White or kraft cardstock
- Cricut machine with pens
- Twine or ribbon
How to Make:
- Choose doodle designs (cupcakes, balloons, flowers, or abstract icons).
- Use Cricut pens to draw directly onto the cardstock tag shape.
- Add names or short notes in handwritten-style fonts.
- Punch a hole and tie with string.
Perfect For: Kids’ birthday parties, casual gift-giving, everyday use.
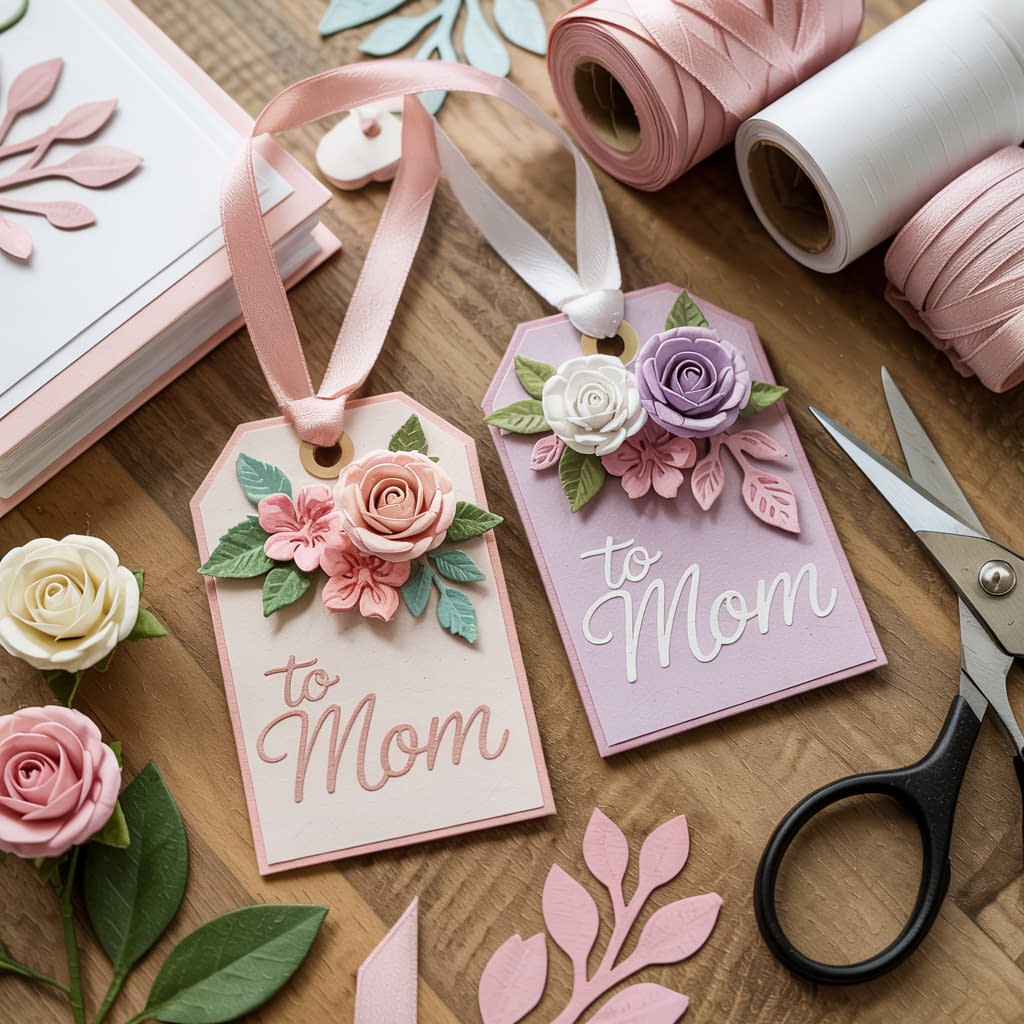
6. Glitter & Metallic Overlay Tags

Shiny details always make tags look eye-catching. These use glitter or foil paper layered for sparkle.
Materials:
- Glitter cardstock or foil paper
- Solid cardstock base
- Glue or adhesive foam squares for dimension
How to Make:
- Cut a base tag from plain cardstock.
- Cut shapes (hearts, stars, geometric patterns) from glitter paper.
- Layer them on top with adhesive foam squares for 3D effect.
- Add ribbon for a final touch.
Perfect For: Weddings, anniversaries, milestone birthdays.
7. Mini Message Pocket Tags

These are tags with a small flap or pocket where you can slip in a note. Inspired by the layered look in your image.
Materials:
- Cardstock in two coordinating colors
- Cricut scoring tool
- Glue
- Ribbon or string
How to Make:
- Cut a tag base with Cricut.
- Cut a smaller rectangle, score the sides, and attach it to the base to form a pocket.
- Slip in a small message card with a name or short greeting.
- Tie with ribbon.
Perfect For: Romantic notes, graduation gifts, teacher thank-yous.
Conclusion
These 7 Cricut gift tag ideas go far beyond basics. They include layered florals, bold typography, intricate cut-outs, contrast layers, doodle illustrations, glitter accents, and even mini pockets for hidden notes. Each one can be customized for different occasions—birthdays, Mother’s Day, Father’s Day, weddings, or any event where you want your gift wrapping to feel personal.u craft tags that show thoughtfulness and creativity in every detail.


