
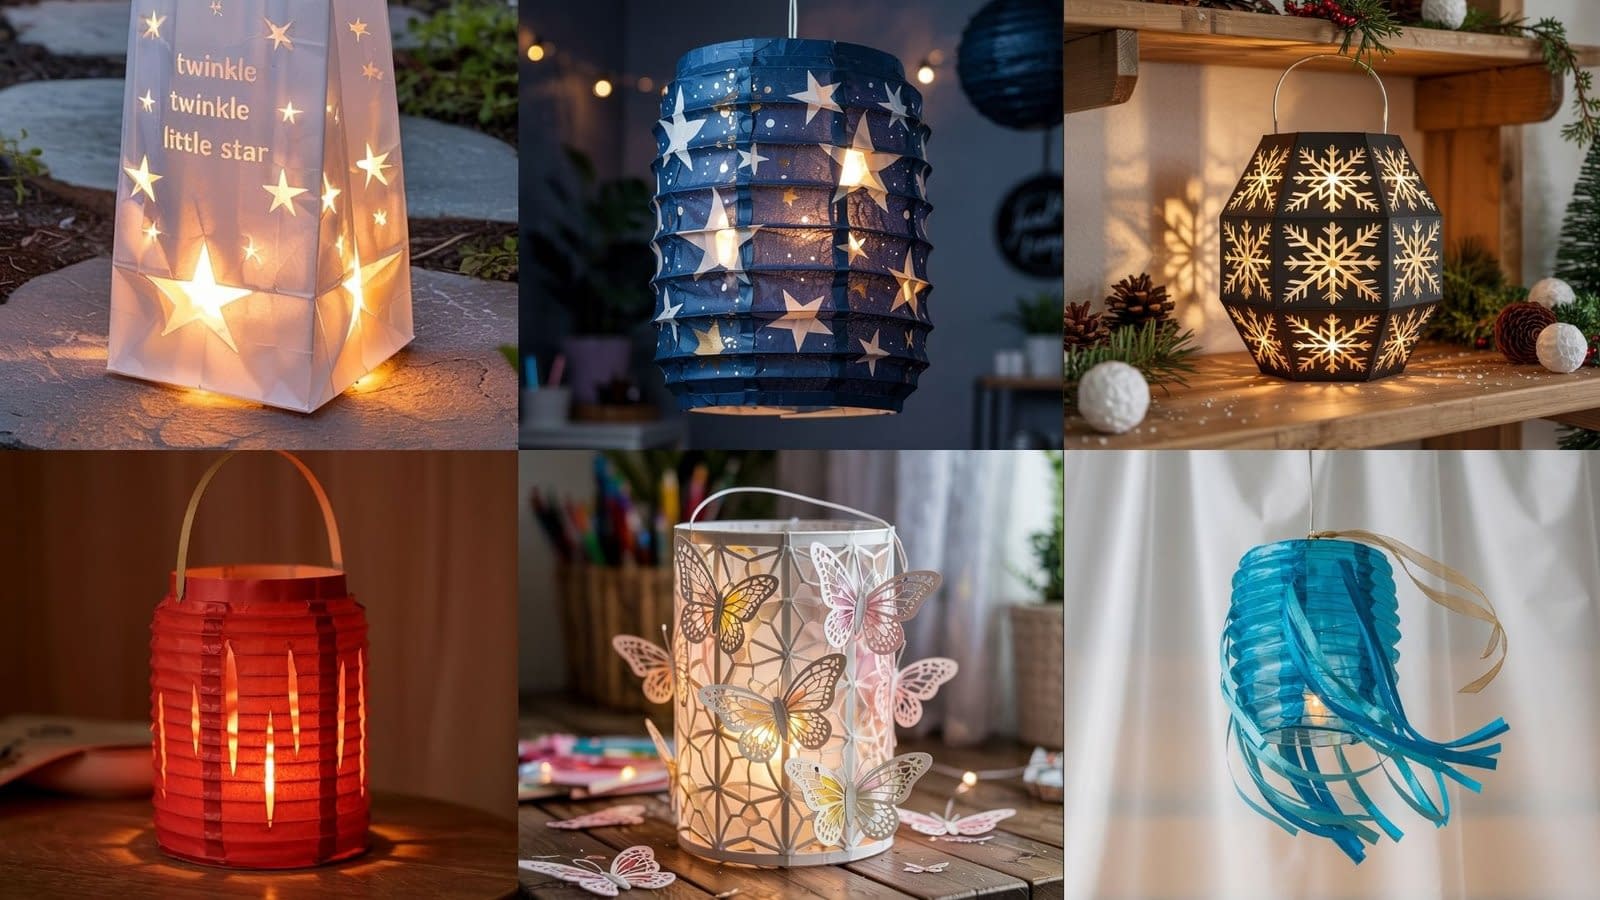
Paper lanterns have been a part of celebrations and home décor for centuries. Their charm lies in the fact that they are simple to make, inexpensive, and endlessly customizable. Whether you want to decorate your home for a festive season, set the mood for a garden party, or simply enjoy a creative afternoon, paper lanterns are a wonderful project. In this guide, we will walk you through 10 DIY Paper Lanterns tutorial ideas with step-by-step details, tips, and variations to ensure you can easily recreate them. All designs use LED tealight candles or battery-powered lights only for complete safety.
Materials You’ll Need
Here’s a general list of materials you may need. Gather them before starting to make the process smoother:
- Colored cardstock or construction paper
- Scissors or craft knife (parents should handle sharp tools)
- Glue stick, double-sided tape, or hot glue gun (kids can use glue sticks)
- Ruler and pencil
- Hole puncher or craft punches (stars, circles, etc.)
- String, yarn, or ribbon for hanging
- LED tealight candles or battery-powered fairy lights
- Decorative items: glitter, washi tape, dried flowers, lace, stickers
1. Classic Cut-Out Paper Lantern
This timeless design is the easiest way to start.
Steps:
- Cut a rectangular sheet of cardstock (about 8.5 x 11 inches works best).
- Fold the paper lengthwise.
- Use a ruler and pencil to mark parallel lines, leaving a 1-inch border on each side.
- Cut along the lines without reaching the edges.
- Unfold the paper and roll it into a cylinder.
- Glue or tape the edges together.
- Add a paper strip or ribbon handle at the top if you want it to hang.
- Place an LED tealight candle inside for a soft glow.
Tips:
- For extra charm, use metallic or glitter paper.
- Add small punched shapes (stars or circles) along the top border for extra detail.
Best For: School projects, garden parties, or quick festive décor.
2. Floral Shadow Lantern
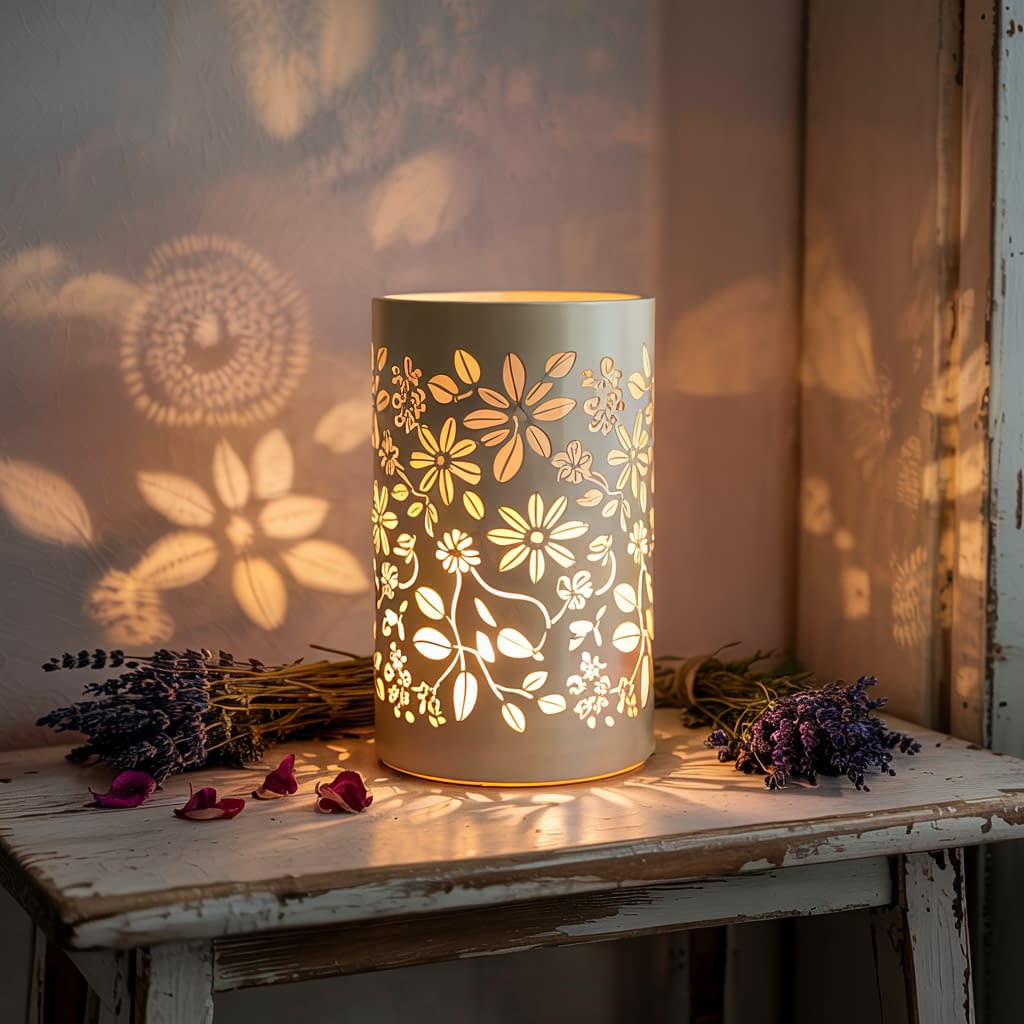
This design casts delicate floral shadows on walls when lit.
Steps:
- Take thick cream or white paper.
- Draw or trace floral patterns (roses, leaves, vines) onto the paper.
- Carefully cut out the designs using a craft knife.
- Shape the paper into a cylinder or cube.
- Place an LED tealight candle inside to create shadow patterns.
Tips:
- Layer thin tracing paper behind the cut-outs for a softer glowing effect.
- Use floral stencils if freehand drawing feels difficult.
Best For: Romantic dinners, weddings, or cozy indoor spaces.
3. Starry Night Lantern
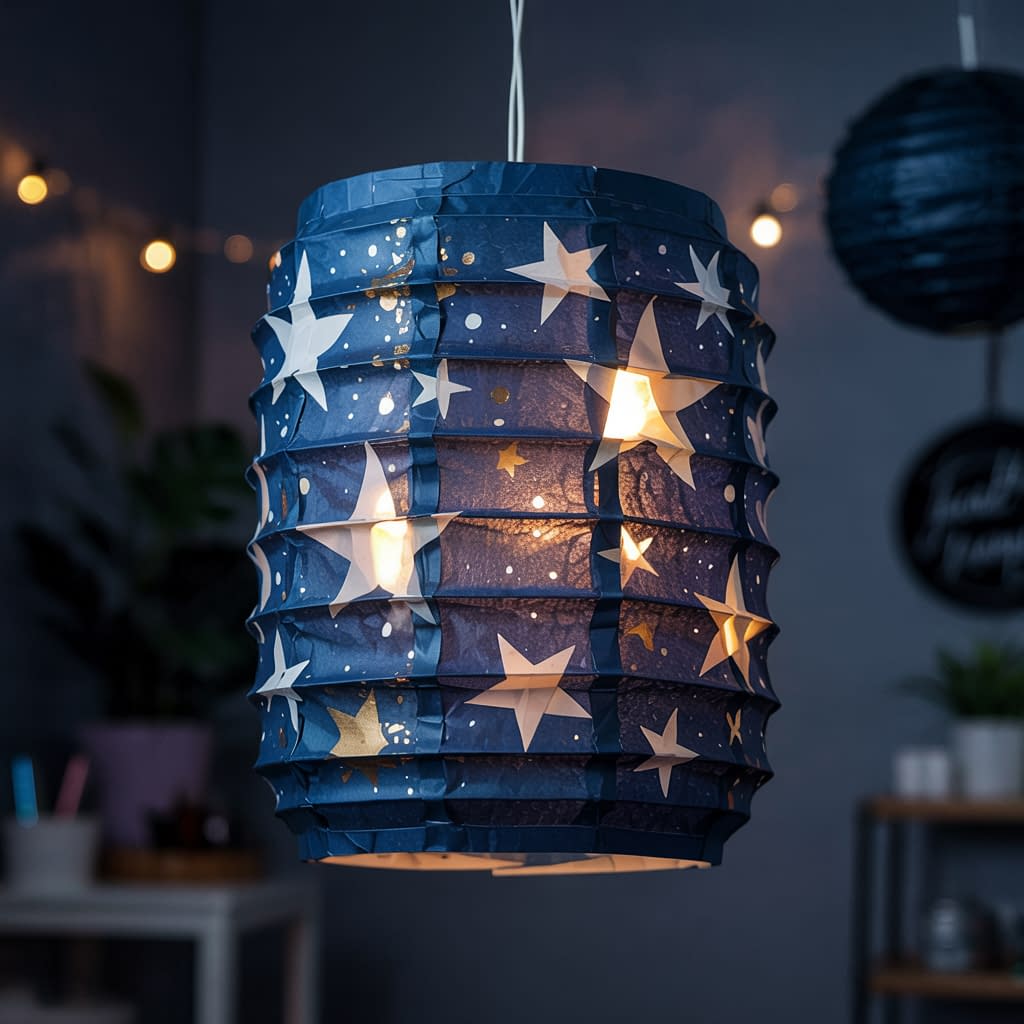
Perfect for stargazers and dreamy evenings.
Steps:
- Select dark-colored paper (navy, black, or deep purple).
- Use a star-shaped punch to create patterns across the sheet.
- Wrap the punched sheet around a glass jar or into a cylindrical lantern.
- Place an LED tealight candle inside for a glowing night-sky effect.
Tips:
- Mix different star sizes for a more realistic night sky.
- Add silver or gold splatter paint for a galaxy effect.
Best For: Birthday parties, night festivals, or children’s bedrooms.
4. Accordion-Style Lantern
A playful design with folds that catch the light beautifully.
Steps:
- Take a sheet of paper (A4 or A3 size works best).
- Fold it back and forth in even accordion folds, like a fan.
- Bring the two ends together to form a tube or circle.
- Secure with glue or tape.
- Place an LED candle inside to illuminate the folds.
Tips:
- Use ombre-colored paper for a gradient effect.
- Decorate with sequins or beads on the folds for sparkle.
Best For: Cultural festivals, lantern parades, or children’s crafts.
5. Hexagon Lantern with Cut-Outs
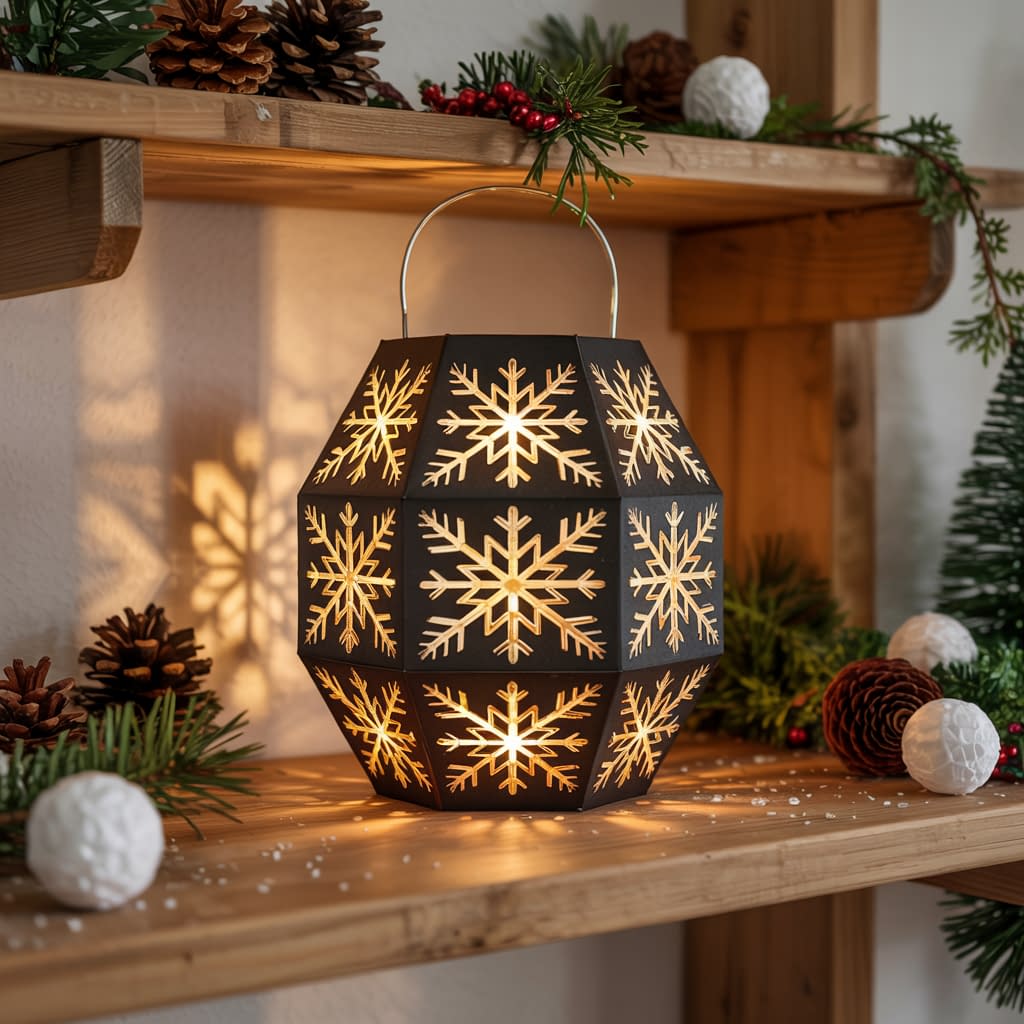
This structured lantern has a more architectural appeal.
Steps:
- Cut six equal panels of cardstock (about 4 x 6 inches each).
- Use stencils to cut out symmetrical designs (snowflakes, autumn leaves, or geometric shapes).
- Attach the panels edge to edge with glue to form a hexagon.
- Add a paper base for stability.
- Place an LED tealight candle inside for glowing cut-out effects.
Tips:
- Use contrasting colors for the cut-outs and backing paper.
- Add a paper roof for a pagoda-style lantern.
Best For: winter holiday décor.
6. Lotus Flower Lantern
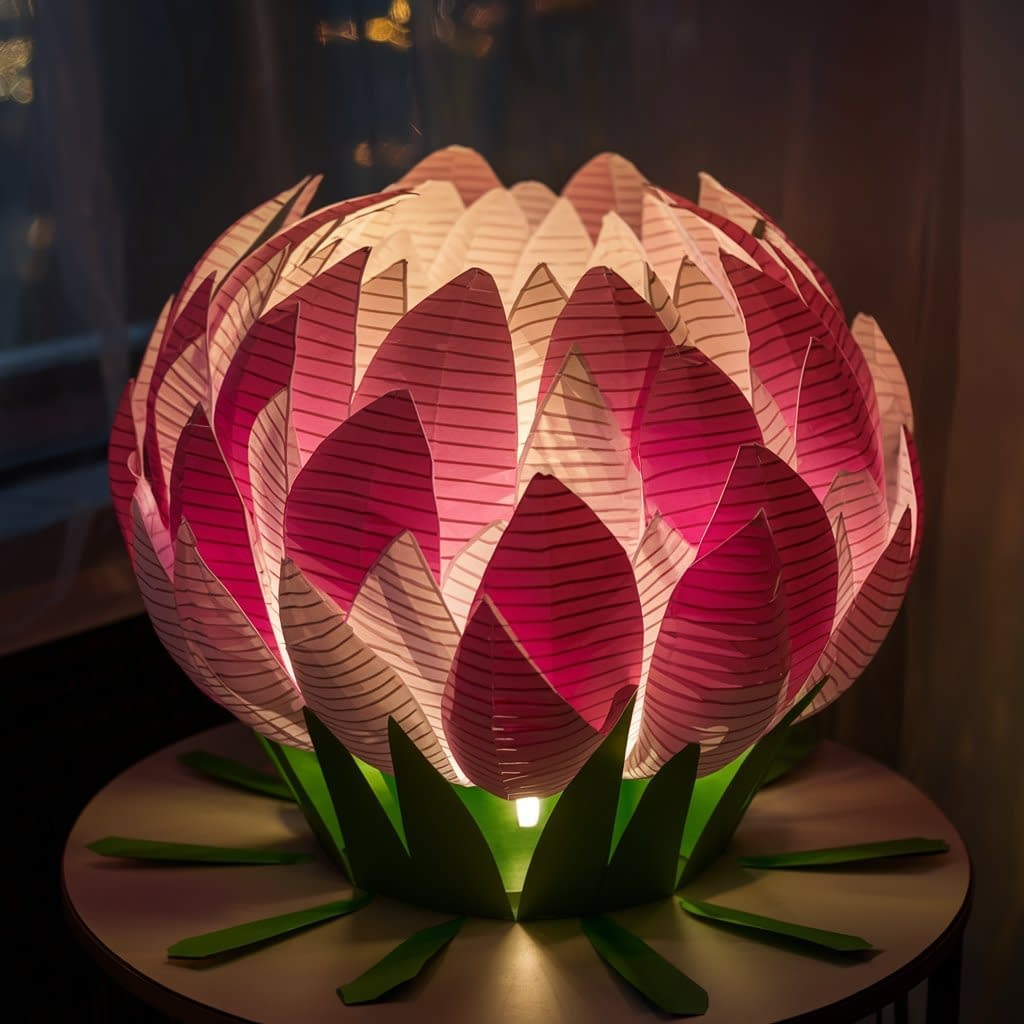
Symbolic and visually striking, this lantern looks like a blooming lotus.
Steps:
- Cut 12–15 petal shapes from red or pink paper.
- Arrange them in a circular base, overlapping each layer.
- Create 2–3 layers, with each inner layer slightly smaller.
- Place an LED tealight candle in the center.
Tips:
- Use vellum or tissue paper for a softer, glowing petal look.
- Add green paper leaves at the bottom for realism.
Best For: Diwali, Vesak, or meditation rooms.
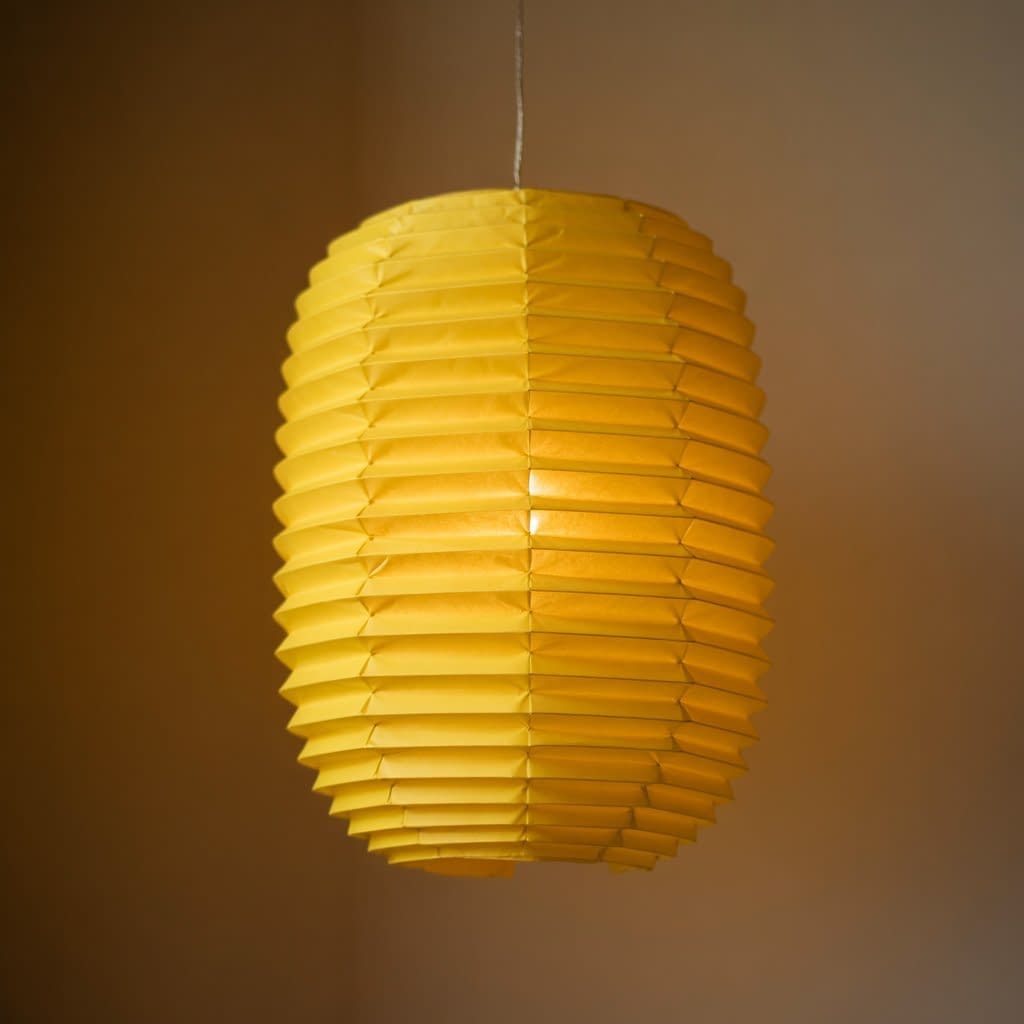
7. Paper Globe Lantern

Inspired by traditional Chinese lanterns, this one has a modern twist.
Steps:
- Cut 8–12 paper strips (1 inch wide, 10–12 inches long).
- Stack the strips and secure them at one end with a brad fastener or glue.
- Spread the strips evenly into a circular shape.
- Connect the other ends with another brad or glue.
- Add a hanging string.
- Place a battery-powered LED light inside to illuminate safely.
Tips:
- Alternate strip colors for a striped effect.
- Use metallic paper for a chic modern design.
Best For: Outdoor garden parties, New Year celebrations.
8. Butterfly Lantern

Perfect for spring or children’s parties.
Steps:
- Cut a rectangle of colored cardstock.
- Draw butterfly shapes and cut them out carefully.
- Roll the paper into a cylinder and glue the edges.
- Place thin colored tissue paper behind the cut-outs for glowing wings.
- Add an LED tealight candle inside for illumination.
Tips:
- Use 3D butterfly cut-outs glued outside for extra depth.
- Decorate with glitter pens to highlight the wings.
Best For: Baby showers, garden events, or birthday parties.
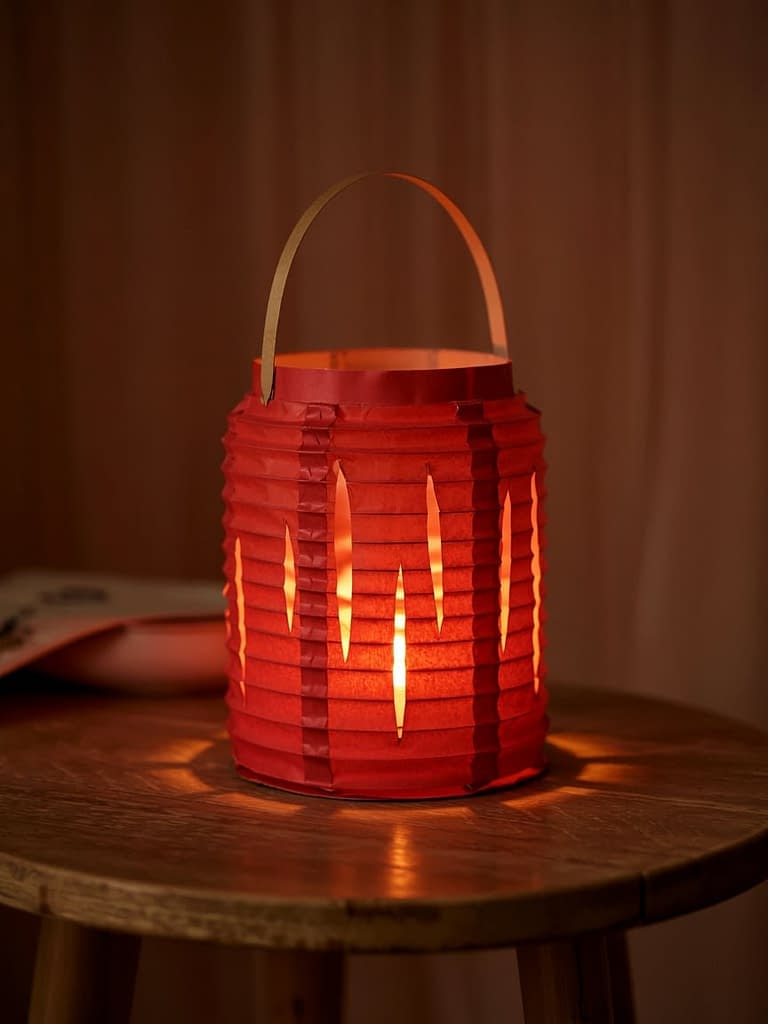
9. Paper Bag Lantern

One of the simplest lanterns that still creates a magical effect.
Steps:
- Take plain paper bags (white or kraft brown work well).
- Use stencils or freehand to cut star or heart shapes.
- Add a bit of sand or pebbles at the bottom to weigh the bag down.
- Place an LED tealight candle inside for safe glowing light.
Tips:
- Line walkways with multiple paper bag lanterns for dramatic effect.
- Decorate with lace cut-outs or stickers.
Best For: Outdoor weddings, garden paths, or casual gatherings.
10. Hanging Tassel Lantern

A festive and lively lantern with extra movement.
Steps:
- Make a basic cylinder lantern (see tutorial #1).
- Cut long paper strips (about 1 inch wide, 10 inches long).
- Glue them around the bottom edge as tassels.
- Add a ribbon or string at the top for hanging.
- Place an LED candle inside for safe, glowing light.
Tips:
- Use multicolored tassels for a playful look.
- Layer tissue paper tassels for added texture.
Best For: Chinese New Year, parades, and festive celebrations.
Tips for Perfect Paper Lanterns
- Always use LED tealight candles, fairy lights, or battery-powered bulbs — never real flames.
- Experiment with different paper textures like vellum, tissue, or metallic cardstock.
- Add layers and colors for depth and vibrancy.
- For outdoor use, pick thicker cardstock or coat the paper lightly with a sealant.
- For children’s crafts, pre-cut shapes to make assembly safer and easier.
Final Thoughts
Paper lanterns bring a magical atmosphere wherever they are placed. With these 10 DIY Paper Lanterns tutorial ideas, you can create anything from simple cut-out designs to elaborate floral or starry-themed lanterns. They are affordable, eco-friendly, and customizable, making them the perfect project for anyone looking to decorate with a personal touch.
And most importantly — they’re completely safe when made with LED lights instead of real candles. Whether it’s for a holiday, party, or simply to add warmth to your home décor, these lanterns will brighten up your space in the most creative way possible.


