

Every old book tells a story, and with a little creativity, its pages can tell another — one that lives on your wall. An Upcycled Book Page Wreath is more than just a craft; it’s an eco-friendly way to transform forgotten books into timeless decor. These wreaths combine the nostalgia of vintage paper with the creativity of handmade design.
Unlike fresh floral wreaths, book page wreaths never wilt, and unlike store-bought decor, they’re one-of-a-kind. With just a hot glue gun, some old pages, and a little time, you can create a piece that looks elegant, rustic, or even glamorous — depending on your style.
In this guide, you’ll find five complete tutorials, each with step-by-step instructions, troubleshooting advice, and ideas to customize your design. By the end, you’ll have not just one wreath idea, but a library of possibilities.
Materials and Tools: What You’ll Need for Any Book Page Wreath
Before jumping into the tutorials, let’s cover the basics. Nearly every version of an Upcycled Book Page Wreath starts with these essentials:
- Old books: Choose books with aged, matte paper. Avoid glossy magazine paper.
- Wreath base: Foam, cardboard, or wire rings (12–16 inches for standard, 4–6 inches for mini).
- Hot glue gun + glue sticks: Low-temperature guns are safer for delicate paper.
- Scissors or craft knife: For trimming pages or cutting petal shapes.
- Ruler or bone folder: Helps keep folds crisp and even.
- Optional extras:
- Ribbons, lace, twine
- Faux flowers or greenery
- Metallic spray paint or ink pads
- Buttons, brooches, or beads for embellishment
Now, let’s get into the five full tutorials.
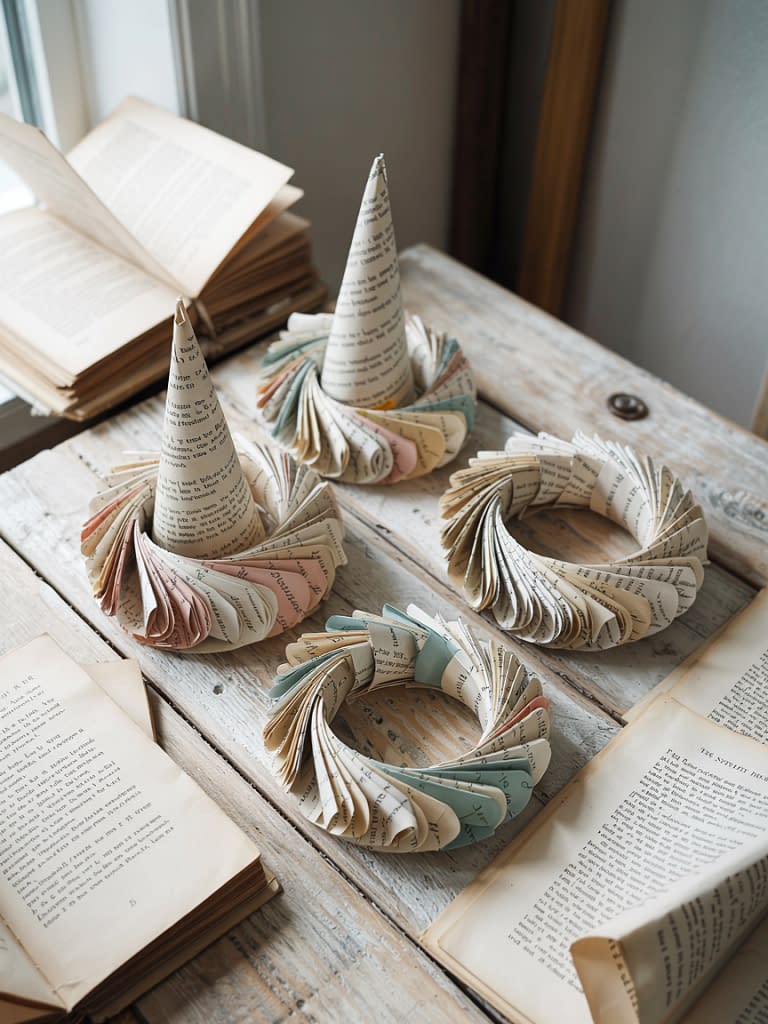
Tutorial 1: Classic Rolled Cone Book Page Wreath (Easy)
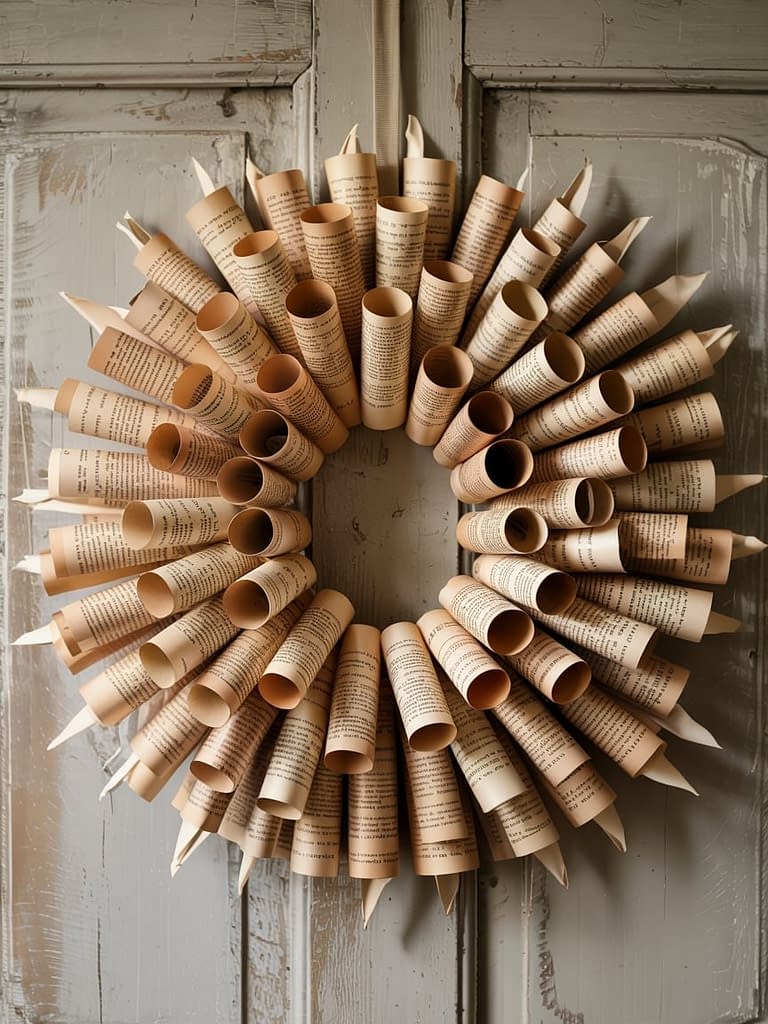
This is the most iconic version of the book page wreath, featuring cone-shaped pages arranged in layers. The result is a starburst-style piece that works in any home.
Step-by-Step Instructions
- Prepare the base
- Cut a ring from sturdy cardboard, about 12–14 inches across with a 2–3 inch band.
- If using foam, ensure it’s thick enough to hold cones without bending.
- Tear out pages
- Gently remove 70–100 pages. Don’t worry about uneven edges; they add character.
- Stack them neatly to keep workflow smooth.
- Roll cones
- Place a page diagonally. Start at one corner and roll tightly into a cone shape.
- Secure the edge with a dab of hot glue.
- Repeat until you have a full batch (aim for at least 60 cones before you begin gluing).
- First layer
- Begin gluing cones around the outer edge of the base, points facing inward.
- Keep spacing even, about half an inch apart.
- Second layer
- Glue cones slightly inside the first row, overlapping so the wreath looks full.
- Angle cones slightly upward for a dimensional effect.
- Continue layering
- Keep working toward the center until the base is hidden.
- For the last row, use shorter cones (trim the pages) to create a clean finish.
- Finish the center
- Options: tightly rolled page cluster, a fabric flower, or a vintage brooch.
- Secure firmly with glue.
- Hang
- Attach ribbon or wire to the back. Test by lifting before hanging.
Variations
- Paint the cone edges with metallic gold for a festive look.
- Use sheet music instead of book pages for a musical theme.
- Alternate cone sizes for extra depth.
Troubleshooting
- Cones popping open? Hold longer with glue or use paperclips until set.
- Uneven spacing? Use a ruler to lightly mark placement points on the base.
Time required: 3–4 hours
Best for: Mantels, entryways, large feature walls
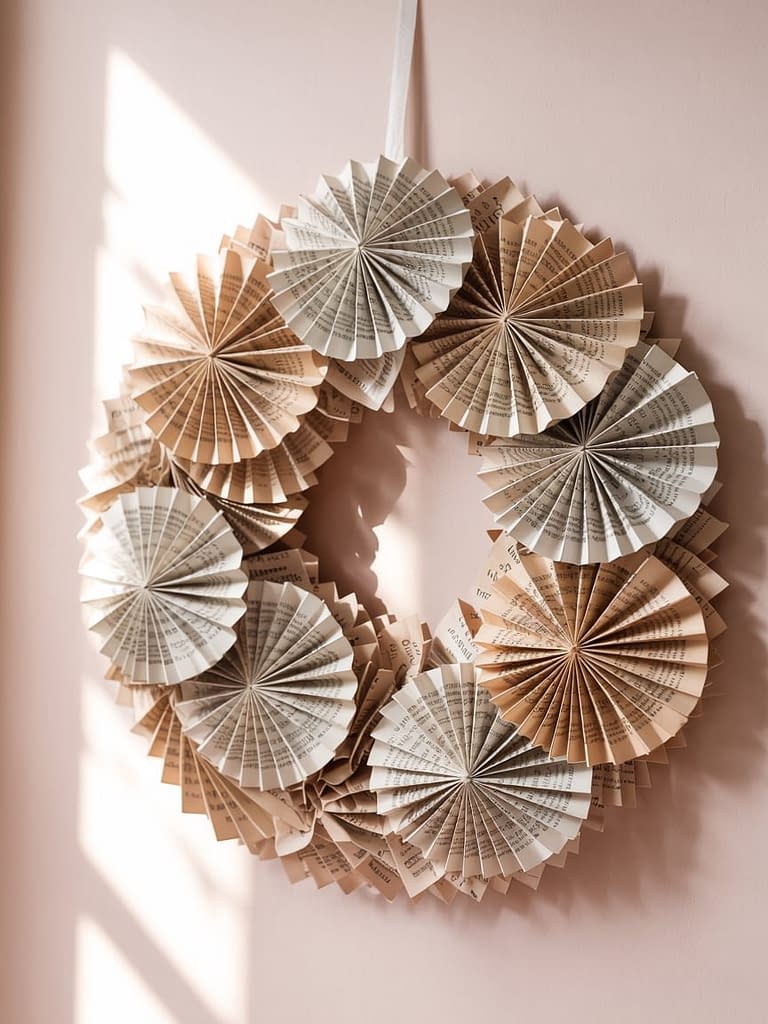
Tutorial 2: Accordion Fold Fan Wreath
This wreath uses folded rosettes instead of cones, creating a layered, textural design that feels modern and artistic.
Step-by-Step Instructions
- Cut strips
- Tear pages into strips about 2–3 inches wide. Length depends on page size.
- Accordion fold
- Fold each strip back and forth (like a fan), about ½ inch per fold.
- Crease firmly for crisp folds.
- Form rosettes
- Glue the ends of one folded strip together to form a circle.
- Press down in the middle to spread it into a flat rosette.
- Add a small paper circle on the back for stability.
- Make multiple sizes
- Create rosettes in varying diameters (small, medium, large).
- Aim for 20–30 rosettes to cover a 14-inch base.
- Attach to base
- Start gluing larger rosettes around the edge of the wreath form.
- Fill gaps with medium and small rosettes.
- Layering
- Stack smaller rosettes on top of larger ones for depth.
- Finish
- Add a central embellishment: button cluster, ribbon bow, or mini flower.
Variations
- Use different shades of aged paper for contrast.
- Ink the folds for a distressed vintage look.
- Add glitter to the edges for a festive wreath.
Troubleshooting
- Rosettes collapsing? Reinforce with an extra paper circle on the back.
- Gaps in the wreath? Overlap rosettes more closely or make extra small ones.
Time required: 2–3 hours
Best for: Modern walls, eclectic decor, gifts
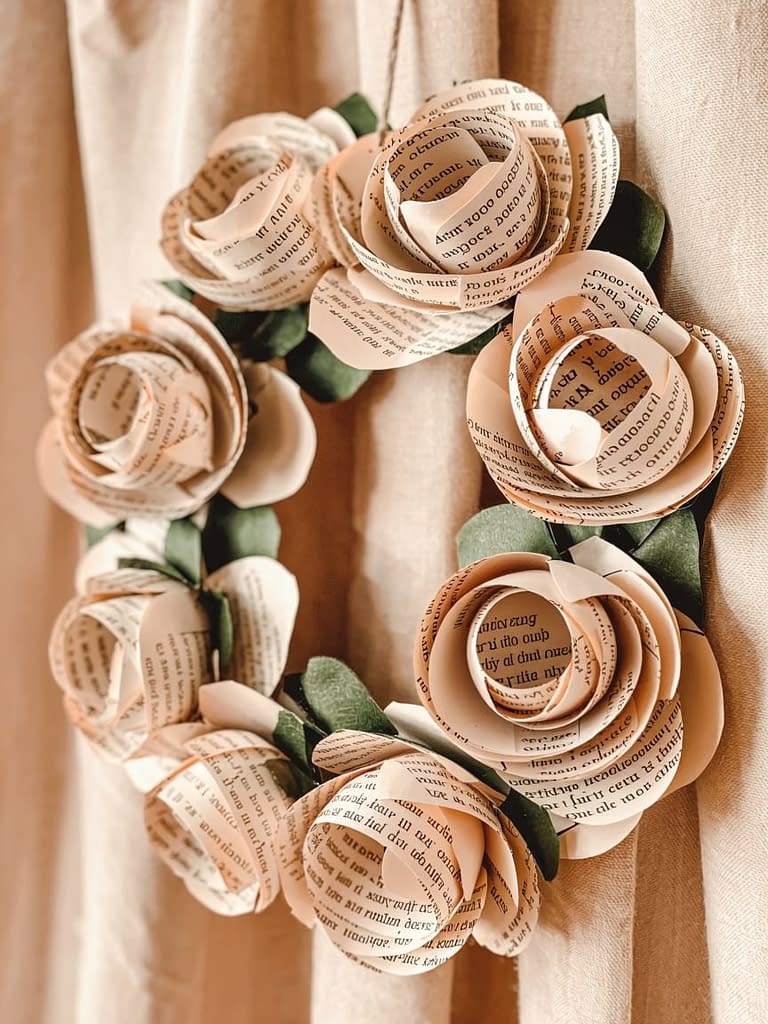
Tutorial 3: Flower Petal Book Page Wreath
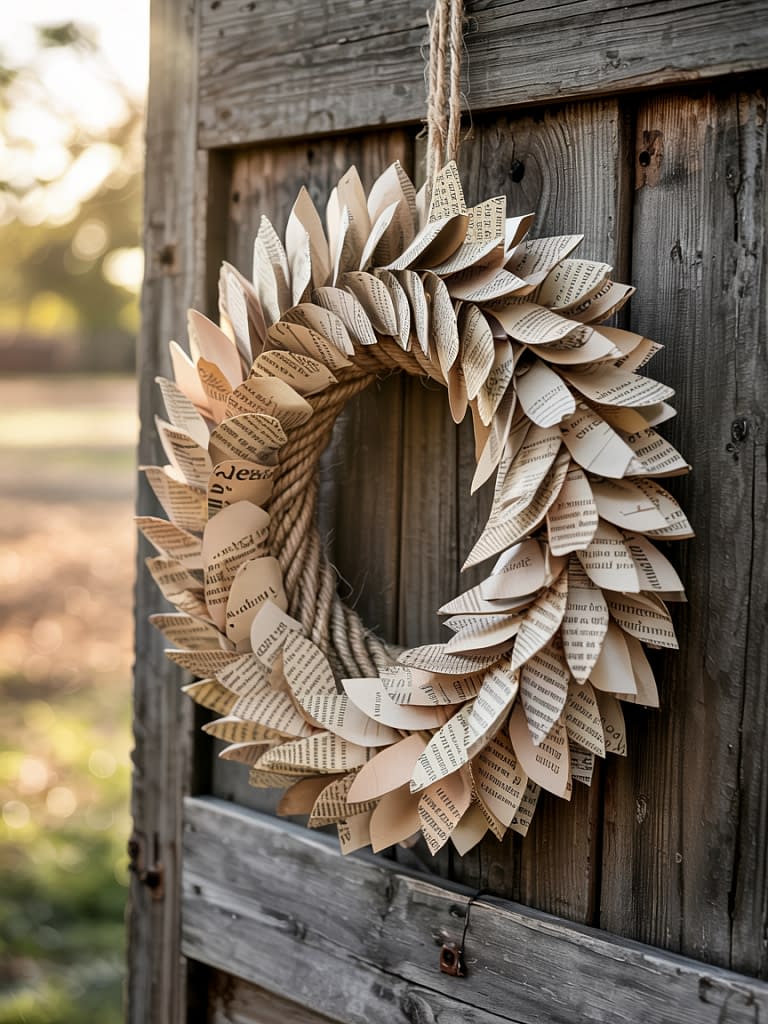
This design mimics a blooming flower by cutting pages into petal shapes and layering them beautifully.
Step-by-Step Instructions
- Cut petals
- Tear pages and cut into teardrop shapes.
- Vary sizes: large for the outer ring, small for the inner layers.
- Shape petals
- Curl the tips slightly with a pencil for a realistic effect.
- Lightly ink edges if desired.
- Start outer layer
- Glue large petals around the outer edge of the base.
- Slightly overlap for fullness.
- Add middle layers
- Glue medium petals above the first layer.
- Angle inward slightly as you work toward the center.
- Create flower center
- Roll a page tightly into a spiral “rose.”
- Glue in the middle as the flower’s center.
- Final touches
- Add lace or fabric leaves for a romantic effect.
Variations
- Dye some pages with tea or coffee for a soft sepia tone.
- Use colored paper accents for a two-tone flower.
- Add faux pearls or rhinestones in the center for elegance.
Troubleshooting
- Petals not sticking? Use more glue at the base only (not the curled edges).
- Flower looks flat? Increase layering and vary petal sizes.
Time required: 3–5 hours
Best for: Weddings, romantic spaces, vintage decor
Tutorial 4: Layered Rosette Book Page Wreath
This combines rosettes and layering to create a sculptural, dimensional wreath that feels bold and dramatic.
Step-by-Step Instructions
- Make rosettes
- Follow accordion folding (Tutorial 2).
- Create 3–4 size groups (small, medium, large, extra-large).
- Layer rosettes
- Glue small rosettes onto medium ones, medium onto large.
- This creates stacked, flower-like elements.
- Arrange on base
- Glue the largest stacked rosettes first, evenly spaced.
- Fill in between with smaller stacks.
- Add accents
- Insert single small rosettes or cones in gaps.
- Optional: paint edges gold or silver for drama.
- Finish
- Add a bold centerpiece, like a jeweled brooch or fabric flower.
Variations
- Alternate rosettes and cones for texture contrast.
- Spray-paint the whole wreath one metallic color for a modern twist.
Troubleshooting
- Rosettes uneven? Adjust stacking — smaller on larger for balance.
- Too flat? Use foam dots or cardboard spacers to lift layers.
Time required: 4–6 hours
Best for: Glamorous decor, holiday celebrations, statement pieces
Tutorial 5: Miniature & Seasonal Accent Wreaths
These small wreaths are perfect for ornaments, party decor, or seasonal touches.
Step-by-Step Instructions
- Cut small base
- Make a 4–6 inch ring from cardboard.
- Choose style
- Rolled cones, mini rosettes, or petals — any method works in miniature.
- Make seasonal variations
- Spring: Add pastel flowers or butterflies.
- Summer: Accent with twine, seashells, or nautical charms.
- Fall: Mix in dried leaves or burlap ribbon.
- Winter: Dust with glitter or faux snow spray.
- Finish
- Attach twine for hanging or glue onto gift packaging.
Variations
- Make a set of four, one for each season.
- Use colored ribbon loops to match decor themes.
Troubleshooting
- Too heavy for ornaments? Use fewer pages and thinner cardboard.
- Paper tearing? Reinforce with a backing circle.
Time required: 30–90 minutes
Best for: Gifts, parties, holidays, small wall accents
Styling & Display Ideas
- Hang a large wreath above the mantel as a centerpiece.
- Group three different styles together for a gallery wall.
- Use small wreaths as wedding table decor or party favors.
- Swap seasonal accents to use the same wreath year-round.
Expert Tips for Success
- Always use matte paper — glossy paper doesn’t fold well.
- Don’t skimp on glue; loose edges can ruin the structure.
- Spray with matte sealant if displaying in humid areas.
- Mix book pages with sheet music or maps for unique styles.
- Store flat in a box when not in use to prevent crushing.
Conclusion
An Upcycled Book Page Wreath is a beautiful blend of sustainability, creativity, and timeless style. With these five detailed tutorials, you can make everything from classic cone designs to romantic flower petals and playful seasonal minis.
Each wreath tells its own story — not just of the book it came from, but of the maker’s creativity. Whether you hang it in your home, gift it to a loved one, or use it for special events, you’ll know that you’ve given forgotten pages a second life as art.


