
In the journey toward a zero-waste lifestyle, small changes often make the biggest impact. Disposable cotton rounds and makeup wipes are single-use items that pile up in landfills daily. By switching to handmade crochet cotton face scrubbies, you are not only reducing household waste but also upgrading your skincare routine.
Cotton is the ideal fiber for these projects because it is natural, biodegradable, and incredibly absorbent. Unlike synthetic acrylics, cotton softens with use and can withstand hot water washes to kill bacteria—essential for facial hygiene. The texture of crocheted stitches provides a gentle exfoliating effect that mass-produced cloth wipes simply cannot replicate. Whether you are a beginner looking for your first project or an experienced crocheter using up scrap yarn, these patterns offer a luxurious, functional reward.
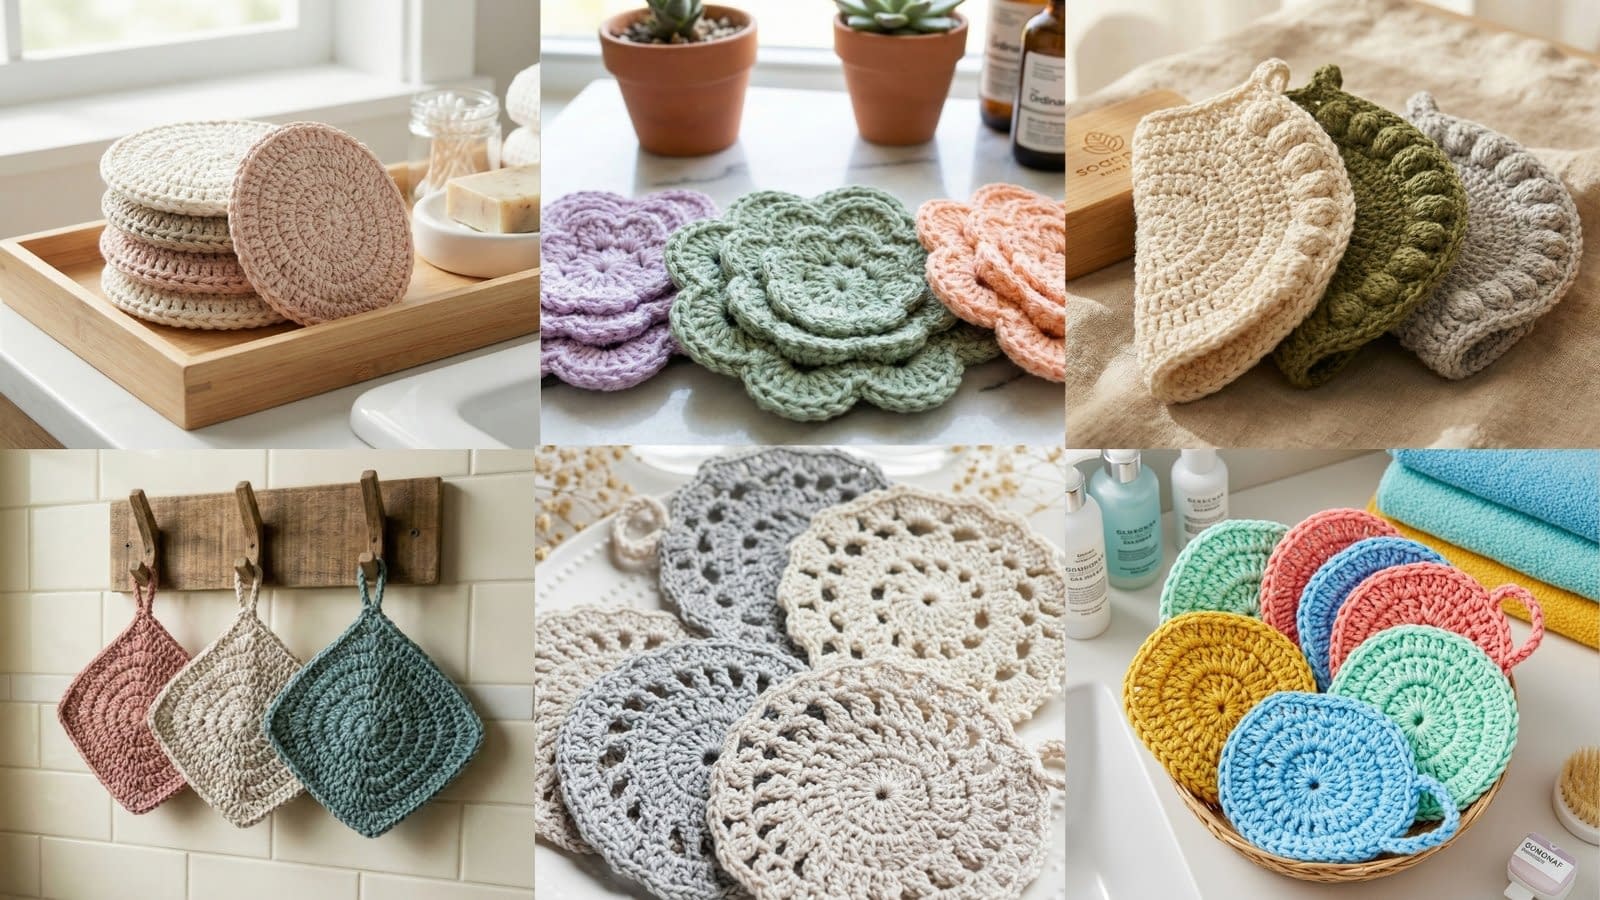
Below, you will find highly detailed, long-form instructions for three distinct styles seen in our feature image. We have avoided all abbreviations to ensure clarity for every skill level.
1. The Classic Minimalist Round Scrubby
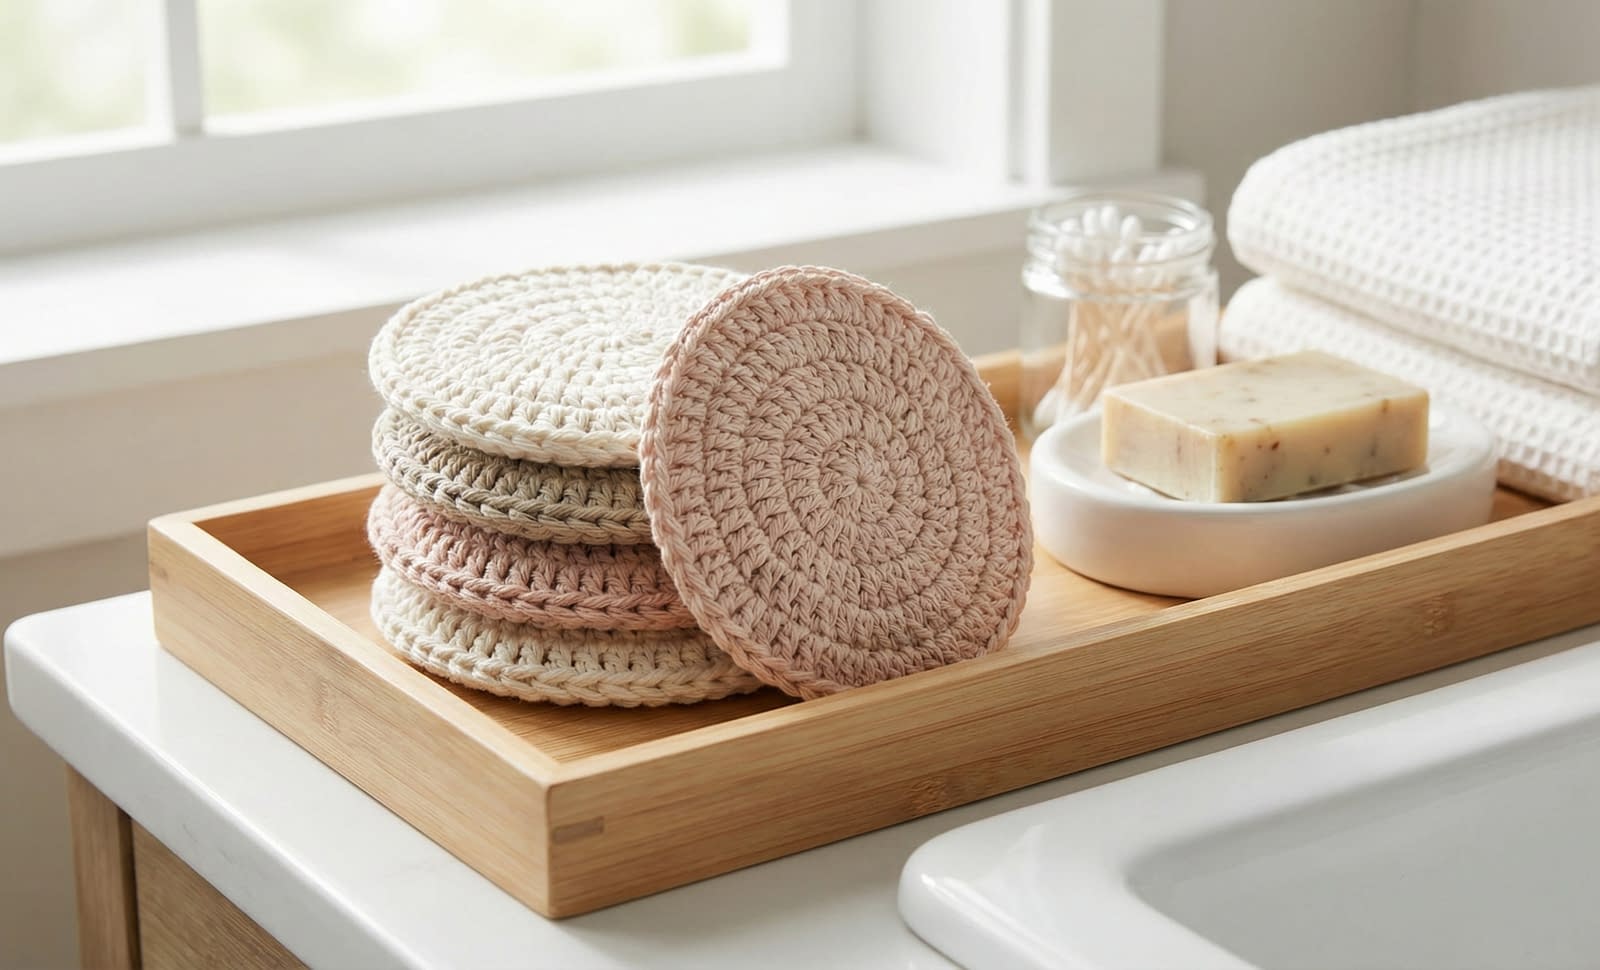
This pattern replicates the clean, spa-like aesthetic of the scrubbies seen in the top-left of the reference image. These are designed to be dense and flat, providing a sturdy surface perfect for applying toner or removing heavy foundation. The secret to their perfectly round shape lies in the precise placement of increase stitches.
Skill Level:
Beginner
Finished Size:
Approximately 3 to 3.5 inches in diameter
Materials
Yarn: 100% Cotton Worsted Weight (Category 4). Colors suggested: Unbleached cotton, pale pink, or sage green.
Hook: 4.0 mm or 4.5 mm crochet hook (depending on your tension).
Tools: Yarn needle for weaving ends, sharp scissors.
Notes
This pattern is worked in joined rounds. You will join the end of each round to the beginning with a slip stitch.
The “chain 2” at the start of the round does not count as a stitch unless specified. This technique creates a seamless look where the join is nearly invisible.
Detailed Step-by-Step Instructions
The Foundation Ring To begin, you will need to create a center ring. We recommend using a “Magic Ring” (also known as a magic circle) because it allows you to pull the center completely tight, leaving no hole.
- Step 1: Form a magic ring with your yarn.
- Step 2: Chain two. Remember, this chain two is just to build height and does not count as your first stitch.
- Step 3: Work twelve double crochet stitches directly into the center of the magic ring.
- Step 4: Gently pull the yarn tail to tighten the ring until the center hole disappears completely.
- Step 5: Locate the first real double crochet stitch you made (ignoring the beginning chain two). Insert your hook into the top loops of that stitch and perform a slip stitch to close the round. (Total Stitch Count: 12 double crochet stitches)
Round Two: The First Expansion Now we must expand the circle so it remains flat.
- Step 1: Chain two.
- Step 2: Work two double crochet stitches into the very same stitch where you just joined your round.
- Step 3: Move to the next stitch and work two double crochet stitches into it.
- Step 4: Continue this pattern around the entire circle. You will place exactly two double crochet stitches into every single stitch from the previous round.
- Step 5: When you reach the end, you should have twenty-four stitches. Join with a slip stitch to the top of the first double crochet of the round. (Total Stitch Count: 24 double crochet stitches)
Round Three: The Final Edge To match the image, the final round creates a defined edge that isn’t too ruffled.
- Step 1: Chain two.
- Step 2: In the first stitch (the same one as the join), work one double crochet stitch.
- Step 3: In the next stitch, work two double crochet stitches.
- Step 4: Repeat this sequence around the circle: work one double crochet in the next stitch, followed by two double crochet stitches in the one after that. This “one, then two” pattern ensures the circle grows evenly without curling up like a bowl.
- Step 5: Continue until you reach the end of the round. You should finish with thirty-six stitches.
- Step 6: Join with a slip stitch to the first double crochet.
Finishing Touches
- Cut your yarn, leaving a tail of about four to five inches.
- Fasten off by pulling the tail through the loop on your hook.
- Thread your yarn needle and weave the tail back and forth through the dense stitches on the wrong side of the scrubby. Do the same with the center tail from the magic ring to ensure it never comes undone in the wash.
2. The Blooming Layered Flower Scrubby
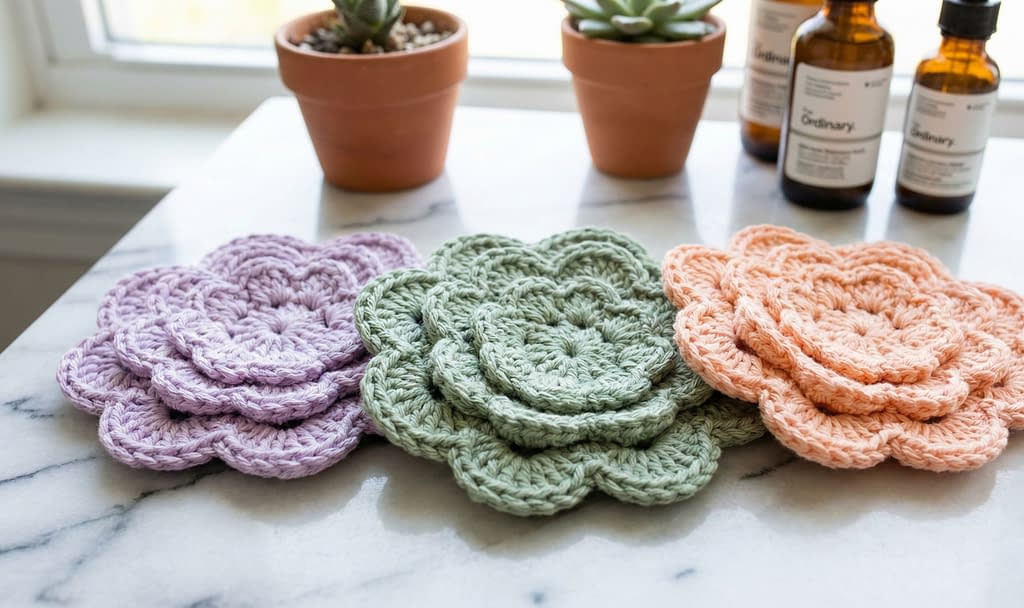
This design is slightly more intricate, creating a thick, cushiony scrubby that feels luxurious on the skin. The “petals” provide texture that helps with gentle exfoliation, while the layered construction makes the pad hold more water and soap.
Skill Level
Intermediate
Finished Size
Approximately 4 inches in diameter
Materials
Yarn: 100% Cotton Worsted Weight. Colors suggested: Lavender, Mint, or Peach.
Hook: 4.0 mm or 5.0 mm crochet hook.
Notes
This pattern uses a technique called “working in the back loops” to create layers.
Make sure to keep your tension somewhat loose so the petals can lay flat.
Detailed Step-by-Step Instructions
The Center Disk
- Step 1: Start with a magic ring.
- Step 2: Chain one (does not count as a stitch). Work six single crochet stitches into the ring.
- Step 3: Pull the ring tight and join with a slip stitch to the first single crochet. (Total Stitch Count: 6 single crochet stitches)
Round Two: Base Expansion
- Step 1: Chain one.
- Step 2: Work two single crochet stitches into every stitch around.
- Step 3: Join with a slip stitch to the first single crochet. (Total Stitch Count: 12 single crochet stitches)
Round Three: Creating the Petal Foundation Now we create the loops where the petals will sit.
- Step 1: Chain one. Work one single crochet in the first stitch.
- Step 2: Chain three. Skip the next stitch.
- Step 3: Work one single crochet in the next stitch.
- Step 4: Repeat this pattern (Chain three, skip one stitch, single crochet in next) around the circle.
- Step 5: You should end with a chain three. Join with a slip stitch to the very first single crochet you made. You should now have six “chain-spaces” or loops around the center.
Round Four: The Petals This is where the flower blooms. We will work into the chain-spaces you just created.
- Step 1: Slip stitch directly into the first chain-three space.
- Step 2: Chain two (counts as a half double crochet).
- Step 3: Into the same space, work four double crochet stitches.
- Step 4: Chain two, and slip stitch back into the same space. This creates one rounded petal.
- Step 5: Move to the next chain-three space. Slip stitch into the space, Chain two, work four double crochet, Chain two, and slip stitch into the same space.
- Step 6: Repeat this for all six spaces. You will have a beautiful six-petal flower.
- Step 7: Fasten off and weave in ends.
Note: For a larger scrubby like the one in the image, you can add a second layer of petals behind the first by working into the skipped stitches of Round Three, but this single-layer version is perfect for facial cleansing.
3. The Bobble-Edged Finger Mitt Scrubby
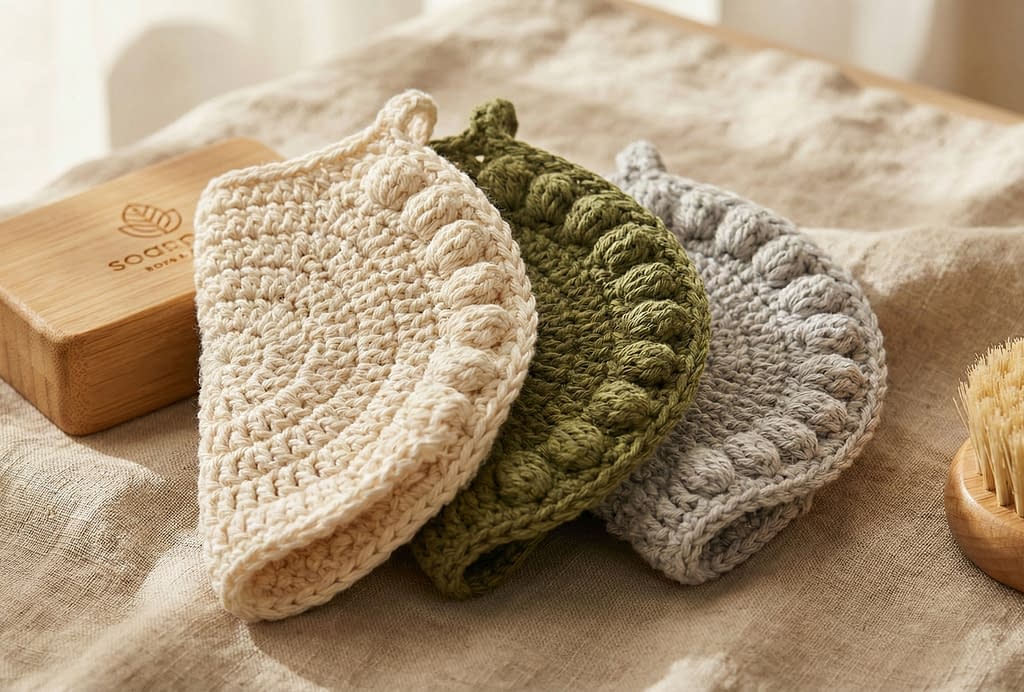
This pattern corresponds to the unique scrubby on the top right. It functions as a “mitt” or pocket that you can slip your fingers into for better control while scrubbing. The defining feature is the decorative and functional bobble edge, which provides a deeper massage for the skin.
Skill Level
Intermediate
Finished Size
Approx. 4 inches wide at the opening.
Materials
Yarn: 100% Cotton Worsted Weight. Colors suggested: Oatmeal, Olive Green, or Grey.
Hook: 4.0 mm crochet hook.
Notes
This is constructed by making two semi-circles (or a long oval folded in half) and seaming them, or working in a continuous pocket shape. For simplicity and structure, we will make a folded mitt.
Bobble Stitch: Yarn over, insert hook into stitch, pull up a loop, yarn over, pull through two loops. Repeat this 4 more times in the same stitch (6 loops on hook). Yarn over and pull through all loops.
Detailed Step-by-Step Instructions
The Main Body (The Mitt) We will create a long oval that folds in half to fit your fingers.
- Step 1: Chain fifteen.
- Step 2: Work a double crochet in the fourth chain from the hook. Work one double crochet in each chain across until you reach the last chain.
- Step 3: In the very last chain, work six double crochet stitches. This fans out the work to turn the corner.
- Step 4: Do not turn your work over. Rotate it so you are working along the bottom side of the original chain. Work one double crochet in each stitch back towards the beginning.
- Step 5: When you reach the start, work five double crochet stitches into the first chain base to match the other end. Join with a slip stitch to the top of the first double crochet. You now have a long oval.
Building the Pocket
- Step 1: Chain two. Work one double crochet in each stitch around the entire oval. If the oval starts to curl up like a bowl, that is actually good—we want it to form a pocket shape.
- Step 2: Repeat this for two or three more rounds until the piece is large enough to cover your fingers when folded or laid flat.
- Step 3: Flatten the piece so the two long sides touch. You should have an opening at one end.
The Bobble Edge Border This creates the bumpy texture seen in the image along the curved edge.
- Step 1: holding the two layers of the opening together (or just the edge of the front flap if you prefer a single layer scrubby), join your yarn at the corner.
- Step 2: Chain one. Work a single crochet in the first stitch.
- Step 3: In the next stitch, work a Bobble Stitch (see Notes above for how to execute this).
- Step 4: Work a single crochet in the next stitch to anchor the bobble and make it pop out.
- Step 5: Repeat the sequence: Bobble Stitch in one stitch, Single Crochet in the next. Continue this along the curved edge of the mitt.
- Step 6: The alternating stitches will create the distinct “pearl” or “bead” look seen in the photo.
- Step 7: When you reach the end of the curve, finish with a single crochet.
- Step 8: Create the hanging loop (optional): Chain twelve, and slip stitch back into the last single crochet. Fasten off and weave in all ends.
4. The Modern Square Hanging Scrubby
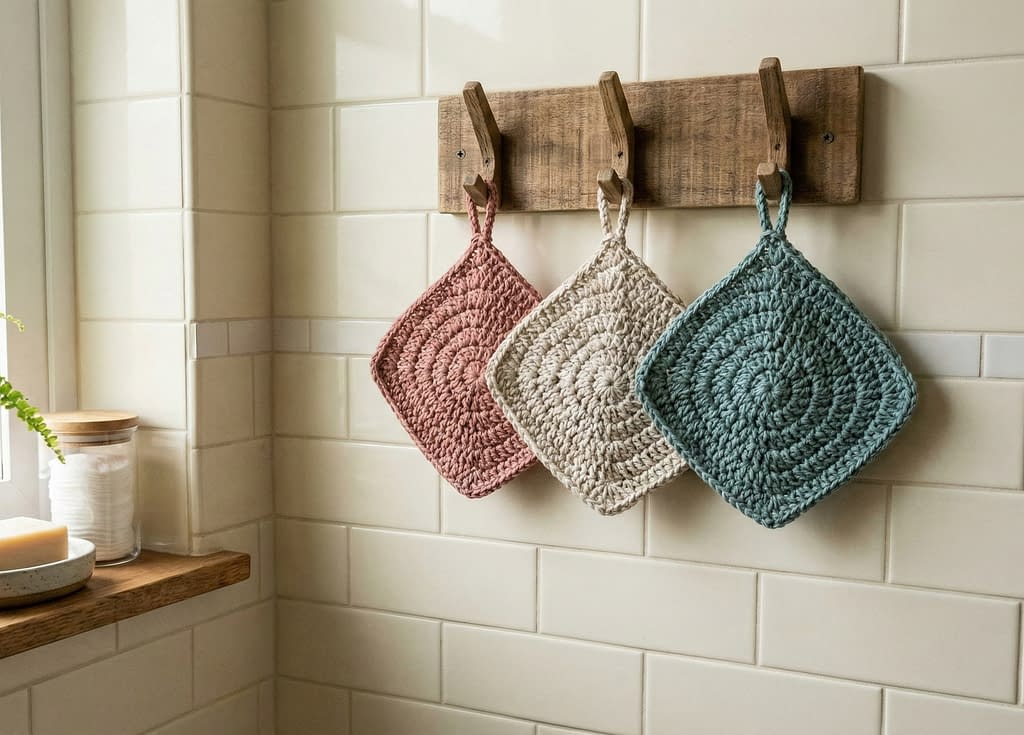
While circular pads are traditional, the square shape shown in the bottom left of our collection offers a modern geometric aesthetic and practical advantages. The straight edges allow you to fold the scrubby precisely to reach tight areas around the nose and eyes. Furthermore, the integrated corner loop is a game-changer for hygiene, allowing you to hang the scrubby to dry completely between uses, preventing any mildew growth. This pattern is worked in rows rather than rounds, making it an excellent variation for those who want to practice turning their work and maintaining straight edges.
Skill Level
Beginner (requires understanding of turning chains and working in rows)
Finished Size
Approximately 4 inches by 4 inches square
Materials
- Yarn: One Hundred Percent Cotton Worsted Weight (Category 4). Colors suggested: Terracotta, Oatmeal, or Slate Blue.
- Hook: 4.0 millimeter or 4.5 millimeter crochet hook.
- Tools: Yarn needle and scissors.
Step by Step Instructions
The Foundation Chain
To begin this pattern, you need to create a foundation width. Start by making a slip knot on your hook. Chain fifteen. This number will determine the width of your square. If you prefer a larger washcloth size, you can chain more, but fifteen is perfect for a facial pad.
Row One Establishing the Base
Insert your hook into the second chain from the hook. Perform a single crochet stitch. Continue to work one single crochet stitch into every chain across the entire length. When you reach the end of the chain, you should have fourteen single crochet stitches. It is important to count your stitches now to ensure your square does not become a trapezoid later.
Row Two Building the Texture
Chain one and turn your work. The chain one does not count as a stitch; it simply raises the yarn to the height of the new row. Insert your hook into the very first stitch—the same one attached to the chain. Work one single crochet stitch. Continue to work one single crochet in each stitch across the row. When you reach the end, count again to ensure you still have fourteen stitches.
Rows Three Through Fourteen
Repeat the instructions for Row Two exactly. Chain one, turn, and single crochet across. As you work, you will see a dense, durable fabric forming. This tight stitch pattern is excellent for scrubbing because it does not stretch out of shape easily when wet. Continue working rows until your piece is perfectly square. You can test this by folding the bottom corner up to the opposite top corner diagonally; if the edges align, it is a square. Usually, this takes about fourteen to sixteen rows depending on your personal tension.
The Border and Hanging Loop
Do not fasten off your yarn yet. To give the square a polished look like the one in the photo, we will add a border. Chain one and rotate your work 90 degrees so you are working down the side edge. Work single crochet stitches evenly down the side (generally one stitch per row end). When you reach the corner, work three single crochet stitches into the same corner space to help the work turn smoothly. Continue this around the bottom and the other side.
When you reach the final top corner where you want the loop to be (as seen in the image), chain twelve. Slip stitch back into the same corner stitch where you started the chain. This creates the sturdy loop. Finally, work three single crochet stitches into that same corner to secure the loop base, then join with a slip stitch to the first stitch of the border.
Finishing
Cut the yarn, leaving a six-inch tail. Thread your needle and weave the end back into the thick fabric of the square. Be sure to weave the tail near the loop extra securely, as the weight of the wet scrubby will hang from this point.
5. The Lacy Spa Wheel Scrubby

The scrubbies in the bottom middle image are distinct for their airy, open structure. Unlike the dense square or the solid round, this “Lacy Spa Wheel” utilizes negative space. The gaps between the stitches allow for incredible lathering when used with facial cleansers, as the air and water can mix freely with the soap. They also dry the fastest of all the patterns due to the open airflow. This pattern looks complex but is created using simple stitch combinations.
Skill Level
Intermediate (requires working with chain spaces and skipping stitches)
Finished Size
Approximately 3.5 inches in diameter
Materials
- Yarn: One Hundred Percent Cotton Worsted Weight. Colors suggested: Dove Grey, Cream, or White.
- Hook: 4.0 millimeter crochet hook.
Step by Step Instructions
The Center Hub
Begin with a magic ring to ensure a tight center. Chain three. This counts as your first double crochet stitch. Work eleven more double crochet stitches into the ring. You should have a total of twelve stitches, resembling a solid wheel hub. Pull the ring tight and join with a slip stitch to the top of the beginning chain three.
Round Two Creating the Spokes
Chain four. This counts as one double crochet stitch plus a chain one space. In the next stitch, work one double crochet, then chain one. Repeat this pattern around the entire circle: double crochet, chain one. Do not skip any stitches from the foundation round; you are simply placing a gap between each post. By the end, you should have twelve double crochet “spokes” separated by chain spaces. Join with a slip stitch to the third chain of the beginning chain four.
Round Three The Lattice Rim
Slip stitch into the first chain one space to start your round in the gap. Chain three (counts as a double crochet). Work one more double crochet into the same space. Chain one. Skip the double crochet post. Work two double crochet stitches into the next chain one space. Repeat the sequence between the asterisks around the circle. You are essentially placing clusters of two double crochet stitches into every gap from the previous round. Join with a slip stitch to the top of the starting chain three.
Round Four The Scalloped Edge
To create the soft, finished edge seen in the image, we will do a simple shell border. Chain one. Work a single crochet in the same stitch. Skip the next stitch. Work five double crochet stitches into the next chain space (the gap between the clusters). Skip the next stitch. Work a single crochet in the next stitch. Repeat this pattern around. This will create gentle waves or scallops along the outer rim. Join with a slip stitch to the first single crochet.
Finishing
Fasten off your yarn. Because this pattern is lacy, you need to be very careful when weaving in your ends. Run the needle up and down the solid “posts” of the double crochet stitches so the tail remains invisible and does not pop out through the holes.
6. The Everyday Essential Looped Round

The final pattern corresponds to the colorful stack in the bottom right image. These are the workhorses of the collection. They feature a ribbed texture similar to the spiral pattern but are worked in joined rounds for distinct concentric circles. The defining feature is the practical loop attached clearly to the side, which is slightly different from the corner loop of the square. This design is perfect for gifting sets in various bright colors.
Skill Level
Beginner to Intermediate
Finished Size
3.5 inches in diameter
Materials
- Yarn: One Hundred Percent Cotton Worsted Weight. Colors suggested: Bright Teal, Mustard Yellow, Coral, or Sky Blue.
- Hook: 4.0 millimeter or 4.5 millimeter crochet hook.
Step by Step Instructions
Round One The Core
Start with a magic ring. Chain two (does not count as a stitch). Work ten half double crochet stitches into the ring. The half double crochet is chosen here because it is slightly shorter and tighter than the double crochet, making for a very firm fabric. Pull the ring tight and join with a slip stitch to the first half double crochet.
Round Two The Increase
Chain two. Work two half double crochet stitches into the same stitch as the join. Work two half double crochet stitches into every stitch around. You will finish with twenty stitches. Join with a slip stitch to the first half double crochet.
Round Three The Ribbed Texture
To get the concentric ring look seen in the photo, you will work in the “third loop” of the half double crochet. This loop is located behind the top V of the stitch. When you work into it, the top V is pushed forward, creating a ridge. Chain two. Work one half double crochet in the third loop of the first stitch. Work two half double crochet stitches in the third loop of the next stitch. Repeat this “one, then two” increase pattern all the way around. Join with a slip stitch. You should have thirty stitches.
Round Four The Final Round and Loop
Chain one. Work one single crochet in the usual top loops (not the third loop) of each stitch around. This smooths out the outer edge. When you have worked a single crochet in every stitch and reached the end of the round, do not join yet. Chain fourteen fairly tightly. This forms the loop. Slip stitch back into the base of the last single crochet you made to close the loop. Now, join with a slip stitch to the very first single crochet of the round.
Finishing
Cut the yarn and pull through. Because the loop will be pulled on frequently, reinforce the base of the loop by sewing over the join a few times with your yarn tail before weaving the rest of the end into the scrubby.
Conclusion
You now have a repertoire of six distinct, high-quality crochet face scrubby patterns. By creating these items, you have taken a significant step away from disposable culture and toward a more sustainable, personalized lifestyle. Whether you chose the textured puff stitch for exfoliation, the lacy wheel for a gentle lather, or the classic solid round for everyday toner application, you have created something beautiful and functional.
Proper Care and Maintenance
To ensure your cotton scrubbies last for years, proper care is essential. Because they are made of one hundred percent cotton, they are durable, but they are also susceptible to shrinking if not treated correctly.
- Washing: Place your used scrubbies in a small mesh laundry bag. This prevents them from getting lost in the machine or snagged on zippers and buttons from other clothing. Wash them on a warm or hot cycle with similar colors. The hot water helps to sanitize the cotton and remove oils and makeup residue effectively.
- Drying: You can tumble dry your scrubbies on medium heat. They may shrink slightly after the first wash, which is normal for cotton; simply stretch them back into shape with your hands while they are still warm. Alternatively, if you made the versions with hanging loops, you can hang them to air dry in a sunny spot, which naturally bleaches out stains and conserves energy.
- Deep Cleaning: If your scrubbies become stained with waterproof mascara or heavy foundation, you can soak them in a mixture of warm water and vinegar or a gentle oxygen bleach solution before running them through the wash.


