
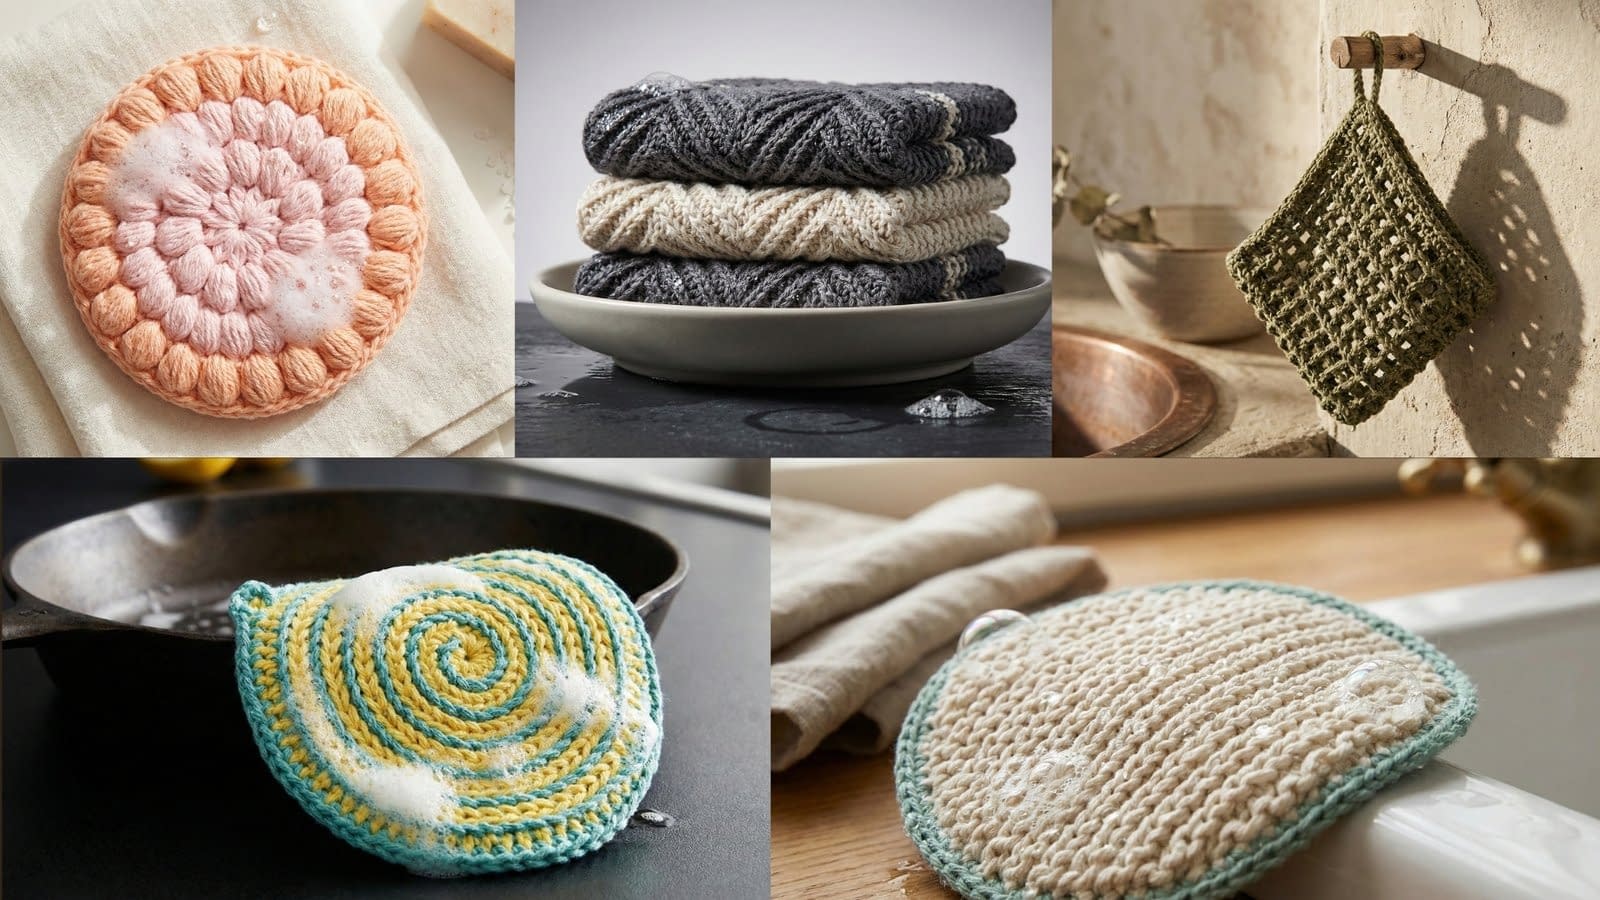
Hand knit cotton dish scrubbers are one of the most practical and satisfying small projects a knitter can make. They are quick enough to finish in a short time, yet detailed enough to practice texture, shaping, and stitch control. More importantly, knit cotton dish scrubbers are reusable, washable, and long lasting, making them an excellent alternative to disposable synthetic sponges. When made well, they clean effectively without scratching dishes, dry faster than store bought scrubbers, and can be customized to suit different cleaning needs.
This guide focuses on 5 Knit Cotton Dish Scrubbers Patterns that range from dense, heavy duty textures to open, fast drying designs. Each pattern is explained in full detail with long form, beginner friendly instructions. No knitting shorthand is used. Every step is written clearly so that even newer knitters can follow along with confidence. You will also find practical notes on stitch purpose, tension control, finishing, and variations, so you can adapt each scrubber to your own preferences.
All five patterns are designed specifically for cotton yarn, which is ideal for dish scrubbers because it is absorbent, heat resistant, and durable. By the end of this post, you will have a complete reference for creating knit scrubbers that are both beautiful and functional, whether you are making them for your own kitchen, as gifts, or for small handmade sales.
Ridged Seed Stitch Round Scrubber Pattern
Skill level and finished size
Skill level: Beginner to intermediate
Finished size: Approximately 9 to 10 centimeters in diameter
Materials
Worsted weight cotton yarn in natural cream
Small amount of contrasting cotton yarn for edging
Knitting needles, 4.5 millimeters or size needed to achieve firm fabric
Yarn needle
Scissors
Notes on construction
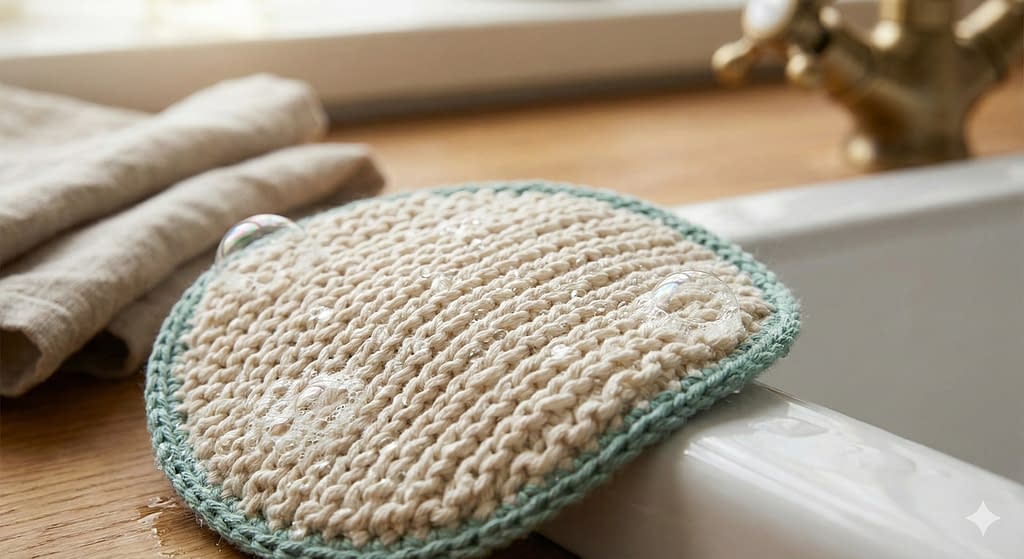
This scrubber is worked flat as a square using a dense seed stitch with added ridge emphasis, then shaped into a round form during finishing. The texture is firm, slightly nubby, and excellent for removing stuck on residue without damaging cookware. The round shape is achieved by cinching the corners inward.
Step by step instructions
Creating the base fabric
Cast on 24 stitches using a long tail cast on. The cast on edge should be firm but not tight.
Row 1: Knit one stitch, purl one stitch. Repeat this sequence across the entire row until you reach the final stitch.
Row 2: Purl one stitch, knit one stitch. Repeat this sequence across the row. This offset creates the classic seed stitch texture.
Rows 3 through 26: Continue repeating Rows 1 and 2. Maintain even tension, as seed stitch shows inconsistencies easily. The fabric should feel thick and springy when gently squeezed.
Once your square measures approximately 9 to 10 centimeters on each side, bind off loosely in pattern so the edge remains flexible.
Shaping into a round scrubber
Thread a yarn needle with the tail from binding off. Starting at one corner, weave the needle in and out along the edge stitches, gently pulling to gather the fabric. Move to the next corner and repeat. As all four corners are drawn inward, the square will naturally form a rounded shape.
Secure the gathered yarn firmly and weave in ends on the back side.
Optional contrast edging
With contrasting yarn, pick up stitches evenly around the outer edge. Knit one round, then purl one round to create a subtle ridge. Bind off loosely.
Finishing tips
Wet the scrubber lightly and shape it with your hands. Allow it to dry flat. This helps the stitches settle and enhances the round form.
Spiral Knit Scrubber Pattern

Skill level and finished size
Skill level: Intermediate
Finished size: Approximately 10 centimeters in diameter
Materials
Two contrasting colors of worsted weight cotton yarn
Knitting needles, 4.5 millimeters
Yarn needle
Scissors
Notes on construction
This scrubber is knit in the round using increases to create a flat spiral disc. Alternating colors form the spiral effect while a textured stitch pattern adds scrubbing power.
Step by step instructions
Starting the spiral
Cast on 8 stitches using the magic loop method. Join carefully in the round, making sure the stitches are not twisted.
Round 1: Knit all stitches.
Round 2: Increase by knitting into the front and back of each stitch. You will now have 16 stitches.
Round 3: Switch to the second color. Knit one stitch, purl one stitch around. This creates a gentle ridge.
Round 4: Increase evenly by knitting two stitches, then knitting into the front and back of the next stitch. Repeat around.
Building the spiral texture
Continue increasing every other round while maintaining the knit one, purl one texture on non increase rounds. Change colors every two rounds to emphasize the spiral. Lay the scrubber flat after each set of rounds. If the edges begin to curl, add an extra increase round.
Continue until the scrubber reaches the desired diameter.
Finishing
Bind off loosely in pattern. Weave in all ends securely on the back side, following the spiral path so the color changes remain smooth.
Puff Stitch Bubble Scrubber Pattern

Skill level and finished size
Skill level: Intermediate
Finished size: Approximately 9 to 10 centimeters in diameter and about 2 centimeters thick
Materials
Worsted weight cotton yarn in a soft pastel, gradient, or solid color
Knitting needles, 5 millimeters or size needed to create a slightly loose fabric that allows the puff texture to stand out
Yarn needle
Scissors
Notes on construction
This scrubber is designed to be soft, cushiony, and gentle, making it ideal for glassware, ceramic dishes, and nonstick cookware. The defining feature of this pattern is the raised puff texture, which is created by repeatedly working elongated stitches into the same stitch. These puffs trap soap and water effectively while remaining flexible and pleasant to hold.
The scrubber is worked flat as a textured square and then shaped into a rounded, slightly padded form during finishing. Careful tension control is important so the puffs remain well defined without becoming loose or floppy.
Step by step instructions
Creating the foundation
Cast on 22 stitches using a standard long tail cast on. The cast on edge should be relaxed but even, as overly tight edges can distort the final shape.
Row 1: Knit all stitches across the row. This establishes a smooth foundation.
Row 2: Knit two stitches. Into the next stitch, knit three times without sliding the stitch off the left needle. To do this, insert the right needle into the stitch, wrap the yarn, pull through, then repeat twice more before finally sliding the stitch off. This forms one puff cluster. Repeat this sequence across the row, ending with knit two stitches.
Row 3: Purl all stitches. This purl row helps push the puff clusters forward, making them more pronounced on the right side of the fabric.
Row 4: Knit all stitches.
Repeat Rows 2 through 4 until the fabric measures approximately 9 to 10 centimeters square. You should see clearly raised, bubble-like textures forming on the right side.
Bind off loosely using a standard bind off. Do not pull the stitches tight, as flexibility is important for a comfortable scrubber.
Shaping the scrubber
Lay the square flat with the puff side facing down. Using a yarn needle, thread a long tail of yarn and weave in and out around the entire outer edge of the square, working through the edge stitches.
Once you have gone all the way around, gently pull the yarn to draw the edges inward, forming a soft, rounded pouch. Adjust the gathers evenly so the puff stitches appear centered and balanced.
Secure the yarn tightly and weave in the end securely on the back side.
Variations and finishing tips
For extra thickness, lightly stuff the center with leftover cotton yarn ends before closing completely. To create a flatter scrubber, skip stuffing and pull the edges only slightly inward. This pattern also works beautifully with subtle color gradients, which highlight the puff texture without overwhelming it.
Lattice Mesh Knit Scrubber Pattern
Skill level and finished size
Skill level: Beginner
Finished size: Approximately 10 to 11 centimeters square
Materials
Worsted weight cotton yarn in a muted or natural tone
Knitting needles, 5 millimeters
Yarn needle
Scissors
Notes on construction
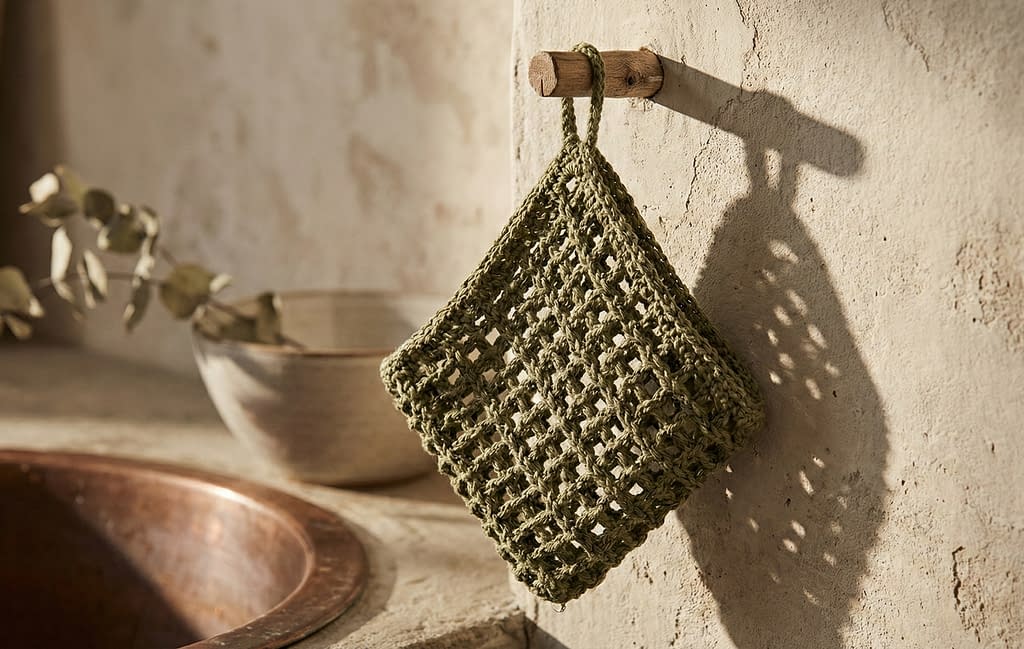
This open lattice scrubber is lightweight, flexible, and fast drying. The openwork design allows water to drain easily, making it ideal for light washing tasks and quick cleanups. The pattern uses simple yarn overs and paired decreases, making it accessible to beginners who want to practice controlled openwork.
Step by step instructions
Working the lattice fabric
Cast on 24 stitches using a long tail cast on.
Row 1: Knit all stitches across the row.
Row 2: Knit two stitches together, yarn over. Repeat this sequence across the row until the final two stitches, then knit those two stitches together.
Row 3: Knit all stitches.
Row 4: Knit one stitch, yarn over, knit two stitches together. Repeat this sequence across the row, ending with knit one stitch.
Row 5: Knit all stitches.
Repeat Rows 2 through 5 until the scrubber measures approximately 10 to 11 centimeters square. The alternating decrease placement creates a balanced lattice pattern with evenly spaced openings.
Bind off loosely to preserve elasticity.
Finishing and care notes
Weave in all ends securely. Lightly block the scrubber by wetting it and gently stretching it into a square shape. Allow it to air dry completely before use. This pattern benefits from regular machine washing, as cotton softens and improves with use.
Chevron Textured Scrubber Stack Pattern

Skill level and finished size
Skill level: Intermediate
Finished size: Approximately 9 to 10 centimeters square
Materials
Worsted weight cotton yarn in two contrasting colors, such as charcoal and natural cream
Knitting needles, 4.5 millimeters
Yarn needle
Scissors
Notes on construction
This scrubber features a bold chevron texture created through symmetrical decreases and increases. The raised ridges provide excellent scrubbing power, making this design ideal for tougher cleaning tasks. The pattern is worked flat and finished as a sturdy square scrubber that holds its shape well.
Step by step instructions
Establishing the chevron pattern
Cast on 30 stitches using a long tail cast on. Keep the cast on edge relaxed but firm.
Row 1: Knit all stitches.
Row 2: Knit two stitches together, knit eleven stitches, yarn over, knit one stitch, yarn over, knit eleven stitches, knit two stitches together.
Row 3: Knit all stitches.
Row 4: Knit two stitches together, knit ten stitches, yarn over, knit one stitch, yarn over, knit ten stitches, knit two stitches together.
Row 5: Knit all stitches.
Continue alternating decrease rows with plain knit rows, shifting the decrease and yarn over placement inward each time to form the chevron peak. Once the center point is reached, reverse the shaping by moving the increases outward again.
Continue until the scrubber measures approximately 9 to 10 centimeters square.
Bind off in knit stitches.
Colorwork and finishing
For a stacked chevron look, change colors every four rows. This highlights the ridge structure and gives the scrubber a bold, graphic appearance. Weave in ends neatly along the back side, following the ridge lines so they remain invisible from the front.
Lightly wet block the scrubber to even out the stitches and enhance the chevron definition. Allow it to dry flat before stacking or using.
Conclusion
These 5 Knit Cotton Dish Scrubbers Patterns offer a complete range of textures, shapes, and techniques for everyday kitchen use. From dense seed stitch to airy lattice mesh and bold chevron ridges, each design serves a distinct purpose while remaining customizable. Knitting your own cotton dish scrubbers is a practical way to reduce waste, refine stitch skills, and create long lasting household essentials. With thoughtful yarn selection, consistent tension, and careful finishing, these scrubbers will remain effective and attractive through repeated use and washing.


