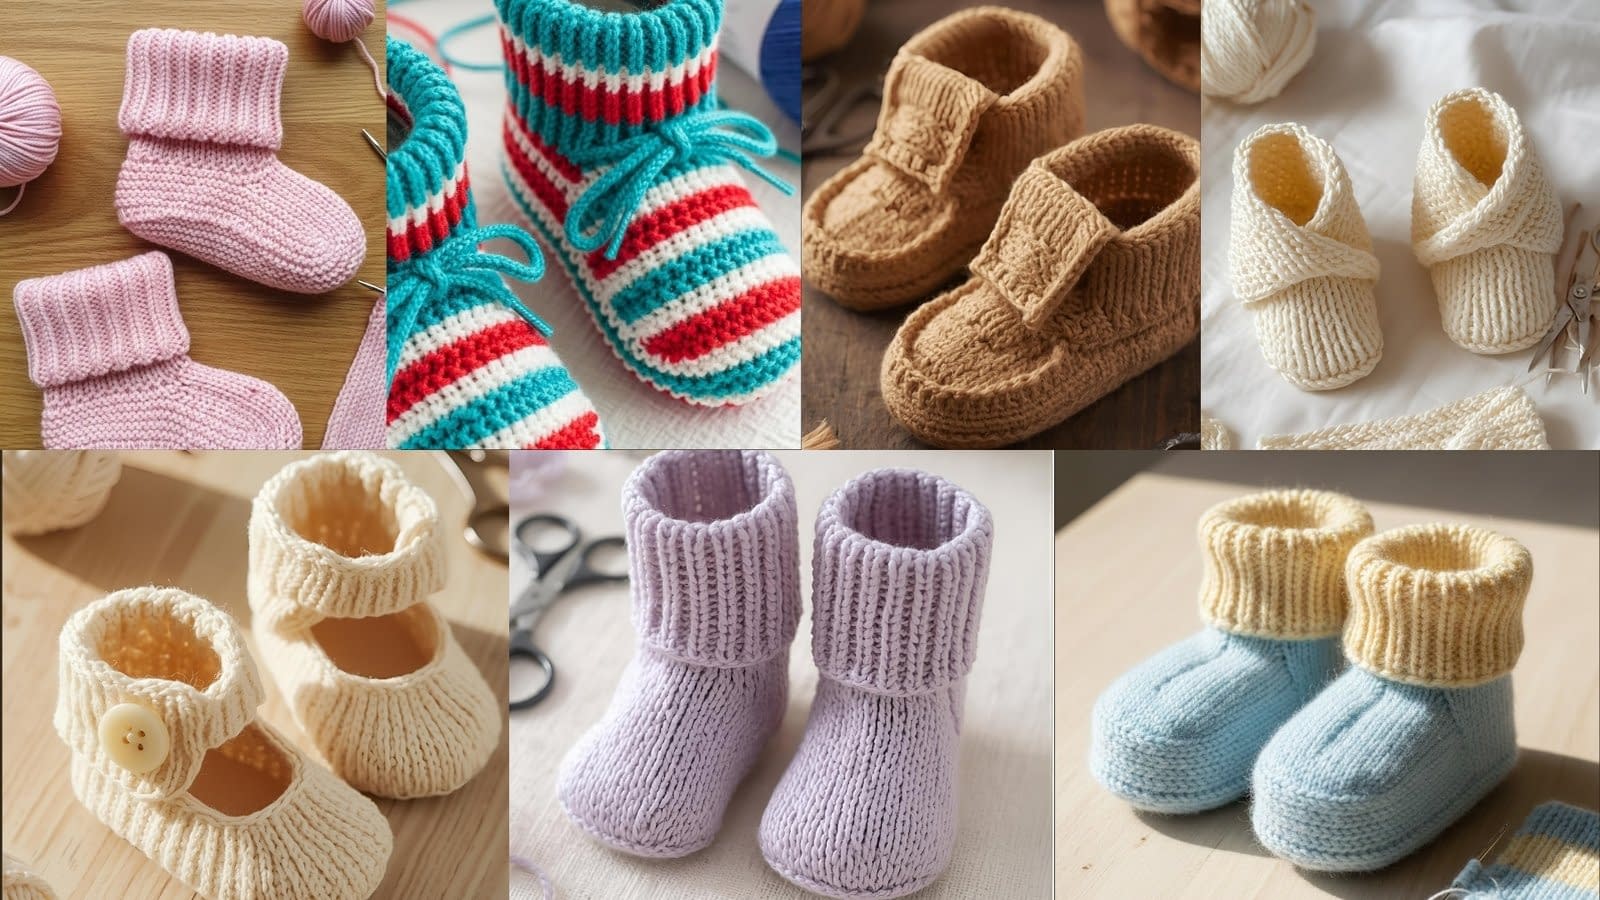
Knitting baby booties is one of the most cherished traditions in the crafting world. These tiny pieces are more than just adorable footwear — they represent warmth, care, and the personal touch that only handmade items can provide. Whether you are knitting for your own little one, preparing a thoughtful baby shower gift, or restocking your craft shop with new designs, exploring different Knit Baby Booties Patterns can help you refine your skills and expand your creative range.
In this guide, you will find 7 Knit Baby Booties Patterns crafted to be practical, beautiful, and suitable for knitters at various experience levels. Each pattern includes in-depth instructions with clear shaping, folding, seaming, and finishing techniques. You will learn not only how to knit the key pieces but also how to assemble them cleanly, where to make strategic folds, how to shape the instep, and how to finish the edges with precision. The goal is to give you full confidence while creating baby booties that are both functional and aesthetically pleasing.
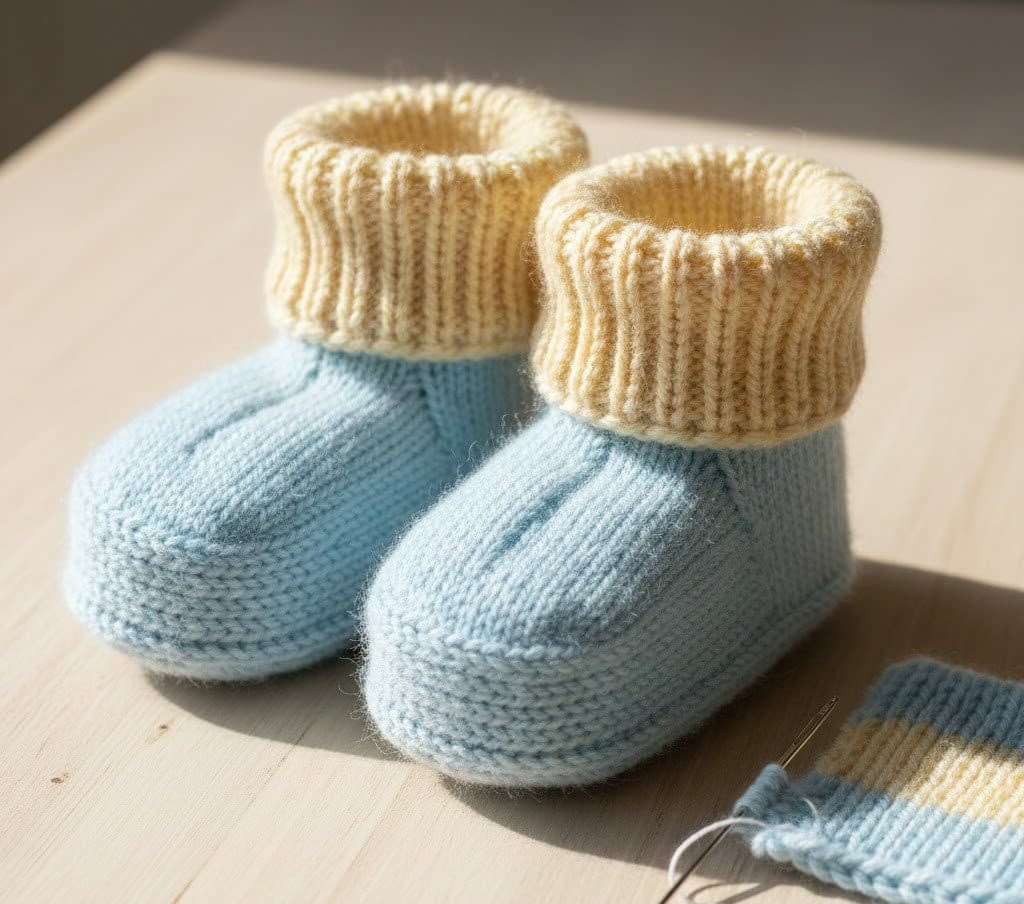
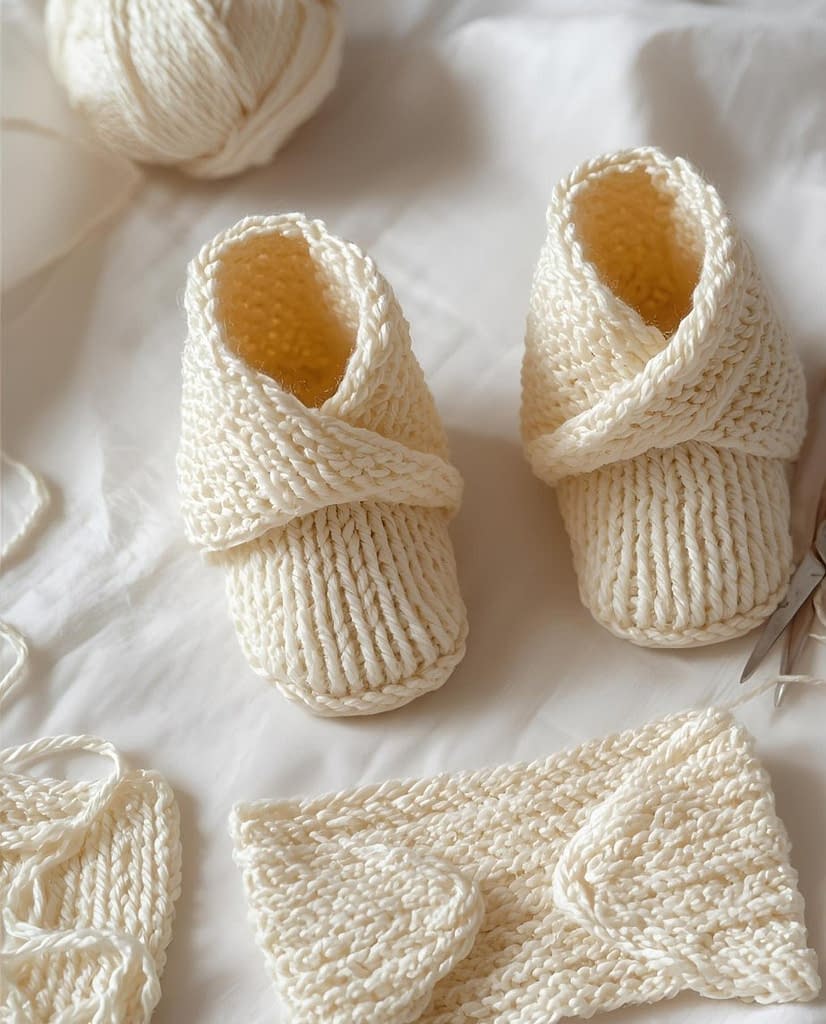
Pattern 1: Classic Folded Cuff Baby Booties
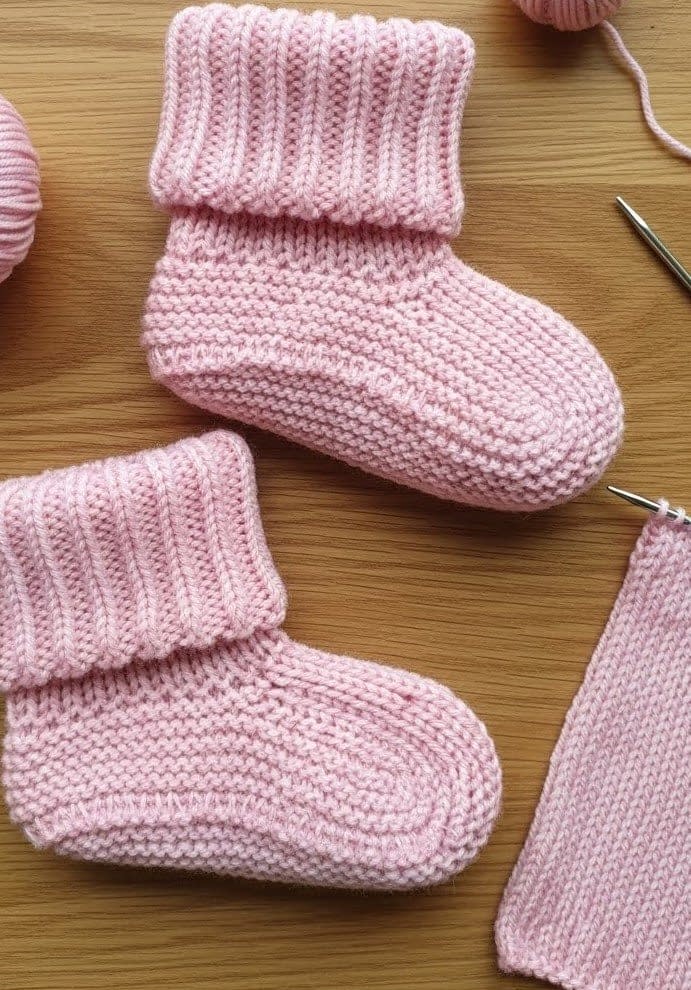
These classic folded cuff booties are soft, stretchy, and universally loved. The design features a ribbed cuff that folds neatly over the ankle, securing the bootie comfortably without elastic. With a clean, classic structure, this is an ideal starting point for beginners who want professional-looking results.
Materials
• Medium or light worsted-weight yarn
• US size 4 or 5 (3.5–3.75 mm) knitting needles
• Yarn needle
• Scissors
• Optional: stitch markers
Size
0–3 months (easily adjustable)
Construction Overview
These baby booties are constructed in three main sections: the cuff, the foot body, and the sole. The key characteristic is the folded cuff, which requires careful attention to the rib stitch and clean seaming to maintain elasticity.
Step-by-Step Instructions
Casting On
Cast on 32 stitches using a stretchy cast-on method. This ensures the cuff stretches comfortably around the baby’s ankle.
Creating the Ribbed Cuff
Knit 12 rows in a k1, p1 rib.
You should see a neat column structure forming as the knit stitches create raised ridges and the purl stitches sink back.
Folding the Cuff
When the ribbing reaches 12 rows, the fabric is long enough to create the fold-over cuff.
At this stage:
• Lay the ribbed section flat.
• Fold it downward toward you, as if forming a clean edge at the top.
• Press lightly with your fingers to define the fold.
You will seam this later, once the rest of the bootie is complete.
Beginning the Foot Body
Switch to stockinette stitch.
Knit 10 rows in stockinette, beginning with a knit row.
Shaping the Instep
The instep creates the rounded top of the baby bootie.
• Knit 10 stitches.
• Bind off the next 12 stitches.
• Knit remaining 10 stitches.
You now have two side flaps that will shape the top opening.
Work 6 rows of stockinette on each flap separately, increasing 1 stitch at the edge closest to the instep on every right-side row.
This helps taper the fabric inward so the top of the foot forms a rounded shape.
Rejoining for the Foot
Once both sides reach the same height, rejoin all stitches on one needle.
Knit 8 more rows evenly to form the sides of the bootie.
Shaping the Sole
To shape the sole:
• On the next row: k2tog at the beginning and end.
Repeat this decrease every other row until you reduce the stitch count to about half.
When the sole becomes narrow enough to form a rounded base, bind off loosely.
Assembly and Seaming
Folding
Lay the bootie flat with the wrong side facing you.
Fold it so that the top of the foot aligns with the sole seam.
Seaming
Using your yarn needle:
• Seam the back of the cuff first, ensuring the cuff fold remains even.
• Seam down the heel, aligning edges carefully.
• Seam the bottom of the sole, tightening any loose gaps.
Avoid pulling the yarn too tight — you want smooth, flexible seams.
Finishing
Turn the bootie right-side out and fold the cuff neatly once again.
Shape with your fingers to perfect the curve of the instep.
Pattern 2: Seamless Top-Down Baby Booties
This design is great for knitters who prefer minimal seaming. Knitted in the round from the cuff down to the toe, these booties offer a smooth finish and excellent stretch.
Materials
• Soft DK yarn
• Double-pointed needles (DPNs) size 3 or 4
• Stitch markers
• Yarn needle
Construction Overview
This pattern creates a continuous tube from the cuff downward. The only shaping involves instep decreases and final toe shaping. No lateral seams, no folding-required instep pieces, and a very clean professional finish.
Step-by-Step Instructions
Casting On
Cast on 36 stitches and divide evenly among your DPNs. Place a stitch marker at the beginning of the round.
Working the Cuff
Work 10 rounds in k2, p2 rib.
The rib should be snug but stretchy, forming a comfortable ankle grip.
Transition to Stockinette
Switch to knitting every round (stockinette in the round).
Knit 12 rounds.
Creating the Instep
This part shapes the top of the bootie.
Round 1:
• Knit 12 stitches.
• Place 12 stitches on a stitch holder.
• Knit remaining 12 stitches.
You will work across the 24 active stitches to shape the top.
Knit 6 rows flat on these stitches, decreasing 1 stitch on each side every right-side row to taper the fabric.
Rejoining for the Foot
Slip stitches from the holder back onto needles and knit across smoothly to rejoin all stitches.
Knit 8 rounds evenly.
Shaping the Toe
Decrease round:
• k2tog every 4 stitches.
Knit 1 round plain.
Repeat decreases until about 10 stitches remain.
Cut yarn, thread through remaining stitches using a yarn needle, and pull tight to close the toe.
Finishing
Weave in ends.
Fold the cuff slightly if you want a tidier edge.
Shape gently with your fingers to define the toe and instep.
Pattern 3: Button-Strap Mary Jane Baby Booties
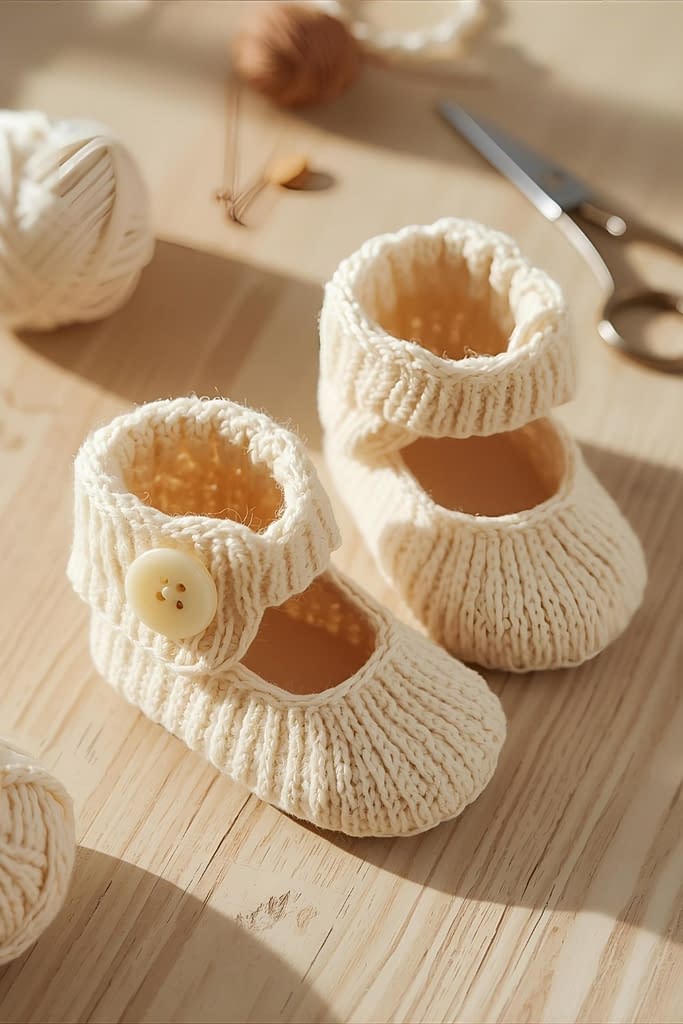
This adorable style mimics classic Mary Jane shoes with a tiny buttoned strap across the foot. These booties look elegant, secure well on the foot, and make wonderful gifts.
Materials
• Worsted weight yarn
• Size 4 or 5 needles (straight needles recommended)
• Small button (0.5–1 cm)
• Yarn needle
• Scissors
Construction Overview
This pattern is knit flat and seamed later. The strap is added by extending one side of the bootie top and folding it across the instep. Careful folding and seaming are essential to make the strap sit correctly.
Step-by-Step Instructions
Casting On
Cast on 28 stitches.
Forming the Ribbed Edge
Knit 4 rows in k1, p1 rib to create a neat edge around the ankle.
Knitting the Body
Switch to stockinette stitch.
Knit 12 rows.
Shaping the Instep
Row 1: Knit 10 stitches, bind off 8 stitches, knit remaining 10 stitches.
Work 6 rows on each flap separately just like in Pattern 1, increasing 1 stitch at the inside edge every other row.
This helps create the rounded Mary Jane shape.
Creating the Strap
Choose the left flap to extend the strap from.
Knit an additional 14 rows on this flap.
This extended piece forms the strap.
At the end of the extension, create a buttonhole by binding off 2 stitches in the center, then continuing for 2 more rows and casting those stitches back on.
Bind off this flap once the strap length is complete.
The other flap remains as the opposite side of the shoe opening.
Rejoining and Knitting the Foot
Rejoin stitches from both flaps and knit 8 rows in stockinette to form the side walls.
Shaping the Sole
Decrease at the beginning and end of every second row until about 12 stitches remain. Bind off loosely.
Assembly and Seaming
Folding
Lay the bootie wrong side up.
Fold the back edges together to form the heel.
Flatten the sole area so the edges align neatly.
Seaming
• Sew the back seam first using mattress stitch.
• Sew the sole seam, shaping it slightly curved.
• Fold the Mary Jane strap across the instep and position it where it sits naturally.
• Sew the non-button side of the strap base securely.
• Attach the button on the opposite flap, ensuring the buttonhole aligns perfectly.
Finishing
Weave in all yarn ends.
Turn the bootie right-side out.
Shape lightly with your fingers so the strap arches gracefully and the toe curves cleanly.
Pattern 4: Ribbed Ankle Booties With Shaped Toe

These booties provide a comfortable fit thanks to their ribbed ankle section, which keeps the bootie securely in place without elastic. The shaped toe gives the design a rounded, professionally constructed look. This pattern is ideal for knitters who want something slightly more advanced than a basic bootie but still easy enough for confident beginners.
Materials
• Soft baby yarn (DK or light worsted)
• Size 4 knitting needles
• Yarn needle
• Scissors
• Optional: stitch markers
Construction Overview
This bootie is knit flat, starting from the ankle rib, moving into the foot body, and finishing with a shaped toe. You will then fold the piece together and seam the back and sole. It’s important to maintain even tension so the toe shaping looks smooth and not pointed.
Step-by-Step Instructions
Casting On
Cast on 34 stitches using a stretchy or long-tail cast-on.
Creating the Ribbed Ankle
Work 14 rows in k1, p1 rib.
The rib should measure approximately 1.5 inches and feel firm but flexible.
Shaping the Transition Row
To prevent a sharp angle between the rib and foot section:
• Knit 1 row plain across all stitches.
This row smooths the transition before switching to stockinette.
Knitting the Foot Body
Work in stockinette for 14 rows.
By now, the piece resembles a long rectangle with ribbing on one end.
Shaping the Toe
The toe shape is created using gradual decreases.
Row 1: k2tog at the beginning, knit to last 2 stitches, k2tog
Row 2: purl across
Repeat Rows 1 and 2 until you have 14 stitches remaining.
This creates a rounded, tapered toe instead of a flat, boxy finish.
Bind off loosely.
Assembly and Seaming
Folding
Lay the piece with the wrong side facing you.
Fold the rib section upward, then fold the rest of the foot fabric over so the toe aligns with the bottom edge.
Seaming
• Seam the back of the ribbed ankle section using mattress stitch.
• Seam down the heel, ensuring the stitches line up cleanly.
• Seam the sole carefully; because the toe is shaped, guide the edges so they form a smooth curve rather than tight angles.
Finishing
Turn the bootie right-side out.
Use your fingers to round the toe, smoothing any slight points.
Fold the ribbed ankle down slightly or leave it upright depending on preference.
Pattern 5: Two-Color Garter Ridge Booties
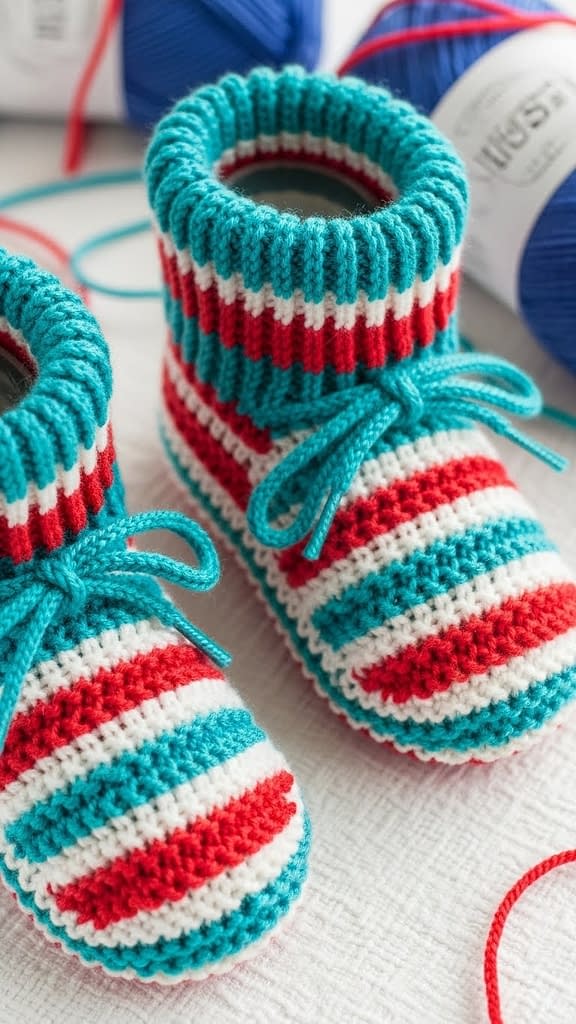
This design is perfect for knitters who enjoy adding color without complicated techniques. The bootie features alternating garter and stockinette ridges, giving it texture and visual depth. With a two-color palette, the pattern becomes eye-catching without requiring fair isle or stranded work.
Materials
• Two contrasting colors of baby yarn
• Size 5 needles
• Yarn needle
• Scissors
• Optional: small bow or button for decoration
Construction Overview
These booties are knitted flat, beginning with the cuff, then transitioning into garter-and-stockinette stripes, finishing with a gathered toe. The folding and seaming steps are straightforward but require careful alignment of color stripes.
Step-by-Step Instructions
Casting On
With Color A, cast on 30 stitches.
Making the Cuff
Work 10 rows in Color A using k2, p2 rib.
Switch to Color B.
Creating Garter Ridges
Row 1 (Color B): Knit across
Row 2: Knit across
Switch to Color A.
Creating Stockinette Ridges
Row 3 (Color A): Knit
Row 4: Purl
Repeat Rows 1–4 until you have completed 5 garter ridges and 5 stockinette ridges.
Always carry the yarn up the side neatly so you don’t have to cut and rejoin constantly.
Shaping the Foot
Switch to main color (Color A) for the shaping.
Knit 8 rows plain.
Gathering the Toe
Cut a long tail.
Using a yarn needle, thread the yarn through all stitches on the needle.
Pull firmly to gather the toe, but not so tight that it puckers sharply.
Tie securely.
Assembly and Seaming
Folding
Fold the bootie lengthwise with right sides together.
Make sure the garter and stockinette stripes align; mismatched stripes create a noticeable seam.
Seaming
• Sew the top of the foot down to the gathered toe first.
• Then seam the back of the cuff and ankle.
• Shape with your fingers to ensure the toe curves nicely.
Optional Decoration
You may sew a tiny bow or button at the center of the cuff—but avoid sharp decorations for newborns.
Finishing
Turn right-side out and lightly stretch the ridges to enhance the alternating texture.
Pattern 6: Moccasin-Style Knit Baby Booties
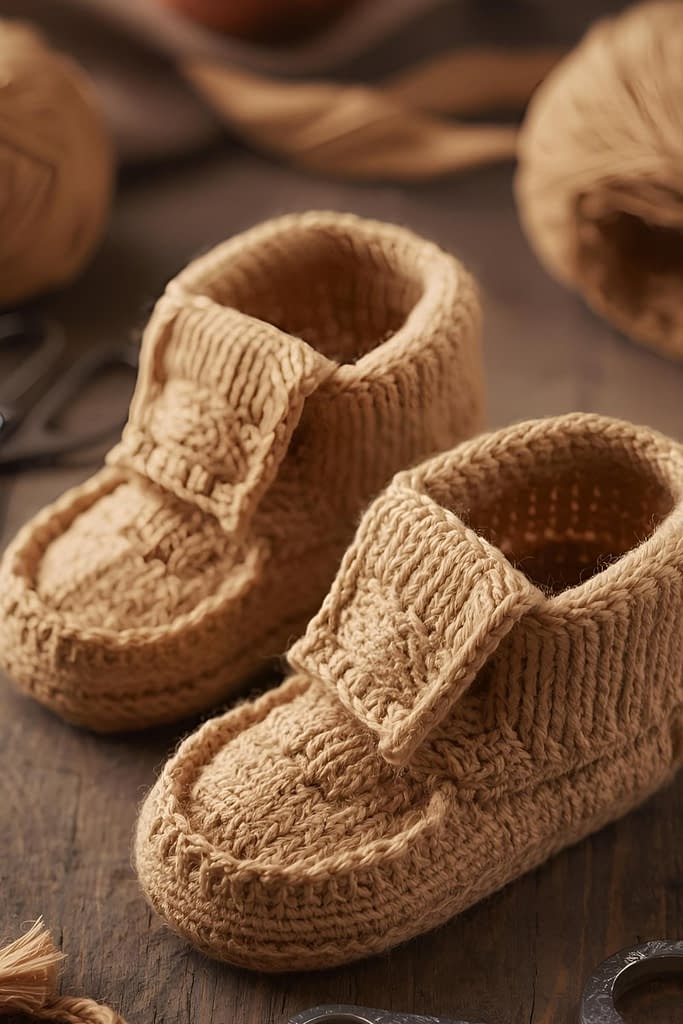
This pattern recreates the look of traditional moccasins with a raised seam around the toe area. These booties are warm, structured, and visually unique. They require more folding and assembly steps than the other patterns and are perfect for knitters who want an artisanal look.
Materials
• Worsted or bulky-weight yarn (soft, not scratchy)
• Size 6 needles
• Yarn needle
• Scissors
Construction Overview
A single long piece forms the upper body of the moccasin, while a separate oval sole is knitted and attached later. This requires precise folding and seaming to create the raised moccasin shape.
Step-by-Step Instructions
Making the Upper Piece
Cast on 24 stitches.
Forming the Wall of the Moccasin
Knit 20 rows in stockinette.
These rows will become the upper walls of the moccasin.
Creating the Tongue
Continue knitting on the center 10 stitches only.
Place the remaining 7 stitches on each side onto stitch holders.
Knit 12 rows on the center 10 stitches.
This forms the front flap, or “tongue,” of the moccasin.
Bind off.
Creating the Side Panels
Return to the side stitches.
Left side:
• Pick up the 7 stitches
• Knit 12 rows in stockinette
Bind off.
Right side:
Repeat the same steps.
Each side panel will fold in and wrap partially over the tongue.
Making the Sole
Cast on 12 stitches.
Knit 4 rows.
Increase 1 stitch at the beginning and end of the next 2 knit rows to shape the oval.
Knit 6 rows plain.
Decrease 1 stitch at the beginning and end of the next 2 rows.
Knit 2 rows.
Bind off.
Assembly and Seaming
Folding
Place the upper bootie piece right-side down.
Fold the tongue downward.
Bring both side panels inward so they meet over the tongue—this creates the moccasin top shape.
Place the sole directly beneath the folded upper piece.
Seaming
Using your yarn needle:
• Sew the side panels to the tongue, but only halfway up, leaving some room for movement.
• Sew the edges of the upper to the outer rim of the sole using whip stitch or overcast stitch.
This seam should be intentionally raised to mimic traditional moccasin edging.
Finishing
Turn right-side out, shape the toe area so it forms the rounded moccasin front.
Pattern 7: Wrap-Around Kimono Baby Booties
These kimono-style baby booties feature a wrap-around front panel that folds and overlaps across the top of the foot. They are incredibly secure and visually elegant, resembling tiny wrap-style shoes. The construction is unique and involves significant folding, careful shaping, and precise seaming.
Materials
• Soft acrylic or cotton blend yarn
• Size 4 needles
• Yarn needle
• Scissors
• Optional: small soft button or crochet tie
Construction Overview
The bootie is knit from the sole upward. Instead of a vertically built upper section, the piece widens at the sides to create long flaps that wrap around the front of the foot like a kimono.
Step-by-Step Instructions
Casting On
Cast on 26 stitches.
Forming the Sole
Knit 6 rows in garter stitch.
This provides firmness and structure.
Expanding the Side Walls
Switch to stockinette.
Row 1: k1, m1, knit to last stitch, m1, k1
Row 2: purl
Repeat these two rows 4 more times until you have 36 stitches.
Building the Body
Knit 12 rows in stockinette.
Creating the Wrap Panels
Now you divide the stitches into three sections:
• Left Panel: 12 stitches
• Center: 12 stitches
• Right Panel: 12 stitches
Work each panel separately:
Left Panel:
• Knit 10 rows
Bind off and place aside.
Right Panel:
• Knit 10 rows
Bind off.
Center Panel:
Knit 6 more rows and bind off.
These three pieces will form the wrap structure.
Assembly and Folding
Folding
Lay the piece wrong-side up.
Place the center panel flat.
Fold the left panel across the center panel, covering about two-thirds of it.
Then fold the right panel over the left panel, creating a layered wrap effect.
Seaming
• Seam the heel first by folding up the back edges and sewing them together.
• Sew the side edges of each wrap panel to the sole sides.
Be careful not to sew the overlapping top edges together—you want the wrap front to remain functional.
Optional Closure
You may add:
• A tiny soft button
• A crochet tie
• A decorative knot
If using a button, place it on the right panel and create a small yarn loop on the left panel for closure. Avoid anything hard or sharp for newborns.
Finishing
Turn the entire bootie right-side out.
Smooth the wrap layers so they overlap neatly and sit flat across the top of the foot.
Conclusion
Knitting baby booties is one of those rare projects where practicality, creativity, and sentiment all come together. These 7 Knit Baby Booties Patterns offer a wide range of styles—simple, textured, classic, and uniquely shaped—so you can choose the perfect design for any baby and any occasion. Whether you enjoy quick, beginner-friendly knits or more structured constructions with folding and seaming details, each pattern gives you the chance to learn something new while creating something soft, warm, and meaningful. No matter which design you start with, the joy of crafting tiny handmade booties never fades, and each pair becomes a small, heartfelt gift made with care and intention.