
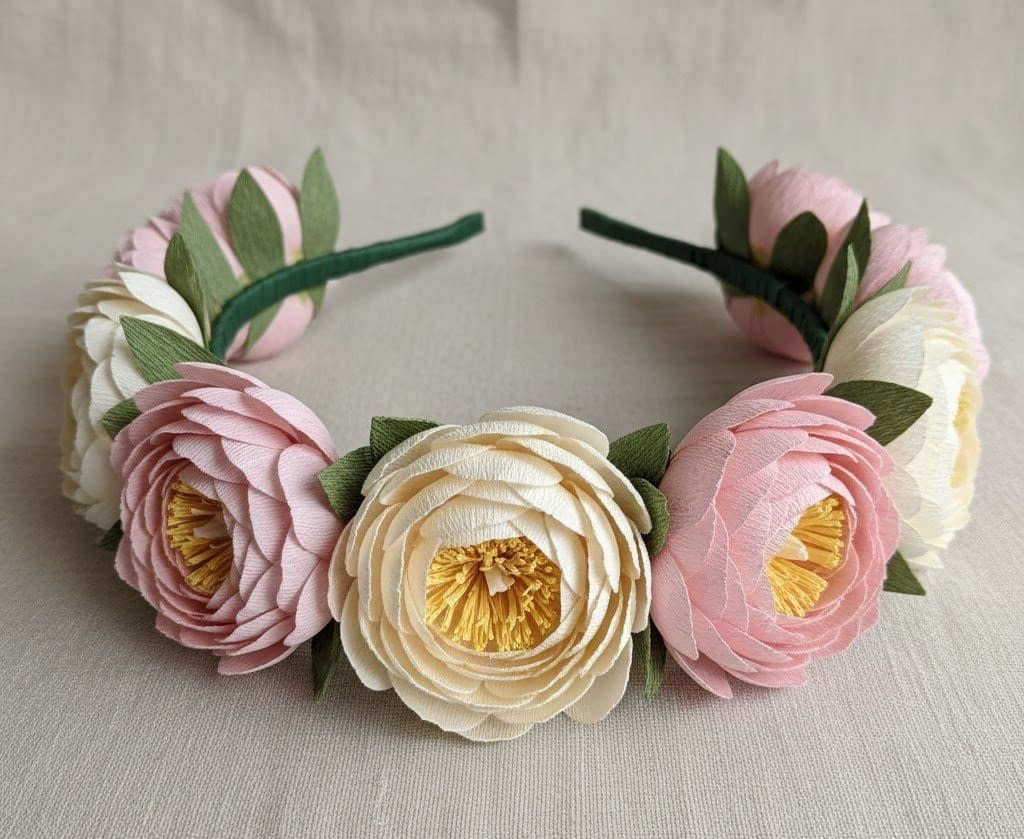
Paper flower crowns are one of those crafts that never lose their charm. You’re preparing for a spring festival, a whimsical photoshoot, a birthday party, or just want to explore your creativity, making a paper flower crown allows you to design something truly personal and timeless. The best part? You can create them with simple materials—paper, glue, and a bit of patience.
In this 5 Paper Flower Crown Tutorial, you’ll learn five different crown styles, each featuring distinct flower types, color combinations, and techniques. Every tutorial includes detailed, easy-to-follow steps—from cutting and shaping petals to assembling and arranging them on your crown base. You don’t need to be an expert crafter—just follow the steps carefully and enjoy the process.
Materials You’ll Need
Before beginning, make sure you have all your tools and materials ready. Having everything nearby helps the process flow smoothly.
Essential Materials:
- Colored cardstock or crepe paper: Choose sturdy paper for structure and lighter-weight paper for delicate petals.
- Scissors: Fine-tipped scissors help with clean petal edges.
- Glue gun or craft glue: Use hot glue for fast drying or craft glue for more precision.
- Floral wire or headband base: This will serve as the main structure for your crown.
- Floral tape: To secure stems and cover wires.
- Pencil: For tracing petal shapes before cutting.
- Ruler: Helps with precise measurements.
- Optional embellishments: Glitter, beads, rhinestones, or fabric leaves.
Basic Techniques: Folding, Cutting, and Shaping Paper Flowers
Before diving into the specific tutorials, it’s important to master some basic paper flower techniques. These skills will be used across all five designs.
Folding
- Start by cutting your chosen paper into squares or rectangles depending on the flower pattern.
- Fold the paper once diagonally to form a triangle. Smooth out the crease with your finger or the edge of a ruler.
- Fold again in half or in thirds, depending on the flower style, to create symmetry when cutting.
- For layered flowers like roses or peonies, keep several folded layers ready at once.
Cutting
- Draw or trace petal shapes directly onto the folded paper.
- Always cut slowly and precisely. If you’re cutting through multiple layers, make sure your scissors are sharp to avoid tearing.
- Round the edges for soft petals (roses, peonies) and cut pointed ends for flowers like daisies or hibiscus.
- Unfold gently and flatten each layer with your palm.
Shaping
- Use your fingers or a thin pencil to curl the petal edges outward for a natural look.
- For a softer curve, roll the petal tips lightly around the pencil, then release.
- For volume, gently press the center of each petal inward using the round end of a pen or small ball tool.
Gluing
- Always apply glue sparingly; a small bead at the petal base is usually enough.
- Hold each glued section for a few seconds until it sets.
- For layered flowers, glue smaller petals in the center of larger ones to create a realistic depth effect.
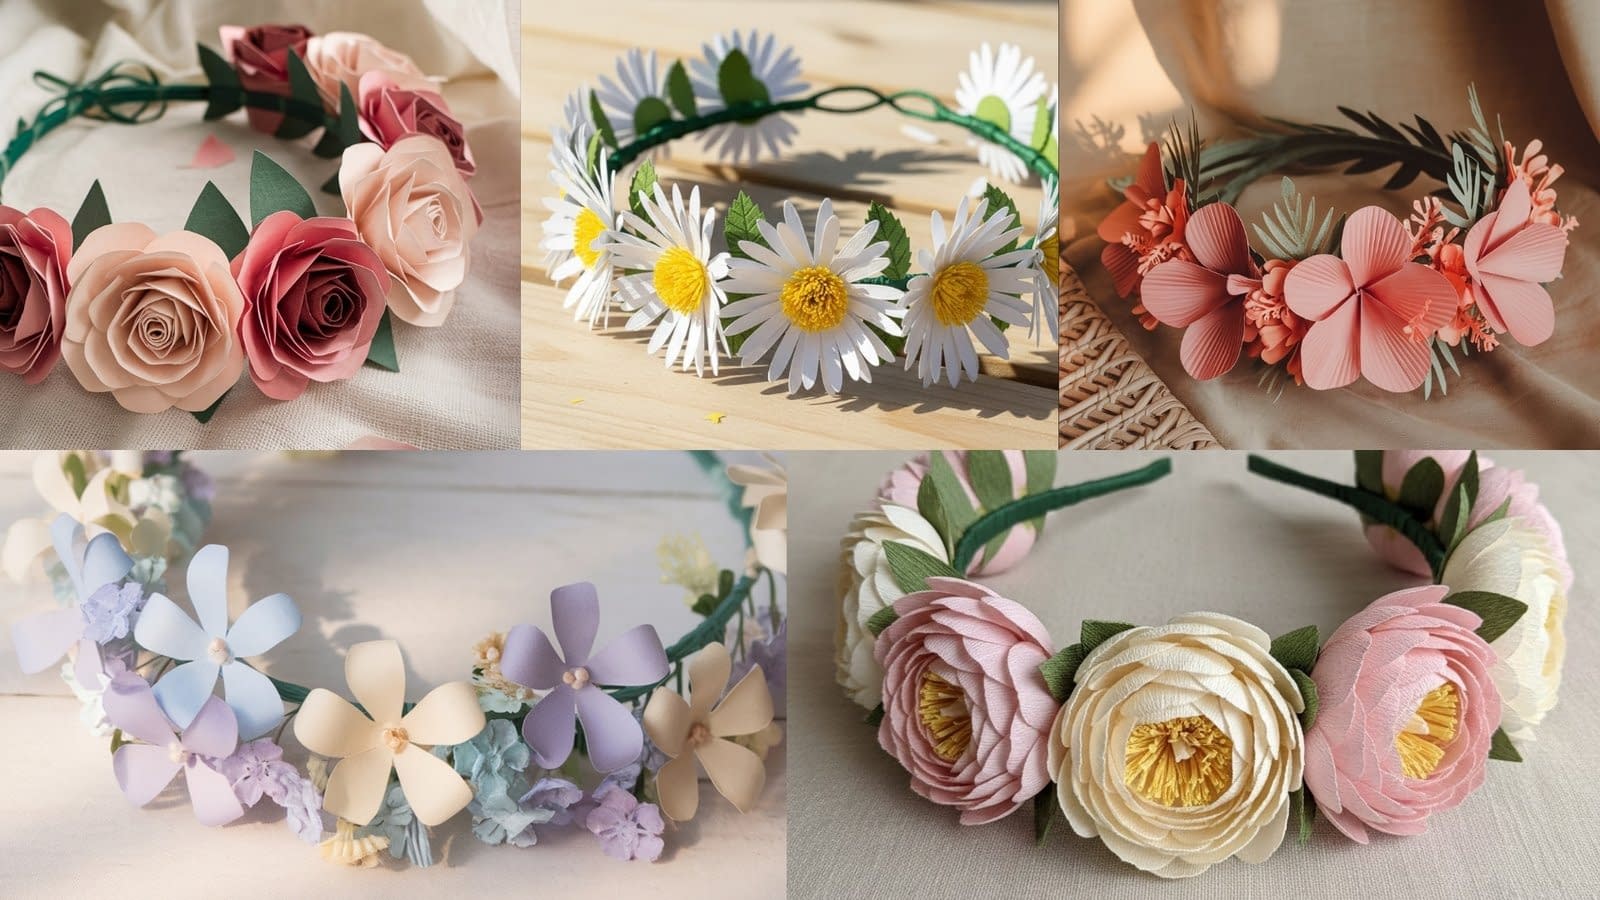
Tutorial 1: Classic Rose Paper Flower Crown
Roses are timeless, romantic, and ideal for any event. This crown combines soft pink, red, and ivory roses with delicate leaves for an elegant look.
Step-by-Step Instructions
- Prepare Your Petal Templates:
- Cut out 3 different petal sizes (small, medium, large). Each flower will need about 3 large petals, 4 medium, and 5–6 small.
- Use a pencil to trace them onto your chosen paper color and cut carefully.
- Shape the Petals:
- Curl the edges of each petal outward using a pencil or wooden stick.
- Lightly pinch the bottom edge of each petal to give it a slight cup shape.
- Create the Rose Center:
- Take one small petal and roll it tightly to form a bud. Secure with glue.
- Wrap another small petal around the bud, slightly overlapping the edges, and glue at the base. Continue layering 3–4 more petals around the center.
- Build the Outer Layers:
- Begin adding medium petals around the inner bud, alternating their placement to fill gaps.
- Finally, add large petals in the outermost layer, gluing only at the base to allow open, natural-looking edges.
- Attach to the Crown Base:
- Cut a length of floral wire or use a plain headband.
- Wrap the base with floral tape.
- Arrange 5–7 roses along the band, gluing or wiring them securely. Add paper leaves between flowers for contrast.
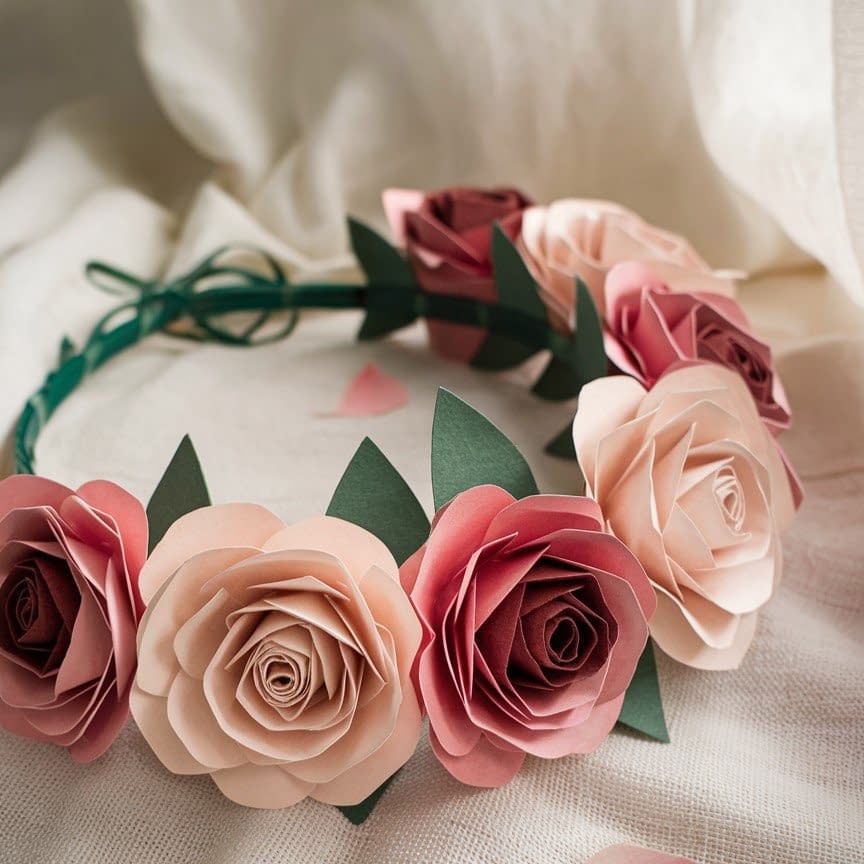
Tutorial 2: Daisy Chain Paper Flower Crown
This cheerful daisy crown brings a fresh, youthful charm—perfect for summer festivals or casual events.
Step-by-Step Instructions
- Cut Petals:
- Use white paper. Cut thin, long petals with slightly rounded tips. Each daisy needs about 12–14 petals.
- Cut small yellow circles for the centers.
- Shape the Petals:
- Gently curve each petal upward by running your thumb and forefinger along its length.
- Slightly press the base to give it dimension.
- Assemble the Daisies:
- Glue petals around the edge of the yellow center, overlapping slightly.
- Add a second layer of petals underneath for a fuller look.
- Create the Chain:
- Wrap floral wire with green floral tape.
- Attach daisies one by one along the length, spacing them evenly.
- Add small green leaves between each daisy for a natural effect.
- Finishing Touches:
- Once all flowers are attached, bend the crown into a circle and twist wire ends together.
- Adjust flower angles for balance and symmetry.
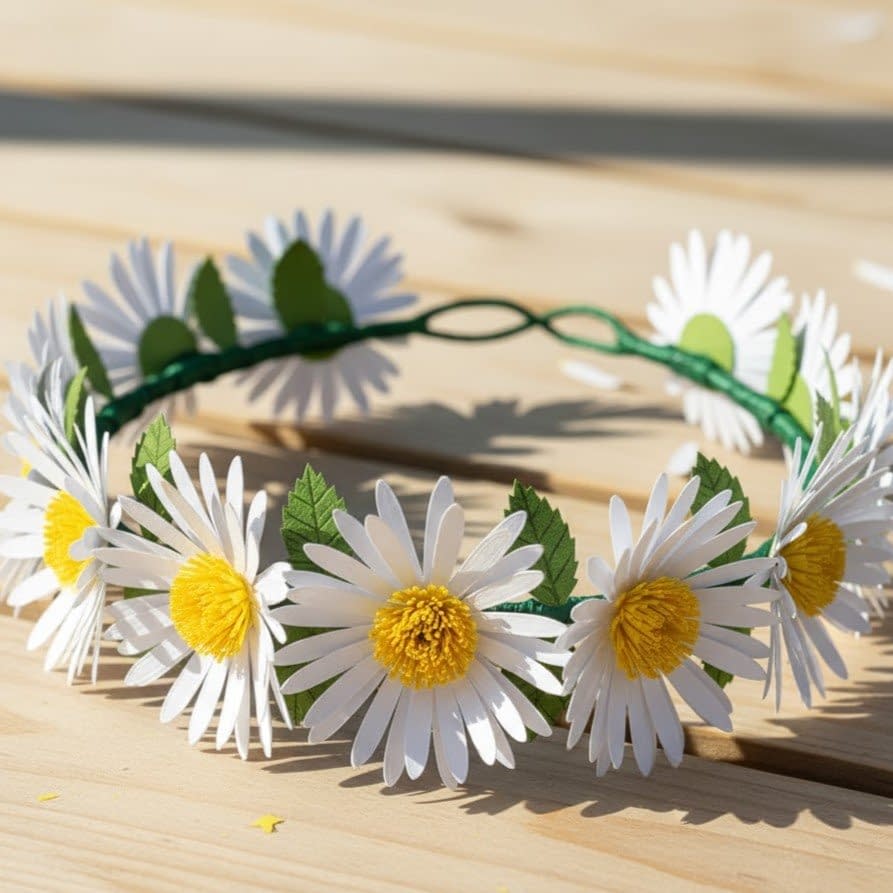
Tutorial 3: Peony and Leaf Paper Flower Crown
Peonies are lush, full blooms that add elegance and volume to your paper crown.
Step-by-Step Instructions
- Cutting Petals:
- Use pastel pink or blush-colored crepe paper. Cut petal shapes about 2 inches wide at the top and narrow at the base. You’ll need 8–10 petals per flower.
- Folding and Shaping:
- Stretch the paper gently at the center to create a natural curve.
- Curl the top edges outward with a pencil.
- Creating the Flower Center:
- Cut a narrow strip of yellow paper (about 1 inch wide).
- Fringe one edge by cutting small slits along its length. Roll it tightly and glue to form stamens.
- Assembling the Peony:
- Glue the smallest petals around the stamen center, overlapping slightly.
- Continue adding petals outward, allowing the larger ones to open up more for a full bloom.
- Adding Leaves and Mounting:
- Cut medium-green leaves with pointed tips and slight vein details.
- Glue leaves behind the flowers before attaching to the crown base.
- Combine 3–5 peonies per crown, spacing them evenly.
Tutorial 4: Tropical Hibiscus Paper Flower Crown
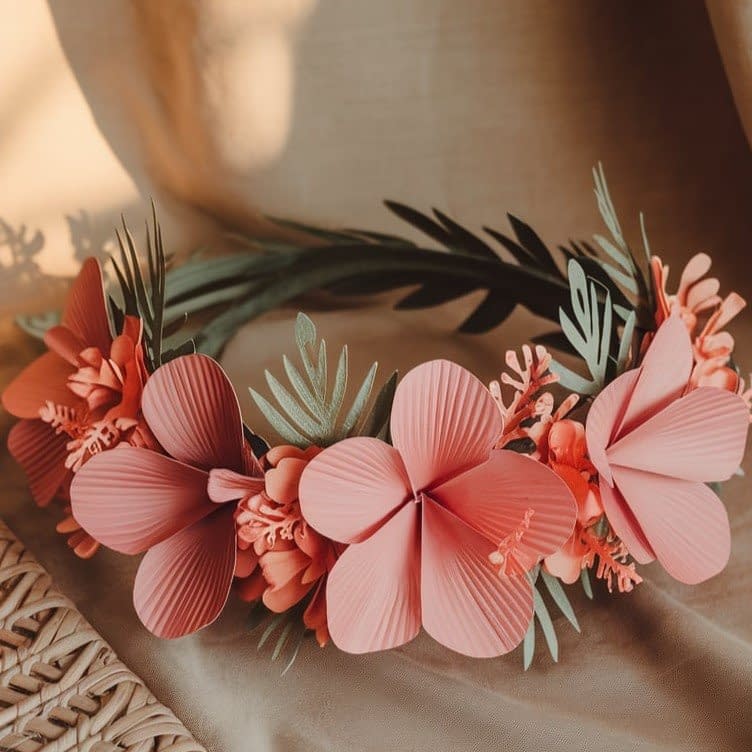
For a vibrant, summer-inspired crown, hibiscus flowers offer bold colors and dramatic shapes.
Step-by-Step Instructions
- Prepare Templates:
- Use bright red, orange, or yellow paper.
- Draw large petals with ruffled edges—each flower will need 5 petals.
- Cut and Curl:
- Cut out the petals and gently curl the edges outward.
- Slightly crease each petal down the middle for texture.
- Make the Stamen:
- Roll a thin strip of yellow paper into a tube.
- Add small dots of glue on the tip and sprinkle with gold glitter or tiny paper dots for pollen.
- Assemble the Flower:
- Glue petals together in a circular arrangement.
- Insert the stamen through the center and secure it underneath.
- Arrange on the Crown:
- Attach 4–6 hibiscus flowers onto the base, alternating colors for contrast.
- Add long, thin green leaves in between to complete the tropical vibe.
Tutorial 5: Minimalist Wildflower Paper Crown
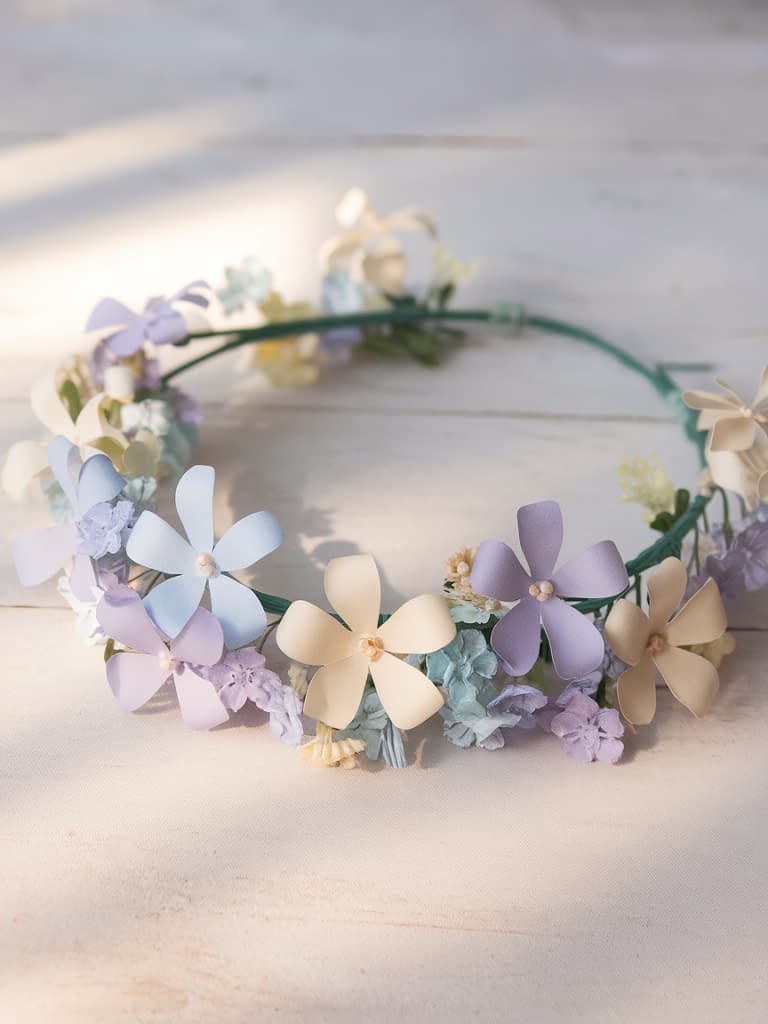
This design focuses on simplicity—tiny flowers, soft hues, and a natural, airy look.
Step-by-Step Instructions
- Cutting Small Flowers:
- Use assorted pastel-colored papers (light blue, lavender, cream).
- Cut small five-petal flowers about 1 inch across.
- Forming Details:
- Press the center of each flower with a pen cap to lift the petals slightly.
- Add a small bead or paper dot in the center for detail.
- Assembly:
- Wrap your floral wire with green floral tape.
- Glue or twist clusters of small flowers along the base, mixing colors randomly.
- Leave some sections with just greenery for a soft, balanced look.
How to Adjust Size and Fit
- To make smaller crowns: Reduce the number of flowers or use thinner wire.
- For children: Measure the head circumference first and trim excess wire before wrapping the ends.
- For larger or full-head crowns: Overlap flowers more tightly and add an extra layer along the back half of the crown.
Decoration Tips and Variations
- Add Texture: Mix different paper types—use crepe for softness and cardstock for structure.
- Use Paint or Ink: Lightly brush the edges of petals with watercolor for dimension.
- Add Sparkle: Apply a fine layer of glue and dust with shimmer powder for a delicate sheen.
- Seasonal Themes:
- Spring: Pastel tones and daisies.
- Summer: Bright hibiscus and tropical leaves.
- Autumn: Deep reds, oranges, and golds.
- Winter: White roses and silver accents.
How to Store and Preserve Your Paper Flower Crowns
- Avoid Moisture: Keep your crowns in a dry place; humidity can warp paper.
- Dust Gently: Use a soft brush to remove dust buildup.
- Store Flat: If not in use, store the crown flat in a box lined with tissue paper.
- Transport Carefully: When carrying, place it in a box slightly larger than the crown to prevent crushing.
Final Thoughts
Creating your own paper flower crown is a deeply satisfying and creative experience. With the 5 Paper Flower Crown Tutorial, you now have the foundation to make a variety of floral designs—each unique in shape, texture, and personality. From romantic roses to lively hibiscus blooms, every style tells a story.
Once you master these methods, feel free to experiment—combine different flower types, adjust colors, or even add dried leaves for a mixed-material effect. Handmade crowns aren’t just accessories; they’re personal expressions of creativity, patience, and art. Whether for yourself or as a thoughtful gift, your paper flower crown will always carry the warmth of handmade craftsmanship.


