
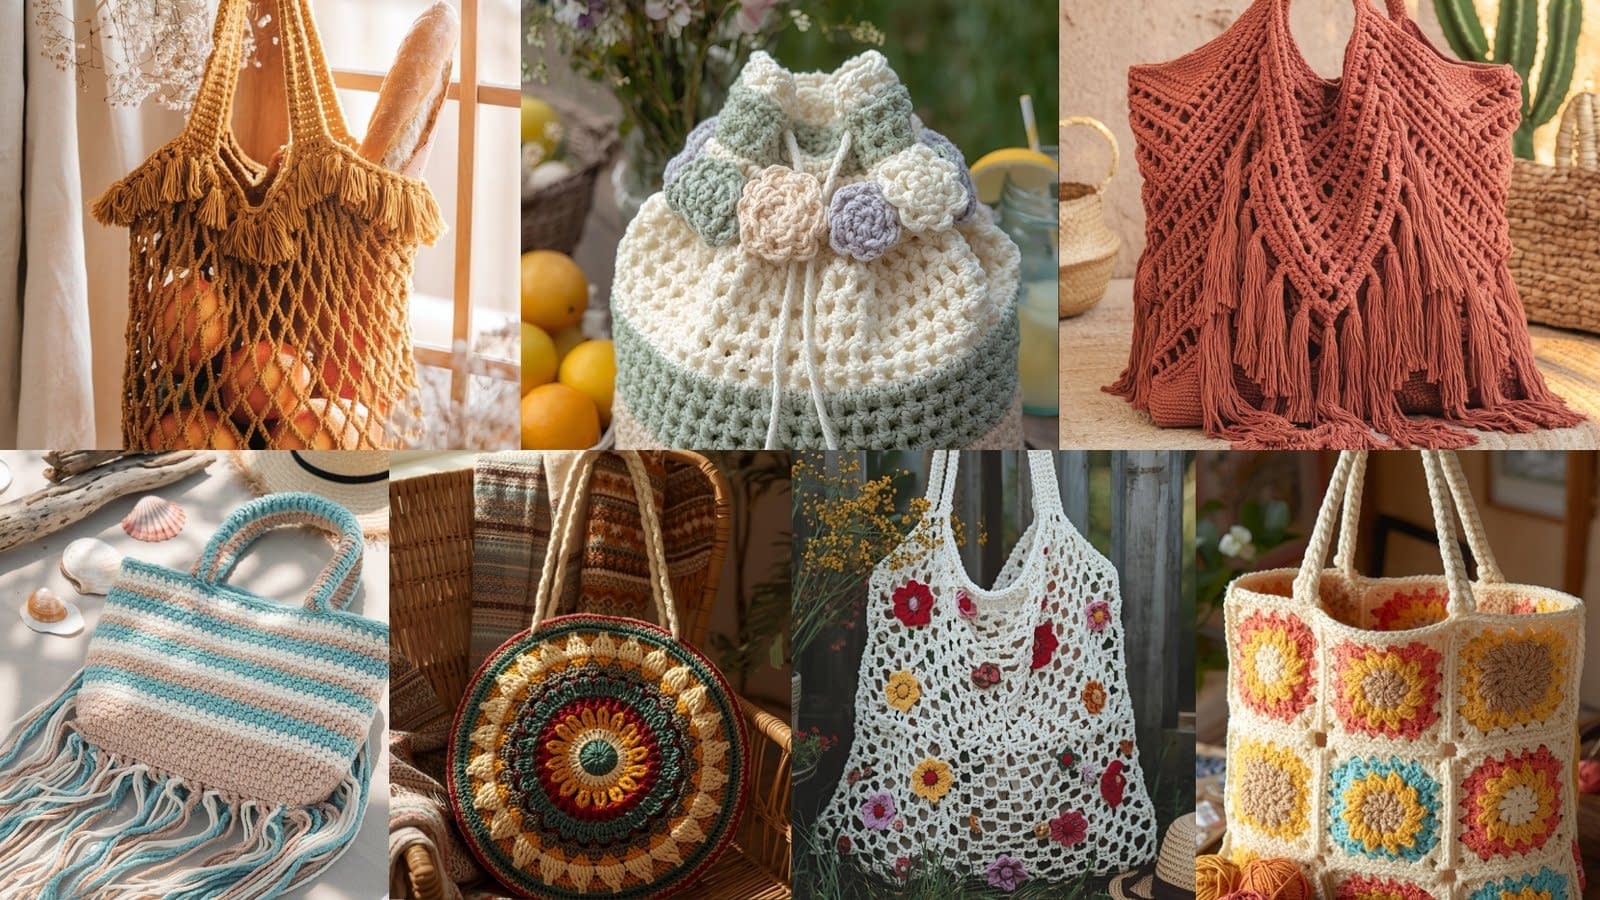
Boho-style crochet market bags are more than just a trendy accessory—they are a practical, eco-friendly, and beautiful way to express your creativity. Whether you are heading to a local market, spending the day at the beach, or just running errands, a crochet market bag offers the perfect blend of function and handmade charm.
In this post, we will explore 7 Boho Crochet Market Bag Patterns, each offering a unique design and texture that showcases the relaxed yet artistic vibe of the bohemian aesthetic. From simple mesh styles perfect for beginners to more intricate lace and textured stitch combinations for advanced crocheters, every pattern here is designed to be clear, detailed, and thoroughly explained.
Every tutorial below includes step-by-step written instructions, material lists, notes on yarn type and hook size, and optional variations to help you personalize your bag. Each pattern is designed to be practical, lightweight, and durable—so you can actually use these bags daily while showing off your crochet skills.
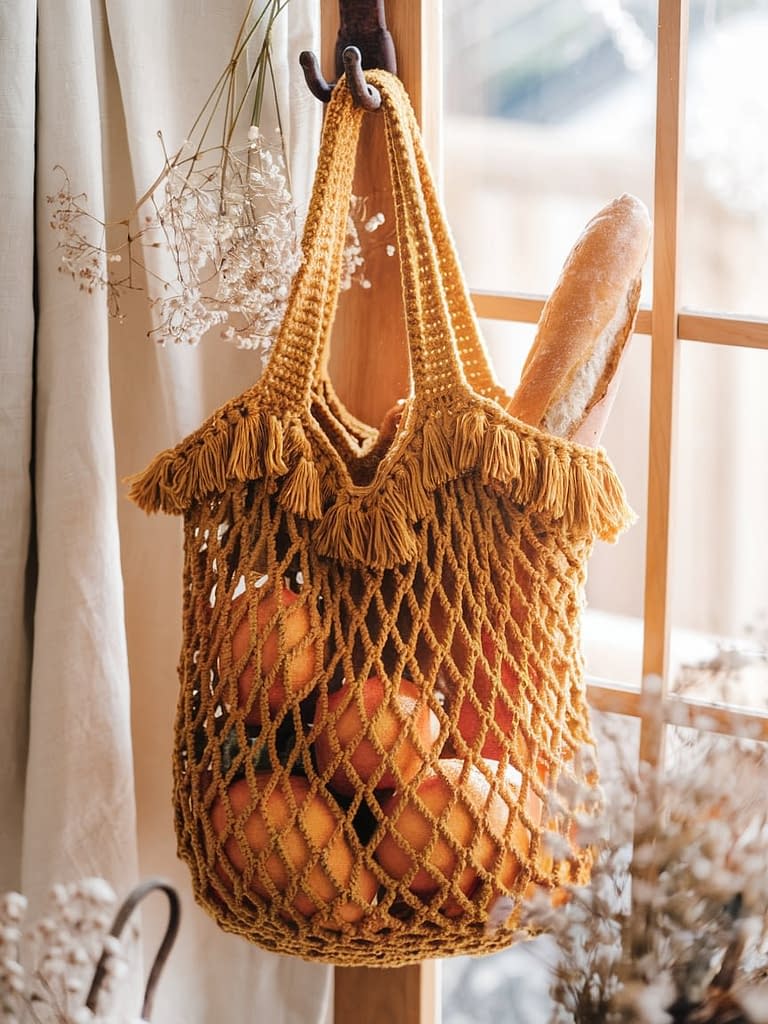
1. The Boho Breeze Mesh Tote Bag
Skill Level: Beginner
Finished Size: Approximately 14 inches wide × 15 inches tall (without handles)
Materials:
- Medium weight cotton yarn (#4) in a neutral shade (such as sand, cream, or taupe)
- Crochet hook size 4.5 mm
- Yarn needle for weaving ends
- Scissors
Notes Before Starting:
This is a simple yet beautiful boho-inspired tote bag. The body is created using open mesh stitches that allow the bag to stretch and breathe. The handles are integrated directly into the body for extra strength and clean finishing.
Step-by-Step Instructions
Step 1: Foundation Base
Start by making a chain of 40 stitches. This will form the bottom edge of your bag.
Work one single crochet stitch into the second chain from your hook. Continue making one single crochet stitch in each chain across. When you reach the end, make three single crochet stitches into the last chain. Then continue along the opposite side of the chain, working one single crochet stitch into each chain across. This forms an oval base. Slip stitch into the first stitch to join.
Step 2: Building the Base Height
Chain one and make one single crochet stitch in each stitch around. Continue working in single crochet stitches for four more rounds to build a firm base. Each round should end with a slip stitch and a chain one to begin the next.
Step 3: Creating the Mesh Body
For the next round, chain four (counts as one double crochet stitch and one chain). Skip one stitch, then make one double crochet stitch in the next stitch. Continue repeating “chain one, skip one stitch, double crochet in the next” around the bag.
At the end of each round, join with a slip stitch into the third chain of your beginning chain four.
Repeat this mesh pattern for approximately 20–25 rounds or until your bag measures around 13 inches tall.
Step 4: Top Edging and Handles
To form a solid top border, work two rounds of half double crochet stitches evenly around the edge.
Next, for the handles:
Chain 50 stitches to create the first handle, then skip 10 stitches on the bag body and join with one half double crochet stitch. Continue making half double crochet stitches across the next 30 stitches, then chain 50 again for the second handle. Skip 10 stitches and join.
On the next round, work one half double crochet stitch in each chain and across each stitch of the round. This strengthens the handles and neatens the top edge.
Step 5: Finishing Touches
Fasten off and weave in all ends with a yarn needle.
You can optionally add a tassel or a simple fringe for a true bohemian look.
This Boho Breeze Mesh Tote is perfect for carrying fresh produce, books, or beach essentials while maintaining that effortless boho aesthetic.
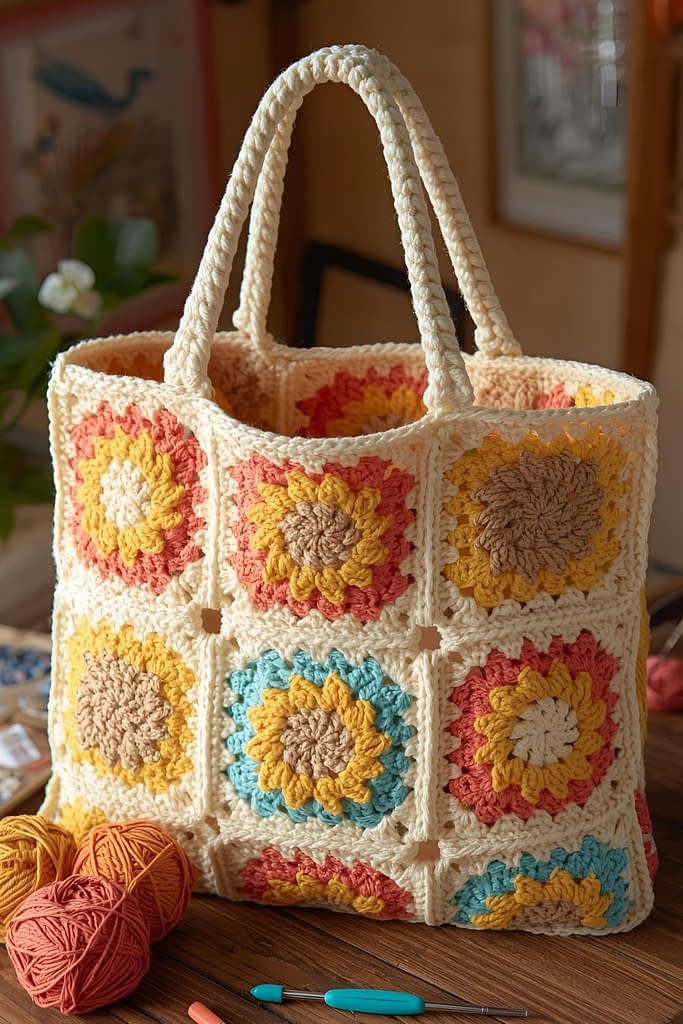
2. The Sunburst Granny Square Market Bag
Skill Level: Intermediate
Finished Size: Approximately 16 inches × 16 inches
Materials:
- Cotton yarn in four contrasting boho-inspired colors (such as terracotta, cream, mustard, and sage)
- Crochet hook size 4.0 mm
- Yarn needle, scissors
Notes:
This design uses traditional granny squares, but instead of the classic blocky look, each motif features a sunburst center. Once the motifs are made, they are joined to form a stylish market bag with a flat bottom.
Step-by-Step Instructions
Step 1: Making the Sunburst Motif
Start with your first color. Make a magic ring.
Round 1: Chain two, then work twelve half double crochet stitches into the ring. Join with a slip stitch.
Round 2: Change to your second color. Chain one, and in each stitch around, work one puff stitch (yarn over, insert hook, pull up a loop three times, then yarn over and pull through all loops). Separate each puff stitch with one chain stitch.
Round 3: Switch to your third color. In any chain space, work three double crochet stitches, chain one, then three double crochet stitches into the next space. Continue around forming the corners of the granny square pattern.
Round 4: Switch to your final color. Continue working standard granny square rounds with groups of three double crochet stitches separated by one chain, and two groups at each corner separated by two chains.
Fasten off and weave in all ends.
Step 2: Create 12 Motifs
Make a total of twelve identical sunburst squares. You can mix color orders to create a patchwork aesthetic.
Step 3: Joining Squares
Lay out the squares in a 3 × 4 layout. Join them using a slip stitch seam or whip stitch seam through the back loops for a clean join. Fold in half to form the bag’s front and back panels.
Step 4: Side and Bottom Seams
Using matching yarn, join the sides and bottom edges with whip stitches, ensuring the seams align evenly.
Step 5: Handles
Attach yarn at the top corner and chain 60 stitches for the first handle. Join to the opposite corner and slip stitch back along the chain for reinforcement. Repeat for the other side.
Step 6: Finishing
Add optional fringe along the bottom or small pom-poms along the edge for that boho flair.
This bag captures sunlight-inspired vibrancy and is perfect for summer market days.
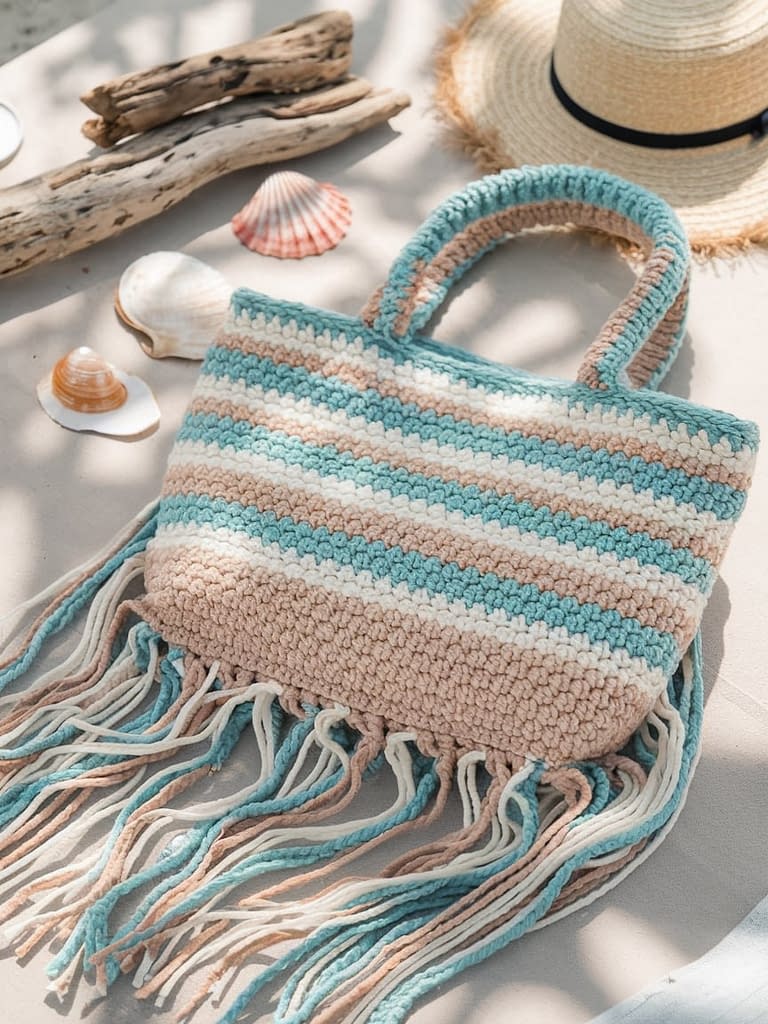
3. The Coastal Fringe Boho Bag
Skill Level: Beginner–Intermediate
Finished Size: 14 inches wide × 13 inches tall
Materials:
- Cotton blend yarn in ocean-inspired colors
- Crochet hook size 5.0 mm
- Yarn needle, scissors
Notes:
This bag has a solid base and open lacy top, finished with long flowing fringe.
Step-by-Step Instructions
Step 1: Base
Chain 41. Single crochet in the second chain from hook and across. Continue in rounds to create an oval base, adding three single crochet stitches at both ends for shaping. Work five rounds in single crochet to build the bottom.
Step 2: Body
Switch to double crochet stitches for three rounds.
Next, create a lacy texture: chain four, skip one stitch, double crochet in next, repeat. Continue until your bag reaches desired height.
Step 3: Top and Handles
Work two rounds of half double crochet stitches. Chain 45 for each handle, attach to opposite side, and reinforce with another half double crochet round.
Step 4: Fringe
Cut yarn strands 12 inches long. Attach fringe evenly around the top edge using a lark’s head knot. Trim evenly.
The long fringe movement and lightweight texture make it a favorite for boho enthusiasts.
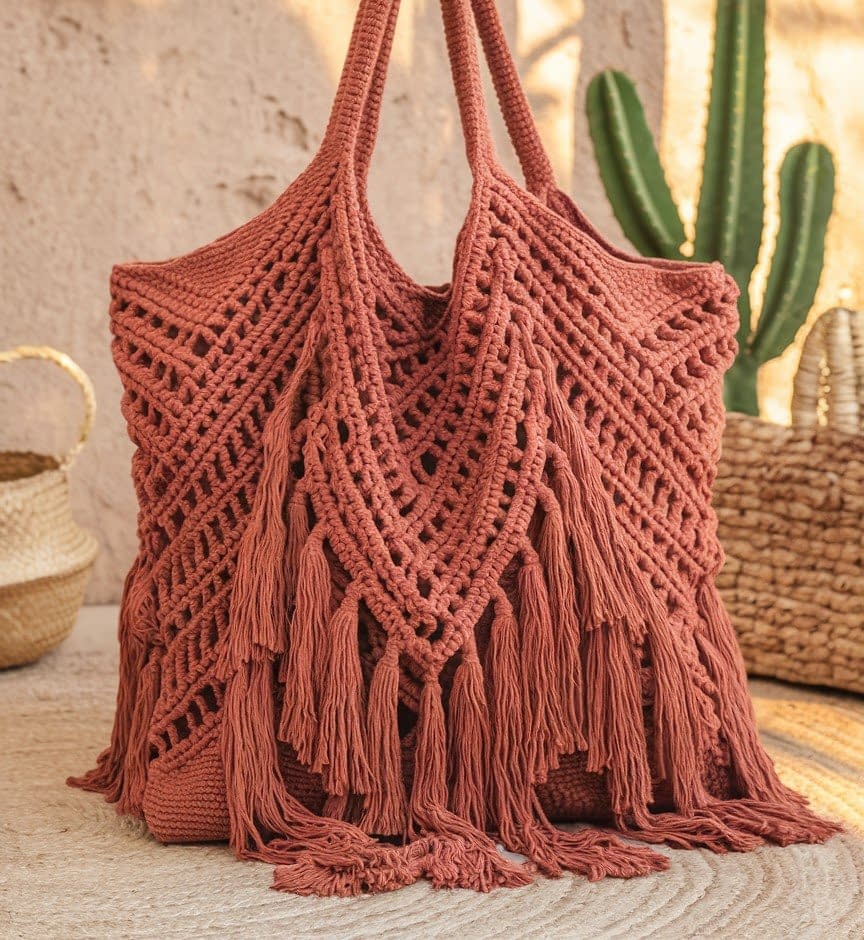
4. The Desert Dream Macrame-Style Crochet Bag
Skill Level: Intermediate
Finished Size: Approximately 15 inches wide × 16 inches tall (excluding handles)
Materials:
- Rope-style cotton cord or strong cotton yarn (Weight #5) — approximately 300–350 yards
- Crochet hook size 6.0 mm (J)
- Yarn needle
- Scissors
- Optional: Wooden beads or rings for decorative finish
Notes Before Starting:
This design combines the strength of crochet with the texture and appearance of macrame. It features thick rope-like stitches, open lattice patterns, and bold braided handles. The result is a sturdy, rustic bohemian tote perfect for beach days or market runs.
This bag is worked in the round from the base upward. The body pattern alternates between rows of crossed double crochet stitches and chain spaces to create a knotted effect.
Step-by-Step Instructions
Step 1: Creating the Base
Start by making a chain of 46 stitches.
Work one single crochet stitch into the second chain from your hook. Continue working one single crochet stitch into each chain across. When you reach the final chain, work three single crochet stitches into it to turn your work around to the opposite side of the chain.
Now continue working along the other side of the starting chain, placing one single crochet stitch in each chain until you return to the beginning. You will have created a neat oval shape. Join with a slip stitch to the first stitch.
Work four more rounds of single crochet stitches around the oval, increasing two stitches at both rounded ends of the base during each round to keep the bottom flat.
You should now have a solid, slightly rounded rectangular base.
Step 2: Building the Body Texture
Change to a slightly looser tension. Chain three (counts as your first double crochet stitch).
Work one double crochet stitch into each stitch around for one complete round. Join with a slip stitch.
Row Pattern for Body Texture:
For the next row, chain three. Skip the next stitch, then work one double crochet stitch into the next.
Now go back and make one double crochet stitch into the skipped stitch — this creates a “crossed” effect. Continue this pattern all the way around: skip one stitch, double crochet in next, then go back and double crochet into the skipped stitch. Join with a slip stitch at the end.
This is your main pattern.
Work four rows of this crossed double crochet pattern.
Then work one row of chain spaces:
Chain two, skip one stitch, make one single crochet stitch into the next. Continue repeating this around. This row forms a light lattice that breaks up the texture.
Alternate between four rows of crossed double crochet and one lattice row until your bag measures about 15 inches tall.
Step 3: Forming the Top and Handles
To create the sturdy top, work three rows of half double crochet stitches evenly around.
Then, for the first handle: chain 60 stitches, skip 15 stitches, and join with one half double crochet stitch. Continue working half double crochet stitches across 30 stitches, then chain 60 again for the second handle. Skip 15 stitches and join with a slip stitch.
Next round: work one half double crochet stitch into each chain and each stitch all around. This strengthens the handle structure.
Step 4: Optional Decorative Finish
Thread wooden beads onto the handles or attach small tassels where the handles join the bag for an earthy macrame-inspired look.
Finishing:
Fasten off, weave in all yarn ends with a yarn needle, and gently block the bag flat if needed.
This Desert Dream Macrame-Style Crochet Bag is a stunning blend of rustic charm and durability. The texture resembles knotted rope, making it perfect for lovers of minimalist boho style.
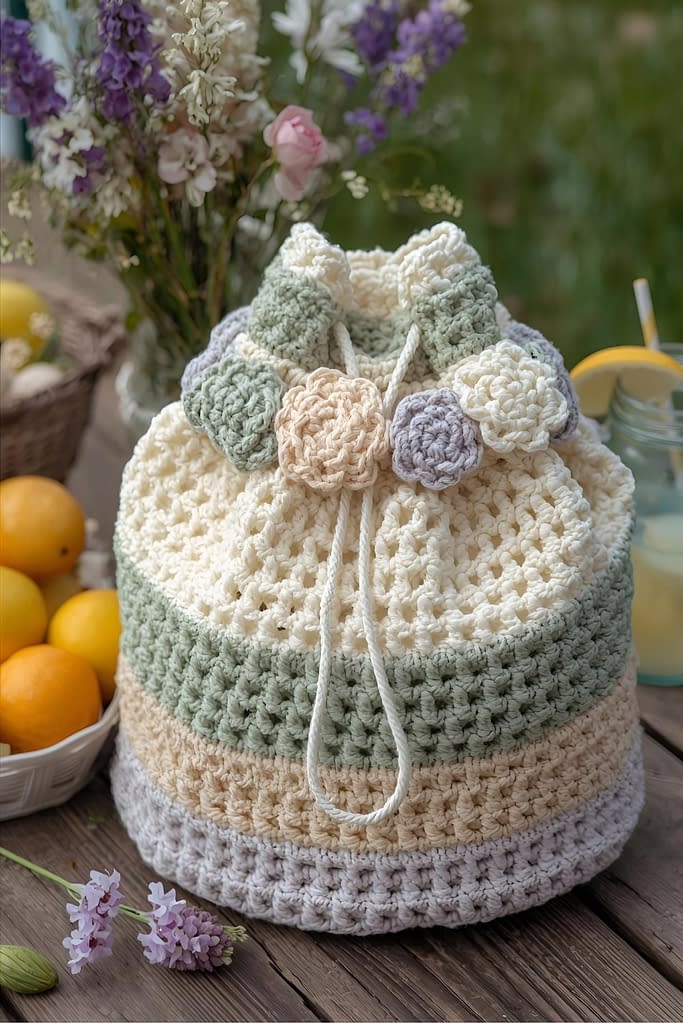
5. The Meadow Bloom Market Sack
Skill Level: Beginner
Finished Size: Approximately 15 inches wide × 14 inches tall
Materials:
- Light cotton yarn in multiple pastel shades (around 250 yards total)
- Crochet hook size 4.5 mm
- Yarn needle, scissors
Notes:
The Meadow Bloom Market Sack is soft, lightweight, and flexible. Its floral-inspired stitch pattern adds a delicate springtime touch while keeping the structure strong enough for groceries or market produce. This bag is worked from the bottom up in continuous rounds.
Step-by-Step Instructions
Step 1: Base Foundation
Make a chain of 36 stitches. Work one single crochet stitch into the second chain from your hook and continue working one single crochet stitch in each chain across. When you reach the end, work three single crochet stitches into the final chain.
Continue along the opposite side of the chain, again placing one single crochet stitch into each chain. Join with a slip stitch to the first stitch.
Work three more rounds of single crochet, increasing two stitches at both ends each round to create an oval base approximately 10 inches long.
Step 2: Begin Floral Mesh Body
Chain four (counts as one double crochet stitch and one chain). Skip one stitch, and make one double crochet stitch into the next. Continue this around the base. Join with a slip stitch.
Next round: chain four, make one double crochet stitch in the next chain space, chain one, and repeat.
After five rounds, the base should begin expanding slightly upward.
Now switch to the floral mesh pattern:
- Chain five, skip two stitches, and make one single crochet stitch into the next.
- Chain five again, skip two stitches, and make another single crochet stitch.
Continue this pattern all around.
This creates elongated loops that resemble flower petals. Continue until the bag measures 12 inches in height.
Step 3: Top and Handles
Switch back to solid stitches to strengthen the top edge.
Work three rounds of half double crochet stitches evenly around.
For the handles:
Chain 55, skip 12 stitches, join with one half double crochet stitch. Continue working half double crochet stitches across the next 25 stitches, then chain 55 again for the second handle. Skip 12 stitches and join.
Next round: make one half double crochet stitch into each chain and each stitch.
Step 4: Optional Finishing Touches
To give it a rustic boho vibe, crochet a narrow cord and thread it through the top edge as a drawstring. Add small tassels at each end.
This bag is perfect for those who love a soft, feminine, and floral aesthetic that remains practical for daily use.
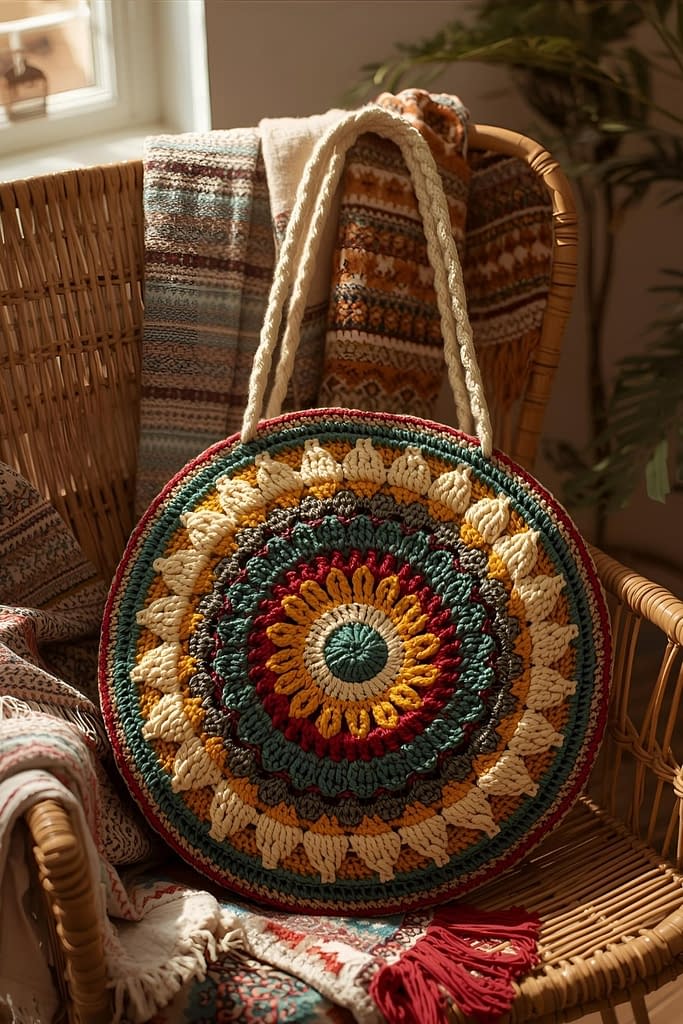
6. The Gypsy Soul Circle Tote
Skill Level: Intermediate
Finished Size: Diameter 16 inches
Materials:
- Cotton yarn (#4) in two complementary tones (for example, mustard and ivory)
- Crochet hook size 5.0 mm
- Yarn needle, scissors
Notes:
The Gypsy Soul Circle Tote is a round, mandala-style bag made from two identical circular panels joined together. It captures free-spirited energy through concentric stitch textures and a flat round form.
Step-by-Step Instructions
Step 1: First Circular Panel
Start with a magic ring.
Round 1: Chain two and make twelve half double crochet stitches into the ring. Pull tight and join with a slip stitch.
Round 2: Chain two, work two half double crochet stitches into each stitch around (24 stitches total). Join.
Round 3: Chain three, work one double crochet stitch into the first stitch, then two double crochet stitches into the next. Repeat this pattern around.
Now start introducing the mandala detail.
Round 4: Chain one. In the next stitch, make one single crochet stitch, chain three, skip the next stitch, and single crochet into the next. Repeat this around. This forms open loops.
Round 5: Chain three, work three double crochet stitches into each loop, separating each cluster with one chain.
Continue alternating rounds of solid double crochet stitches and open loop rounds until your circle measures about 16 inches across.
Fasten off and weave in all ends.
Step 2: Make Second Panel
Repeat the exact same process for the second circle panel.
Step 3: Joining Panels
Place both panels with right sides facing out.
Join yarn at the top edge and work single crochet stitches through both panels, joining them together around the sides and bottom. Leave about 12 inches open at the top for the bag opening.
Step 4: Creating the Handles
Attach yarn at one top edge. Chain 70 for a long handle or 40 for a short one. Join to the opposite side. Work one more round of half double crochet stitches across both handles for sturdiness.
Step 5: Finishing Touches
You may line the inside with a circular fabric for reinforcement. Optionally add fringe or a crochet flower motif at the center for decoration.
This Gypsy Soul Circle Tote stands out for its detailed round mandala look and is ideal for bohemian outings or creative gift-giving.
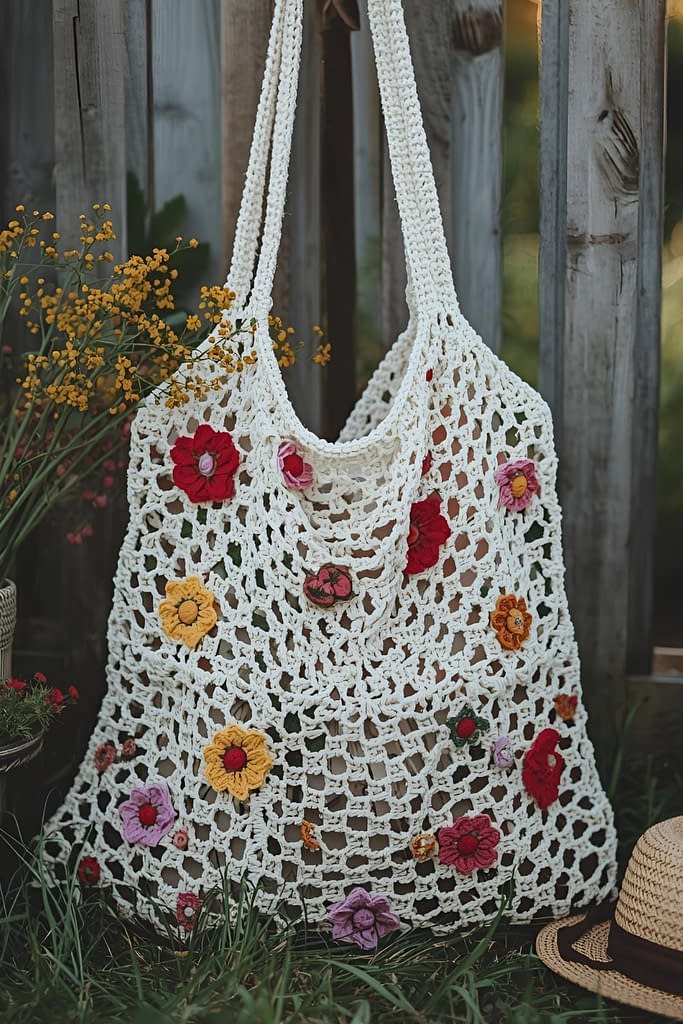
7. The Wildflower Boho Net Bag
Skill Level: Beginner
Finished Size: 16 inches tall × 13 inches wide
Materials:
- Lightweight cotton yarn (#3) — approximately 250 yards
- Crochet hook size 4.0 mm
- Yarn needle, scissors
Notes:
The Wildflower Boho Net Bag is the essence of boho simplicity. It features a stretchy, open mesh pattern that expands to hold a surprising amount of items. The design is breathable and elegant, making it perfect for summer markets or beach adventures.
Step-by-Step Instructions
Step 1: Foundation and Bottom
Make a chain of 50 stitches.
Work one single crochet stitch into the second chain from your hook and continue working one single crochet stitch in each chain across.
At the end, make three single crochet stitches into the final chain, then work along the opposite side of the chain with one single crochet stitch per chain. Join with a slip stitch to the first stitch.
Work four rounds of single crochet stitches, increasing two stitches at each rounded end to maintain a flat oval base.
Step 2: Creating the Net Body
Chain five (counts as one double crochet stitch and two chains). Skip two stitches, then make one double crochet stitch into the next.
Repeat this around: “chain two, skip two stitches, double crochet in the next.” Join with a slip stitch into the third chain of your beginning chain five.
Next round: chain five again, and place one double crochet stitch into the next chain space (not into the stitch itself). Continue around, working into chain spaces rather than stitches.
Repeat this airy pattern until your bag measures approximately 14 inches tall. The mesh will stretch significantly, so keep that in mind when determining your preferred length.
Step 3: Top and Handles
To create a solid top edge, work two rounds of half double crochet stitches evenly around the opening.
Now for the handles:
Chain 60, skip 10 stitches, and join with one half double crochet stitch. Work half double crochet stitches across the next 25 stitches, then chain 60 again for the second handle. Skip 10 stitches and join.
Next round: work one half double crochet stitch into each chain and each stitch across to reinforce the handles.
Step 4: Optional Details
If you want to add some extra boho flair, weave a thin contrasting yarn through the top edge like a drawstring, or add a few mini crochet flowers along the rim.
Finishing:
Fasten off, weave in all ends, and stretch the bag gently to shape.
The Wildflower Boho Net Bag folds neatly into a small bundle and is ideal for anyone who loves functional yet artistic handmade accessories.
Conclusion
Each of these seven unique Boho Crochet Market Bag Patterns offers a journey into creativity and craftsmanship. From the light and airy Boho Breeze Mesh Tote to the intricate Gypsy Soul Circle Tote, every pattern captures a different essence of bohemian artistry.
These crochet bags combine practicality with personal expression — you can use them for shopping, beach trips, picnics, or everyday errands. What makes them even more special is that every stitch reflects patience, mindfulness, and individuality.
Whether you are a beginner eager to explore basic mesh patterns or an experienced crocheter looking for textured macrame-style designs, these projects provide endless opportunities to learn and enjoy the art of handmade fashion. So choose your favorite pattern, pick your yarn colors, and let your creativity bloom one stitch at a time.


