
If you have ever wanted to crochet your very first scarf but felt unsure where to start, this guide is made for you. Scarves are one of the best beginner-friendly crochet projects because they allow you to practice basic stitches, learn how to maintain even tension, and experiment with colors and textures without worrying too much about shaping or advanced techniques.
In this detailed tutorial, you will learn three easy and rewarding scarf patterns that are perfect for first-time crocheters. Each one focuses on building essential skills — from learning how to work consistent rows and change colors, to understanding how to finish and block your project neatly.
Even if you have never held a crochet hook before, by following the instructions carefully, you will be able to create a warm, stylish scarf that you can proudly wear or gift to someone special. Every pattern in this guide includes step-by-step instructions, complete material lists, clear stitch explanations, and optional variations for those who want to personalize their design.
So, grab your yarn, prepare your crochet hook, and let us begin this creative journey with your first set of scarves.
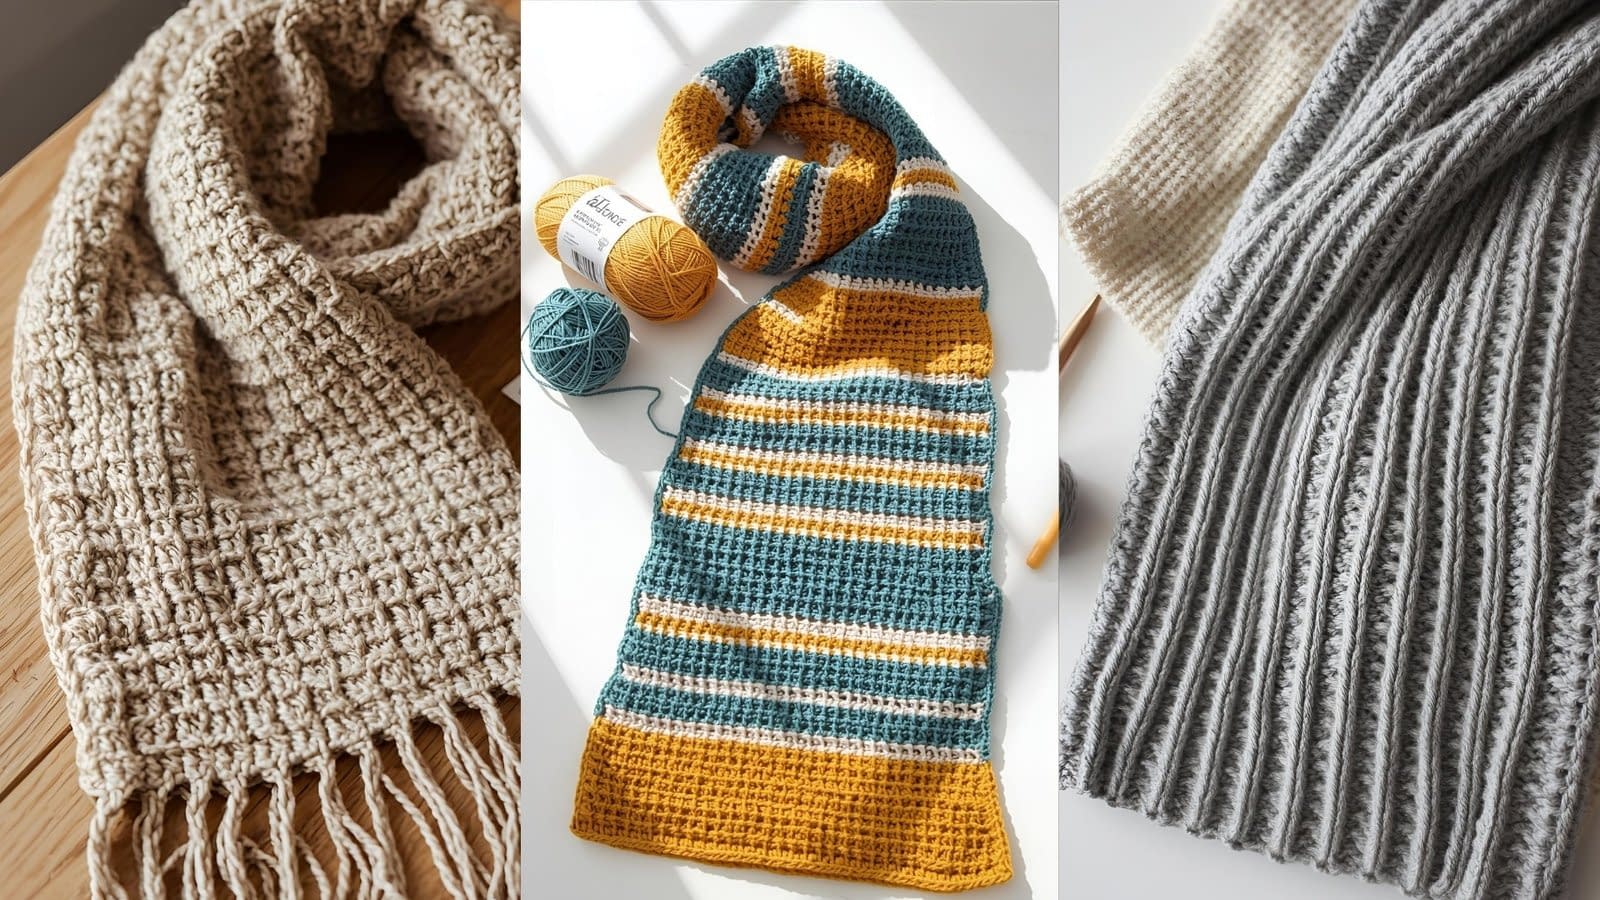
Pattern 1 — Cozy Beginner Crochet Scarf
Skill Level:
Absolute Beginner
Finished Size:
Approximately 6 inches wide × 60 inches long (you can adjust length easily).
Materials:
- Medium worsted weight yarn (category #4): approximately 250–300 yards. Choose a soft acrylic or wool blend for warmth.
- Crochet hook: 5.0 millimeter (H-8)
- Yarn needle for weaving in ends
- Scissors
Notes:
This pattern uses only two basic stitches — the chain stitch and the half double crochet stitch — making it ideal for beginners. You will learn how to create a foundation chain, work across rows, and maintain consistent edges.
Step-by-Step Instructions
Step 1 — Create the Foundation Chain
Start by making a slipknot. Tighten it around your crochet hook but do not pull too tightly.
Next, chain 22 stitches. This will determine the width of your scarf. If you want a wider scarf, chain a few extra stitches.
Step 2 — First Row (Half Double Crochet Across)
Yarn over once, then insert your hook into the third chain from the hook. Yarn over again and pull up a loop. You will now have three loops on your hook. Yarn over once more and pull through all three loops. You have made one half double crochet stitch.
Continue working one half double crochet stitch into each chain across the row until you reach the end. You should now have 20 half double crochet stitches in total (since the first two chains count as a turning chain).
Step 3 — Turning Your Work
At the end of the first row, chain 2 and turn your work. Always turn in the same direction each time to maintain even edges.
Step 4 — Continue the Pattern
Work one half double crochet stitch in each stitch across the row. Be sure to place your first stitch into the very first space after your turning chain. Repeat this step for every row until your scarf reaches about 60 inches in length or your desired size.
Step 5 — Finishing Off
When your scarf reaches the desired length, cut the yarn leaving an 8-inch tail. Pull the yarn through the final loop to secure it. Use your yarn needle to weave in both ends neatly.
Optional Step — Add Fringe or Tassels
Cut several strands of yarn approximately 8 inches long. Fold them in half, insert your hook through the edge of the scarf, pull the loop through, and thread the ends through the loop to create a knot. Add tassels evenly across both ends for a polished finish.
Tips for Success
- Keep your tension relaxed to avoid curling edges.
- Always count your stitches at the end of each row to maintain consistent width.
- Use stitch markers at the beginning and end of each row if you are new to crocheting.
This simple scarf builds the foundation for your crochet journey. Once you complete it, you will have a solid understanding of working flat rows and maintaining even stitches.
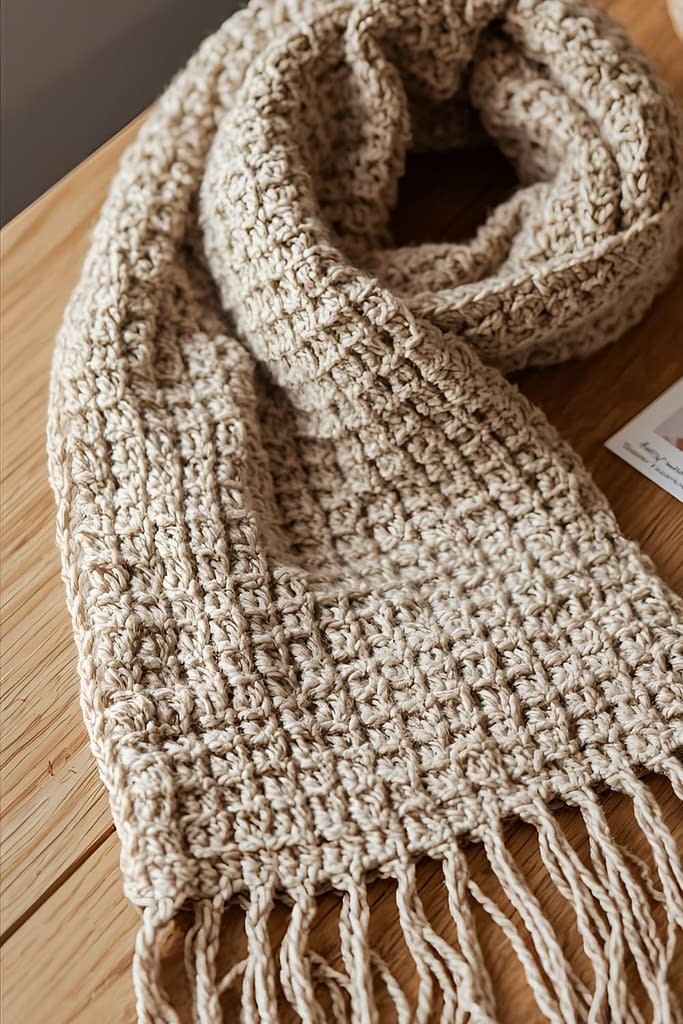
Pattern 2 — Striped Double Crochet Scarf
Skill Level:
Beginner
Finished Size:
7 inches wide × 65 inches long
Materials:
- Two contrasting colors of worsted weight yarn (category #4): approximately 150 yards of each color.
- Crochet hook: 5.5 millimeter (I-9)
- Yarn needle and scissors
Notes:
This scarf pattern introduces color changing and double crochet stitches, which create a looser, lighter texture perfect for layering. You will also learn how to carry yarn neatly at the edge for clean transitions between stripes.
Step-by-Step Instructions
Step 1 — Foundation Chain
Using Color A, make a slipknot and chain 25 stitches. This will create a nice medium-width scarf.
Step 2 — First Row (Double Crochet Across)
Yarn over, insert the hook into the fourth chain from the hook, yarn over again, and pull up a loop. You now have three loops on the hook. Yarn over once more and pull through the first two loops, then yarn over again and pull through the remaining two loops.
This completes your first double crochet stitch. Continue making one double crochet stitch in each chain across the row. You should end up with 22 stitches (since the first three chains count as the turning chain).
Step 3 — Turning Chain and Second Row
At the end of the row, chain 3 and turn your work. Then work one double crochet stitch into each stitch across. Repeat this process for five rows total using Color A.
Step 4 — Change Colors
When switching to Color B, do not fasten off the previous color. Instead, on the last stitch of the previous row, yarn over with the new color before completing the stitch. This creates a smooth transition.
Continue with Color B for the next five rows, following the same double crochet pattern. Alternate between Color A and Color B every five rows until your scarf measures approximately 65 inches long.
Step 5 — Finishing Off
Cut the yarn, leaving an 8-inch tail. Weave in all ends securely using a yarn needle.
Optional Step — Add a Border
If you want a polished edge, use Color A to work one round of single crochet evenly around the entire scarf. This gives a professional finish and helps prevent curling.
Tips for Success
- Keep your color changes consistent by always switching at the same edge.
- When carrying yarn up the side, do not pull too tightly — it can cause puckering.
- Choose yarn colors that contrast clearly for a bold striped design.
This striped double crochet scarf is a great next step after learning basic stitches. It allows you to experiment with color and texture while keeping the technique simple and relaxing.
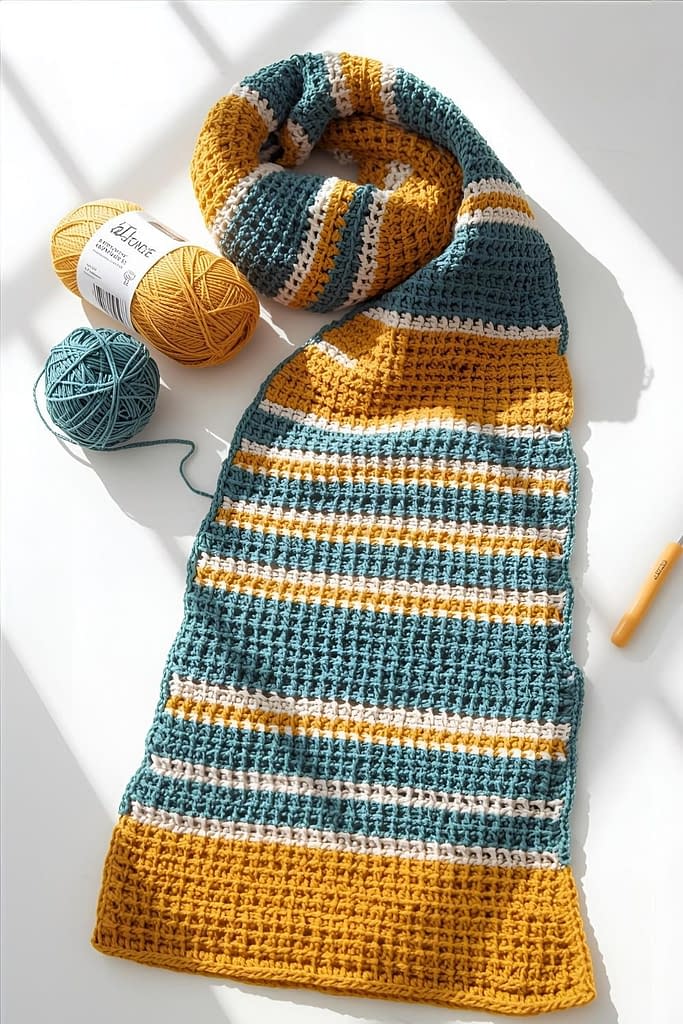
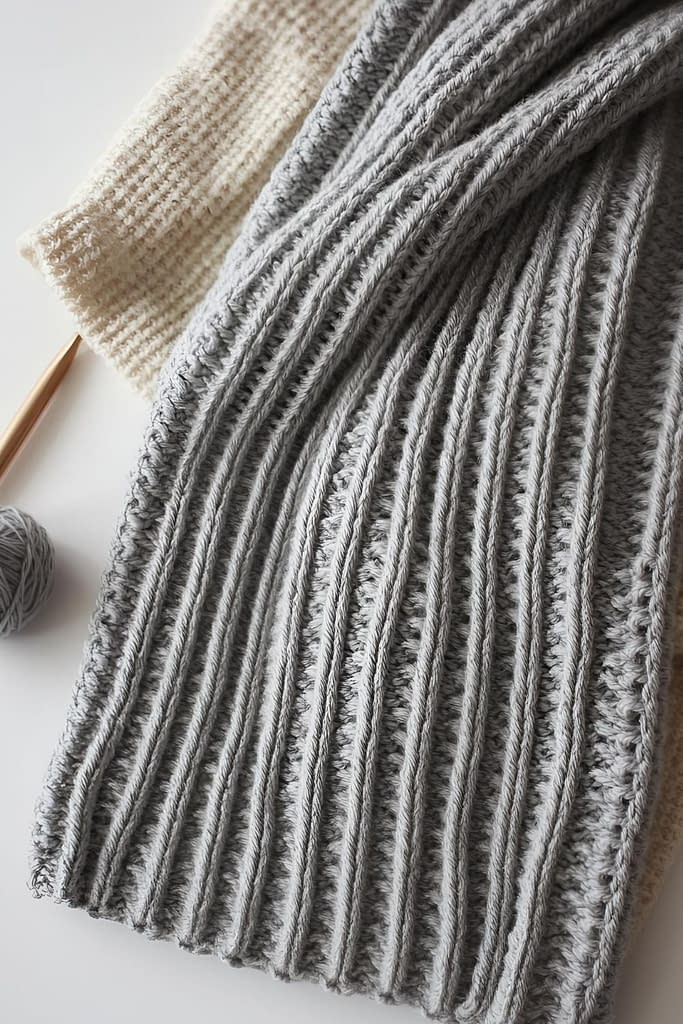
Pattern 3 — Textured Ribbed Crochet Scarf
Skill Level:
Beginner–Intermediate
Finished Size:
8 inches wide × 70 inches long
Materials:
- Worsted weight yarn (category #4): approximately 350 yards. Choose soft, non-scratchy yarn for comfort.
- Crochet hook: 6.0 millimeter (J-10)
- Yarn needle and scissors
Notes:
This pattern creates a beautiful ribbed texture using front post double crochet and back post double crochet stitches. It feels cozy, stretchy, and elegant, making it perfect for gifting or everyday wear.
Step-by-Step Instructions
Step 1 — Foundation Chain
Create a slipknot and chain 28 stitches.
Step 2 — First Row (Base Row)
Work one double crochet stitch into the fourth chain from the hook. Continue making one double crochet stitch into each chain across. You will have 25 stitches total. Chain 3 and turn your work.
Step 3 — Create Ribbing Texture
In this row, you will alternate between front post double crochet (FPDC) and back post double crochet (BPDC) stitches.
To make a front post double crochet, yarn over, insert your hook around the post of the next stitch from front to back and out to the front again, yarn over and pull up a loop, then complete your double crochet as usual.
To make a back post double crochet, yarn over, insert your hook from back to front and around the post of the stitch, yarn over, pull up a loop, and complete your double crochet as usual.
Work one front post double crochet, then one back post double crochet alternately across the row. Chain 3 and turn your work.
Step 4 — Continue the Ribbing Pattern
In the next row, match your stitches: work a front post double crochet over the previous front post double crochet and a back post double crochet over the previous back post double crochet. This maintains the ribbed texture.
Repeat this pattern for each row until your scarf measures about 70 inches long or your desired length.
Step 5 — Finishing
Cut the yarn, pull through the last loop, and weave in all loose ends neatly.
Optional Step — Add Edging or Fringe
For a decorative touch, you can work a single crochet border around all edges or add fringe along both ends for a classic look.
Tips for Success
- Keep your tension even when working post stitches, as they tend to tighten the fabric.
- Use a larger hook if your scarf feels too stiff.
- Block your finished scarf lightly to enhance stitch definition.
This ribbed scarf adds an elegant twist to your crochet skills while remaining easy enough for beginners who are comfortable with basic double crochet stitches.
Conclusion
Learning to crochet your first scarf is a creative journey filled with satisfaction and growth. These 3 first-time crochet scarf tutorials guide you from basic stitches to textured designs, ensuring that you not only finish a beautiful handmade project but also understand every part of the process.
Whether you start with the simple half double crochet scarf, move on to colorful stripes, or challenge yourself with the ribbed texture pattern, each project will help you become more confident with your hook and yarn.
By the end, you will not just have three cozy scarves — you will have gained the foundation to create countless crochet pieces in the future. Remember, the most important part of crocheting is patience and consistency. Every stitch you make adds not just to your project, but to your skill and creativity.


