
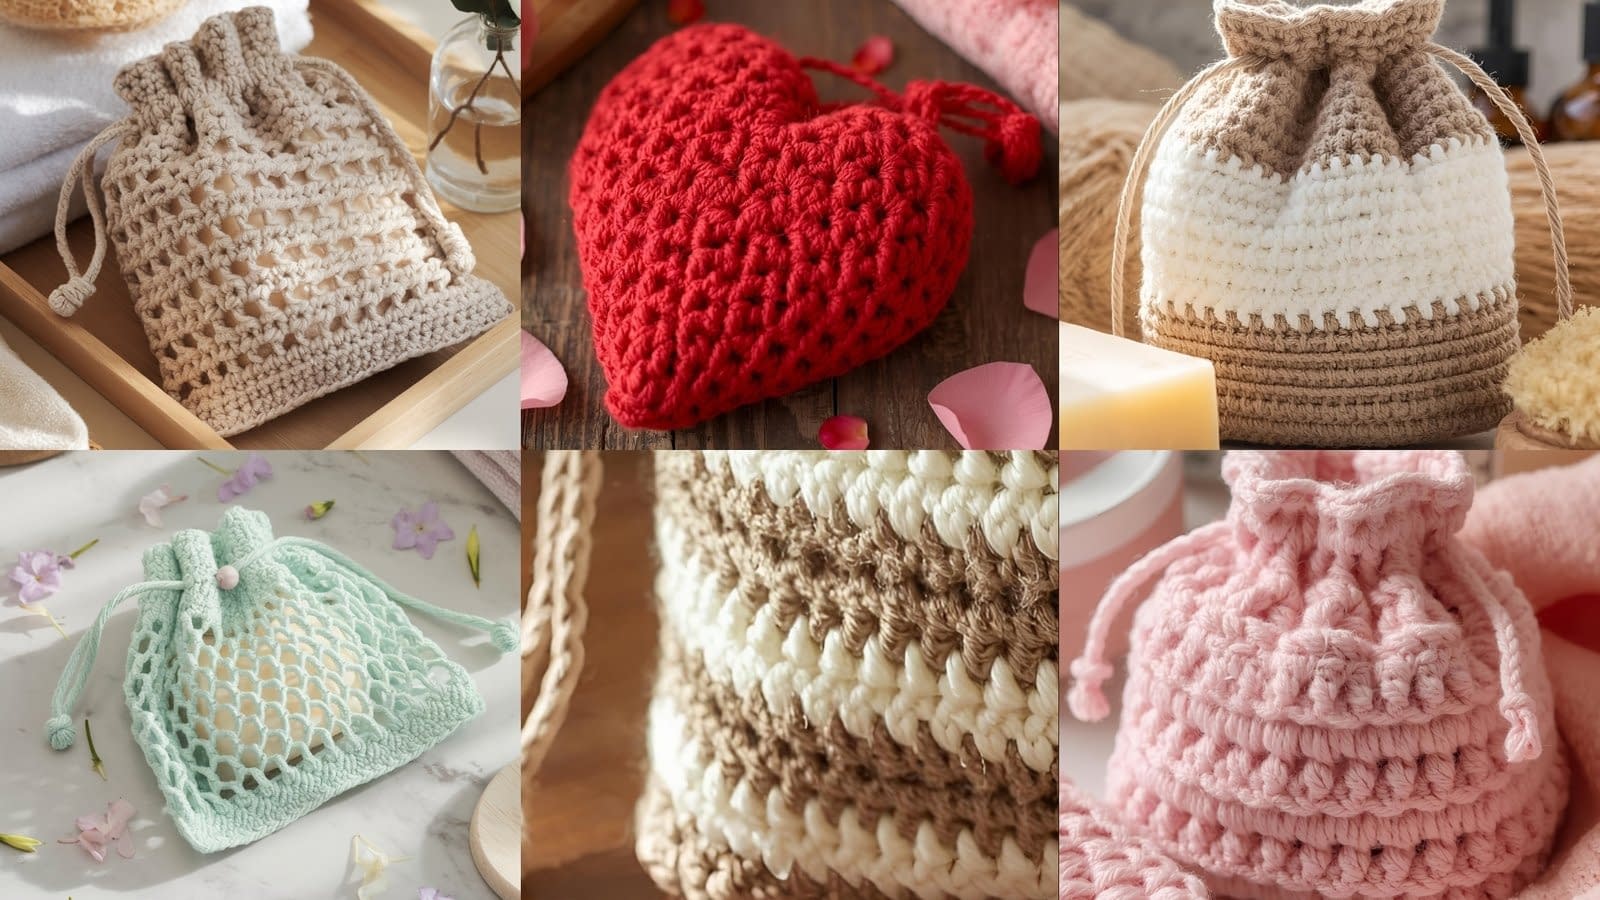
Handmade soap saver pouches are an elegant, sustainable way to extend the life of bar soap, reduce waste, and add a personal touch to your bathroom routine. Whether you prefer a simple mesh that lathers quickly, a plush textured pouch that doubles as a gentle exfoliant, or a decorative heart-shaped pouch to gift with a bar of soap, a well-written crochet pattern can get you there.
This guide presents six carefully designed crochet soap saver pouch patterns, each with full materials lists, clear skill levels, finished sizes, step-by-step instructions written in long-form, finishing and care tips, and variations to help you personalize every project. I have written these patterns in a friendly, professional, and beginner-accessible tone. Each stitch name is written out in full, and instructions are long-form so you can follow them without needing prior shorthand knowledge.
Read through the patterns to choose one that fits your yarn stash, hook collection, and skill level, or make several to create a matching set for gifting. Now let us begin with the simplest design and progress to more decorative and textural options.
Pattern 1 — Basic Mesh Soap Saver (Beginner)
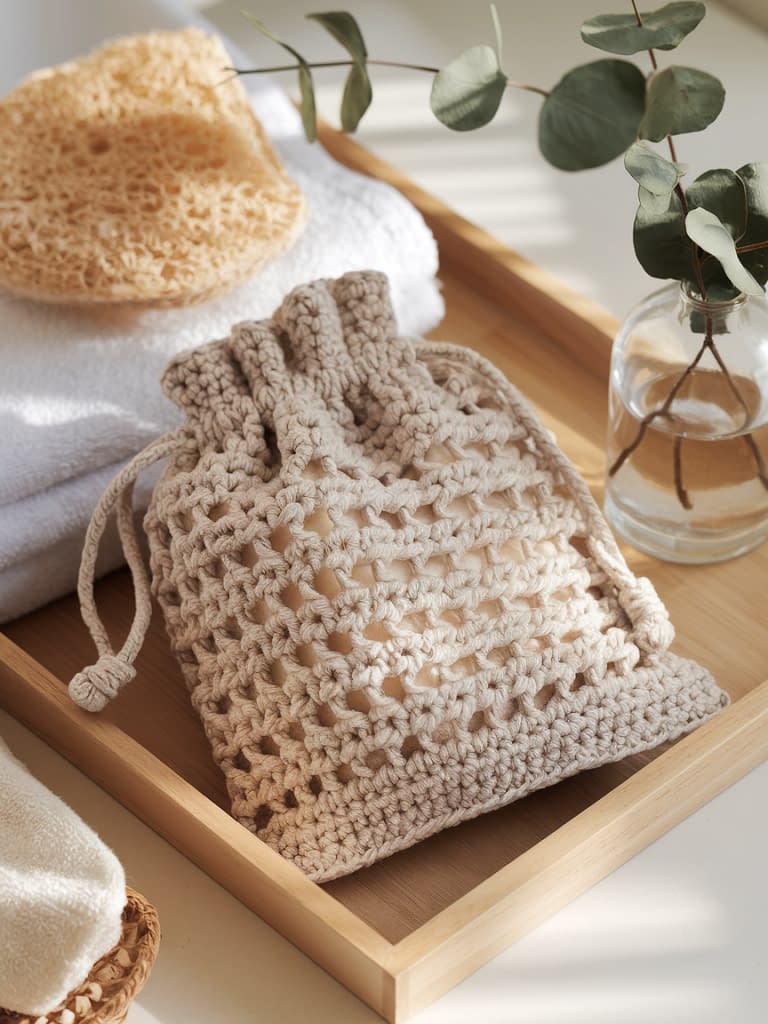
Skill level: Beginner (simple repeats, no shaping)
Finished size: Approximately 3.5 inches wide by 4.5 inches tall when worked in worsted weight yarn with a 4.5 mm crochet hook. Adjust by changing yarn weight or hook size.
Materials:
- Cotton or cotton-blend worsted weight yarn (medium weight / #4): about 40–50 yards.
- Crochet hook: 4.5 mm (G).
- Yarn needle for weaving ends.
- Scissors.
- Optional: small wooden or plastic bead for drawstring closure.
- Optional: small scrap of ribbon for hanging loop.
Notes: This pattern is worked flat and seamed to form a little pouch. The mesh structure allows good lather and dries quickly. Cotton is recommended because it absorbs water and holds soap well.
Step-by-step instructions
- Foundation chain: Chain twenty-two stitches. The number of chains can be adjusted in multiples of three plus one for a different width. The chain counts as the turning chain and does not count as a stitch for the first row of mesh.
- Row 1: Single crochet in the second chain from the hook to create a firm first edge. Single crochet across the foundation chain so that you have twenty-one single crochet stitches at the end of the row. Chain three and turn. The chain three will act as the first double crochet of the mesh row.
- Row 2: Make one double crochet into the same stitch as the chain three. Skip the next single crochet, chain one, then make one double crochet into the following single crochet. Repeat the sequence between the asterisks across the row until you reach the last stitch. End the row with one double crochet in the top of the final single crochet. Chain three and turn.
- Row 3: Make one double crochet into the same stitch as the chain three to begin. Make one chain one, then make one double crochet into the next double crochet (the next open space becomes easier to see after one row). Continue repeating the chain one, double crochet in the next double crochet pattern across the row. End with one double crochet into the top of the turning chain from the previous row. Chain three and turn.
- Rows 4–18: Repeat Row 3 until the panel measures approximately 4.5 inches from the foundation chain. Keep tension even and check width to ensure it remains near 3.5 inches. If the mesh seems to drift, count stitches occasionally to confirm the number of double crochets remains constant.
- Top edge row: After finishing the final mesh row, work a firm border to stabilize the opening. Chain one, turn, and single crochet across the entire top edge, placing one single crochet into the top of each double crochet and into the top of the chain three at the end. Fasten off leaving a twelve inch tail for seaming.
- Make a second panel: Repeat Steps 1–6 to make a second identical panel.
- Assembly: Place the two panels with right sides facing each other, aligning edges carefully. Using the twelve inch tail and tapestry needle, whip stitch or mattress stitch the two side edges from the bottom point up, leaving the top edge unseamed to form the opening. Alternatively, use slip stitch along the sides for a decorative seam: insert hook through both layers and pull through a loop, yarn over, pull through both loops. Repeat along both side edges.
- Drawstring: To add a drawstring, take a length of yarn about four times the width of the pouch. Using a tapestry needle, weave the cord through the mesh spaces near the top of the pouch, leaving equal lengths on both sides. Thread a small bead on the cord and tie a secure knot. Trim ends and apply a dab of clear fabric glue or a small knot to prevent unravelling. Optionally add a short hanging loop by folding a 4 inch ribbon and stitching it inside the seam at one corner before completing the seam.
- Finishing: Weave in all ends securely. Block lightly by dampening the pouch and shaping it flat on a towel to dry; this will open the mesh uniformly. Insert a small bar of soap and pull the drawstring closed.
Tips and variations
- For a larger pouch, use a 5.5 mm hook and increase the foundation chain in multiples of three.
- For a softer feel, use a cotton-acrylic blend yarn; for the best soap-holding and durability, use 100 percent cotton.
- To make a hanging loop, leave one short side of seam unsewn for 1 inch, fold the top edge and stitch across to create a hanging channel, then thread ribbon or cord.
Pattern 2 — Textured Puff Stitch Soap Saver (Beginner–Intermediate)
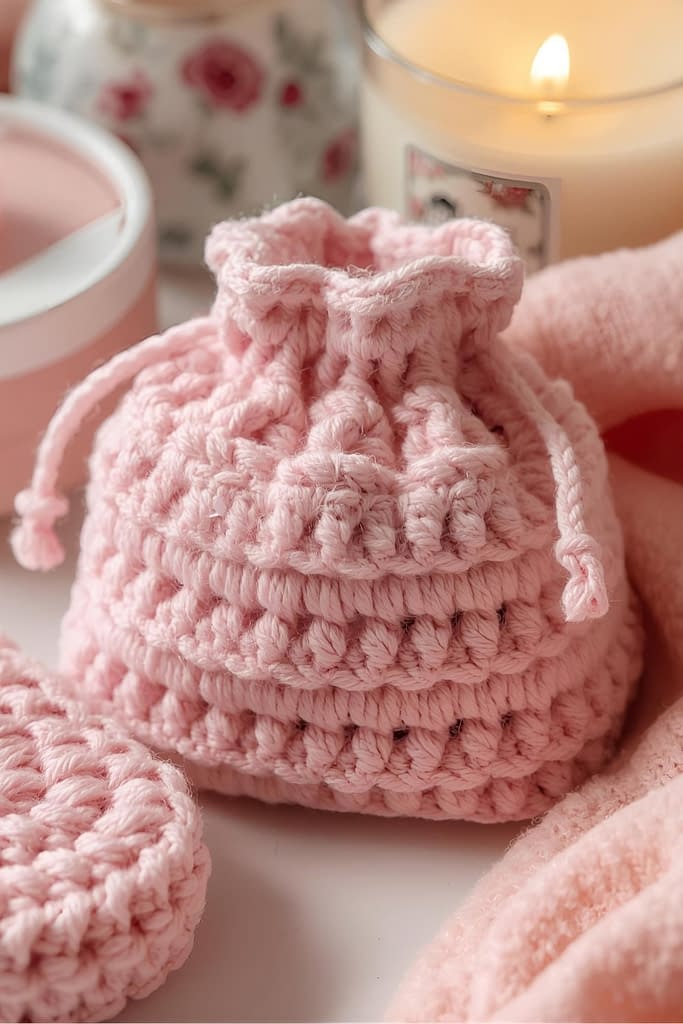
Skill level: Beginner–intermediate (puff stitch technique and shaping)
Finished size: Approximately 3.5 inches by 4.5 inches with worsted weight cotton and a 5.0 mm hook.
Materials:
- 100 percent cotton worsted weight yarn: 50–60 yards.
- Crochet hook: 5.0 mm (H).
- Yarn needle.
- Scissors.
- Optional: small button or wooden toggle for closure.
Notes: The puff stitch creates a plush, exfoliating texture that is gentle on skin. Work the puff stitches evenly to keep the panel flat and symmetrical.
Step-by-step instructions
- Foundation chain: Chain twenty-four stitches. Chain three at the beginning of each puff row counts as the first double crochet when needed; here we will begin with a base row of single crochet to stabilize.
- Row 1 (base): Single crochet in the second chain from the hook and in each chain across for a total of twenty-three single crochet stitches. Chain one and turn.
- Row 2 (puff stitch row): Single crochet in the first stitch to anchor the row. To make a puff stitch: yarn over, insert hook into the next stitch, yarn over and pull up a loop, yarn over and pull up another loop into the same stitch, repeat to gather four loops on the hook total, then yarn over and pull through all loops on the hook. Chain one to close the puff. Make one puff stitch in the next stitch. Continue alternating one puff stitch, one single crochet across the row, ending with one single crochet in the last stitch. Chain one and turn.
- Row 3: Single crochet across the row into each stitch and into the chain one spaces after each puff stitch. Chain one and turn.
- Row 4: Repeat Row 2 to create an alternating texture pattern. Continue alternating a puff stitch row and a single crochet row until the panel reaches the desired height of approximately 4.5 inches, typically about twelve to fourteen rows depending on gauge.
- Top border: After the final pattern row, make a round of single crochet around the three unworked sides of the panel to create a neat border. Work three single crochet into each corner to keep the edge flat. Fasten off leaving a tail for seaming.
- Second panel: Make a second panel identical to the first.
- Seaming and finishing: Place the panels right sides together and seam the two side edges using a slip stitch or whip stitch, leaving the top open. For a secured closure, fold a 1 inch flap from the wide top edge toward the front and stitch across the sides for a tuck-over flap. Sew a small button to the front panel and create a loop with a short chain on the flap, or attach a wooden toggle.
- Optional lining: If you prefer a more robust pouch that holds soap fragments, line the inside with a circle of fine mesh fabric cut slightly smaller than the pouch and whip stitch it inside the seam, or crochet a simple liner using single crochet in fine cotton held double for strength.
Tips and variations
- For a denser exfoliating pouch, make puff stitches in every stitch and omit the single crochet anchor stitch. This will create a thicker texture but may reduce lather slightly.
- Use contrasting colored yarn for the top flap to add a decorative touch.
- To make a soap saver with a flat base, insert a small rectangular piece of cardboard between the panels at the bottom before seaming, then sew around it; remove the cardboard before use.
Pattern 3 — Lacy Shell Stitch Soap Saver with Drawstring (Intermediate)

Skill level: Intermediate (shell stitch pattern with consistent counting)
Finished size: Approximately 4.0 inches wide by 5.0 inches tall using sport weight cotton with a 4.0 mm hook. Adjust by yarn and hook.
Materials:
- Sport weight cotton yarn: 60–70 yards.
- Crochet hook: 4.0 mm (G).
- Yarn needle.
- Scissors.
- Small cord or 3.0 mm cotton cord for drawstring, about 24 inches.
- Optional: small bead for drawstring end.
Notes: The shell stitch produces a decorative, open lacy texture that still holds soap securely while allowing airflow. Count stitches after each shell repeat to keep edges straight.
Step-by-step instructions
- Foundation chain: Chain twenty-seven stitches plus one additional chain for turning, for a total of twenty-eight chains. The shell stitch pattern requires a multiple of six stitches plus one; adjust accordingly for different widths.
- Row 1: Single crochet in the second chain from the hook and in each chain across to stabilize the foundation. Chain three and turn.
- Row 2 (begin shell pattern): Make one double crochet into the first single crochet. Skip two stitches, then in the next stitch work five double crochet stitches all into the same stitch to create the shell. Skip two stitches and make one double crochet into the next stitch. Repeat the sequence between the asterisks across the row. End with one double crochet in the top of the final single crochet. Chain three and turn.
- Row 3: Make one double crochet into the same stitch as the chain three. Work one double crochet into each of the next two double crochet stitches (the first two of the shell), then make five double crochet stitches into the center double crochet of the shell from the previous row to stack the shell. Continue across, ending with the same pattern and one double crochet at the end. Chain three and turn.
- Rows 4–18: Repeat Row 3, keeping shell centers aligned and counting shell units to ensure consistent width. Continue until the panel reaches approximately 5.0 inches tall.
- Top edging: Chain one, turn, and single crochet across the top edge. Fasten off leaving a long tail.
- Second panel: Create a second identical panel.
- Seaming: Place panels right sides together and sew the two long sides using a mattress stitch for an invisible seam, leaving the top edge open for soap insertion. When stitching near the top, leave a gap of about three-quarters of an inch unsewn at the top center for threading the drawstring.
- Drawstring casing: Using a tapestry needle and yarn, weave a cord through the shell openings near the top of the pouch to create a drawstring. Another option is to fold the top edge inward by one-quarter inch and single crochet across through both layers to create a neat casing; thread a cord through the casing to close the pouch. Knot the cord ends and add beads if desired.
- Finishing: Weave in ends. Lightly block the pouch to open the shell motifs and allow the lace to sit flat.
Tips and variations
- For a sturdier pouch, use worsted weight cotton and increase hook size to 5.5 mm; adjust starting chain to maintain shell multiples.
- To make a larger soap saver for full-size soap bars, increase the length of the foundation chain by adding six-stitch multiples and increase the number of rows for height.
Pattern 4 — Scrubby T-Shirt Yarn Soap Saver (Beginner)

Skill level: Beginner (single crochet in the round, no complex shaping)
Finished size: Approximately 4.0 inches wide by 4.5 inches tall using t-shirt yarn and a 6.5 mm hook. Size will vary with yarn thickness.
Materials:
- T-shirt yarn (chunky recycled fabric yarn) or bulky cotton yarn: approximately 30–40 yards.
- Crochet hook: 6.5 mm (K) or appropriate hook for the yarn.
- Yarn needle.
- Scissors.
- Optional: metal ring or wooden bead for decorative closure.
Notes: T-shirt yarn is ideal for heavy-duty scrubbers that remove stubborn soap scum. This pouch is worked in the round for a seamless, sturdy finish.
Step-by-step instructions
- Create a slip knot and base loop: Make a slip knot and place it on the hook. Chain two to form a small base.
- Round 1 (base): Make six single crochet into the second chain from the hook to form a small round. Join with a slip stitch into the first single crochet. Chain one to start the next round. Alternatively, work into a magic ring of six single crochet if you prefer an invisible starting round.
- Round 2: Make two single crochet into each stitch around for a total of twelve single crochet. Join with a slip stitch into the first single crochet and chain one.
- Round 3: Work one single crochet in the first stitch, then two single crochet in the next stitch. Repeat the one single crochet, two single crochet sequence around to increase evenly. Join and chain one.
- Rounds 4–6: Continue increasing in the same manner by placing single crochet increases spaced evenly so the base remains flat. For example, Round 4: one single crochet in each of the next two stitches, two single crochet in the next stitch repeat. Stop increasing when the base measures approximately 2.25 inches in diameter. Join and chain one.
- Body rounds: Work even rounds of single crochet without increasing for approximately ten to twelve rounds, or until the piece measures about 4.5 inches tall from the base. Maintain consistent stitch count for each round to keep sides straight.
- Top edge: To finish the top, make one round of slip stitch to tighten the opening slightly. Fasten off leaving a tail for the drawstring.
- Drawstring: Cut a length of cord or use a separate length of t-shirt yarn. Weave the cord through every other stitch at the top round to create a closure. Pull tight and tie a knot. Add a decorative ring or bead to the cord if desired.
- Finishing: Weave in ends and trim. For a flatter pouch that sits well in a soap dish, fold the top inwards and whip stitch the edge to secure a tidy opening.
Tips and variations
- T-shirt yarn can be heavy on the skin; consider lining the pouch with a softer cotton mesh for gentle exfoliation.
- Make a hanging loop by leaving a length of cord at the top and securing it to hang from the shower knob.
Pattern 5 — Double-Layered Exfoliating Soap Saver (Intermediate)

Skill level: Intermediate (working two textures and joining method)
Finished size: Approximately 4.0 inches wide by 5.0 inches tall with worsted weight cotton and a 4.5 mm hook.
Materials:
- Worsted weight cotton yarn in two colors: 60–70 yards total.
- Crochet hook: 4.5 mm (G).
- Yarn needle.
- Scissors.
Notes: This design stacks two layers: an internal mesh liner that holds soap fragments and an outer textured layer for exfoliation. The double layer increases durability and creates a pleasing hand-feel.
Step-by-step instructions
- Inner liner — mesh panel: Chain twenty-two stitches. Row 1: Single crochet in the second chain from the hook and across for twenty-one single crochet. Chain three and turn. Row 2: Double crochet, chain one, double crochet in alternating stitches across to create a stable mesh. Repeat the mesh pattern until the panel measures about 4.75 inches tall. Finish with a single crochet border and fasten off leaving a twenty inch tail.
- Outer panel — textured front: With contrasting yarn, chain twenty-two stitches. Row 1: Single crochet across to stabilize. Row 2: Work a row of half double crochet into each stitch to create a slightly puffed surface. Chain two and turn. Row 3: Work a textured cluster row: skip one stitch, make a cluster of three double crochet together into the next stitch, skip one stitch, single crochet into next stitch. Repeat across the row to build a pebbled texture. Continue alternating rows of half double crochet and cluster rows until the outer panel matches the height of the inner liner. Finish with a single crochet border and fasten off leaving a twenty inch tail.
- Assembly: Place the inner liner and outer panel wrong sides together so that the right side of each faces outward. Align edges carefully. Using a tapestry needle and the yarn tail from the outer panel, whip stitch around three sides, leaving the top open. For added strength, stitch through both layers and include the yarn tail of the inner panel as you sew to bind them together securely.
- Top finish and closure: Fold a small one inch flap from the wide edge inward and sew across to create a tuck-over flap. Add a short crocheted chain of ten chains and attach to the flap as a loop if you want to secure the pouch with a button. Alternatively, weave a drawstring through the mesh near the top and knot.
- Finishing: Weave in all ends and trim. Block lightly to even out the texture.
Tips and variations
- Use one color for the inside and a contrasting color for the outside to make the double layer visible and decorative.
- For extra durability, crochet the inner liner with two strands of fine cotton held together.
Pattern 6 — Heart-Shaped Soap Saver Pouch (Advanced Beginner)

Skill level: Advanced beginner (shaping and joining two motifs)
Finished size: Approximately 4.0 inches wide by 4.0 inches tall when worked in worsted weight cotton with a 4.5 mm hook.
Materials:
- Worsted weight cotton yarn: 50–60 yards.
- Crochet hook: 4.5 mm (G).
- Yarn needle.
- Scissors.
- Small button or toggle for optional closure.
Notes: The heart-shaped pouch makes a lovely gift when paired with a small soap bar. The shaping requires attentive stitch counting to form symmetric lobes.
Step-by-step instructions
- Make two heart lobes: Each lobe is a semicircular motif that will be joined at the center to form a heart. Begin with a magic ring.
- Lobe foundation: Create a magic ring and make one chain two to count as the first half double crochet where required. Work eight double crochet into the magic ring. Pull the ring tight to close. Join with a slip stitch to the first double crochet. Chain three.
- Lobe increase round: Make one double crochet into the base of the chain three, then two double crochet into each stitch around to increase the semicircle. Adjust the number of increases to form a smooth rounded lobe—typically one round of increases will suffice. Fasten off and weave end.
- Make second lobe: Repeat Step 1 to create an identical second lobe. Fasten off and leave a long tail for joining if you prefer to sew rather than slip stitch.
- Form the heart: Place the two lobes side by side with right sides facing outward and the curved edges touching. Align the outer edges and begin joining from the outermost top edge down toward the center point with single crochet or a slip stitch join. Leave an opening for the top center to create a small pocket.
- Create the bottom point: After joining down both sides to the lower center seam, shape the point of the heart by decreasing stitches on a short row: chain one, single crochet into the next two stitches, single crochet two together to decrease, then single crochet into the remaining stitches to finish the point. Fasten off leaving a tail to weave into the seam.
- Make the back panel: For a more stable pocket, make a flat back panel by chaining twenty stitches and working in single crochet for eight rows to create a rectangular back panel approximately 3.5 inches wide by 3.5 inches tall. Seam the back panel to the heart sides to form a depth for the soap. Alternatively, make a second heart and join them to form a fully heart-shaped pouch.
- Closure: Add a small flap by folding the top edge of one lobe inward and stitching across the sides to create a tuck-in flap. Sew a small button at the center front and attach a short loop on the flap. For a simpler closure, weave a cord through the top curves for a drawstring.
- Finishing: Weave in ends carefully and block gently to shape the heart lobes.
Tips and variations
- For a more delicate heart, use sport weight yarn and a smaller hook to decrease finished size.
- Add a small crocheted flower or embroidered initials to the front of the heart for gifting.
General Care, Washing, and Use Tips
- Washing: Most cotton soap saver pouches can be machine washed on a gentle cycle and tumble dried on a low setting or air dried. For t-shirt yarn scrubbers, hand wash in warm soapy water and hang to dry to maintain shape.
- Drying: Allow the pouch to dry completely between uses to prevent mildew. Hang from a loop in the shower or place in a well-drained soap dish.
- Soap fragments: Save tiny soap crumbs inside the pouch so they form a useful slurry for handwashing. Double-layer pouches are excellent at holding small pieces so nothing goes to waste.
- Replacing drawstrings: Cord or ribbon drawstrings may loosen over time. Replace them by threading a new cord through the top openings or create a small sewn loop to anchor a new cord.
- Longevity: Cotton will soften and become more flexible with use and washing. For longer life, rotate pouches and launder them periodically.
Conclusion
These six crochet soap saver pouch patterns provide options for every maker—from the beginner who wants a quick mesh pouch to the advanced beginner who prefers a decorative heart-shaped holder. Each pattern balances function and aesthetic, offering thoughtful details such as drawstring closures, double layers for durability, and textured surfaces for gentle exfoliation.
Make a set of pouches in different textures for gifting, try contrasting color combinations for a modern bathroom aesthetic, or create a small batch for your own daily routine. By using natural yarns like cotton and upcycling materials such as t-shirt yarn, you are contributing to a more sustainable lifestyle while enjoying the satisfaction of handmade items.


