
Paper bats are one of the easiest and most impactful decorations for Halloween or themed room decor. They instantly transform a plain wall into something fun, spooky, and artistic—all without needing expensive materials or tools. In this post, you’ll learn 3 paper bats wall decor tutorials that cover different styles: classic silhouette bats, 3D folded bats, and layered wing bats. Each tutorial includes detailed, step-by-step instructions, tips for neat folding and cutting, and creative display ideas for your wall.
Why Paper Bats Are Perfect for Wall Decor
Paper bats are not only affordable and easy to make but also incredibly versatile. You can customize their size, shape, and arrangement to suit your space—whether you’re decorating a living room for Halloween, adding a playful touch to a kid’s room, or styling a photo backdrop.
Here’s why paper bats are a go-to craft idea:
- Budget-friendly: You only need paper, scissors, and glue.
- Quick to make: Each bat can be done in minutes once you get the hang of it.
- Customizable: Change their size, color, or wing design for different moods.
- Removable: You can easily remove them without damaging the wall.
- Fun for all ages: Great craft for kids, families, and DIY enthusiasts.
Now let’s go through the three paper bats wall decor tutorials in detail.
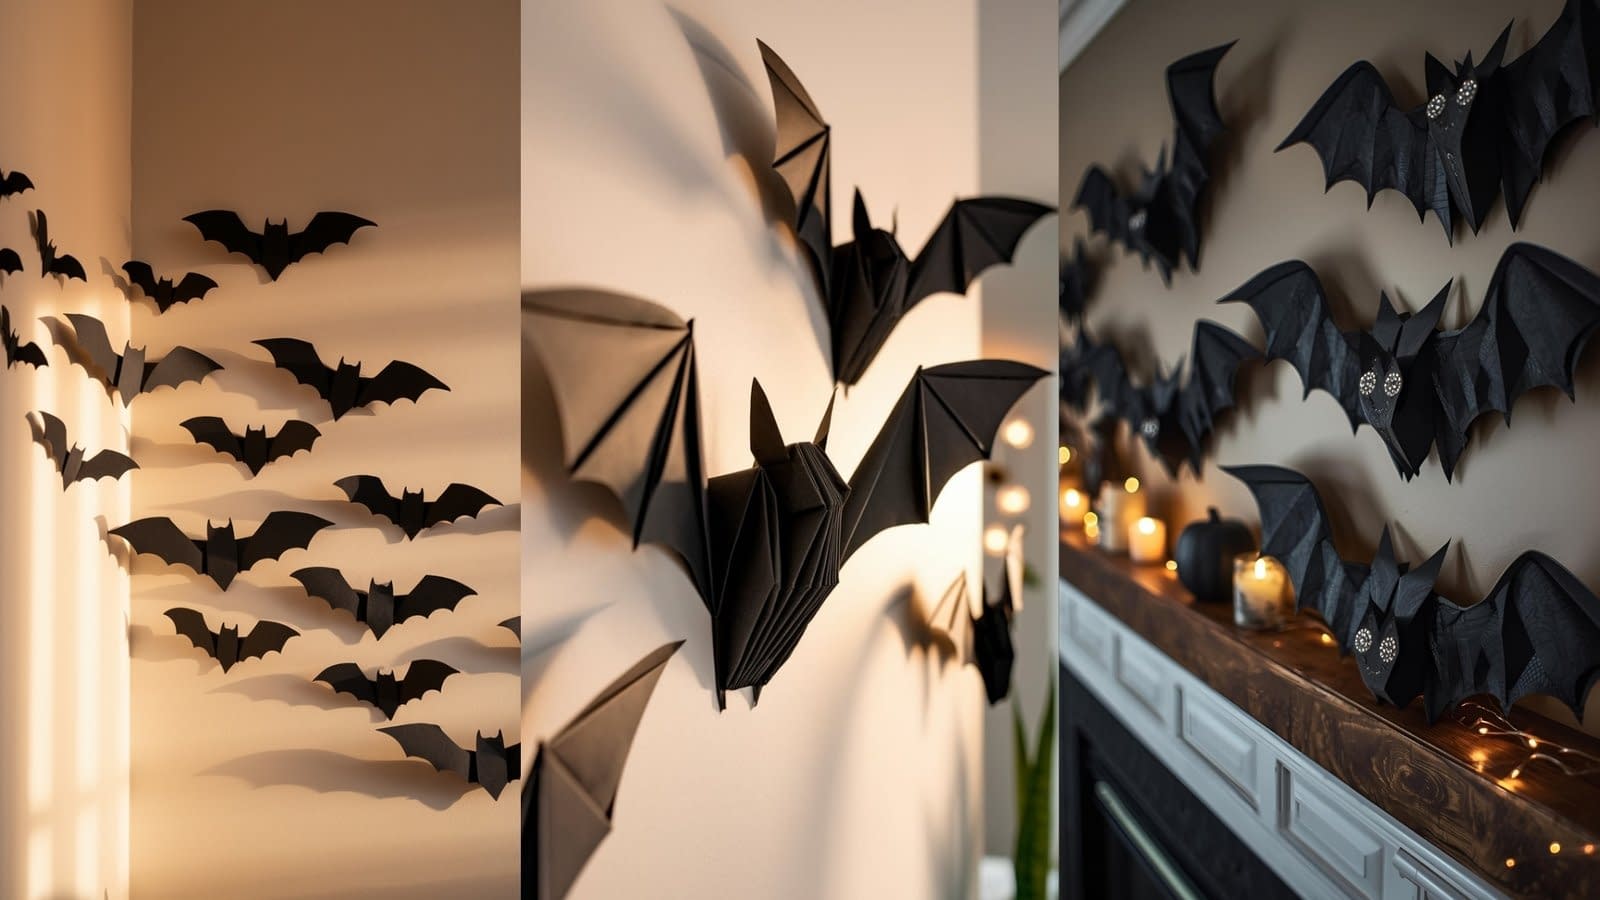
Tutorial 1: Classic Silhouette Paper Bats
What You’ll Need
Materials:
- Black construction paper or cardstock
- Pencil
- Scissors
- Tape or removable wall adhesive
- Bat template (optional but helpful)
Step 1: Draw or Trace the Bat Shape
- Start by folding your black paper in half—this will help you create symmetrical wings.
- On one side of the folded paper, use a pencil to sketch half of a bat shape. The bat’s body should be near the folded edge.
- For a clean look, draw a round head, small ears, and slightly curved wings.
- If you’re unsure about the shape, print or trace a bat template and use it as your guide.
Step 2: Cut the Bat
- While keeping the paper folded, carefully cut along your drawn line.
- When you unfold it, you’ll have a perfectly symmetrical bat.
- Use small, slow cuts around curved areas to avoid jagged edges.
Step 3: Smooth the Edges
After cutting, gently run your fingers along the edges to flatten any rough cuts or folds. If the wings feel uneven, trim them slightly for balance.
Step 4: Attach to the Wall
- Use small rolls of double-sided tape or removable adhesive putty behind the bat’s body.
- Arrange the bats in clusters for a flying effect. You can angle each bat differently to create the illusion of movement.
- Stick them above doorways, across the living room wall, or behind furniture for a dramatic effect.
Tip: Mix small, medium, and large bats together for a more natural look—just like a real bat colony in flight.
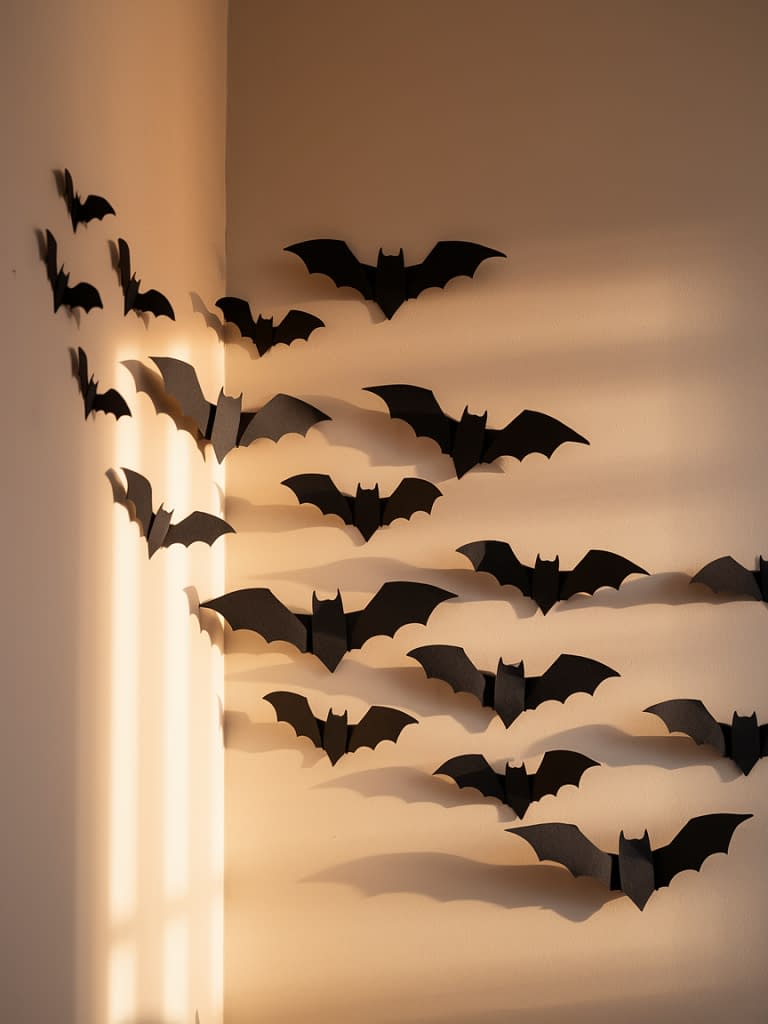
Tutorial 2: 3D Folded Paper Bats

If you want your bats to pop off the wall with more dimension, this 3D paper bats wall decor tutorial is perfect. The slight folds make the wings lift, adding shadow and movement to your wall.
What You’ll Need
Materials:
- Black cardstock or thick paper
- Pencil
- Scissors or craft knife
- Ruler
- Glue stick (optional for wing reinforcement)
- Double-sided tape or mounting squares
Step 1: Create the Bat Template
- Fold the paper in half lengthwise.
- Draw half of a bat design on the folded side—this time, make the wings slightly larger and curved for a 3D effect.
- Cut along the outline while the paper is folded.
- Unfold carefully to reveal a symmetrical bat with extended wings.
Step 2: Fold the Wings for Dimension
- Place the bat flat on your workspace.
- Using a ruler, draw two faint vertical lines starting from the top of the bat’s body to the bottom—one on each side of the body’s center.
- Fold both wings upward along these lines at about a 25–30° angle.
- Then, slightly fold the outer edge of each wing downward to give a realistic curve.
This combination of upward and downward folds makes the bat appear as if it’s mid-flight.
Step 3: Add Structural Details (Optional)
If you want the bat to hold its shape better, apply a thin strip of glue along the fold line and press lightly with your fingers until set. This keeps the wings from flattening over time.
Step 4: Mount the Bats
- Attach double-sided tape or small mounting squares to the back of the bat’s body.
- Avoid taping the wings—this keeps them raised and 3D.
- Arrange them on the wall in a scattered or swirling pattern. For a dramatic look, make them “fly” toward a light fixture or mirror.
Tip: To vary the effect, create different fold angles—some bats with sharper folds for a flying look, others more relaxed for a resting pose.
Tutorial 3: Layered Wing Paper Bats
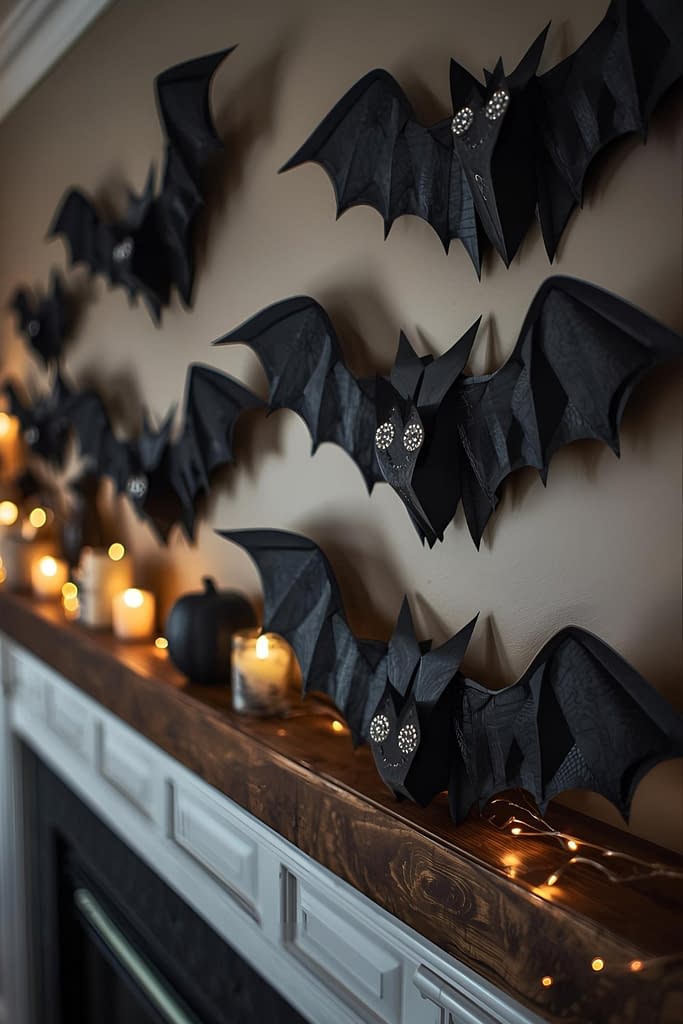
The third method is more advanced and gives your bats extra texture by layering two paper pieces to form the wings. These look beautiful for accent walls or above mantel displays.
What You’ll Need
Materials:
- Two shades of black or gray cardstock (or black and metallic paper for contrast)
- Scissors
- Pencil
- Glue stick or craft glue
- Ruler
- Optional: small decorative rhinestones or glitter glue for eyes
Step 1: Create the Base Body
- On your darker paper, draw the main bat body—this includes the head, torso, and basic wing outline.
- Cut it out neatly with scissors, keeping your lines smooth and clean.
Step 2: Draw and Cut the Wing Layers
- On the second sheet (lighter shade or metallic paper), draw two wing overlays slightly smaller than the first set. These should follow the same wing curve but stop just short of the outer tips.
- Cut these pieces carefully and make sure they fit smoothly over the base wings.
Step 3: Fold for Volume
- Gently fold the top of each wing piece about ¼ inch from the edge. This small fold creates a base to glue onto the main body without flattening the layered shape.
- Curve the wings slightly outward using your fingers to add lift.
Step 4: Glue the Layers
- Apply a thin line of glue along the folded edge of the top wing pieces.
- Press them gently onto the base wings. Hold for 10–15 seconds to set.
- Avoid adding glue across the whole wing surface—you want the edges to stay slightly lifted for dimension.
Step 5: Add Details
For a striking look, add a tiny dot of glitter glue or rhinestones for the eyes. This gives a subtle shimmer when the light hits.
Step 6: Mount on the Wall
- Use small dots of removable wall adhesive behind the bat’s body.
- Arrange several of these layered bats in varying sizes and directions.
- The overlapping textures will catch light beautifully, adding depth to your wall display.
Tip: These layered bats look especially good when lit by warm string lights or candles—creating soft shadows and highlights.
How to Arrange Your Paper Bats on the Wall
After finishing your 3 paper bats wall decor tutorials, the real fun begins with arranging them. Here are a few design ideas to inspire you:
- Flying Swarm: Start from one corner of the wall and spread bats diagonally upward across the space. It looks like they’re flying together in one direction.
- Circular Swirl: Arrange bats in a spiral pattern for a magical, wind-swept look.
- Above the Fireplace: Use layered bats for a focal point display with flickering candles beneath.
- Door or Mirror Frame: Place small bats around the frame to create a border effect.
- Accent Wall: Mix different sizes and styles (flat, 3D, layered) for a visually dynamic wall.
When attaching, test the placement with tape before finalizing. Adjust their angles for a more natural movement effect.
Extra Tips for Perfect Paper Bat Decor
- Paper Type: Use cardstock for durability. Construction paper is fine for short-term displays but may curl over time.
- Cutting Technique: For crisp edges, use small, sharp scissors or a craft knife. Keep your hand steady and cut in smooth motions.
- Color Variation: Try deep purple, charcoal gray, or metallic black papers for a richer, layered look.
- Lighting: Position your bats where light hits them at an angle—this enhances their 3D shadows.
- Reuse & Storage: Keep them flat in an envelope after the season for reuse next year.
Conclusion
Making your own paper bats wall decor is a fun, inexpensive, and creative way to bring festive spirit to your home. With these 3 paper bats wall decor tutorials, you can choose the look that fits your style—from the simplicity of flat silhouettes to the eye-catching detail of layered wings. Each method provides detailed folding, cutting, and gluing steps so you can confidently create high-quality decorations that impress guests and bring life to your walls.


