
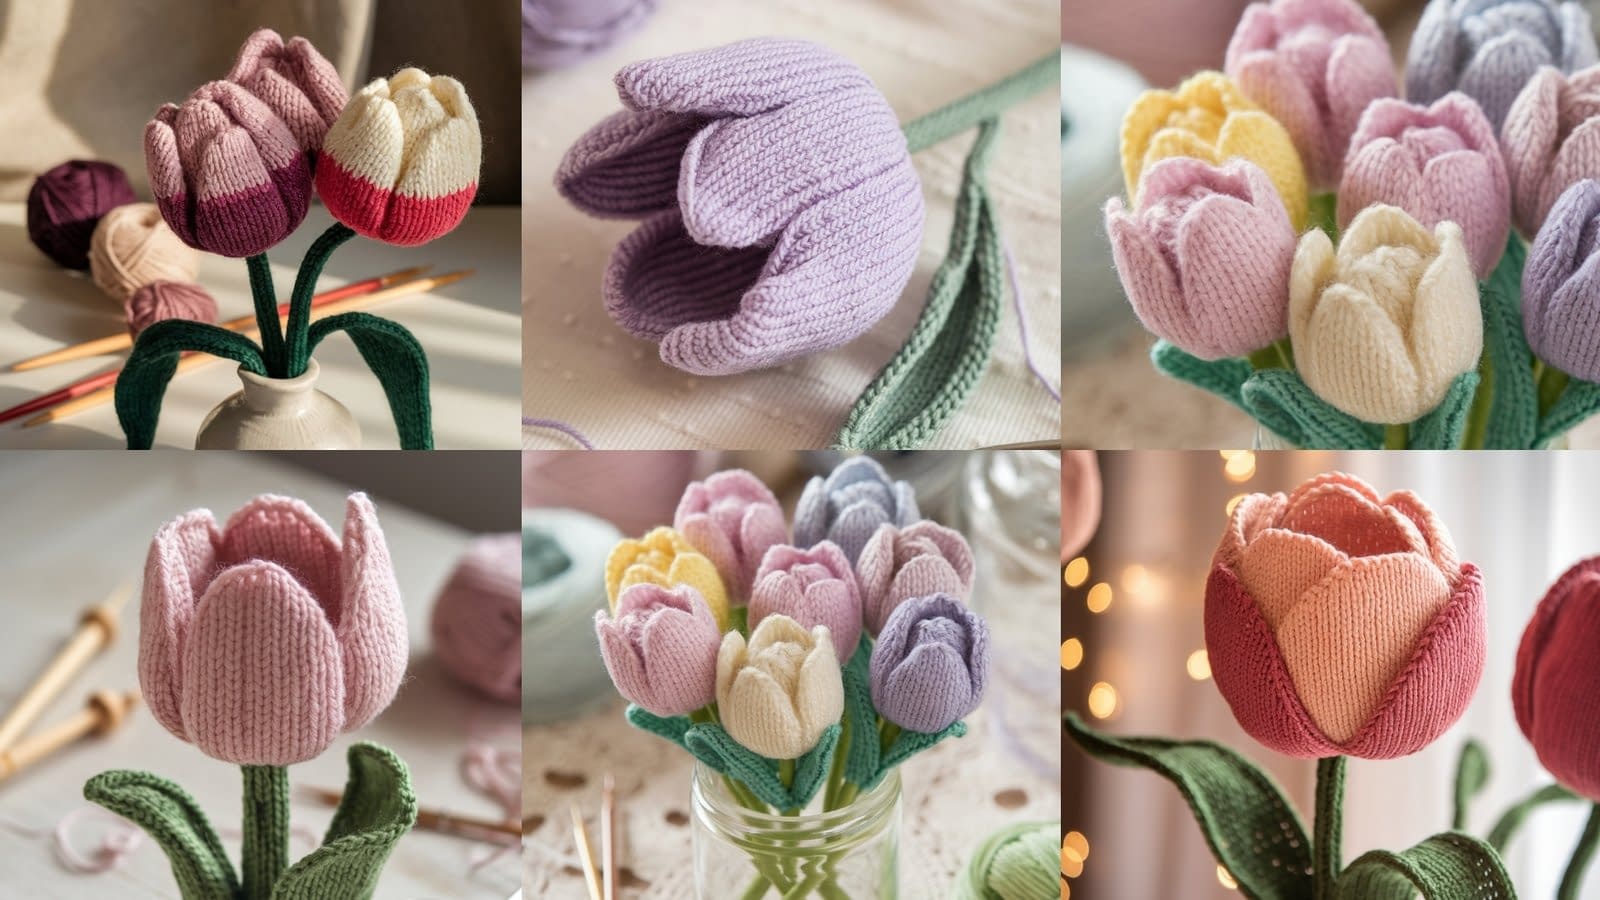
Tulips are one of the most graceful and timeless flowers, often symbolizing love, renewal, and the arrival of spring. Their elegant shape and vibrant colors make them a favorite for home décor, handmade gifts, and knitted flower arrangements. Whether you are new to knitting or have some experience with small projects, creating knit tulip flowers can be both a fun and rewarding craft.
In this post, we will guide you through 5 different knit tulip flower patterns, each offering a unique approach to making lifelike tulips using simple techniques and basic materials. From soft, rounded petals to long, elegant stems, every design will teach you new skills and help you build confidence with shaping, color changes, and finishing.
Each pattern includes:
- The skill level and approximate finished size
- A full list of materials and tools
- Notes about shaping, tension, and assembly
- Long, step-by-step knitting instructions written in complete stitch names
- Optional variations and design ideas
By the end, you will be able to create your own knit tulip bouquets, arrange them in vases, or even attach them to knitted garments or accessories. Let us begin with the first tulip pattern — a classic, simple design perfect for beginners.
1. Classic Knit Tulip Flower Pattern
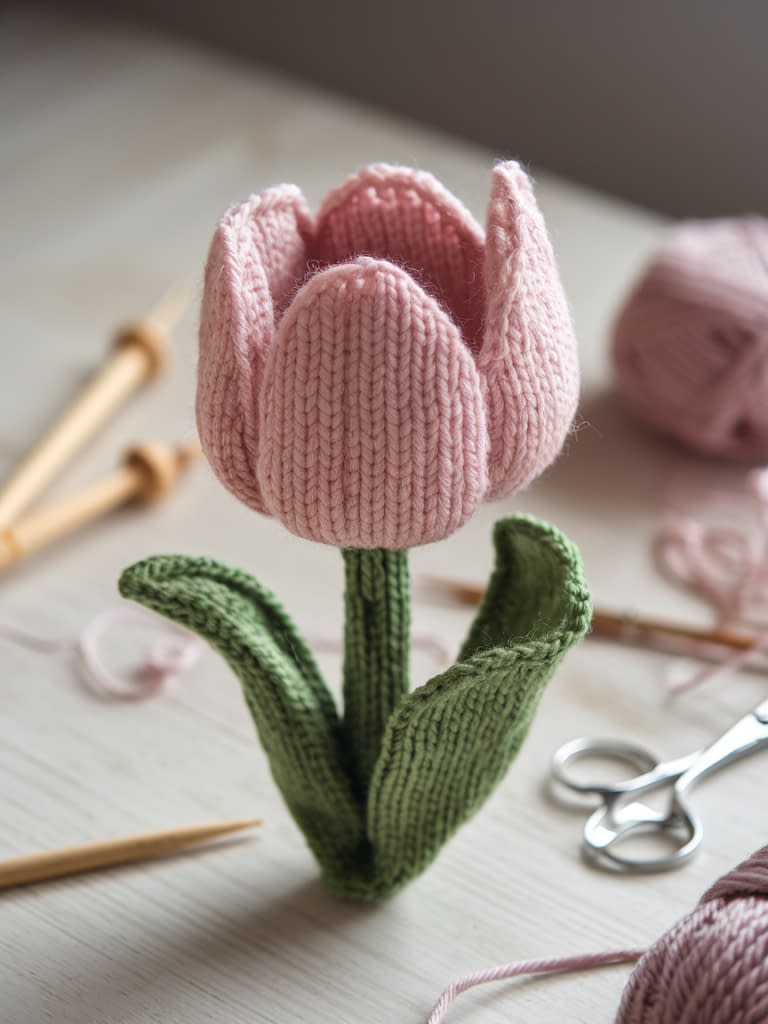
Skill level: Beginner
Finished size: Approximately 6 inches tall (including stem), depending on yarn and needle size
Materials Needed
- Light worsted weight yarn in your chosen tulip color (red, pink, yellow, or purple)
- Green yarn for the stem and leaves
- Pair of knitting needles, size 3.5 mm or 4.0 mm
- Yarn needle for sewing
- Scissors
- Optional floral wire for shaping stems
- Fiberfill or soft stuffing for the tulip bulb
Notes
This pattern is perfect for beginners who are learning to shape curved petals. The tulip bulb is created by knitting petal panels that are later sewn together. The stem and leaves are knit flat and attached during assembly. You can adjust the size by using thicker or thinner yarn or by changing your needle size.
Instructions
Step 1: Knitting the Tulip Petals (Make 3)
- With your flower color yarn, cast on 10 stitches.
- Row 1: Knit across all stitches.
- Row 2: Purl across all stitches.
- Row 3: Knit across.
- Row 4: Purl across. Continue alternating knit and purl rows until your piece measures approximately 2 inches in length.
- Row 9: Begin shaping the petal. Knit 2 stitches together at the beginning and end of the row (you will decrease by 2 stitches total).
- Row 10: Purl across.
- Row 11: Knit 2 stitches together at the beginning and end again.
- Row 12: Purl across.
- Row 13: Knit across until 4 stitches remain, then knit 2 stitches together twice.
- Cut the yarn, leaving a long tail for sewing. Thread through the remaining stitches and pull tight to close the petal tip.
Repeat this process to make three petals in total.
Step 2: Assembling the Tulip Bulb
- Position the three petals slightly overlapping each other.
- Use the long yarn tails to sew the edges together, forming a cup-shaped flower head.
- If desired, lightly stuff the center with a small amount of fiberfill to give your tulip a soft, rounded shape.
Step 3: Knitting the Stem
- With green yarn, cast on 6 stitches.
- Work in stockinette stitch (knit one row, purl one row) for about 8 inches or desired stem length.
- Bind off all stitches.
- Fold the piece lengthwise and sew along the long edge to create a tube. You can insert floral wire before closing it completely to make your stem bendable.
Step 4: Knitting the Leaf
- Cast on 8 stitches with green yarn.
- Row 1: Knit across.
- Row 2: Purl across.
- Row 3: Knit 2 stitches together at the beginning, knit across until 2 stitches remain, then knit 2 stitches together.
- Row 4: Purl across.
- Repeat these two rows until you have only 2 stitches left.
- Bind off and weave in the ends.
Step 5: Final Assembly
- Sew the tulip head to the top of the stem.
- Attach the leaf to one side of the stem near the base.
- Adjust the petal overlap for a natural shape, and your classic knit tulip is complete.
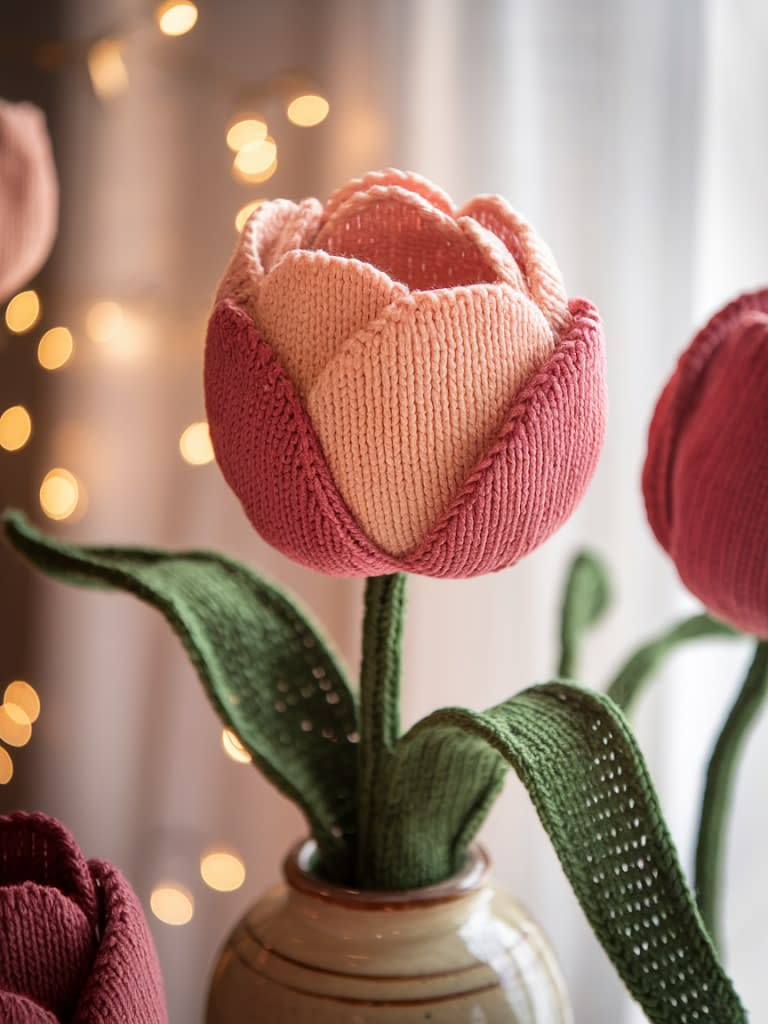
2. Two-Tone Knit Tulip Flower Pattern
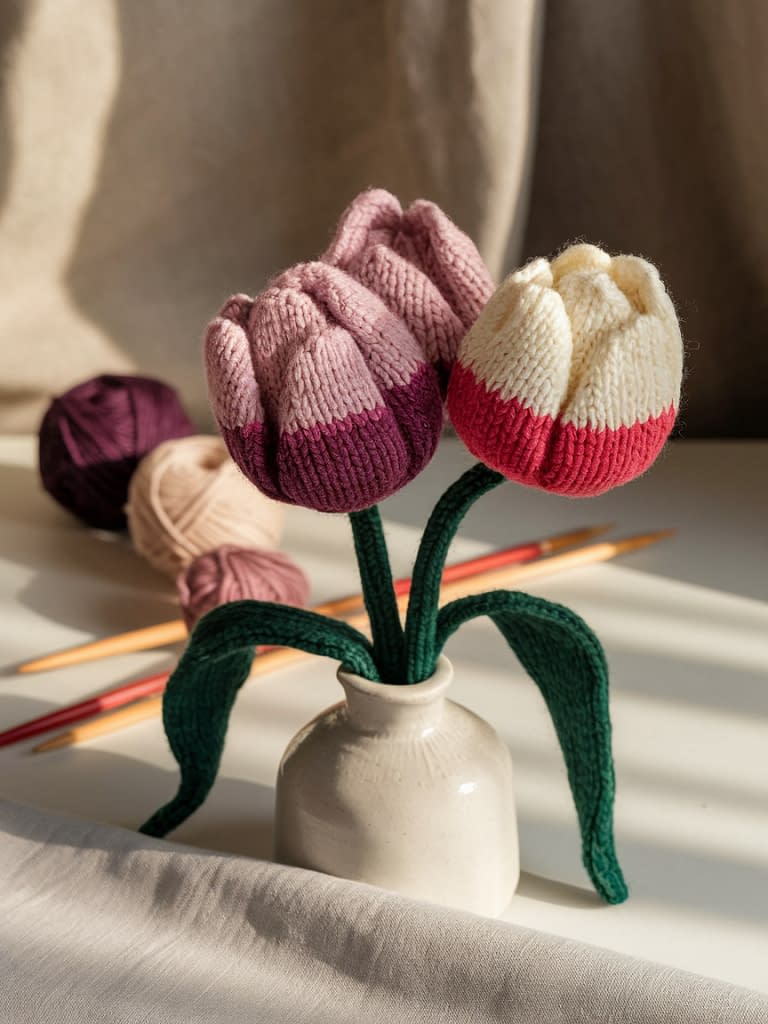
Skill level: Intermediate (basic color changes and shaping)
Finished size: Approximately 7 inches tall
Materials Needed
- Two colors of worsted weight yarn (for example, pink and white, or red and yellow)
- Green yarn for stem and leaves
- Knitting needles size 4.0 mm
- Yarn needle, scissors, and optional floral wire
Notes
This version introduces simple color changes to mimic the beautiful, blended petals of real tulips. You can experiment with different yarn shades to achieve unique color gradients.
Instructions
Step 1: Petal Panels (Make 3)
- With the darker shade, cast on 12 stitches.
- Work 4 rows in stockinette stitch (knit one row, purl one row).
- Switch to your lighter color and continue knitting for another 10 rows.
- Begin decreasing: knit 2 stitches together at both ends every right-side row until 4 stitches remain.
- Bind off, leaving a long tail for sewing.
Repeat to make three petals in alternating color combinations for a natural gradient look.
Step 2: Assembly
Sew the petals together just as in the classic tulip, allowing the color transitions to line up beautifully. Lightly stuff the inside if desired.
Step 3: Stem and Leaf
Use the same method as in Pattern 1. However, you can make two leaves this time and attach one slightly higher on the stem for a fuller appearance.
This two-tone tulip looks striking when arranged in bunches, especially with alternating shades.
3. Ribbed Knit Tulip Flower Pattern
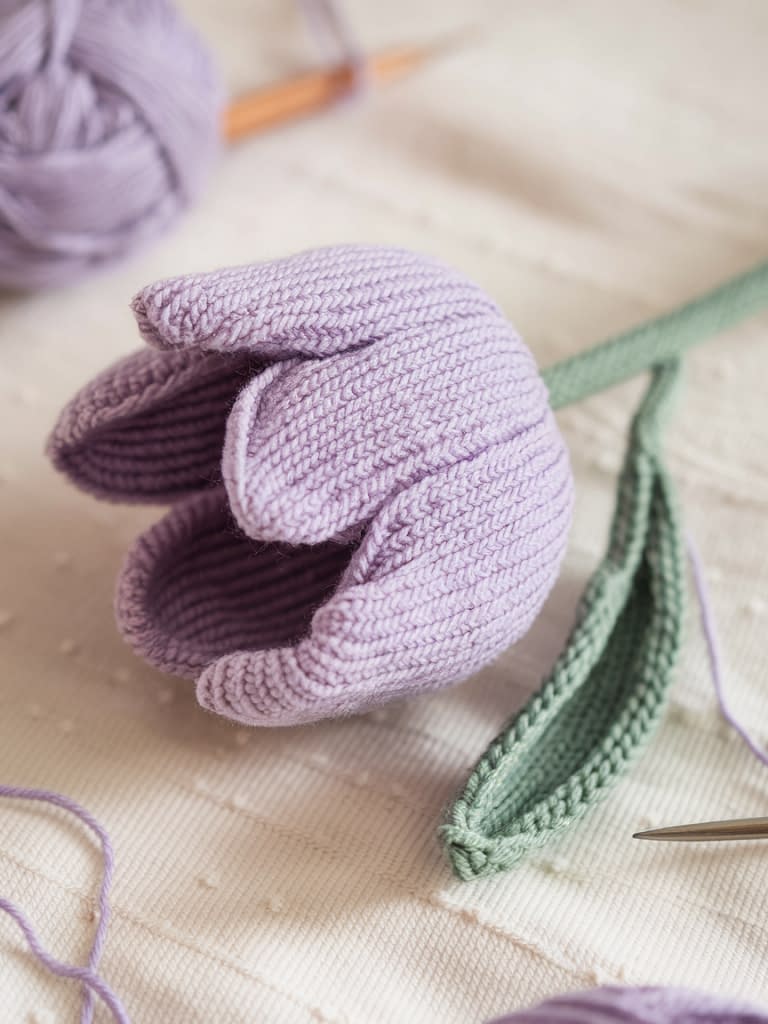
Skill level: Beginner–Intermediate
Finished size: 6 to 8 inches tall
Materials Needed
- Worsted weight yarn in your chosen tulip color
- Green yarn for stem and leaves
- Knitting needles, size 3.5 mm
- Yarn needle and scissors
Notes
The ribbed texture adds a lifelike look to the tulip petals. The ridges naturally curl slightly inward, giving the flower more depth and dimension without any special shaping.
Instructions
Step 1: Petals (Make 4)
- Cast on 10 stitches.
- Work in a 2×2 rib pattern (knit 2, purl 2) across every row for about 2.5 inches.
- Begin decreasing by knitting 2 stitches together on the first and last two stitches of every knit row.
- Continue until 4 stitches remain.
- Cut the yarn, pull through the loops, and tighten.
Repeat this process to make four petals.
Step 2: Assembly
Join the petals together, overlapping them slightly so the ribbing texture is visible from all angles. Sew the sides neatly and add a small bit of stuffing.
Step 3: Stem and Leaf
Follow the stem and leaf instructions from Pattern 1. This design looks especially elegant with thinner yarn, as the ribbed petals create a subtle, realistic texture.
4. Knitted Mini Tulip Pattern
Skill level: Beginner
Finished size: Approximately 3 inches tall
Materials Needed
- Small amounts of lightweight or fingering yarn
- Knitting needles size 3.0 mm
- Green yarn for stem
- Yarn needle and scissors
Notes
This pattern is perfect for miniature tulip bouquets or decorations for hats, bags, and gifts. It uses simple stitches but creates delicate, compact flowers.
Instructions
Step 1: Petal (Make 3)
- Cast on 8 stitches.
- Knit 4 rows.
- On the next right-side row, knit 2 stitches together at both ends.
- Knit 2 more rows, then bind off.
- The petal should be about 1 inch tall.
Repeat to make 3 petals.
Step 2: Assembly
Sew petals together at the sides to form a small cup. No stuffing is needed for this version.
Step 3: Stem
- Cast on 4 stitches with green yarn.
- Knit 8 rows.
- Roll the strip into a tight tube and sew the edge.
Attach the tulip head to the stem, and you have a lovely mini tulip. Make several to form a small bouquet.
5. Layered Knit Tulip Flower Pattern
Skill level: Intermediate–Advanced
Finished size: Approximately 8 inches tall
Materials Needed
- Worsted weight yarn in two coordinating tulip shades (for layered look)
- Green yarn for stem and leaves
- Knitting needles 4.0 mm
- Yarn needle, scissors, and fiberfill
Notes
This pattern creates a layered tulip with two sets of petals for a 3D, realistic effect. The inner petals are shorter and slightly narrower than the outer ones, creating a natural depth when assembled.
Instructions
Step 1: Inner Petals (Make 3)
- With lighter color, cast on 10 stitches.
- Work 6 rows in stockinette stitch.
- Begin decreasing by knitting 2 stitches together at both ends on every right-side row until 4 stitches remain.
- Bind off, leaving a long tail.
Step 2: Outer Petals (Make 3)
- With darker color, cast on 12 stitches.
- Work 8 rows in stockinette stitch.
- Decrease as before until 4 stitches remain.
- Bind off and leave a tail.
Step 3: Assembly
- Sew the three inner petals together to form a small cup.
- Arrange the outer petals around it, slightly overlapping the edges.
- Sew everything securely and lightly stuff the center.
Step 4: Stem and Leaves
Use the same method as before but make two long leaves by casting on 10 stitches and knitting until 5 inches long before shaping the tips. Attach them to the stem for a natural, layered appearance.
Creative Variations and Finishing Ideas
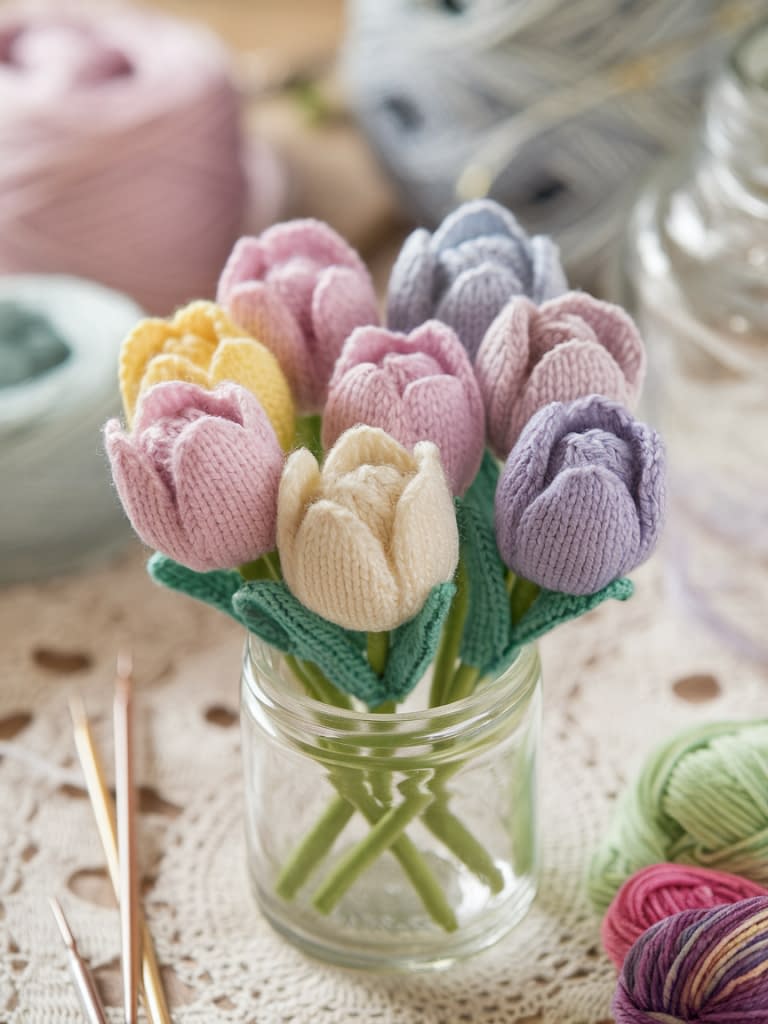
- Bouquet Arrangement: Make several tulips in various colors and sew the stems together to form a bouquet. Wrap with a knitted ribbon for a handmade touch.
- Potted Tulips: Place the knitted flowers into a small pot with foam or pebbles for a charming home décor piece.
- Gift Toppers: Mini tulips make excellent decorations for wrapped gifts or handmade cards.
- Color Themes: Experiment with pastel shades for springtime projects or deep reds and purples for elegant home decorations.
Conclusion
Creating your own knit tulip flowers is a relaxing and satisfying project that brings the charm of springtime into your home any time of the year. With these five different tulip patterns — from the classic and two-tone designs to ribbed, mini, and layered versions — you can explore endless color combinations and styles.
Each design teaches valuable knitting techniques like shaping, color transitions, and layering, making this guide suitable for all levels. Whether you are crafting them for a gift, home décor, or simply to enjoy the art of knitting flowers, these tulip patterns will inspire you to create something truly beautiful and timeless.
Take your time with each step, enjoy the process, and soon you will have a vibrant bouquet of hand-knit tulips ready to brighten any space.


