
Easter is a time of joy, renewal, and color, and there is no better way to celebrate than with handmade decorations that bring warmth and charm into your home. Among the most delightful Easter crafts are crocheted eggs, which can be used as ornaments, table decorations, gifts, or as part of a festive garland.
Crocheted Easter eggs are versatile and suitable for all skill levels. Beginners can start with simple, classic designs, while experienced crocheters can experiment with intricate patterns, textures, and decorative techniques.
In this guide, you will find five detailed crochet Easter egg patterns, all written in full, descriptive language without any shorthand. Each pattern includes a list of materials, step-by-step instructions, and helpful tips to ensure your finished egg is beautiful and professional-looking.
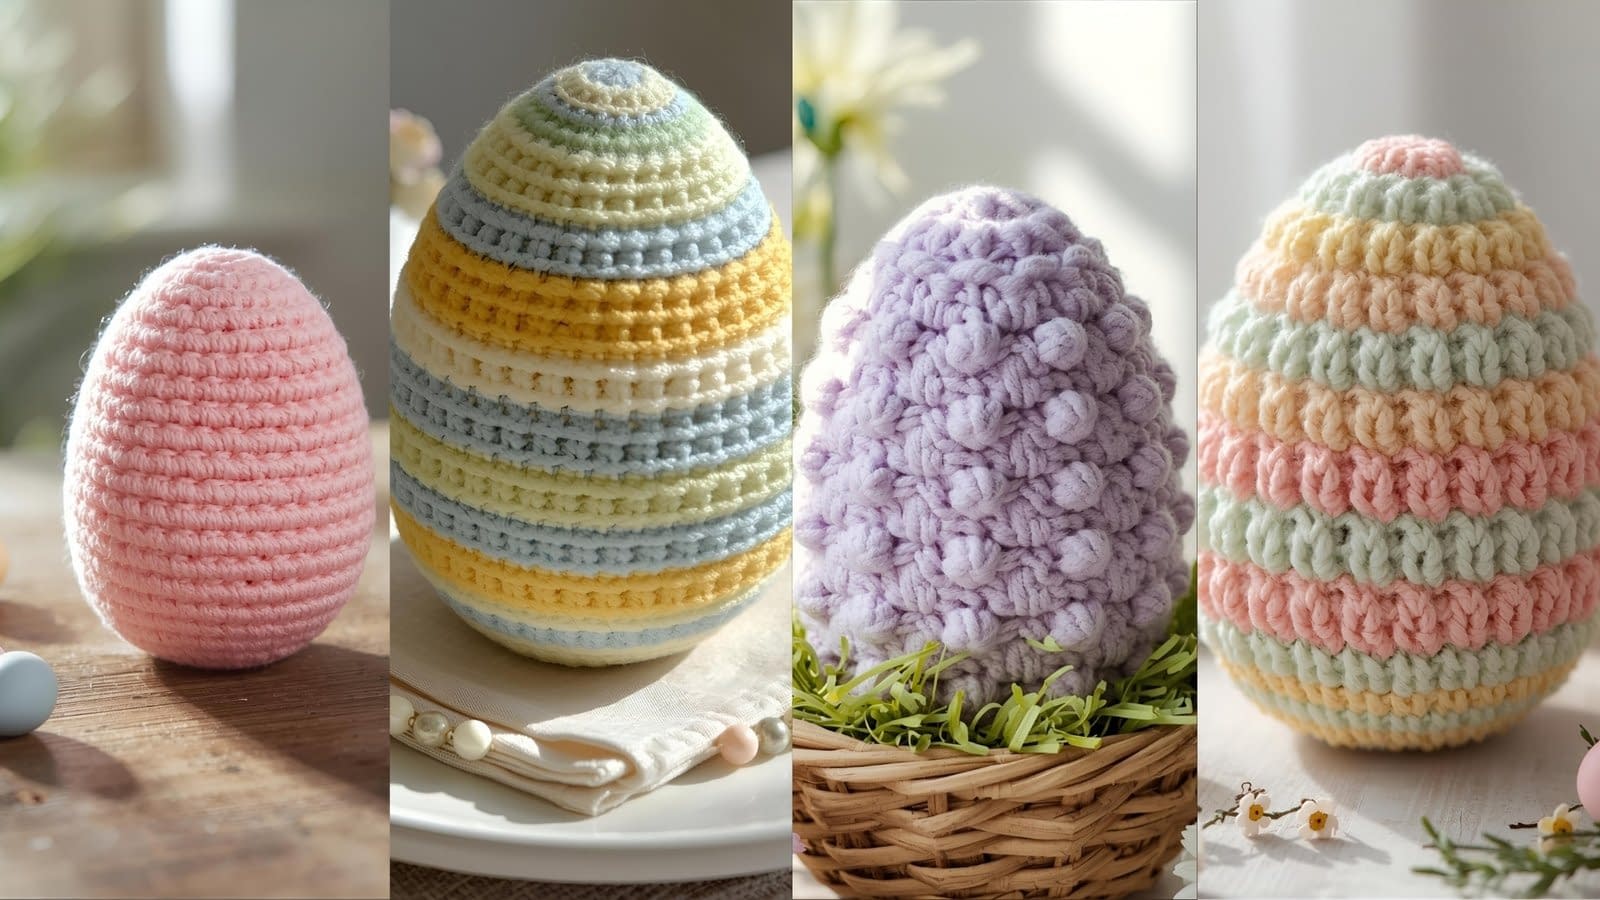
1. Classic Crochet Easter Egg

Skill Level: Beginner
Finished Size: Approximately three inches tall by two and a half inches wide
Materials Needed
- Worsted weight yarn in soft pastel colors such as yellow, pink, blue, or green
- Crochet hook size three and a half millimeters
- Fiberfill stuffing
- Yarn needle for weaving in ends
- Scissors
Instructions
Step 1: Create the Base Ring
Begin by forming a magic ring with your chosen yarn color. To do this, wrap the yarn around your fingers to form a loop, insert the crochet hook into the loop, and pull up a loop of yarn. This will create a small adjustable ring that will serve as the foundation of your Easter egg.
Step 2: First Round – Forming the Center
Chain two to count as your first half double crochet. Work five additional half double crochet stitches into the ring. You should have a total of six half double crochet stitches including the chain two. Gently pull the tail of the yarn to close the magic ring.
Step 3: Second Round – Increasing the Base
Chain two. Work two half double crochet stitches into the first stitch, then one half double crochet stitch into each of the remaining stitches around the ring. This will expand the base of your egg and start giving it a slightly rounded shape.
Step 4: Third Round – Continuing the Shape
Chain two, which counts as your first half double crochet. Work two half double crochet stitches in the first stitch, then one half double crochet stitch into each of the next stitch. Repeat this pattern around. This gradual increase will create the widening middle portion of the egg.
Step 5: Middle Rounds – Building the Egg Body
Chain two at the beginning of the round. Work one half double crochet stitch into each stitch around without increasing. Repeat for four rounds. This will allow the egg to extend vertically and form the main body.
Step 6: Shaping the Top – Decreasing
To begin shaping the top of the egg, chain two. Work one half double crochet stitch over the next two stitches together (decrease) at evenly spaced points around the round, then continue half double crochet stitches in each remaining stitch. Repeat this decrease in subsequent rounds, gradually closing the top of the egg.
Step 7: Stuffing the Egg
Before the top is fully closed, use fiberfill stuffing to fill the egg. Push the fiberfill gently into the egg so that it maintains a smooth, rounded shape. Do not overstuff, as this can distort the stitches.
Step 8: Closing and Finishing
Continue decreasing until the top is closed. Fasten off the yarn, leaving a long tail, and use a yarn needle to weave the end securely through the top stitches. Adjust the stuffing if needed and smooth the surface of the egg. Optionally, decorate the egg with small embroidered dots, stripes, or pastel color changes.
Tips:
- Keep your tension consistent throughout, especially when increasing and decreasing, to maintain a smooth shape.
- Light pastel colors give a classic Easter appearance.
2. Striped Crochet Easter Egg

Skill Level: Beginner–Intermediate
Finished Size: Approximately three and a half inches tall by two and a half inches wide
Materials Needed
- Worsted weight yarn in at least two contrasting colors
- Crochet hook size three and a half millimeters
- Fiberfill stuffing
- Yarn needle
- Scissors
Instructions
Step 1: Start the Base
Make a magic ring using your first yarn color. Work six single crochet stitches into the magic ring and gently pull the tail to close the center.
Step 2: Increase the Base
Work two single crochet stitches in each stitch around the ring. This will form a slightly wider base.
Step 3: Third Round – Gradual Increase
Work one single crochet stitch in the first stitch, then two single crochet stitches in the next stitch. Repeat this pattern around the round to continue widening the base.
Step 4: Middle Section
Work one single crochet stitch in each stitch around for two rounds. This begins the main body of the egg.
Step 5: Begin Stripes
Switch to your second yarn color. Chain one at the start of the round, then work one single crochet stitch into each stitch around. Continue in this second color for two to three rounds, depending on how wide you want the stripe.
Step 6: Alternate Colors
Return to the first color and work one single crochet stitch in each stitch around. Alternate colors for as many stripes as desired until you reach the top of the egg.
Step 7: Decreasing the Top
To shape the top, gradually decrease by working two single crochet stitches together at evenly spaced intervals around the round. Continue decreasing until the top is closed.
Step 8: Stuffing and Closing
Before completely closing the top, fill the egg with fiberfill stuffing to create a firm, rounded shape. Finish closing the egg, fasten off the yarn, and weave in the ends.
Tips:
- Maintain consistent tension while changing colors to avoid loose loops.
- Color stripes can be as wide or narrow as you prefer for a playful effect.
3. Bobble Stitch Crochet Easter Egg

Skill Level: Intermediate
Finished Size: Approximately three and a half inches tall by two and a half inches wide
Materials Needed
- Worsted weight yarn in pastel shades
- Crochet hook size three and a half millimeters
- Fiberfill stuffing
- Yarn needle
- Scissors
Instructions
Step 1: Begin with the Base
Form a magic ring and work six single crochet stitches into the ring. Pull the tail to close the center.
Step 2: Increase for the Base
Work two single crochet stitches in each stitch around to form the rounded base of the egg.
Step 3: Continue Increasing
Work one single crochet stitch in the first stitch and two single crochet stitches in the next stitch, repeating around the round to continue widening.
Step 4: Middle Body
Work one single crochet stitch in each stitch around for two rounds. This creates the middle of the egg.
Step 5: Create Bobble Stitches
For the first bobble stitch round, work a bobble stitch in the first stitch and a single crochet stitch in the next stitch, repeating this pattern around. For a bobble stitch, yarn over, insert the hook into the stitch, yarn over and pull up a loop, yarn over and pull through two loops on the hook, repeat this process five times in the same stitch, then yarn over and pull through all loops on the hook.
Step 6: Continue Pattern
Alternate one round of single crochet stitches with one round of bobble stitches until you reach the desired height.
Step 7: Begin Decreasing
Work two single crochet stitches together at evenly spaced points while maintaining the bobble stitch pattern. Continue decreasing gradually until the top closes.
Step 8: Stuff and Finish
Stuff the egg firmly with fiberfill before completely closing. Fasten off and weave in ends. The bobble stitches create a textured, decorative surface that looks like intricate egg decoration.
4. Striped Puff Stitch Easter Egg

Skill Level: Intermediate
Finished Size: Approximately four inches tall by three inches wide
Materials Needed
- Worsted weight yarn in multiple pastel colors
- Crochet hook size four millimeters
- Fiberfill
- Yarn needle
- Scissors
Instructions
Step 1: Start with the Base
Form a magic ring and work six single crochet stitches into the center. Pull the tail to close the ring.
Step 2: Increase the Base
Work two single crochet stitches in each stitch around to begin shaping the base.
Step 3: Continue Shaping
Work one single crochet stitch in the first stitch, two single crochet stitches in the next stitch, repeating around to gradually widen the egg.
Step 4: Puff Stitch Round
Work a puff stitch in the first stitch, then a single crochet stitch in the next stitch, repeating around the round. For a puff stitch, yarn over, insert the hook into the stitch, yarn over and pull up a loop, yarn over and pull through two loops on the hook, repeat this process four times in the same stitch, then yarn over and pull through all loops on the hook.
Step 5: Continue Pattern
Alternate rounds of single crochet stitches with rounds of puff stitches until the egg reaches desired height.
Step 6: Decrease the Top
Gradually decrease by working two single crochet stitches together at evenly spaced intervals while maintaining the puff stitch pattern. Stuff the egg with fiberfill as you go.
Step 7: Close and Finish
Close the top completely, fasten off, and weave in all ends. Optionally, use a contrasting yarn color to outline the puff stitches for decorative effect.
Conclusion
Crocheted Easter eggs are a versatile and charming addition to your spring décor. From simple, beginner-friendly designs to intricate lace and textured puff patterns, these handmade creations allow for endless creativity. By following the detailed, step-by-step instructions provided in these five patterns, you can create beautiful, professional-looking eggs suitable for gifts, decorations, or even festive garlands.
The beauty of crocheted Easter eggs lies not only in their aesthetic appeal but also in the joy of making them yourself. Each stitch represents care and creativity, resulting in a personalized decoration that will be treasured for years. As you grow more confident in your skills, you can experiment with colors, textures, and decorative elements to truly make your Easter eggs unique.
You are gifting them, filling baskets, or creating a festive centerpiece, these crochet Easter egg patterns are sure to bring warmth, color, and a handmade charm to your spring celebrations.


