
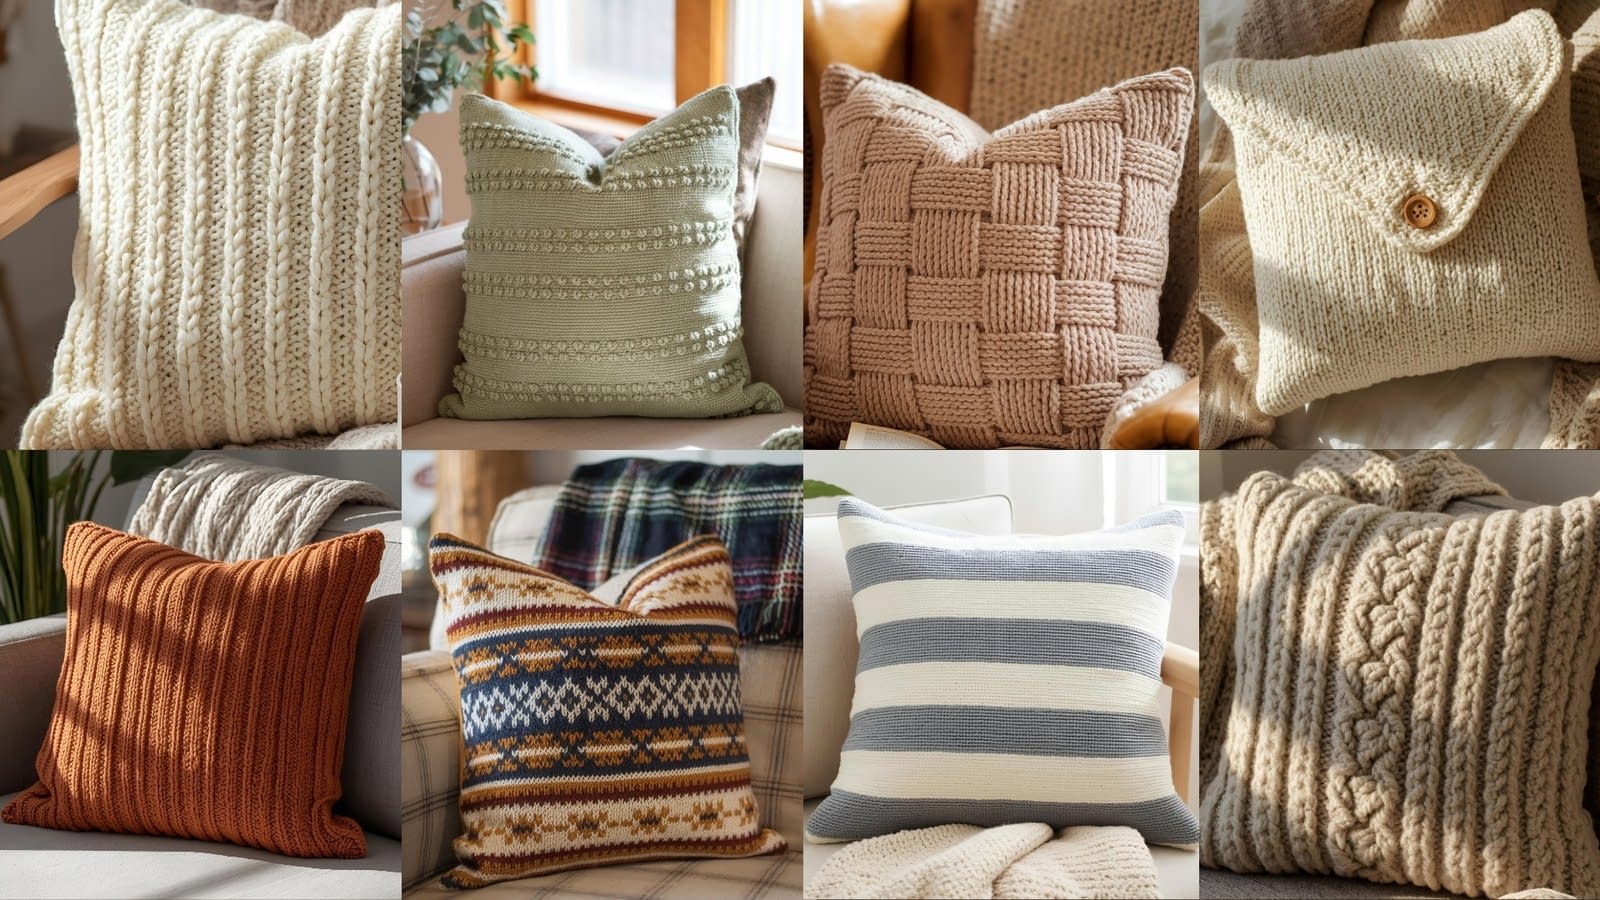
A handmade knit pillow cover can transform any room. It adds warmth, color, and personality, making your space feel more inviting. Knitting your own pillow covers also gives you the freedom to choose your favorite yarns, textures, and patterns — whether you love modern simplicity or cozy traditional looks.
In this guide, you’ll find eight detailed pillow cover tutorials, each offering something unique. From basic stitches to textured designs and cables, these patterns are written for knitters of every level. Each section includes a complete materials list, step-by-step instructions, and finishing tips. Whether you’re new to knitting or already experienced, these tutorials will help you create stylish pillow covers that look professionally made.
So, prepare your knitting needles, find a soft yarn you love, and let’s start making your home more comfortable — one pillow at a time.
1. Classic Stockinette Knit Pillow Cover Pattern

Skill level: Beginner
Finished size: Fits a 16-inch by 16-inch pillow insert
Materials
- Worsted weight yarn (number 4) – approximately 350 to 400 yards
- Pair of 5.0 millimeter knitting needles (U.S. size 8)
- Yarn needle
- Scissors
- Optional: four 1-inch buttons for a decorative closure
Notes
This design is perfect for beginners because it uses the simplest and most traditional knitting pattern — the stockinette stitch. It produces a smooth front surface and a slightly textured back, creating a clean, modern look.
Instructions
Front panel:
- Begin by casting on 64 stitches.
- For the first row, knit across all stitches.
- For the second row, purl across all stitches.
- Continue alternating between one row of knit stitches and one row of purl stitches. This alternating pattern creates the smooth texture known as stockinette stitch.
- Keep knitting until your fabric measures 16 inches in height from the cast-on edge.
- Once you reach the desired size, bind off all stitches loosely to maintain flexibility.
- Weave in the loose yarn ends with a yarn needle.
Back panels (you will make two):
- Cast on 64 stitches.
- Work in the same stockinette pattern for about 8 inches in height.
- Bind off.
- Repeat to make the second back panel.
Assembly
- Lay the front panel flat on a clean surface with the smooth side (the right side) facing upward.
- Place one back panel on top of it, aligning the edges carefully.
- Then place the second back panel on top, overlapping the first one by about 2 inches. This overlap will form the envelope-style opening for inserting the pillow.
- Sew around all four outer edges using mattress stitch or whip stitch.
- Turn the cover right side out and insert your pillow form.
- If you prefer, you can sew buttons along the overlapping edge for a neat, decorative closure.
Tip:
Block your panels before sewing to help the edges lie flat and to make seaming easier.
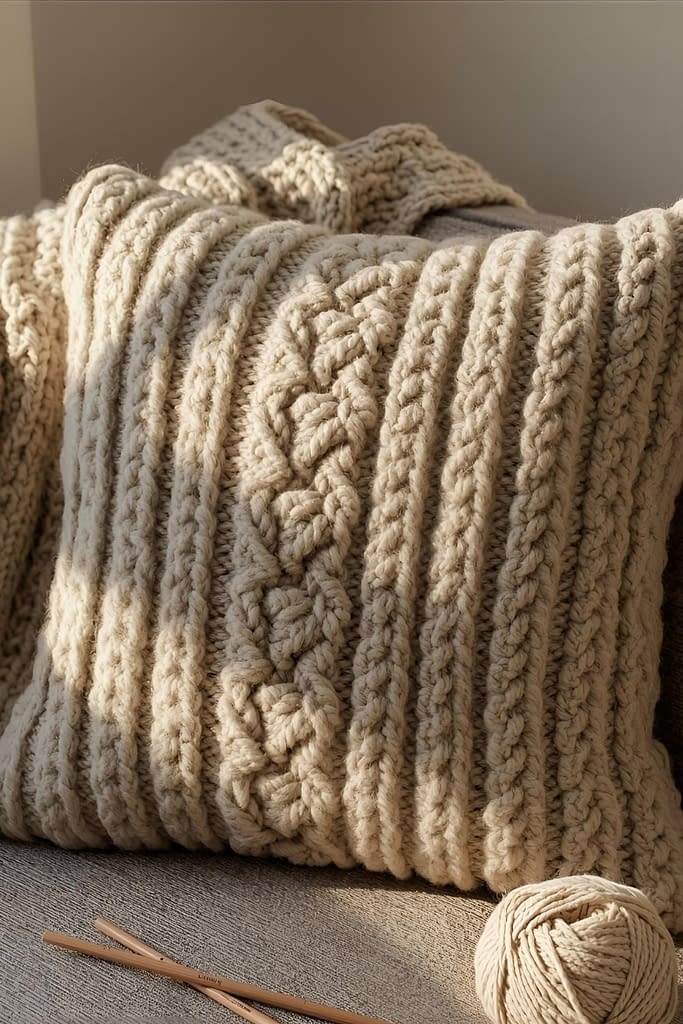
2. Chunky Cable Knit Pillow Cover Pattern
Skill level: Intermediate
Finished size: 18 inches by 18 inches
Materials
- Super bulky yarn (number 6), approximately 300 yards
- Circular knitting needles, 8 millimeters (U.S. size 11)
- One cable needle
- Yarn needle and scissors
Notes
This pattern is ideal for knitters who enjoy texture. The large, bold cables give a luxurious, cozy appearance, perfect for a living room sofa or reading chair. The thick yarn creates a soft, warm pillow that’s both stylish and functional.
Instructions
Front panel:
- Cast on 54 stitches.
- Begin with a setup row: knit across all stitches to create a foundation.
- Row 1 (front side): Knit four stitches, purl two stitches, then work a cable by moving the next three stitches onto a cable needle and holding it in front of your work. Knit the next three stitches from your main needle, then knit the three stitches from the cable needle. Purl two stitches. Repeat this sequence across the row.
- Row 2 (back side): Purl four stitches, knit two stitches, purl six stitches, knit two stitches — and repeat this sequence until the end of the row.
- Continue working these two rows to maintain the pattern, repeating the cable cross every sixth row to keep the cables even.
- Keep knitting until the panel measures about 18 inches in height.
- Bind off all stitches and block the piece to flatten it slightly while keeping the cable texture defined.
Back panel:
- Cast on 54 stitches.
- Knit two stitches, purl two stitches across every row (this creates a flexible ribbed pattern).
- Continue until your piece measures 18 inches tall.
- Bind off and weave in ends.
Assembly
- Place both panels with the right sides facing each other.
- Sew around three sides, leaving one edge open for inserting the pillow form.
- Insert the pillow and stitch the final side closed, or sew on buttons for a removable option.
Tip:
When blocking, do not stretch your cables too much — this helps them retain their plump, three-dimensional texture.
3. Textured Seed Stitch Pillow Cover Pattern

Skill level: Beginner
Finished size: 16 inches by 16 inches
Materials
- Aran weight yarn (number 4), about 350 yards
- 5.0 millimeter knitting needles (U.S. size 8)
- Yarn needle, scissors
Notes
Seed stitch is one of the easiest ways to add texture to knitting. It’s achieved by alternating knit and purl stitches in every row, creating a small, bumpy texture that looks beautiful on both sides.
Instructions
Front panel:
- Cast on 70 stitches.
- For the first row, alternate one knit stitch and one purl stitch all the way across.
- For the second row, start with one purl stitch, then one knit stitch, repeating across the row.
- Continue repeating these two rows until your fabric reaches 16 inches tall.
- Bind off loosely and weave in ends.
Back panels:
- Cast on 70 stitches.
- Work in the same seed stitch pattern for 8 inches in height.
- Bind off and make a second identical piece.
Assembly
- Lay the front panel on a flat surface.
- Place the two back panels on top, overlapping them by 2 inches.
- Pin the edges to hold them in place, then sew around all sides.
- Turn the cover right side out and insert your pillow.
Tip:
For a more decorative touch, use different colors for the back and front panels, creating a reversible pillow with two unique looks.
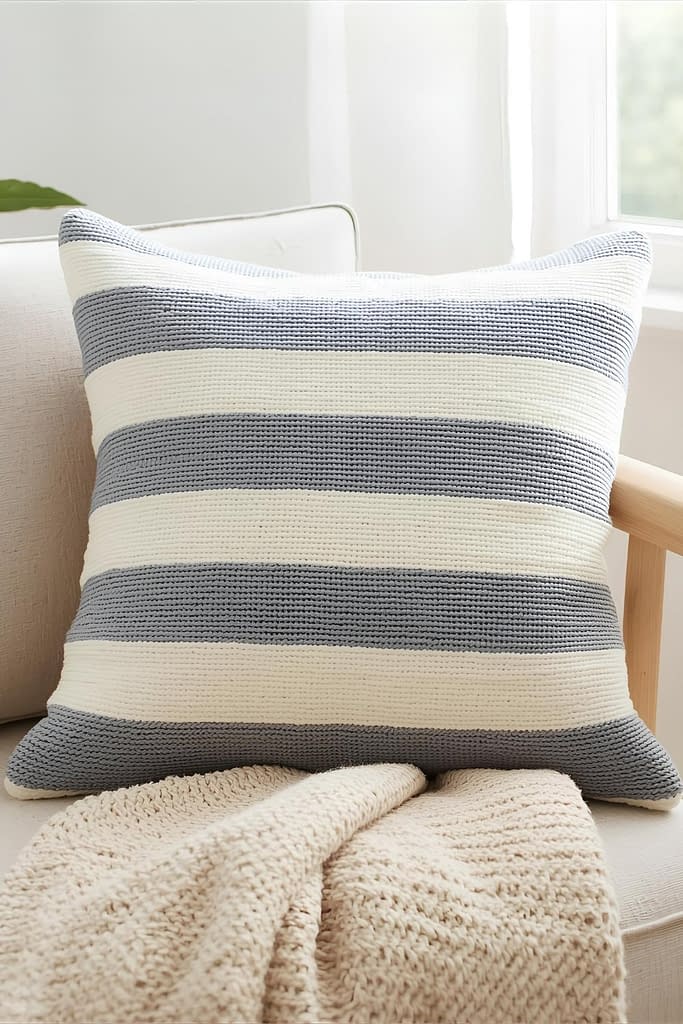
4. Striped Knit Pillow Cover Pattern
Skill level: Beginner to intermediate
Finished size: 18 inches by 18 inches
Materials
- Two contrasting colors of worsted weight yarn (number 4)
- 5.0 millimeter knitting needles
- Yarn needle
Notes
Stripes add character without complexity. This pattern lets you play with color, creating a bold and modern look that’s simple to make.
Instructions
Front panel:
- Cast on 72 stitches.
- Knit one row with your first color.
- Purl the next row with the same color.
- After every eight rows, switch to the second color. To change colors, simply drop the old yarn and start the new one, leaving a short tail to weave in later.
- Continue alternating colors every eight rows until the panel measures 18 inches tall.
- Bind off all stitches and weave in any loose yarn ends carefully to hide them.
Back panel:
- Use one solid color and knit in garter stitch (knitting every row).
- Continue until your piece measures 18 inches tall.
- Bind off and block if necessary.
Assembly
- Place both panels with the right sides facing inward.
- Sew along three sides, leaving one side open for inserting the pillow form.
- Insert the pillow and close the remaining edge with a neat whip stitch.
Variation:
Try making one color stripe twice as wide as the other for a creative, asymmetrical effect.
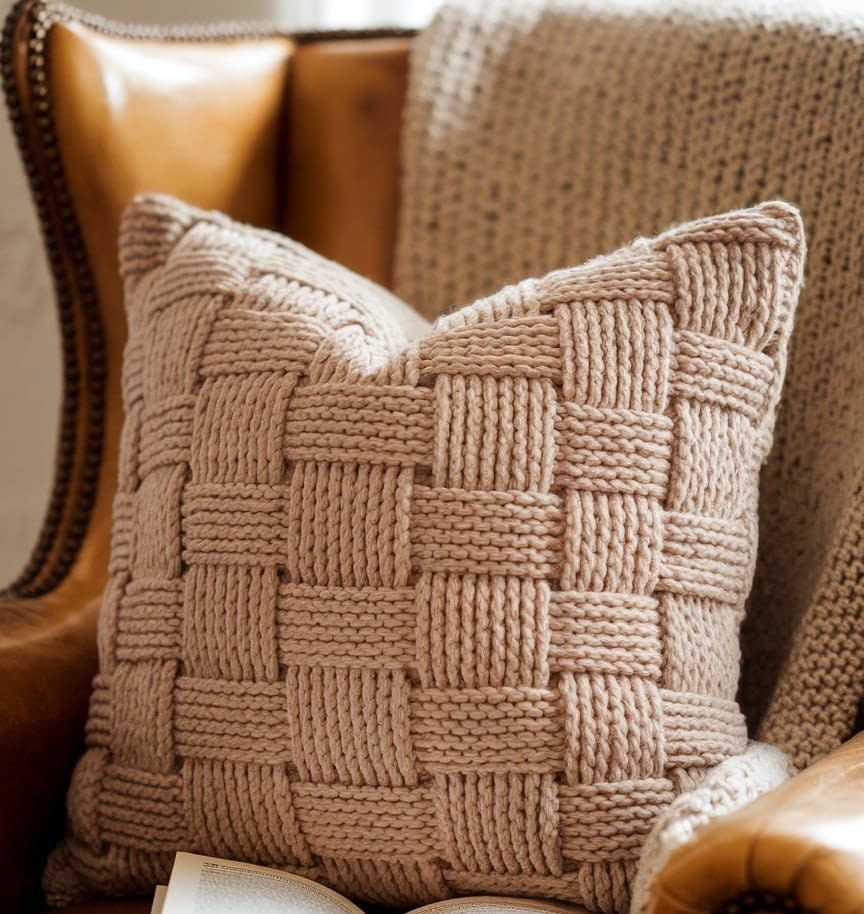
5. Basketweave Knit Pillow Cover Pattern
Skill level: Intermediate
Finished size: 20 inches by 20 inches
Materials
- Aran weight yarn (number 4), approximately 400 yards
- 5.5 millimeter knitting needles (U.S. size 9)
- Yarn needle and scissors
Notes
Basketweave is a classic stitch pattern that looks like woven fabric. It’s created by alternating blocks of knit and purl stitches, giving your pillow cover a sturdy, structured feel.
Instructions
Front panel:
- Cast on 80 stitches.
- Work the first six rows by knitting four stitches and purling four stitches, repeating across the row.
- For the next six rows, reverse the pattern by purling four stitches and knitting four stitches across the row.
- These twelve rows create one full basketweave section.
- Continue repeating this sequence until the piece measures about 20 inches tall.
- Bind off and weave in ends.
Back panel:
- You can either repeat the same pattern or use simple stockinette stitch for a smoother back.
- Work until it matches the front panel in size.
- Bind off and block both panels for even edges.
Assembly
- Place both panels with the right sides together.
- Stitch along three edges using mattress stitch or slip stitch.
- Insert the pillow form and close the remaining edge.
Optional variation:
Add a zipper or button closure on one edge if you want to easily remove the cover for washing.
6. Fair Isle Knit Pillow Cover Pattern
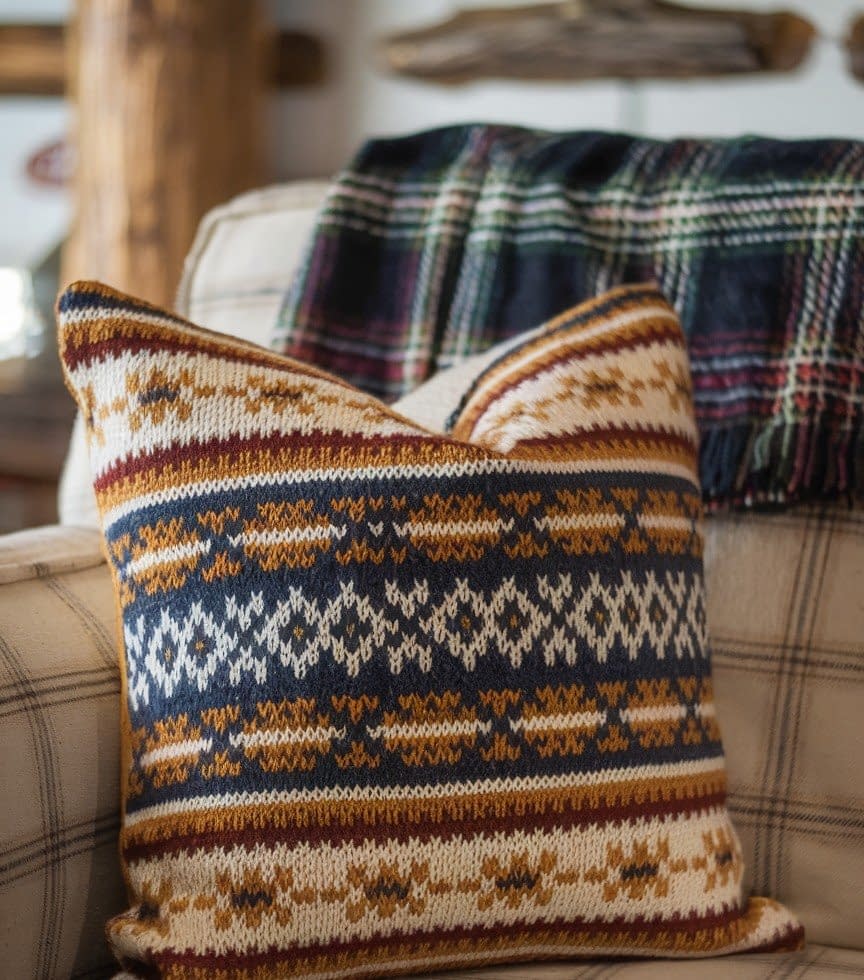
Skill level: Intermediate to advanced
Finished size: 18 inches by 18 inches
Materials
- Two or three colors of lightweight yarn (number 3)
- Circular knitting needles, 4 millimeters (U.S. size 6)
- Yarn needle
Notes
Fair Isle is a colorwork technique that uses two or more yarns in one row to create patterns and motifs. It requires patience and careful tension but produces striking, professional results.
Instructions
Front panel:
- Cast on 80 stitches.
- Begin working in stockinette stitch, following a colorwork chart of your choice (such as simple diamonds or geometric shapes).
- When carrying two yarns, hold one in each hand or wrap them carefully to prevent tangling.
- Keep the strands at the back loose enough to avoid puckering.
- Continue knitting until your piece reaches 18 inches tall.
- Bind off all stitches and block gently to smooth out the design.
Back panel:
- Knit a solid-colored stockinette piece measuring 18 inches by 18 inches.
- Bind off and weave in all ends.
Assembly
- Lay both panels right sides together.
- Sew neatly along all edges, leaving one side open.
- Insert pillow form and close the last edge.
Tip:
When blocking, use steam rather than full soaking to prevent colors from bleeding.
7. Ribbed Knit Pillow Cover Pattern
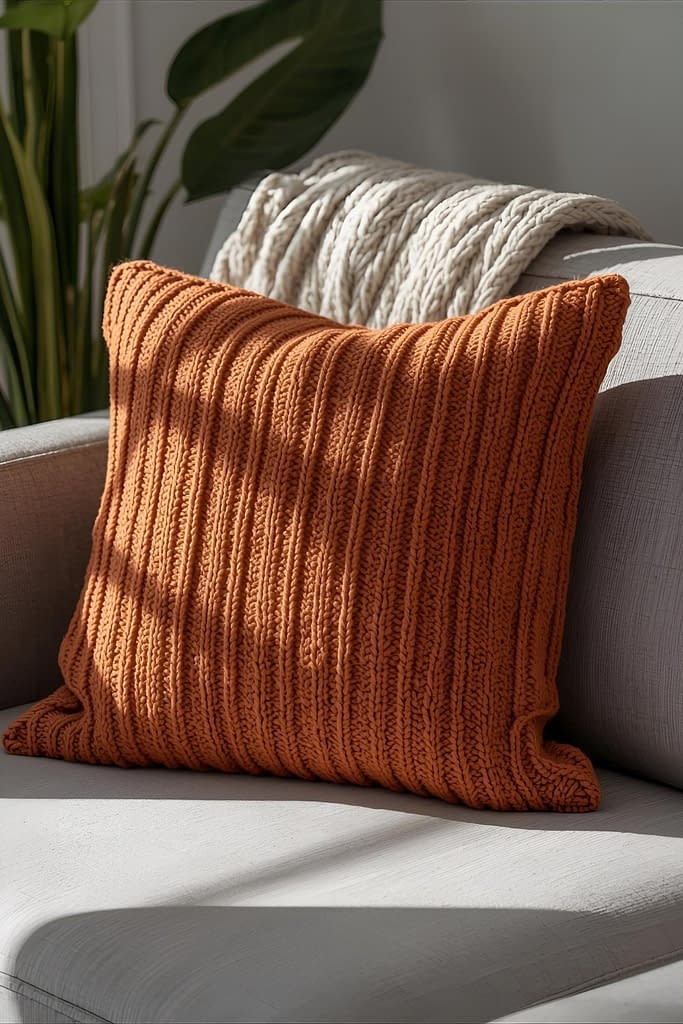
Skill level: Beginner
Finished size: 16 inches by 16 inches
Materials
- Worsted weight yarn (number 4), about 350 yards
- 5.0 millimeter knitting needles
- Yarn needle
Notes
Ribbing creates a stretchy, textured surface that hugs the pillow snugly. It’s easy to knit and works beautifully in solid colors.
Instructions
Front panel:
- Cast on 68 stitches.
- Knit two stitches, then purl two stitches across the row.
- Repeat this pattern for every row, keeping the columns of knit and purl stitches lined up.
- Continue until your piece measures 16 inches tall.
- Bind off loosely to maintain stretch.
Back panel:
- Make another identical piece.
- Bind off and weave in ends.
Assembly
- Place the two panels together with the textured sides facing inward.
- Sew along three sides using a mattress stitch.
- Insert the pillow and sew the remaining edge closed.
Variation:
Use two shades of yarn — one for the knit columns and another for the purl columns — to create subtle color contrast.
8. Buttoned Envelope Knit Pillow Cover Pattern
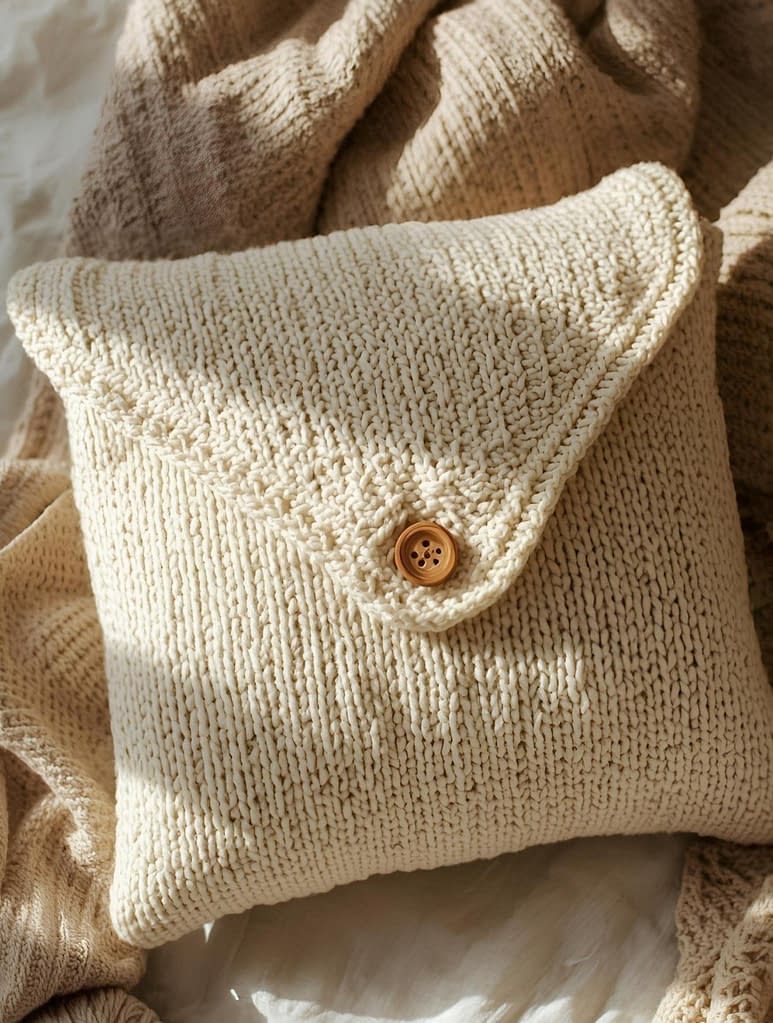
Skill level: Beginner to intermediate
Finished size: 18 inches by 18 inches
Materials
- Worsted weight yarn (number 4), about 400 yards
- 5.0 millimeter knitting needles
- Four large buttons
- Yarn needle and scissors
Notes
This pillow features a neat buttoned back, making it removable and easy to clean. It’s practical and stylish, ideal for everyday use.
Instructions
Front panel:
- Cast on 72 stitches.
- Work in stockinette stitch (knitting one row, purling one row) until your piece measures 18 inches tall.
- Bind off and block.
Back panels:
- Top section:
- Cast on 72 stitches and work in stockinette stitch for 10 inches.
- Bind off and set aside.
- Bottom section:
- Cast on 72 stitches and knit for 7 inches.
- On the next row, create four buttonholes evenly spaced across: knit four stitches, yarn over, knit two together — repeat this sequence across the row.
- Continue knitting for two more rows to reinforce the button edge.
- Bind off and weave in ends.
Assembly
- Place the front panel with the right side facing up.
- Position the two back panels on top, overlapping them so the buttonholes sit over the lower panel.
- Sew along all four sides.
- Turn right side out and attach the buttons underneath the buttonholes, sewing securely through the lower flap.
Tip:
Reinforce the button band with a row of slip stitches or tight single crochet stitches along the edge for durability.
Conclusion
Knitting pillow covers allows you to combine creativity with comfort. Whether you prefer the simple elegance of stockinette, the bold texture of cables, or the intricate colorwork of Fair Isle, there’s a pattern here that fits your style. Each of these 8 Knit Pillow Cover Pattern Tutorials offers a chance to learn something new while creating practical, cozy home decor.
You can experiment with yarn thickness, color combinations, or even mix textures for a layered look. Hand-knit pillow covers make wonderful gifts and add a handmade warmth that store-bought pieces simply can’t match.


