
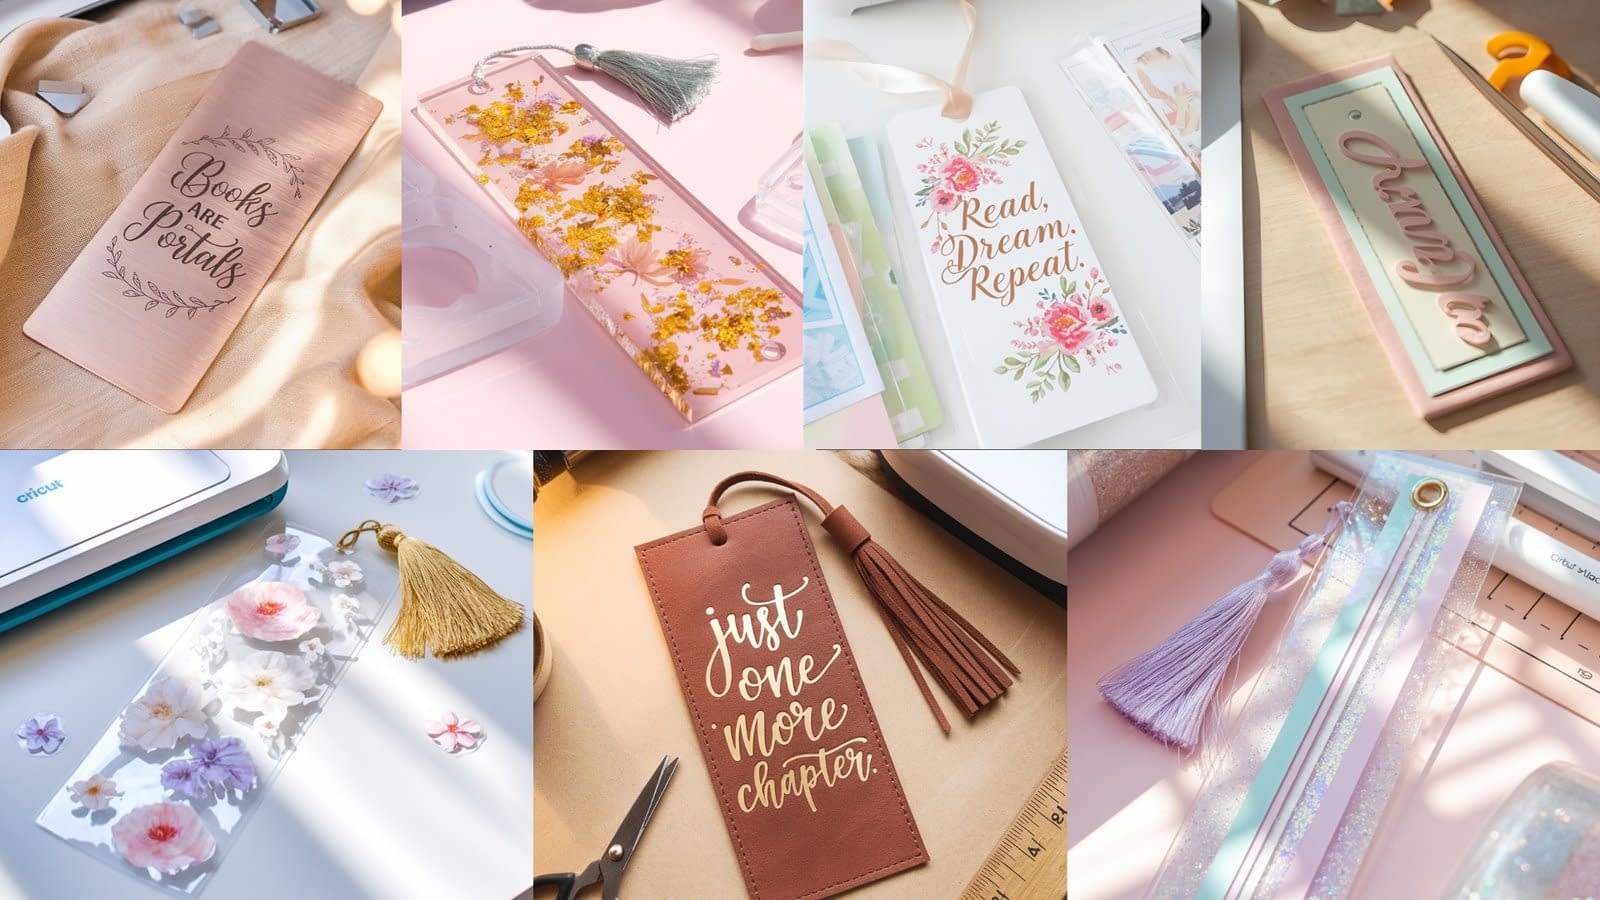
Making bookmarks with your Cricut is one of the most satisfying and creative ways to personalize your reading experience. From glittering transparent designs to engraved metal pieces, Cricut lets you experiment with materials, styles, and textures that go far beyond simple paper crafts. In this guide, we’ll walk through seven detailed bookmark tutorials — each matching the specific project type listed below.
Whether you’re creating gifts for book lovers or adding something handmade to your personal library, these Cricut bookmarks will inspire you to craft something beautiful, durable, and completely your own.
Bookmark Tutorial 1: Floral Vinyl Bookmark with Tassel

This floral vinyl bookmark combines delicate flower designs with a glossy finish and a soft tassel accent — a perfect project for beginners.
Materials:
- Cricut Maker or Cricut Explore
- Clear bookmark blanks (acrylic or PVC)
- Permanent vinyl (floral patterned or printed)
- Transfer tape
- Weeding tool
- Hole punch
- Tassel or ribbon
- Scraper tool
Steps:
- Design your bookmark
Open Cricut Design Space and set your project size (typically 2” x 6”). Choose or upload a floral pattern design. Adjust it to fit your bookmark blank. - Cut your vinyl
Place your vinyl sheet on the Cricut mat (shiny side up) and load it into your Cricut. Select “Vinyl” as your material and let the machine cut your floral pattern. - Weed the design
Carefully remove the excess vinyl around your floral cut using a weeding tool, leaving only the flower design. - Transfer the design
Use transfer tape to lift the floral design and place it neatly onto your clear bookmark blank. Use a scraper tool to remove bubbles and ensure a smooth finish. - Add a tassel
Punch a hole at the top center and tie a tassel or ribbon for a decorative touch. - Finish and polish
Wipe the surface clean with a microfiber cloth to bring out the gloss and shine of your floral vinyl bookmark.
Tip: Try layering small gold vinyl details for an elegant metallic accent.
Bookmark Tutorial 2: Layered Paper Bookmark with Name Design

This layered paper bookmark adds dimension with multiple cardstock layers and a personalized name design.
Materials:
- Cricut Maker or Explore
- Heavy cardstock in 3–4 pastel colors
- Craft glue or double-sided tape
- Cricut StandardGrip mat
- Weeding tool (optional)
- Hole punch and ribbon
Steps:
- Create your design
In Cricut Design Space, set the bookmark size (about 2” x 6.5”). Create three rectangles in slightly different sizes for each cardstock layer. Add your name in cursive font on the top layer. - Cut your layers
Load each cardstock color onto your mat and cut the layers one by one. The top layer should have the name cut out for a dimensional look. - Assemble the bookmark
Stack the layers carefully — glue the bottom layers first, aligning edges precisely. Finish by attaching the top cut-out layer. - Add finishing touches
Punch a hole at the top and insert a matching ribbon or cord.
Pro Tip: Use foam adhesive dots between layers for a 3D shadow effect that enhances the design’s depth.
Bookmark Tutorial 3: Faux Leather Bookmark with Foil Lettering

Elegant and durable, this faux leather bookmark with foil lettering gives a professional, boutique look.
Materials:
- Cricut Maker with a Deep-Point Blade
- Faux leather sheet
- Heat transfer foil or metallic iron-on
- EasyPress Mini or household iron
- Heat-resistant tape
- StrongGrip mat
- Hole punch and leather cord
Steps:
- Design your text
In Design Space, type your favorite quote or word (like “Read More” or “Adventure Awaits”). Choose a sleek serif or cursive font. - Cut the faux leather
Place your faux leather shiny side down on the StrongGrip mat and secure it with tape. Select “Faux Leather” as the material and cut the bookmark shape. - Apply foil lettering
Mirror your text before cutting the foil. Once cut, place the lettering over your faux leather and secure with heat-resistant tape. Press with your EasyPress Mini for 30 seconds at low heat. - Finish and embellish
Punch a hole and add a leather cord or gold tassel. Optionally, apply a small edge stitch effect using a decorative marker.
Tip: Metallic foils in gold, rose gold, or silver work beautifully on dark leather shades.
Bookmark Tutorial 4: Acrylic Bookmark with Resin Coating

This acrylic bookmark combines Cricut precision with a smooth resin finish for a professional, glossy result.
Materials:
- Acrylic bookmark blanks
- Permanent vinyl (any pattern or text design)
- Transfer tape
- UV resin and UV lamp
- Gloves and mixing stick
- Hole punch and tassel
Steps:
- Prepare your design
Create or upload a minimal design — text, florals, or small icons. Cut the design from vinyl and apply it to the acrylic blank using transfer tape. - Apply resin
Mix a small amount of UV resin and apply a thin, even coat on top of your bookmark. Use a stick to spread it out smoothly. - Cure under UV light
Place the bookmark under the UV lamp for 2–3 minutes until it hardens completely. - Finish up
Punch a hole and add your tassel. The result is a crystal-clear, glossy bookmark with a durable coating.
Tip: Add a touch of glitter into your resin before curing for a sparkly finish.
Bookmark Tutorial 5: Laminated Bookmark with Inspirational Quote

Perfect for everyday use, this laminated bookmark is lightweight and motivational.
Materials:
- Cricut machine
- Printable vinyl or sticker paper
- Laminating sheets
- Laminator
- Scissors or paper trimmer
- Hole punch and ribbon
Steps:
- Design your quote
In Design Space, write your favorite inspirational quote and choose a beautiful font combination. Add soft backgrounds or minimal illustrations. - Print and cut
Print your design on vinyl or sticker paper, then use the Cricut’s Print Then Cut feature to cut it out precisely. - Laminate the bookmark
Place your cut bookmark inside a laminating sheet, leaving a small border. Run it through your laminator. - Trim and finish
Cut the laminated edges neatly and punch a hole for a ribbon.
Tip: Round the corners for a polished look and longer durability.
Bookmark Tutorial 6: Engraved Metal Bookmark with Cricut Maker

Sleek, durable, and sophisticated — this metal bookmark is a statement piece for serious readers.
Materials:
- Cricut Maker with Engraving Tool
- Aluminum or stainless steel blank
- StrongGrip mat
- Masking tape
- Design Space engraving text
Steps:
- Secure your metal blank
Tape the metal blank firmly to your StrongGrip mat to prevent slipping. - Design your text
Type your engraving phrase (like “Books are portals” or your initials) in a cursive or serif font. Resize to fit the metal surface. - Engrave the design
Load the mat into your Cricut Maker, select “Engrave” as the operation, and let the tool etch your text onto the metal. - Polish and finish
Wipe off any residue with a soft cloth. Attach a leather cord or silk ribbon through the hole if desired.
Pro Tip: Brushed metal gives a beautiful texture and highlights engraved details better than a mirror finish.
Bookmark Tutorial 7: Transparent Bookmark with Glitter Vinyl Layers

This sparkling design features clear acetate and holographic vinyl for a mesmerizing transparent look.
Materials:
- Cricut Maker or Explore
- Clear acetate sheets
- Holographic glitter vinyl in pastel colors
- Transfer tape
- Weeding tool
- Hole punch and tassel
Steps:
- Design your layout
Create a simple shape (rectangular or rounded) in Design Space. Add layered geometric or wave patterns using different glitter vinyl colors. - Cut your vinyl layers
Cut each vinyl color separately using your Cricut. Weed out excess vinyl carefully. - Assemble the layers
Use transfer tape to apply each vinyl layer onto the acetate sheet, aligning them perfectly for a layered glitter look. - Add finishing touches
Punch a hole and add a pastel tassel or charm.
Tip: Layer no more than 3–4 vinyl patterns to maintain a transparent effect and prevent heaviness.
Final Thoughts
Cricut bookmarks are a beautiful way to blend creativity, precision, and functionality. From the shimmer of glitter vinyl to the polished elegance of engraved metal, each project teaches a new material technique and design style. You can personalize them endlessly — add names, favorite quotes, floral motifs, or even pressed flowers under resin.
Once you try these seven bookmark tutorials, you’ll not only have stunning reading accessories but also a set of handmade gifts that every book lover will adore.


