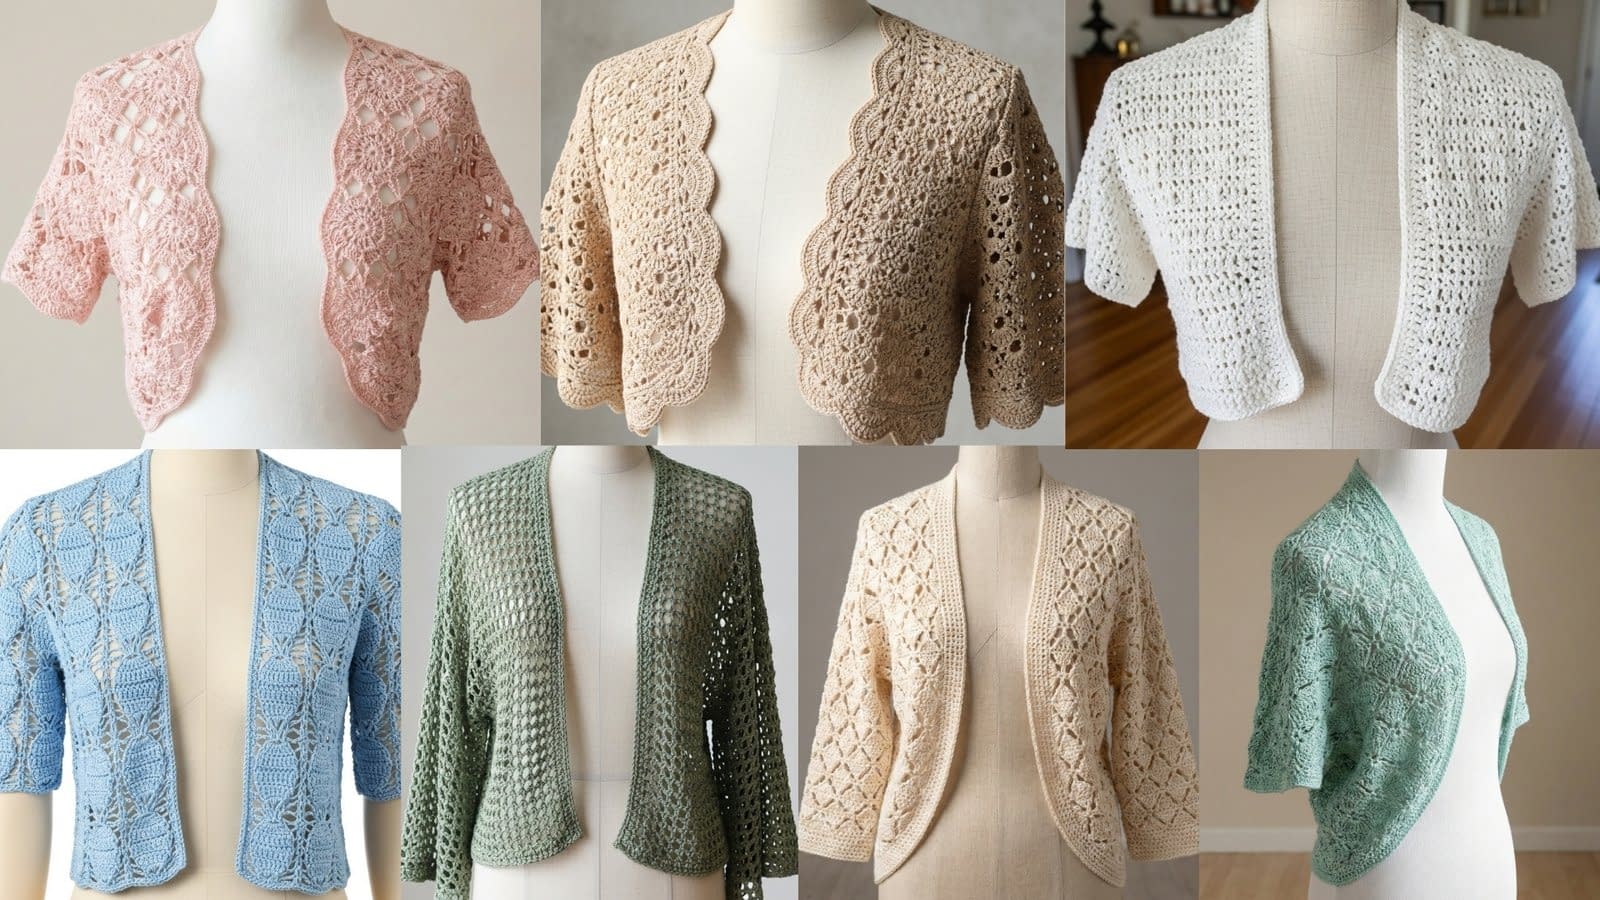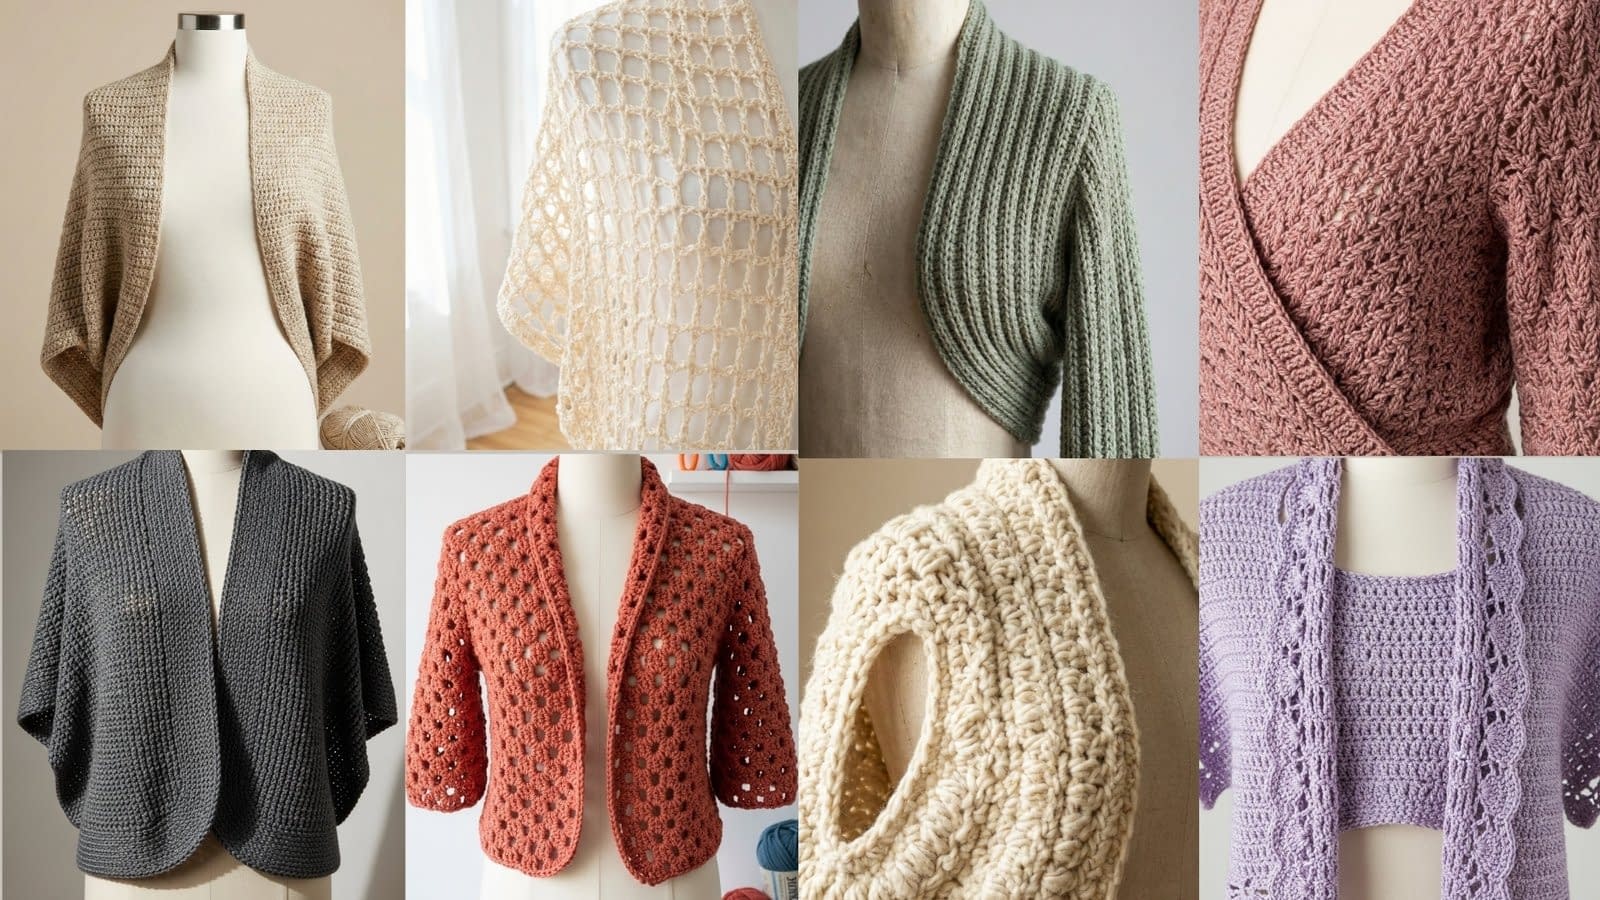
Summer is all about comfort without compromising on style. When the temperature rises, cotton knit tops become your go-to wardrobe essential. Lightweight, breathable, and versatile, these tops keep you cool while allowing endless styling options. In this guide, we’re exploring 9 summer cotton knit tops that are perfect for every occasion—from casual coffee dates to evening strolls by the beach. Each top combines functionality with style, making your summer wardrobe effortlessly chic. We’ll dive deep into each design, discuss the materials and techniques to choose, and offer styling tips to make the most of each piece. Whether you’re an experienced knitter or a fashion enthusiast looking to shop wisely, this post will give you everything you need.
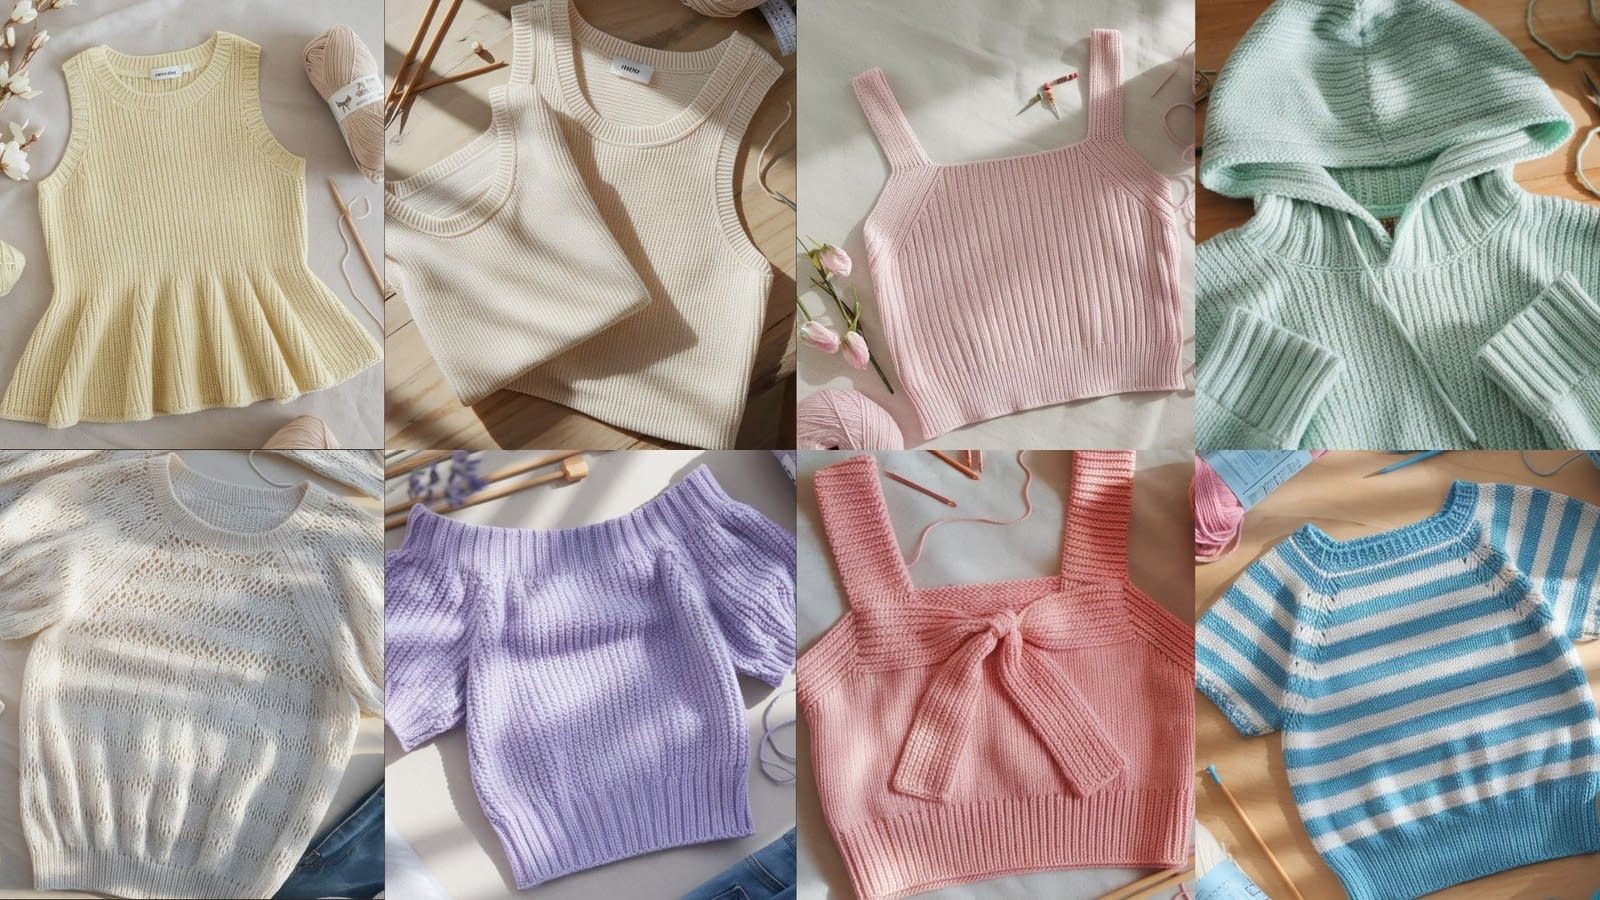
1. Classic Cotton Tank Top

Skill Level: Beginner–Intermediate (simple shaping + finishing)
Finished Size: Varies based on bust size; typical size: 36″ bust, 22″ length (adjust stitches for personal size)
Materials
- Worsted weight cotton yarn (#4), 2–3 skeins depending on size
- Knitting needles: 4.0 mm (US G)
- Stitch markers
- Yarn needle for seaming
- Scissors
Notes
- This tank is worked in flat pieces, then seamed.
- Slight shaping is added at the armholes and neckline for a comfortable fit.
- Tension: Keep stitches even—cotton yarn can stretch slightly after blocking.
- Optional: You can add ribbed edges or decorative stitches along the hem, neckline, and armholes for texture.
Instructions
Back Panel
- Cast On:
- Cast on enough stitches to match your bust measurement plus 2–4 extra for ease. For example, 80 stitches for a medium size.
- Place a stitch marker at the center if you want to keep track for later shaping.
- Ribbed Hem:
- Row 1–8: Work in 1×1 ribbing (K1, P1 across). This creates a slightly stretchy, neat hem.
- Body:
- Switch to stockinette stitch (knit on right side, purl on wrong side) and continue until the piece reaches about 14–15″ from cast-on edge (adjust length based on preference).
- Armhole Shaping:
- Bind off 3–5 stitches at the beginning of the next two rows for the armholes.
- Continue knitting in stockinette until the back panel reaches 20–22″ from cast-on edge (depends on desired tank length).
- Neckline:
- Bind off the center 10–12 stitches (for medium size) to create a shallow neckline.
- Continue each side separately, decreasing 1 stitch at the neck edge every other row 2–3 times for a curved shape.
Front Panel
- Cast On and Hem:
- Repeat the back panel steps (cast on same number of stitches and knit ribbed hem).
- Body & Armholes:
- Same as back panel, but the neckline will be deeper for the front: bind off 14–16 center stitches at the top and decrease 1 stitch at neck edge every other row 3–5 times for a subtle curve.
Assembly
- Place the front and back panels right sides together.
- Align edges carefully; pin if needed.
- Seam Sides: Use a mattress stitch for an invisible seam.
- Shoulder Seams: Seam shoulders similarly, making sure the neckline edges match.
- Finishing:
- Weave in all loose ends.
- Gently block the tank to open up stitches and smooth the fabric.
Tips
- If you want a more fitted tank, decrease stitches slightly at the waist.
- For a looser fit, add a few extra stitches during the cast-on.
- Cotton tends to stretch, so always measure the bust before seaming.
- Optional: Add a small decorative edge around the neckline using a crochet hook for a neat finish.
Variations
- Ribbed Neckline and Armholes: Add 3–4 rows of 1×1 rib at edges for a polished look.
- Textured Pattern: Alternate stockinette with garter stitch stripes every 3–4 rows for subtle texture.
- Longer or Cropped: Adjust total body length to make a cropped tank or tunic-length top.
2. Cropped Cotton Knit Top

Skill Level: Beginner–Intermediate (simple shaping + finishing)
Finished Size: Typical size: 34–36″ bust, 15–17″ length (adjust stitches and length as needed)
Materials
- Worsted or light worsted cotton yarn (#3–#4), 2 skeins
- Knitting needles: 3.5–4.0 mm (US E–G)
- Stitch markers
- Yarn needle, scissors
- Optional: Decorative buttons or small beads for embellishment
Notes
- This top is worked in two flat panels (front and back), then seamed.
- Cropped style sits above the natural waist, perfect for pairing with high-waisted bottoms.
- Slight shaping is added at armholes and neckline for comfort.
- Optional: Add ribbing along the hem, neckline, and sleeves for structure.
Instructions
Back Panel
- Cast On:
- Cast on the number of stitches to fit your bust measurement plus 2–4 stitches for ease. For example, 70 stitches for a medium size.
- Place a stitch marker at the center for alignment.
- Ribbed Hem:
- Row 1–6: Work 1×1 ribbing (K1, P1) to form a stretchy hem that will sit neatly above the waist.
- Body:
- Switch to stockinette stitch (Knit on right side, Purl on wrong side) and knit until the panel reaches 10–12″ from the cast-on edge.
- Armhole Shaping:
- Bind off 3–5 stitches at the beginning of the next two rows to shape the armholes.
- Continue knitting straight until panel reaches 13–15″ from the cast-on edge.
- Neckline:
- For a simple rounded neckline, bind off 8–10 center stitches.
- Decrease 1 stitch at each neckline edge every other row 2–3 times for a subtle curve.
Front Panel
- Cast On and Hem:
- Repeat the back panel steps for cast-on and ribbed hem.
- Body & Armholes:
- Knit in stockinette until reaching 10–12″.
- Bind off for armholes the same way as the back.
- Neckline:
- For a more flattering cropped look, bind off 12–14 center stitches at the top and decrease 1 stitch at each edge every other row 3–5 times for a gentle curve.
Assembly
- Place front and back panels right sides together.
- Align edges and pin if needed.
- Seam the sides using a mattress stitch for an invisible seam.
- Seam shoulders similarly.
- Weave in loose ends.
- Blocking: Gently block the top to smooth stitches and ensure the cropped hem lies flat.
Tips
- For a looser fit, add extra stitches during the cast-on.
- If you prefer a fitted crop, remove 2–4 stitches across the width.
- Cotton stretches slightly—measure before seaming.
- Optional: Sew on small buttons along the shoulder or side seam for decoration.
Variations
- Ribbed Detailing: Add 2–3 rows of ribbing around the neckline and armholes.
- Short Sleeves: Pick up stitches at armholes to knit small cap sleeves.
- Textured Stripes: Alternate stockinette with garter stitch or seed stitch every few rows for subtle texture.
3. Off-Shoulder Summer Knit Top

Skill Level: Intermediate (requires shaping + optional elastic for security)
Finished Size: Bust: 34–36″ (adjustable), Length: 20–22″
Materials
- Cotton or cotton-blend yarn, 2–3 skeins
- Circular knitting needles 4.0 mm (US G)
- Stitch markers
- Yarn needle, scissors
- Optional: Thin elastic thread to secure neckline
Notes
- This top is worked flat in panels, then seamed, with shaping for off-shoulder fit.
- The neckline sits below the shoulders, giving a relaxed, airy summer style.
- Elastic thread can be threaded along the neckline to prevent slipping.
- Optional puffed sleeves add a feminine touch.
Instructions
Back Panel
- Cast On:
- Cast on stitches to fit your bust measurement plus ease. Example: 80 stitches for a medium.
- Mark the center for reference.
- Ribbed Neckline Base:
- Row 1–6: Knit in 1×1 ribbing (K1, P1) to create a slightly stretchy band that will hold the top in place off the shoulders.
- Body:
- Switch to stockinette stitch. Knit straight until the panel reaches 14–16″ from cast-on edge.
- Armhole Shaping:
- Bind off 3–5 stitches at the beginning of the next two rows for armholes.
- Continue knitting straight until panel reaches 20–22″ from cast-on edge.
Front Panel
- Cast On and Ribbed Neckline:
- Same as back panel.
- Body & Armholes:
- Knit until reaching 14–16″.
- Neckline:
- Bind off 14–16 center stitches to create a slightly deeper front neckline.
- Decrease 1 stitch at each edge every other row 3–5 times for a gentle slope.
Sleeves (Optional Puffed Sleeves)
- Pick Up Stitches: Pick up stitches along the armhole edge.
- Ribbing: Knit 1–2″ in 1×1 rib for a neat cuff.
- Sleeve Body: Switch to stockinette and knit 4–6″, taper slightly towards the cuff.
- Finishing: Seam the sleeve edge if knitted flat, or leave seamless if knitted in the round.
Assembly
- Place front and back panels right sides together.
- Seam shoulders and sides using a mattress stitch.
- Attach sleeves if worked separately.
- Weave in loose ends.
- Optional Elastic: Thread a thin elastic along the top edge inside the neckline to keep it comfortably in place.
- Gently block the top to smooth stitches and shape neckline and sleeves.
Tips
- If you want a more relaxed fit, cast on extra stitches at the bust.
- For a tighter off-shoulder fit, reduce a few stitches at neckline and add elastic for stability.
- Cotton stretches; block carefully to avoid over-stretching the neckline.
- Pair with high-waist bottoms or skirts for a chic summer look.
Variations
- Puffed Sleeves: Add more stitches at the top of the sleeve for extra volume.
- Lace Detail: Incorporate simple eyelet rows along the neckline for a delicate look.
- Shorter Crop: Adjust length to create a cropped off-shoulder style for hot summer days.
4. Lightweight Cotton Hoodie

Skill Level: Intermediate (requires shaping and hood construction)
Finished Size: Bust: 34–36″ (adjustable), Length: 22–24″
Materials
- Cotton or cotton-blend yarn, 3–4 skeins depending on size
- Knitting needles: 3.5–4.0 mm (US E–G)
- Circular needles (optional, for hood)
- Yarn needle, stitch markers, scissors
- Optional: Drawstring cord for hood
Notes
- This hoodie is worked in panels: back, front, and hood.
- Sleeves are slightly tapered for a comfortable summer fit.
- Cotton keeps it lightweight and breathable while still giving the cozy hoodie feel.
- Optional: Add a small front pocket or decorative edge along hem, sleeves, or hood.
Instructions
Back Panel
- Cast On:
- Cast on stitches to match your bust measurement plus 2–4 for ease. Example: 80 stitches for medium.
- Place markers at the edges for armhole shaping.
- Ribbed Hem:
- Row 1–8: Work in 1×1 ribbing (K1, P1) to create a neat stretchy bottom hem.
- Body:
- Switch to stockinette stitch and knit straight until the piece reaches 14–16″ from cast-on edge.
- Armhole Shaping:
- Bind off 3–5 stitches at the beginning of the next two rows.
- Continue straight until back panel reaches 20–22″ total length.
Front Panel
- Cast On & Hem:
- Repeat back panel steps for cast-on and hem.
- Body & Armhole Shaping:
- Knit stockinette until same length as back panel.
- Bind off for armholes as done in back panel.
- Neckline Shaping:
- Bind off 8–12 center stitches for the neckline.
- Decrease 1 stitch at each edge every other row 2–3 times to form a gentle curve.
Hood
- Pick Up Stitches:
- With circular needles, pick up stitches along the neckline edges.
- Ribbed Base of Hood:
- Knit 1–2″ in 1×1 ribbing to create a neat, stretchy edge for the hood.
- Hood Body:
- Switch to stockinette stitch and knit straight for 8–10″.
- For shaping, decrease 1 stitch at each edge every 4th row to taper the top slightly.
- Finishing Hood:
- Fold the hood in half and seam the top edge with mattress stitch.
- Optional: Thread a thin drawstring cord through the ribbed edge for adjustment.
Sleeves
- Cast On & Cuff:
- Cast on enough stitches to fit wrist circumference plus ease.
- Work 1–2″ of 1×1 ribbing for cuffs.
- Body of Sleeve:
- Knit in stockinette, increasing gradually every 6th row until sleeve reaches armhole width.
- Seaming:
- Seam sleeves to body panels, ensuring armhole edges match neatly.
Assembly
- Place front and back panels right sides together.
- Seam shoulders and sides with mattress stitch.
- Attach sleeves carefully.
- Seam hood to neckline if knitted separately.
- Weave in all loose ends.
- Block gently to shape hood, neckline, and body.
Tips
- For a lighter summer fit, use a thinner cotton yarn or add short sleeves.
- Cotton stretches slightly—measure bust and armhole before seaming.
- Optional: Knit a small kangaroo pocket for extra style and practicality.
- Keep tension even to avoid puckering along seams.
Variations
- Short Sleeve Hoodie: Reduce sleeve length for a breezier summer version.
- Textured Hem & Cuffs: Add garter or seed stitch along edges.
- Cropped Hoodie: Adjust total length to sit above the natural waist for a trendy look.
5. Peplum Cotton Top

Skill Level: Intermediate (shaping and flare construction)
Finished Size: Bust: 34–36″, Waist: 28–30″, Length: 22–24″ (including peplum flare)
Materials
- Cotton or cotton-blend yarn, 3 skeins
- Knitting needles: 3.5–4.0 mm (US E–G)
- Stitch markers, yarn needle, scissors
- Optional: Decorative stitch markers for pattern placement
Notes
- This top has shaping at the waist and a flared peplum hem.
- Worked flat in panels (front and back), then seamed.
- Cotton provides lightweight structure while keeping it breathable.
- Optional: Add a lace or textured stitch along peplum for added elegance.
Instructions
Back Panel
- Cast On:
- Cast on stitches to fit your bust plus 2–4 for ease (example: 80 stitches for medium).
- Ribbed Hem:
- Work 1×1 ribbing for 1–2″ at the bottom hem.
- Body to Waist:
- Switch to stockinette stitch. Knit straight until 12–14″ from cast-on edge (measuring to natural waist).
- Waist Shaping:
- Decrease 1 stitch at each side every 4th row 4–6 times to create gentle tapering.
- Armhole Shaping:
- Bind off 3–5 stitches at the beginning of the next two rows.
- Neckline Shaping:
- Bind off 8–10 center stitches at top for a rounded neckline.
- Decrease 1 stitch at each neck edge every other row 2–3 times for a smooth curve.
Front Panel
- Cast On & Hem:
- Repeat back panel steps.
- Body & Waist Shaping:
- Knit stockinette until waistline (same as back).
- Decrease sides for waist shaping.
- Armhole & Neckline:
- Bind off stitches for armholes.
- Front neckline can be slightly deeper: bind off 10–12 center stitches, decreasing 1 stitch at each side every other row 3–5 times.
Peplum Flare
- Pick Up Stitches at Waist:
- Along the waist edge, pick up all stitches or knit directly off bottom edge if still on needles.
- Increase for Flare:
- Increase 1 stitch every 4th row along each side until you achieve the desired width of the peplum (usually 1.5–2× waist measurement).
- Knit Peplum:
- Work stockinette or lace pattern until peplum reaches 6–8″ long.
- Optional: Add a scalloped or garter stitch edge for a finished look.
Assembly
- Place front and back panels right sides together.
- Seam shoulders and sides with mattress stitch.
- Weave in all loose ends.
- Block gently to open stitches and shape waist and peplum.
Tips
- If you prefer a less dramatic peplum, reduce the number of increases along the waist.
- Cotton stretches; measure before adding peplum to avoid over-flare.
- Optional: Add subtle lace or seed stitch along peplum for extra texture.
- Keep tension even for smooth shaping at waist.
Variations
- Textured Bodice: Use garter or seed stitch for the top section.
- Short Sleeve or Sleeveless: Pick up stitches at armholes to add short sleeves, or leave open for a sleeveless summer top.
- Longer Tunic Style: Extend body before peplum to create a tunic-length summer top.
6. Striped Cotton Knit Top

Skill Level: Beginner–Intermediate (requires color changes and seaming)
Finished Size: Bust: 34–36″, Length: 22″ (adjust stitches for personal fit)
Materials
- Cotton yarn in two or more contrasting colors, 2–3 skeins total
- Knitting needles: 3.5–4.0 mm (US E–G)
- Stitch markers
- Yarn needle, scissors
- Optional: Tapestry needle for color weaving
Notes
- This top is worked in flat panels (front and back) and seamed.
- Stripes can be any width: 2–4 rows per color works well for subtle texture, while 6–8 rows creates a bolder statement.
- Cotton yarn keeps it breathable for summer.
- Keep tension even during color changes to avoid puckering.
- Optional: Ribbed edges along neckline, hem, and sleeves for a polished finish.
Instructions
Back Panel
- Cast On:
- Cast on enough stitches to fit your bust plus 2–4 for ease. Example: 80 stitches for medium size.
- Place stitch markers at edges for shaping.
- Ribbed Hem:
- Row 1–6: Work 1×1 ribbing (K1, P1).
- Body & Stripes:
- Switch to stockinette stitch.
- Begin color pattern: knit 4 rows in Color A, then 4 rows in Color B. Repeat until panel reaches 14–15″ from hem.
- Adjust stripe height as desired; thinner stripes create a delicate look, thicker stripes are bolder.
- Armhole Shaping:
- Bind off 3–5 stitches at the beginning of the next two rows.
- Continue knitting until panel reaches 20–22″ total length.
- Neckline:
- Bind off center 8–12 stitches.
- Decrease 1 stitch at each neck edge every other row 2–3 times for smooth curve.
Front Panel
- Cast On & Ribbed Hem:
- Repeat back panel cast-on and hem.
- Body & Stripes:
- Knit in stockinette, following the same stripe pattern as the back.
- Armhole Shaping:
- Same as back panel.
- Neckline Shaping:
- For a slightly deeper neckline: bind off 10–14 center stitches.
- Decrease 1 stitch at each side every other row 3–5 times.
Assembly
- Place front and back panels right sides together.
- Seam shoulders and sides with mattress stitch.
- Weave in all loose ends.
- Block gently to even out stripes and shape neckline and hem.
Tips
- Use a tapestry needle to weave in ends neatly at each color change.
- Keep tension even while switching colors to prevent wavy stripes.
- Cotton stretches slightly, so measure before seaming.
- Optional: Add a small decorative edge in contrasting yarn along neckline or hem.
Variations
- Multiple Colors: Incorporate three or more colors for a rainbow effect.
- Textured Stripes: Alternate stockinette with garter or seed stitch rows to add dimension.
- Longer Tunic Style: Extend body before neckline shaping to create a tunic-length summer top.
7. Lace Cotton Knit Top

Skill Level: Intermediate–Advanced (requires lace pattern and shaping)
Finished Size: Bust: 34–36″, Length: 22–24″
Materials
- Lightweight cotton yarn, 2–3 skeins
- Knitting needles: 3.0–3.5 mm (US D–E)
- Stitch markers
- Yarn needle, scissors
Notes
- Worked in flat panels, then seamed.
- Lace stitch provides breathability and elegance—perfect for summer layering.
- Keep even tension; lace patterns can skew if stitches are inconsistent.
- Optional: Add ribbed edges or picot edge for a refined finish.
Instructions
Back Panel
- Cast On:
- Cast on enough stitches to fit your bust plus 2–4 for ease (example: 80 stitches).
- Ribbed Hem (Optional):
- Row 1–6: Work 1×1 ribbing to anchor the bottom edge.
- Lace Pattern:
- Switch to lace pattern of choice (simple eyelets or leaf lace work well).
- Example: Row 1: K2, yarn over, K2tog, repeat to end. Row 2: Purl all stitches.
- Continue until panel reaches 14–16″ from hem.
- Armhole Shaping:
- Bind off 3–5 stitches at beginning of next two rows.
- Continue lace pattern until panel reaches 20–22″ total length.
- Neckline Shaping:
- Bind off center 8–12 stitches.
- Decrease 1 stitch at each neckline edge every other row 2–3 times for smooth curve.
Front Panel
- Cast On & Ribbed Hem:
- Repeat back panel steps.
- Body & Lace Pattern:
- Knit lace pattern to match back panel.
- Neckline Shaping:
- For a deeper neckline, bind off 10–14 center stitches and decrease 1 stitch at each side every other row 3–5 times.
Assembly
- Place front and back panels right sides together.
- Seam shoulders and sides using a mattress stitch to maintain lace alignment.
- Weave in loose ends carefully.
- Block gently to open lace stitches and smooth edges.
Tips
- Keep stitch markers at regular intervals to avoid losing track of lace repeats.
- Cotton lace stretches—measure before seaming.
- Optional: Add a delicate picot edge along neckline and hem for a polished look.
- Layer over camisole or tank for modesty while showing lace texture.
Variations
- Short Sleeve Lace Top: Pick up stitches at armholes to knit small cap sleeves.
- Textured Lace: Combine lace with simple stockinette or garter stitch stripes for added dimension.
- Crop or Tunic Length: Adjust total length for a cropped summer top or longer tunic-style top.
8. Button-Down Cotton Knit Top

Skill Level: Intermediate (requires shaping, button band, and seaming)
Finished Size: Bust: 34–36″, Length: 22–24″
Materials
- Cotton or cotton-blend yarn, 2–3 skeins depending on size
- Knitting needles: 3.5–4.0 mm (US E–G)
- Stitch markers
- Yarn needle, scissors
- 5–7 small buttons (or as needed for length)
Notes
- This top is worked in panels (front and back), with a separate button band.
- Button-down styling adds versatility—wear it open over a tank or closed for casual chic.
- Cotton ensures breathability for summer wear.
- Keep tension consistent, especially along the edges for a neat button band.
- Optional: Add ribbing or garter stitch edges for stability along the placket.
Instructions
Back Panel
- Cast On:
- Cast on enough stitches to fit your bust plus 2–4 for ease (example: 80 stitches for medium).
- Ribbed Hem:
- Row 1–6: Work 1×1 ribbing for a neat hem.
- Body:
- Switch to stockinette stitch and knit straight until panel reaches 14–15″ from hem.
- Armhole Shaping:
- Bind off 3–5 stitches at the beginning of the next two rows.
- Continue straight until panel reaches 20–22″ total length.
- Neckline Shaping:
- Bind off center 8–10 stitches for a shallow neckline.
- Decrease 1 stitch at each neck edge every other row 2–3 times.
Front Panels (Left and Right)
- Cast On & Hem:
- Cast on half the stitches for each panel (plus extra for button band if needed).
- Knit 1×1 ribbing for 1–2″ at hem.
- Body:
- Knit in stockinette until panel reaches same length as back panel.
- Button Band / Placket:
- Pick up or include 4–6 extra stitches along the edge for button band.
- Knit in garter stitch or 1×1 rib for added structure.
- Mark button placement evenly along one side.
- Neckline:
- For the front neckline, bind off 4–6 center stitches for a slight curve.
- Decrease 1 stitch at the inner neckline edge every other row 2–3 times.
Sleeves (Optional)
- Cast On & Cuff:
- Cast on enough stitches to fit wrist plus ease.
- Work 1–2″ of 1×1 ribbing.
- Body of Sleeve:
- Knit stockinette, gradually increasing to fit the armhole width.
- Seaming:
- Seam sleeves to body, ensuring armhole edges match neatly.
Assembly
- Place front and back panels right sides together.
- Seam shoulders and sides with mattress stitch.
- Attach sleeves if knitted separately.
- Sew on buttons along the placket.
- Weave in loose ends.
- Block gently to smooth edges and ensure the button band lies flat.
Tips
- Use stitch markers for button placement to ensure even spacing.
- Cotton stretches slightly—measure bust and armhole before seaming.
- Optional: Add a small lace or garter stitch trim along the hem and neckline for a polished finish.
- Keep tension consistent along edges to prevent the button band from curling.
Variations
- Short Sleeves or Sleeveless: Knit shorter sleeves or leave open for summer style.
- Textured Front Panels: Use garter, seed, or lace stitch for subtle texture.
- Cropped Version: Reduce body length for a trendy summer crop top.
9. Cropped Knit Tank with Tie Front

Skill Level: Intermediate (requires shaping and tie construction)
Finished Size: Bust: 34–36″, Length: 15–17″ (above waist)
Materials
- Cotton or cotton-blend yarn, 2 skeins
- Knitting needles: 3.5–4.0 mm (US E–G)
- Stitch markers
- Yarn needle, scissors
Notes
- This cropped tank features a tie at the hem, adding playful style and adjustability.
- Worked flat in front and back panels.
- Cotton provides lightweight breathability for summer.
- Optional: Add ribbing along neckline and armholes for structure.
Instructions
Back Panel
- Cast On:
- Cast on stitches to fit bust plus 2–4 for ease (example: 70 stitches for medium).
- Ribbed Hem (Optional):
- Knit 1–2″ in 1×1 ribbing.
- Body:
- Switch to stockinette stitch and knit straight until panel reaches 10–12″ from cast-on edge (cropped length).
- Armhole Shaping:
- Bind off 3–5 stitches at the beginning of the next two rows.
- Continue knitting straight until panel reaches 12–14″ total length.
- Neckline Shaping:
- Bind off 6–8 center stitches for a shallow curve.
- Decrease 1 stitch at each neck edge every other row 2–3 times.
Front Panel
- Cast On & Hem:
- Repeat back panel steps for cast-on and hem.
- Body & Tie Section:
- Work stockinette until 10–12″ from hem.
- Leave extra length at bottom edges for the tie—approximately 4–6″ on each side.
- Neckline Shaping:
- Bind off 8–10 center stitches for a deeper front neckline.
- Decrease 1 stitch at each neckline edge every other row 3–5 times.
Assembly
- Place front and back panels right sides together.
- Seam shoulders and sides using mattress stitch.
- Weave in loose ends.
- Tie front edges to create adjustable bow or knot.
- Block gently to smooth edges and ensure tie hangs evenly.
Tips
- Adjust the length of the tie according to your preference for a small knot or larger bow.
- Cotton stretches; measure bust before seaming for accurate fit.
- Optional: Add ribbing around armholes and neckline to prevent curling.
- Keep edges neat when weaving in ends to maintain a polished look.
Variations
- Longer Crop: Extend body length slightly for a mid-waist cropped top.
- Textured Hem: Add garter or seed stitch along tie edges for a decorative touch.
- Sleeves: Pick up stitches to create short or cap sleeves for added coverage.
Conclusion
Cotton knit tops are a summer staple because they perfectly combine comfort, breathability, and effortless style. From classic tanks to lace and peplum designs, there’s a knit top to suit every mood, body type, and occasion. Whether you’re knitting your own or shopping ready-made pieces, these 9 summer cotton knit tops will elevate your wardrobe, keeping you stylish and comfortable all season long. Experiment with colors, textures, and details like buttons or ties to make each piece uniquely yours.