
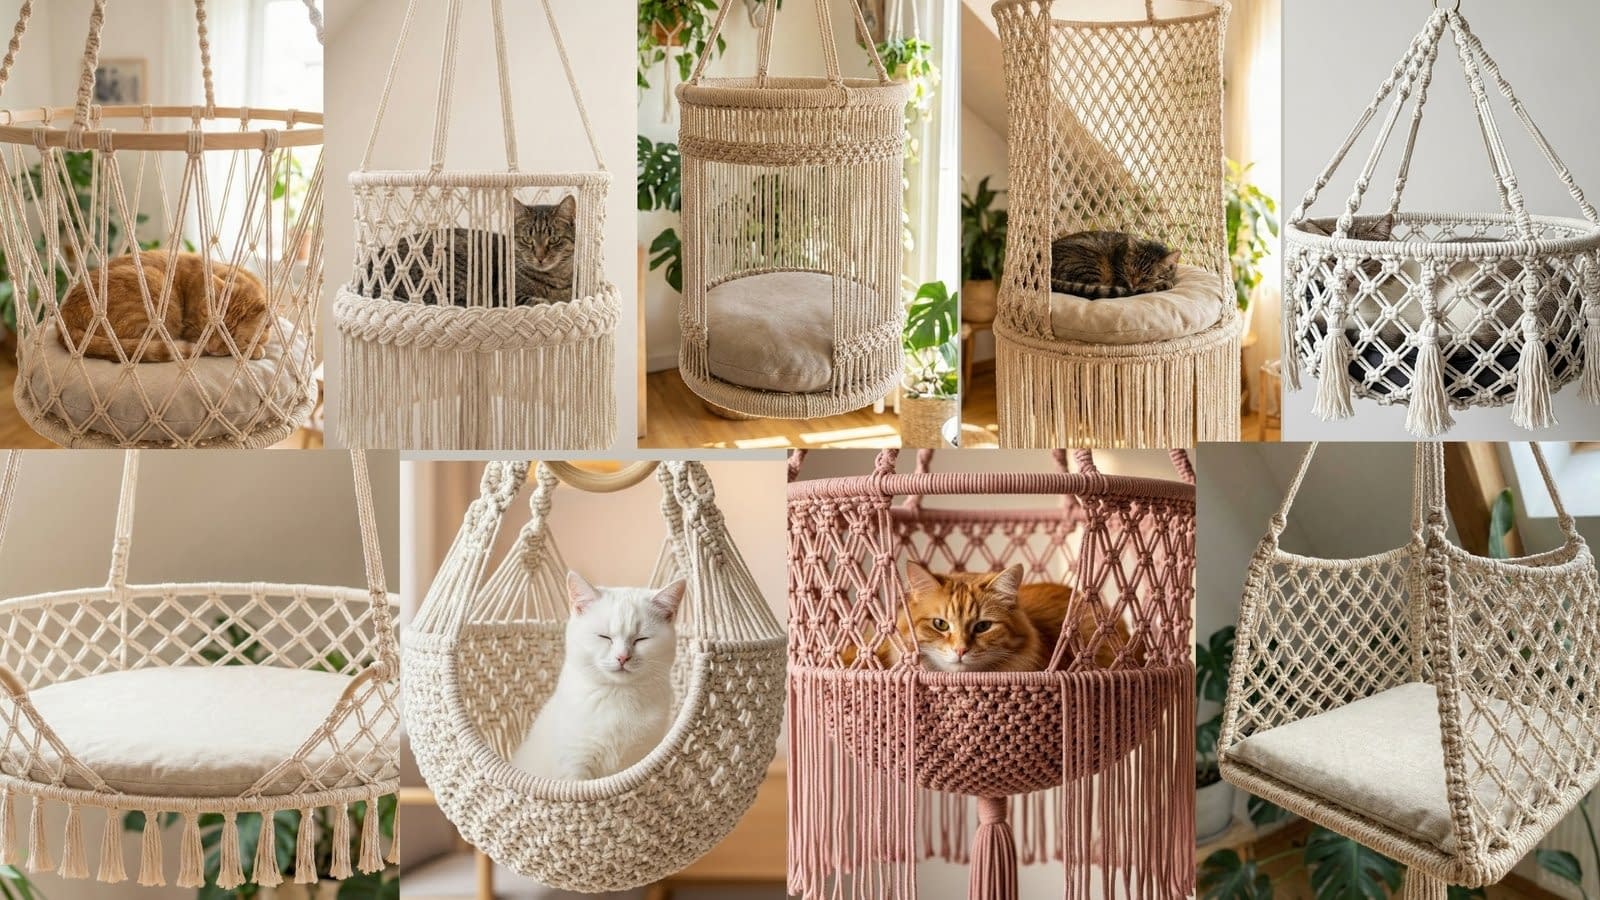
If you share your home with a cat, you already know two undeniable truths: they love to sleep, and they absolutely adore being elevated off the ground. Cats are natural climbers who seek out high vantage points to observe their kingdom safely. Simultaneously, the modern home aesthetic has seen a massive resurgence in fiber arts, with macramé taking center stage in interior design. So, why not combine these two worlds?
A macramé cat hammock is not just a piece of pet furniture; it is a functional work of art. It provides your feline friend with a dedicated sanctuary that is breathable, comfortable, and undeniably stylish. Unlike bulky, carpet-covered cat trees that can clash with your decor, a handmade macramé hammock adds a touch of bohemian elegance to any room. Whether you prefer a minimalist cream design, a structured cylindrical tower, or a playful bed with tassels, there is a pattern here that will suit your home and your cat’s personality perfectly.
In this comprehensive guide, we are going to walk through nine distinct tutorials. We have designed these instructions to be beginner-friendly yet detailed enough to ensure a professional finish. We will not be using any confusing abbreviations or shorthand. Every knot and step will be explained in full detail so that you can follow along with confidence, even if this is your very first time picking up a cord.
Prepare your scissors, measure out your rope, and let us get started on creating the ultimate lounging experience for your pet.
1. The Spiral Sanctuary: Premium Woven Cat Hammock
This design focuses on elegance and comfort. It features a deep, rounded basket style that makes the cat feel secure and enclosed, which is perfect for anxious cats who like to hide away. The defining feature of this hammock is the beautiful spiral knot detail on the suspension cords and the creamy off-white cotton rope that gives it a clean, modern boho look.
Skill Level
Beginner to Intermediate
Finished Size
Approximately 18 inches in diameter at the base and 50 inches in total length from the ceiling hook to the bottom of the basket.
Materials Needed
High-quality 5 millimeter single twist or 3-ply cotton cord in creamy off-white One large metal or wooden hoop (approximately 18 to 20 inches in diameter) One small wooden ring (2 inches in diameter) for the top suspension A sharp pair of scissors Measuring tape A comb for brushing out fringe (optional) A ceiling hook rated for at least 30 pounds (to hold the hammock plus the cat)
Knot Guide
Lark’s Head Knot Square Knot Spiral Knot (Half Square Knot) Wrapping Knot
Instructions
Step 1: Cutting the Cords
To begin, you will need to cut your cord into specific lengths. Since macramé consumes a lot of rope, it is always better to cut a little extra than to run short. Cut 8 cords that are each 8 meters (approximately 26 feet) long. These will be used for the main suspension straps. Cut 24 cords that are each 4 meters (approximately 13 feet) long. These will be added later to create the deep basket. Cut 2 cords that are 1 meter (3 feet) long for the wrapping knots.
Step 2: Setting the Foundation
Take your small 2-inch wooden ring. This will be the anchor point that hangs from the ceiling. Take the 8 long cords (the 8-meter ones). Fold each cord exactly in half to find the center loop. Attach each cord to the small wooden ring using a Lark’s Head Knot. To do this, push the folded loop through the ring, then pull the loose ends of the cord through that loop and tighten it down firmly. You should now have 16 strands hanging from the small ring.
Step 3: Creating the Spiral Suspension
Divide your 16 strands into 4 groups of 4 strands each. These will become the four straps that hold the hammock. Take one group of 4 strands. You will create a Spiral Knot sennit. A Spiral Knot is simply a Square Knot that is only half-finished, repeated over and over. Take the left outer cord and cross it over the two center filler cords. Take the right outer cord and place it over the left cord, then bring it behind the two center cords and up through the loop created by the left cord. Pull tight. Repeat this exact same step—starting with the left cord—again and again. As you continue tying this same half-knot, the design will naturally begin to twist into a beautiful spiral. Continue this for approximately 30 inches, or until the strap is your desired length. Repeat this process for the other three groups of strands until you have four identical spiral straps.
Step 4: Attaching the Main Hoop
Now you need to attach these straps to the large 18-inch hoop. Ensure the straps are straight and not twisted. Take the four strands from the end of one spiral strap and tie them around the large hoop using double half-hitch knots or simply by looping them over the hoop and securing them with a square knot tightly against the wood. Repeat for all four straps, spacing them perfectly evenly around the hoop (think of a clock face: 12, 3, 6, and 9).
Step 5: Filling in the Basket
You currently have large gaps between your four straps on the hoop. This is where you will add the remaining cords to build the basket. Take your 24 shorter cords (the 4-meter ones). Fold them in half. Attach 6 of these cords into each of the four sections between your straps using the Lark’s Head Knot directly onto the large hoop. You should now have the entire hoop covered in cords.
Step 6: Weaving the Net
To create the deep, rounded basket, we will use Alternating Square Knots. Start a row of Square Knots all the way around the hoop, directly under the wood. A Square Knot is formed by crossing the left cord over the middle two, bringing the right cord over the left, behind the middle, and through the loop. Tighten. Then, do the reverse: right cord over the middle, left cord over the right, behind the middle, and through the loop. For the second row, drop the first two cords and the last two cords. Tie a Square Knot using the remaining cords. This alternates the position of the knots, creating a net-like diamond pattern. Continue tying rows of Alternating Square Knots. As you work your way down, try to keep your tension slightly looser to allow the shape to balloon out and form a comfortable, deep seat. Continue for about 12 to 15 inches of netting depth.
Step 7: The Final Gather
Once the basket is deep enough to hold a cat comfortably, gather all the hanging cords together at the bottom center. Take one of your extra 1-meter cords and create a Wrapping Knot. Gather the bundle of loose cords in your hand. Lay a short end of the extra cord against the bundle, pointing up. Create a loop, then wrap the long end of the cord tightly around the bundle and the loop multiple times. Thread the end through the loop and pull the top tail to trap the knot inside the wraps. Trim the ends. Trim the remaining tassel at the bottom to your desired length. Place a soft round cushion inside, and your Spiral Sanctuary is ready.
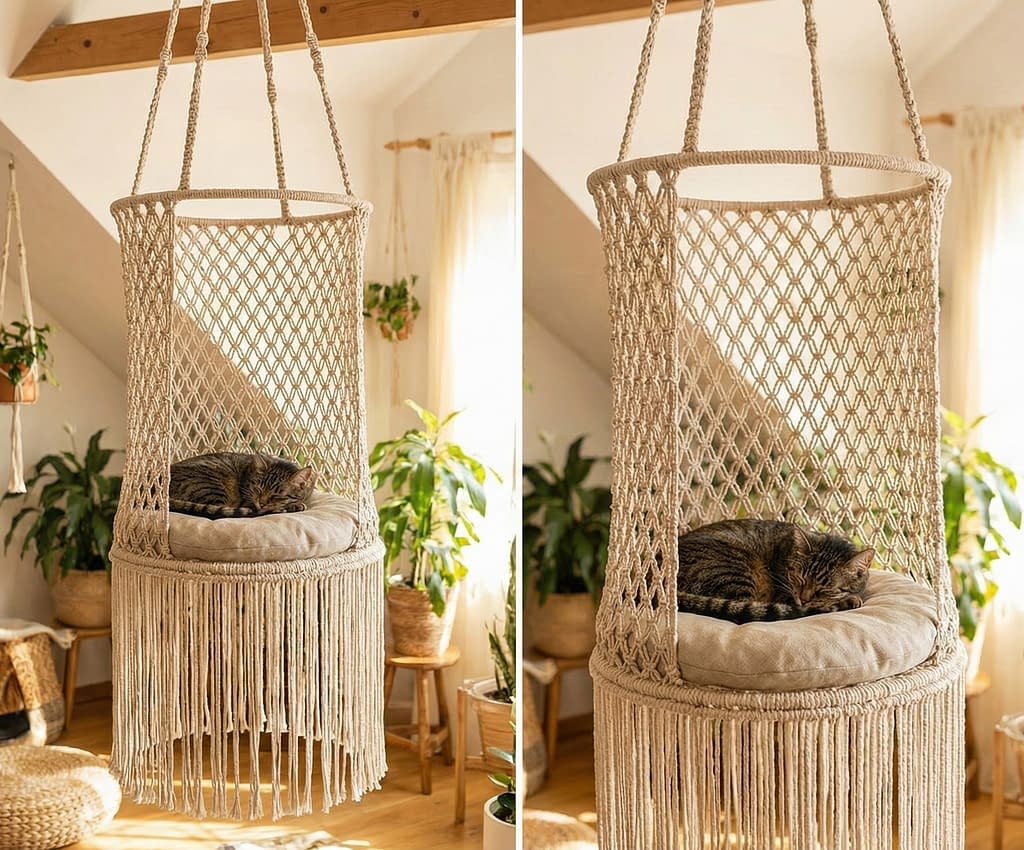
2. The Cylindrical Tower: Structured High-Rise Hammock
This design is distinct because of its architectural shape. It is a tall cylinder with a solid top and bottom, creating a secure, fortress-like feel. The vertical lines and decorative bands give it a very organized, clean appearance suitable for modern living spaces.
Skill Level
Intermediate
Finished Size
Approximately 16 inches in diameter and 30 inches tall (excluding suspension straps).
Materials Needed
Medium thickness 4 millimeter cotton rope Two identical metal rings (16 inches in diameter) One heavy-duty suspension ring for the top A round linen cushion that fits the 16-inch diameter Scissors and Measuring Tape
Knot Guide
Square Knot Wrapping Knot Double Half Hitch Knot
Instructions
Step 1: The Suspension
This hammock hangs from a single point but splits into four ropes. Cut 4 lengths of rope, each 6 meters long. Find the center of these ropes and attach them to your top heavy-duty suspension ring using Lark’s Head Knots. You now have 8 strands. Group them into 4 pairs. You can braid these pairs or knot them to create strong straps that will support the weight of the structure. Make these straps about 20 inches long.
Step 2: The Top Rim
Attach the four suspension straps to your first 16-inch metal ring. Space them evenly at four equidistant points. Secure them tightly with knots that will not slip. Now, you need to fill in the circumference of this top ring. Cut approximately 40 lengths of cord, each roughly twice the length of the height of the cylinder (about 2 meters each). Fold these cords in half and attach them to the top ring using Lark’s Head Knots, filling the entire space between your suspension points. The ring should be completely covered in rope.
Step 3: Creating the Vertical Columns
Unlike the previous net style, this design features straight vertical columns. To achieve this, we will not be knotting the entire surface. Separate your cords into groups of 4. For the top 3 inches, tie a column of Square Knots (one Square Knot directly below the other) on every group. This creates a sturdy upper border.
Step 4: The First Decorative Band
Leave a gap of about 6 inches where the cords just hang straight down. This creates the “open” feel of the cylinder. Now, create a horizontal band of knots to stabilize the structure. Perform two rows of Alternating Square Knots all the way around the cylinder. This band acts like a belt, keeping the vertical cords in place and adding visual interest.
Step 5: The Lower Section and Second Band
Let the cords hang straight down for another 6 to 8 inches. Create a second decorative band exactly like the first one, using two rows of Alternating Square Knots. This should be positioned just a few inches above where the bottom ring will be.
Step 6: Attaching the Bottom Ring
This is the most technical part. You need to attach all the hanging cords to the second 16-inch metal ring to close the cylinder. Take each cord and tie a Double Half Hitch Knot onto the bottom ring. Ensure the tension is very tight so the walls of the cylinder stand up straight and do not sag. The distance between the top ring and bottom ring should be consistent all the way around.
Step 7: The Solid Base
Once the cords are attached to the bottom ring, you will have a lot of excess rope hanging below. To create a solid base for the cushion, you need to weave a bottom. You can take opposite cords (from one side of the ring to the other) and tie them together in the center, or weave them in a radial pattern toward the center point. Once the bottom web is secure and strong enough to hold a cat, gather the remaining ends in the center underneath the hammock. Secure them with a large, tight Wrapping Knot. Trim the excess cord so it looks neat. Place your fitted round linen cushion inside. It should rest flat against your woven base.
3. The Shallow Diamond: Soft and Breathable Lounger
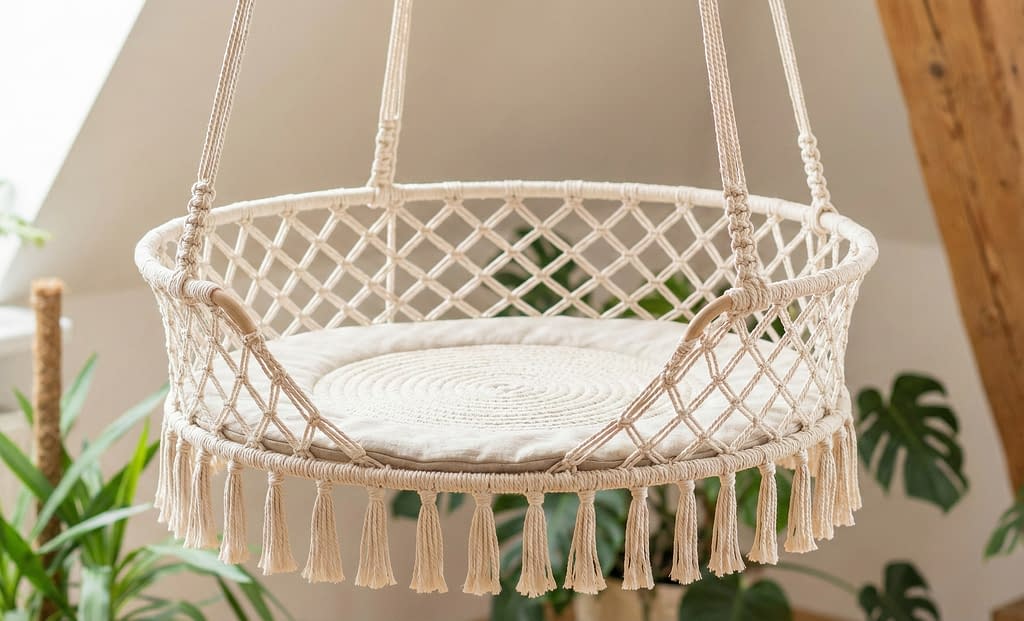
This hammock is designed for the cat who loves to sprawl out and observe the room without high walls blocking their view. It features a shallow depth, intricate diamond netting, and a playful fringe of short tassels.
Skill Level
Beginner
Finished Size
18 inches diameter, shallow depth of about 6-8 inches.
Materials Needed
Thin 3 millimeter cotton rope (for a lighter, more delicate look) One 18-inch metal or wooden hoop Scissors and Tape Measure A thin padded fabric insert or blanket
Knot Guide
Square Knot (Alternating pattern) Lark’s Head Knot Overhand Knot (for preventing fraying, optional)
Instructions
Step 1: The Suspension Cords
Cut 4 cords, each 5 meters long. Fold them in half and attach them to a top hanging ring (or simply gather them with a wrapping knot to form a loop). Create four simple twisted ropes or braided straps about 25 inches long. Attach the ends of these four straps to your 18-inch hoop at four equal points (North, South, East, West).
Step 2: Preparing the Rim
For this shallow basket, you want a dense net. Calculate the circumference of your hoop. You will need enough cords to cover the rim. Cut approximately 48 cords, each 3 meters long. Fold each cord in half and mount them to the hoop using the Lark’s Head Knot. Fill the spaces between your suspension straps.
Step 3: Diamond Netting
We will create a classic diamond mesh. Row 1: Tie Square Knots all around the perimeter using groups of 4 cords. Row 2: Skip the first 2 cords, and use the next 4 cords to tie a Square Knot. This “alternating” technique splits the cords from the row above, creating the top of the diamond shape. Continue this alternating pattern. Because we want a shallow shape, do not pull the knots too tight. Let the mesh flow gently inward. Continue for roughly 8 to 10 rows. The net should naturally begin to curve inward toward the center bottom.
Step 4: Closing the Bottom
Since this is a shallow lounger, we do not want a long tassel hanging down that drags on the floor. We want a flat finish. As you approach the center bottom of the hammock, you will notice the circle of cords getting very tight. You have two options here. You can gather all cords into a single heavy wrapping knot at the center (which creates a deeper point), or for a flatter base, you can take a smaller 4-inch metal ring and tie all the converging cords onto this small ring using Double Half Hitch knots. Using a small bottom ring is excellent for this design as it keeps the bottom flat, perfect for the “flat woven base” look.
Step 5: The Tassel Fringe
The design calls for short tassels hanging from the bottom edge or the rim. If you want tassels on the rim: Cut extra pieces of cord about 6 inches long. Attach them between your main structural cords on the large hoop using a Lark’s Head Knot. Comb out the ends of these short cords so they become fluffy. Trim them evenly all the way around so you have a uniform 3-inch fringe bordering the hammock.
Step 6: Final Touches
Place your thin padded fabric insert inside. The diamond netting provides plenty of airflow, making this an ideal bed for warmer climates or cats who overheat easily. Hang it near a window for the best sunbathing opportunities.
4. The Boho Cylinder: Fringe & Form
This design stands out for its vertical elegance. Unlike the basket styles that curve inward, this hammock maintains a straight, cylindrical shape that looks like a modern art installation. The long, dramatic fringe hanging from the bottom adds movement and bohemian flair, while the diamond netting allows you to peek in on your sleeping kitty. The “unreinforced” top look gives it a clean, minimalist entry point, creating a seamless transition from the suspension cords to the bed itself.
Skill Level
Intermediate
Finished Size
16 inches in diameter and roughly 45 inches in total length (including the long fringe).
Materials Needed
Medium weight 4 millimeter cotton rope (natural or white) One 16-inch metal hoop (to maintain the cylinder shape at the top, concealed) One 16-inch metal hoop (for the base structure) Scissors Measuring Tape A round cushion to fit the base
Knot Guide
Lark’s Head Knot Square Knot Double Half Hitch Knot Gathering Knot
Instructions
Step 1: Preparing the Suspension
Cut 4 groups of cords to serve as your main hangers. Each group should have 2 cords, cut to 6 meters long. Fold them in half and loop them over your ceiling hook or a small top ring. You now have 8 strands hanging down (4 groups of 2). Create a decorative sennit (a chain of knots) for each of the four straps using Square Knots or Spiral Knots for about 24 inches.
Step 2: The Concealed Top Ring
To achieve the “clean, unreinforced” look while keeping the hammock open, we will attach these straps to the top 16-inch hoop but cover the hoop entirely. Take your four suspension straps and tie them to the 16-inch hoop at four equidistant points (North, South, East, West). Now, cut filler cords to cover the rest of the hoop. You will need roughly 40 to 50 cords, each cut to 5 meters long. Fold each filler cord in half and attach it to the hoop using the Lark’s Head Knot. Push them close together so the metal hoop is completely hidden by the rope.
Step 3: Vertical Walls with Diamond Netting
You now have a curtain of ropes hanging from the hoop. We will create the cylinder walls using Alternating Square Knots. Row 1: Take 4 strands and tie a Square Knot. Repeat this all the way around the circle. Row 2: Drop the first 2 strands. Take the next 4 strands (which consists of 2 strands from the first knot and 2 from the second knot) and tie a Square Knot. This creates the alternating diamond pattern. Continue this process for approximately 12 to 15 inches. Keep your tension consistent. Unlike the bowl shapes, do not let the work expand or contract; you want straight, vertical walls.
Step 4: The Base and Fringe
Now you need to attach the bottom 16-inch hoop to give the cylinder a solid floor. This step requires patience. Take each hanging cord and tie a Double Half Hitch Knot around the bottom hoop. Ensure the hoop sits level and straight. Once all cords are knotted onto the bottom hoop, do not trim them. The design calls for “long, straight fringe.” Let the remaining lengths of rope hang down freely. Trim the fringe so it is even, leaving it quite long (about 12 to 15 inches) to create that dramatic curtain effect beneath the bed.
Step 5: The Base Support
To support the cushion, you need to weave a net inside the bottom hoop. Use spare rope to create a simple crisscross or radial web across the bottom hoop. It does not need to be fancy as it will be covered by the cushion. Insert your thin padded round cushion, and your cylinder is complete.
5. The Geometric Square: A Modern Box Cradle
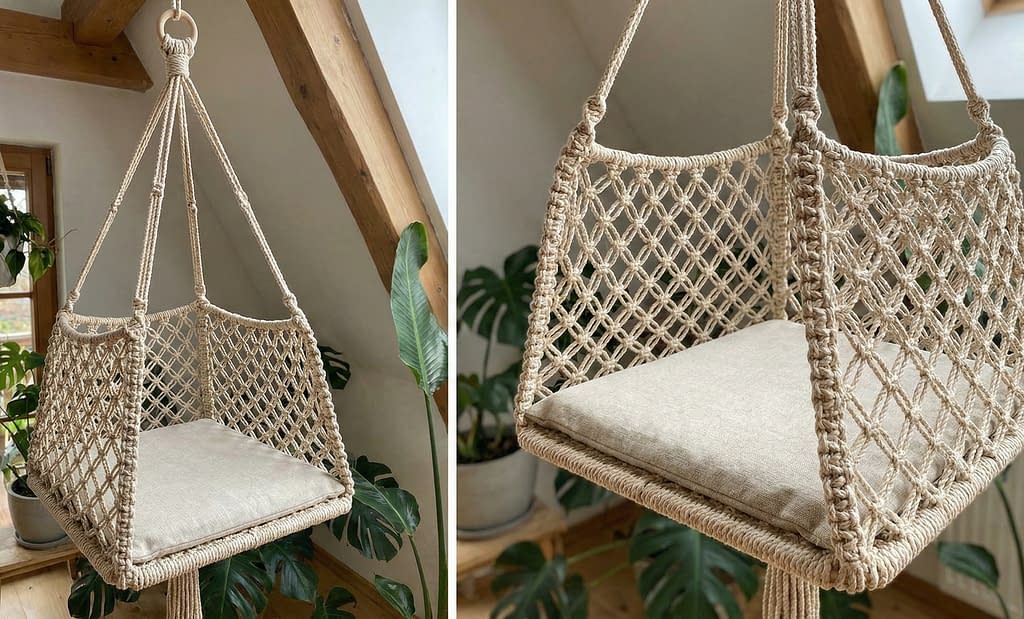
Macramé is traditionally associated with round shapes, which is why this square-based hammock is such a striking showpiece. It mimics the shape of a traditional box bed but suspends it in the air. The reinforced corners give it a crisp, tailored look, and the diamond netting softens the sides just enough to make it cozy.
Skill Level
Intermediate to Advanced (due to shaping)
Finished Size
Approximately 15 inches by 15 inches square base.
Materials Needed
Medium 4 millimeter cotton rope One square metal frame (15 x 15 inches) or four sturdy wooden dowels lashed together to form a square Scissors and Measuring Tape A square fabric cushion
Knot Guide
Square Knot Lark’s Head Knot Double Half Hitch Knot
Instructions
Step 1: The Four-Point Suspension
This bed hangs from four distinct corners. Cut 8 cords, each 6 meters long. Group them into pairs. Attach each pair to your main top suspension ring. Braid or knot these pairs for about 30 inches. These will be the four cables that hold up the four corners of the square bed.
Step 2: Establishing the Corners
Attach one suspension cable to each corner of your square metal frame. Ensure the frame hangs perfectly level. The “reinforced corner cords” mentioned in the pattern refers to the ropes that will run down the four vertical edges of the box. Cut 4 thick cords (or bundles of 3 standard cords), each 2 meters long. Attach one bundle to each corner of the metal frame. These will act as your “corner pillars.”
Step 3: Filling the Sides
Now you need to fill in the four sides of the square frame. Cut approximately 12 cords for each side (48 total), each 3 meters long. Attach them to the square frame using Lark’s Head Knots. You now have a square frame with ropes hanging down on all four sides.
Step 4: The Box Walls
We will work one side at a time to keep things organized. On Side A, begin tying Alternating Square Knots to create a mesh. As you work your way down, you need to connect the sides at the corners. When you reach the edge of Side A, take the cords from the edge of Side B and tie a Square Knot that wraps around the “corner pillar” cord we established in Step 2. This locks the sides together and creates a distinct corner shape. Continue this for about 8 to 10 inches of depth.
Step 5: The Floor
Once the walls are deep enough, you need to create the floor. Since you do not have a bottom frame in this specific “soft box” description, you will weave the bottom. Bring the cords from opposite sides (Side A and Side C) toward the center and tie them together using Square Knots. Do the same for Sides B and D. Work in concentric squares toward the center until the entire bottom is closed off. Finish by tying all remaining cords into a few tight central knots underneath or weaving them back into the structure for a seamless finish.
Step 6: Finishing
Insert the square cushion. It should fit precisely into the corners. The reinforced vertical corners will help the bed keep its boxy shape even when the cat jumps in.
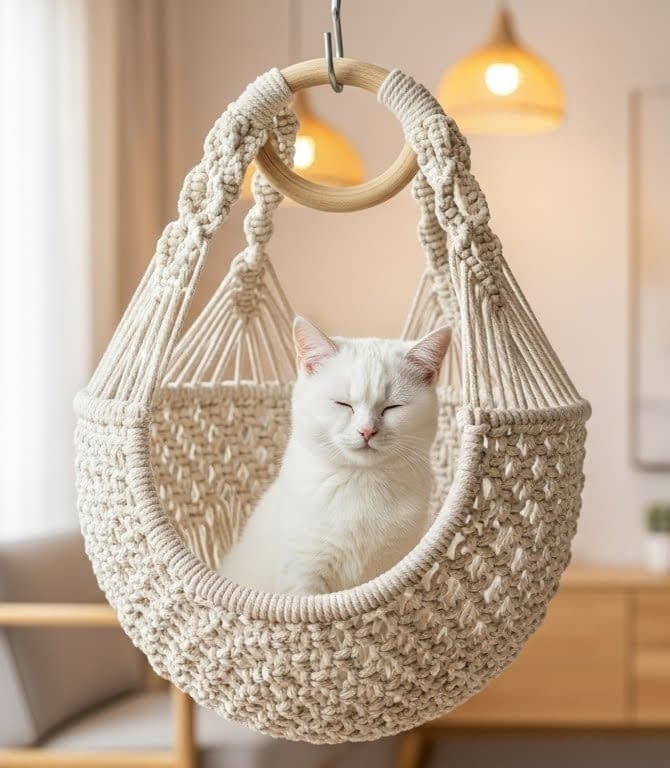
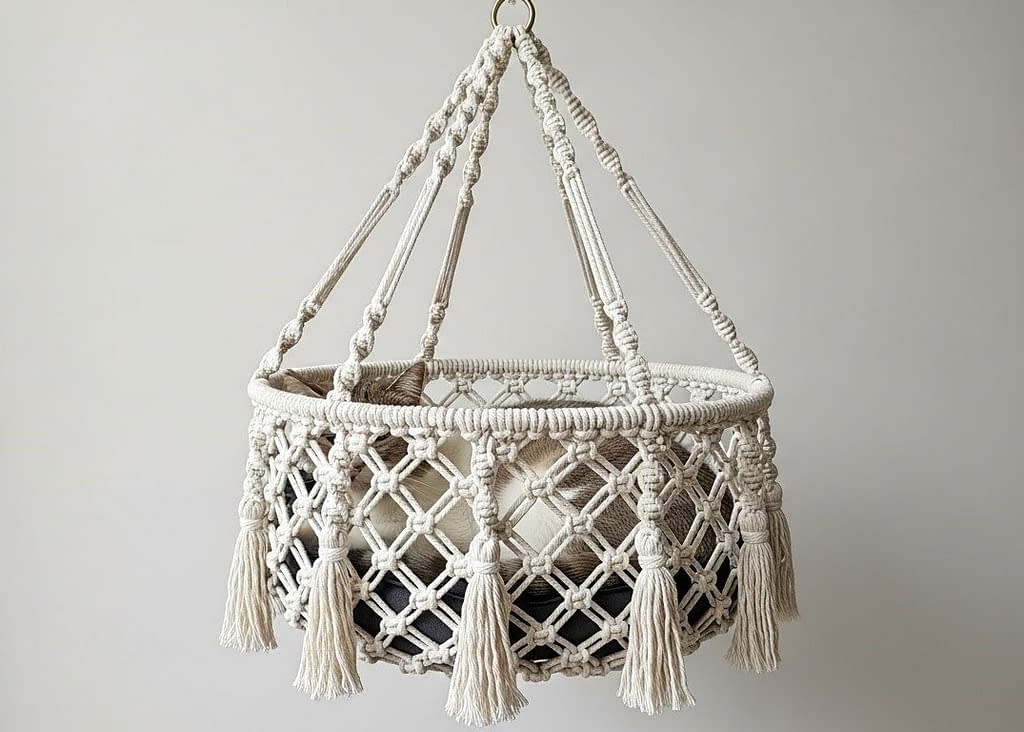
6. The Braided Halo: Wide Rim & Fringe

This design is all about texture and width. The standout feature is the thick braided rim at the top, which acts like a sturdy halo and gives the cat a solid ledge to rest their chin on. The long fringe hanging directly from this rim creates a beautiful skirt effect that hides the basket, making the cat look like they are floating on a cloud.
Skill Level
Intermediate
Finished Size
20 inches in diameter (a wider, more spacious bed).
Materials Needed
Medium 4 millimeter to 5 millimeter cotton cord One large 20-inch metal hoop Scissors and Tape Measure
Knot Guide
Square Knot Lark’s Head Knot Three-Strand Braid (for the rim)
Instructions
Step 1: The Braided Rim
Before you attach any suspension cords, we must create the decorative rim. Cut 3 bundles of cord. Each bundle should be thick (about 6 to 8 strands of rope) and roughly 70 inches long. Braid these three bundles together to create one very thick, long braid. Wrap this braid around your 20-inch metal hoop. Use a separate thin string or matching cord to stitch the braid tightly onto the metal hoop so the metal is completely covered and you have a plush, soft rim.
Step 2: The Suspension
Cut 4 lengths of rope, 6 meters each. Tie them to your ceiling ring, then bring them down and attach them securely to the metal hoop (hiding the attachment points underneath the thick braid). Space them evenly.
Step 3: The Fringe Skirt
This pattern has a specific detail: “Long straight fringe hangs from the lower edge of the rim.” Cut roughly 60 pieces of cord, each 1.5 meters long. Fold them in half and attach them to the bottom of the braided rim (not over the top, but threaded through the bottom loops of the braid). These cords serve two purposes: some will be used to make the basket, and the others will remain loose to form the fringe. Decide on your ratio. For every 4 cords you attach, keep 2 hanging loose as fringe, and use 2 to weave the basket.
Step 4: The Basket Nest
Take the cords designated for the basket (the ones on the inner layer). Begin tying Alternating Square Knots. Because the rim is wide (20 inches), you will need to decrease the number of knots as you work toward the center bottom to create a bowl shape. To decrease: In every third row, skip a knot or tie two cords together to merge them. This pulls the net inward. Continue knotting until you reach the center bottom.
Step 5: Closing the Base
Gather the ends of the basket cords at the bottom center. Tie a large Wrapping Knot to secure the base. Trim the tassel short.
Step 6: Grooming the Fringe
Now, go back to the outer layer of cords hanging from the rim (the fringe). Comb them out if you want a fluffy look, or leave them as twisted rope for a sleek look. Trim them evenly so they hang down like a skirt, covering the sides of the netted basket. Place a flat, tightly woven base or a cushion inside. The thick braided rim provides excellent structure, making this one of the most durable designs for heavier cats.
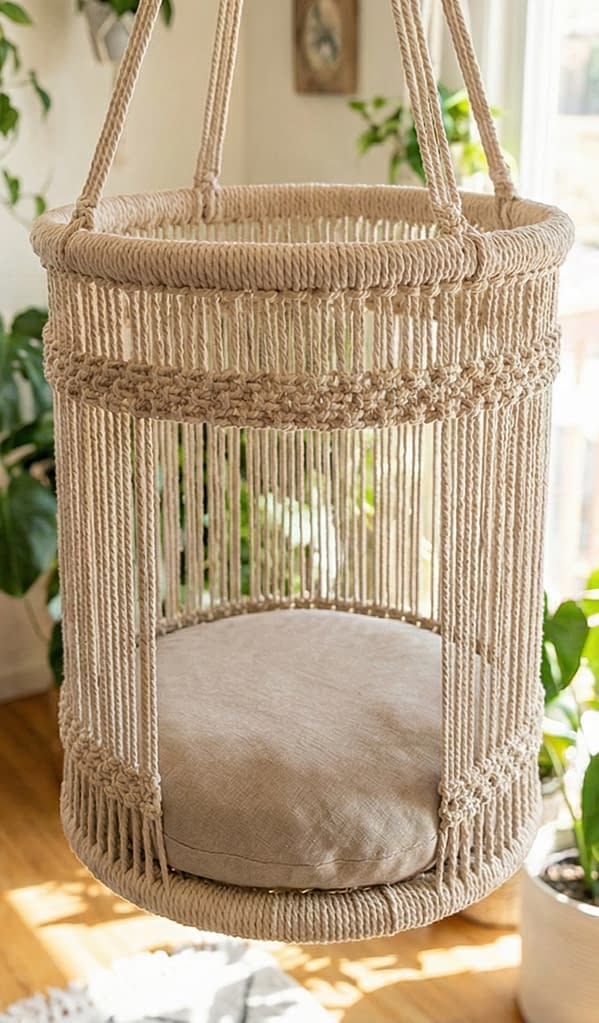
7. The Wooden Rim Classic: Deep Basket & Linen
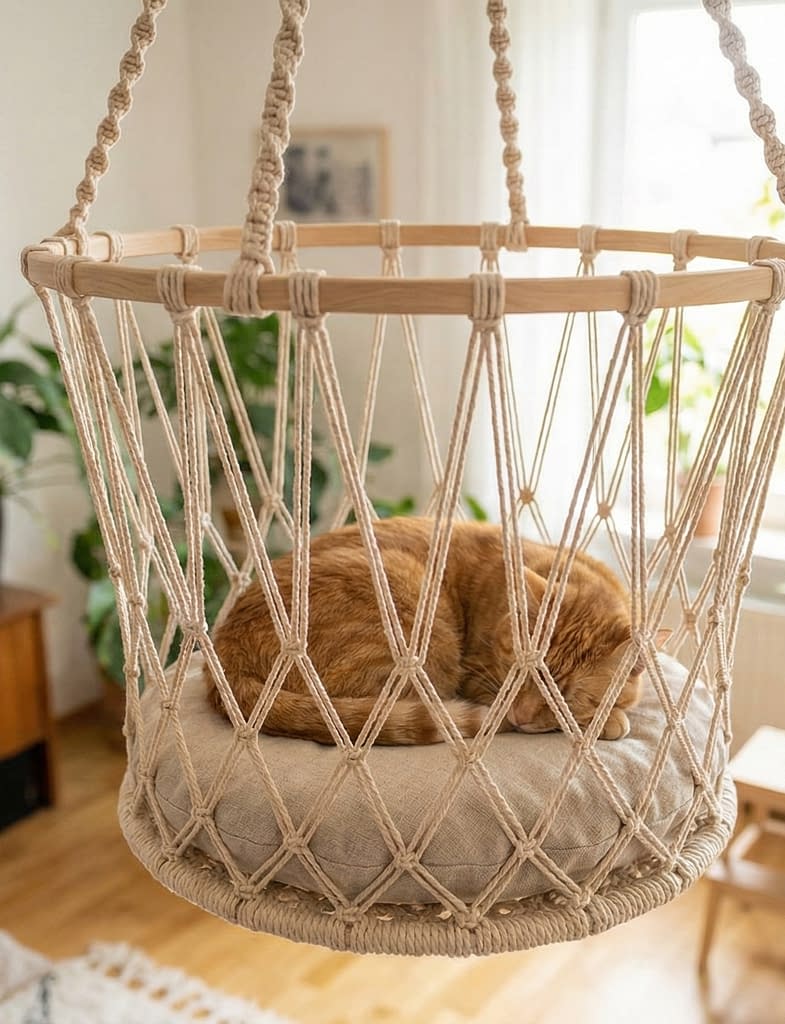
This design marries the rustic warmth of natural wood with the softness of cotton. Unlike the previous designs where the metal hoops are fully covered by rope, this hammock proudly displays a thick, rigid wooden ring at the top. The contrast between the polished wood and the intricate diamond netting creates a sophisticated, furniture-quality piece. The shape is a deep, rounded basket, providing a high level of security for the cat, paired with a low-profile linen cushion for understated luxury.
Skill Level
Intermediate
Finished Size
18-inch diameter wooden ring; approximately 50 inches total hanging length.
Materials Needed
One 18-inch sturdy wooden hoop (approx. 1-inch thickness for visual weight) Medium to thin cotton rope (3mm or 4mm) in natural white One small wooden ring for suspension (2-inch diameter) A fitted round linen cushion (must fit the basket base perfectly) Scissors Measuring Tape
Knot Guide
Lark’s Head Knot Square Knot Wrapping Knot
Instructions
Step 1: The Suspension Assembly
Cut 4 lengths of rope, each 6 meters long. Fold them in half and attach them to the small 2-inch suspension ring using Lark’s Head Knots. You will have 8 strands hanging down. Group these into 4 pairs. Tie a series of Square Knots or a simple spiral sennit for approximately 24 inches. Attach these four straps to your large 18-inch wooden hoop. To keep the wood visible, do not wrap the rope around the rim excessively. Simply pass the strap over the wood and secure it with a tight knot underneath, or drill holes in the wood if you prefer a hardware-free look (though tying is standard for macramé).
Step 2: Setting the Perimeter
Cut 32 cords, each 4 meters long. Attach these cords to the wooden hoop using Lark’s Head Knots. Space them out evenly between your four suspension points. Crucial Design Note: Leave a small amount of space between each knot so the beautiful wood grain of the ring remains visible. This “negative space” is key to the design’s aesthetic.
Step 3: Deep Basket Netting
Begin tying Alternating Square Knots. Row 1: Tie Square Knots around the entire perimeter roughly 1 inch below the wooden ring. Row 2: Drop the first two strands and tie the next four strands into a Square Knot. This creates the alternating diamond mesh. Continue this pattern for approximately 14 to 16 inches. Maintain consistent, moderate tension. You want the net to bulge out slightly to form a “deep rounded basket” shape, rather than a straight tube. The depth is important here—it needs to be deep enough that the cat feels hidden and secure.
Step 4: The Densely Woven Base
As you reach the bottom of the basket, you need to transition from an open net to a “densely woven” base for strength. To do this, stop leaving space between your rows of knots. Begin tying your Square Knots immediately below the previous row’s knots. You can also drop strands (cut them short and tuck them into the back of knots) as the circle gets smaller to reduce bulk. Continue this tight weaving until the hole at the bottom is nearly closed.
Step 5: Final Closure
Gather all remaining cord ends into a thick bundle at the very center bottom. Secure them with a strong Wrapping Knot, winding the cord around at least 10 times to ensure it can hold weight. Trim the tassel to a medium length (about 6 inches). Insert your fitted round linen cushion. The cushion should be “low profile,” meaning it shouldn’t be too puffy; it should sit flat and neat inside the deep woven nest.
8. The Minimalist Tassel: Precise Shallow Lounger
Exact Reconstruction: This pattern follows a strict structural guide. It features a shallow circular base designed for lounging rather than hiding. The defining characteristics are the breathable diamond knot netting, the specific depth which is neither flat nor deep, and the short tassels that act as a uniform border. There is no artistic reinterpretation here; the goal is perfect symmetry and balance using natural off-white rope.
Skill Level
Intermediate (Requires precise tension control)
Finished Size
18-inch diameter; Shallow depth (approx. 6 inches deep).
Materials Needed
Natural off-white cotton rope (4mm thickness exactly) One 18-inch metal hoop Scissors Measuring Tape A plain wall background for display (as per visualization context)
Knot Guide
Square Knot Lark’s Head Knot Double Half Hitch Knot
Instructions
Step 1: Standardized Suspension
Cut 4 cords, 5 meters length each. Join them at the top. This design uses “four cords joined at the top” without a complex sennit or decorative weave on the straps. Keep the suspension cords straight and simple. Attach the four ends to the 18-inch metal hoop at equal quadrants (North, South, East, West).
Step 2: Rim Construction
Cut 40 cords, each 3 meters long. Fold in half and mount to the hoop with Lark’s Head Knots. Ensure the knots are pushed tight against each other. The metal hoop should be fully covered by the rope to provide a soft entry point for the cat.
Step 3: The Diamond Net (Sides)
The description requires “Diamond knot net sides.” Row 1: Tie a row of Square Knots 1.5 inches below the rim. Row 2: Tie a row of Alternating Square Knots 1.5 inches below the first row. Precision Check: Use your measuring tape. The distance between rows must be consistent to achieve the “match knot spacing” requirement. Continue for exactly 4 rows. This limited number of rows ensures the basket remains “shallow.” If you go further, it becomes a deep sack, which deviates from the reference.
Step 4: The Circular Base
To form the “shallow circular base,” you must now pull the netting inward rapidly. Thread a spare piece of cord through the loops of your last row of knots and pull it like a drawstring until the bottom opening narrows to about 4 inches. Secure this drawstring tightly. Take the hanging ends and tie them firmly around this central gathering point.
Step 5: The Even Tassels
The reference specifies “short tassels hanging evenly around the bottom edge.” This does not mean a single center tassel. It means a fringe around the bottom perimeter of the basket. Cut excess cords hanging from your final row of knots to a uniform length of exactly 4 inches. Comb them out slightly to create volume. The result should be a shallow, saucer-shaped bed where the fringe creates a halo effect at the bottom, rather than a long tail. Place the cat inside to test the “cat lying inside” visualization. The bed should sag slightly but maintain its shallow structure.
9. The Blush Pink Cylinder: Dusty Rose Sanctuary
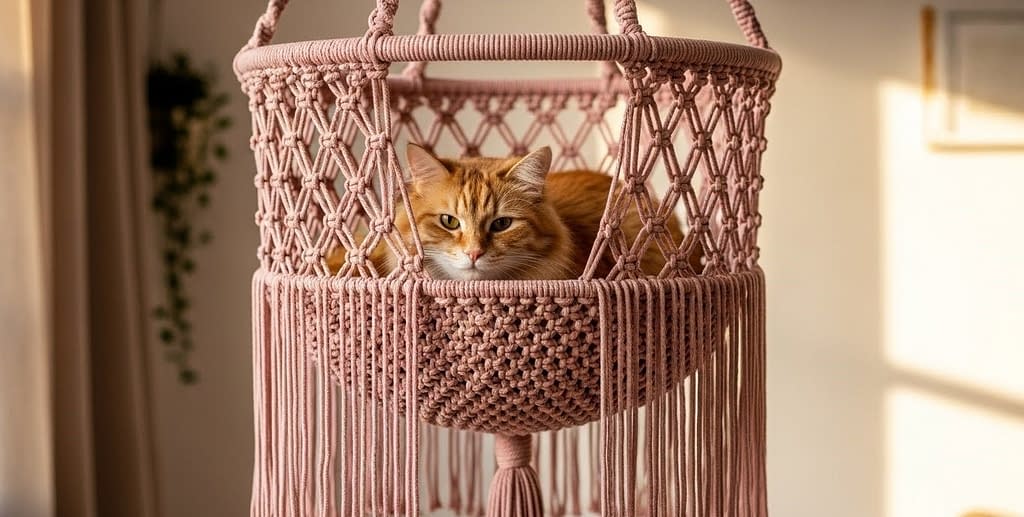
Exact Reconstruction: This is the only pattern in the collection that deviates from the neutral color palette. It requires “Muted dusty pink cotton cord” and strictly follows a cylindrical hanging shape. The structure is comprised of a solid woven base, diamond net sides, and long straight fringe. No changes to design or proportions are permitted.
Skill Level
Intermediate
Finished Size
16-inch diameter cylinder; 35 inches length (plus fringe).
Materials Needed
Muted Dusty Pink cotton cord (4mm thickness) Two 16-inch metal hoops (Top and Bottom) Scissors Measuring Tape
Knot Guide
Lark’s Head Knot Square Knot Double Half Hitch Knot Radial Weave (for the base)
Instructions
Step 1: Color Prep and Suspension
Ensure your cord is the specific “muted dusty pink” shade—not bright neon pink or pastel baby pink. It must be an earthy, dusty tone. Cut 4 cords, 6 meters each. Attach to a top ring/hook and braid simple straps for 20 inches. Attach the straps to the Top 16-inch metal hoop.
Step 2: The Cylindrical Walls
Cut 48 cords of pink rope, each 4 meters long. Attach them to the Top hoop using Lark’s Head Knots, covering the metal completely. Begin the “Diamond knot net sides.” Tie Alternating Square Knots. Crucial Structure Note: You must maintain a straight vertical line. Do not increase or decrease stitches. The shape must be a perfect cylinder. Continue the diamond netting for 18 inches of height.
Step 3: The Bottom Hoop Connection
To ensure the “Cylindrical hanging shape” holds true, you must attach the netting to the Bottom 16-inch hoop. Take each hanging cord and tie a Double Half Hitch Knot around the bottom hoop. Adjust each knot so the hoop hangs perfectly level and parallel to the top hoop.
Step 4: The Solid Woven Base
The reference requires a “solid woven base.” Using the cords that are now attached to the bottom hoop, weave them toward the center. You can use a radial pattern: Take cords from opposite sides and knot them in the center, or weave them over-and-under like a pie crust. The goal is to create a floor that is solid (not netted) so the cat has a firm surface to sit on.
Step 5: The Long Straight Fringe
Do not trim the cords short after weaving the base. The design specifies “long straight fringe around the bottom.” Let the remaining rope hang down from the bottom hoop. Trim the ends in a perfectly straight horizontal line, approximately 12 to 15 inches below the base. Comb the fringe so it hangs smooth and straight, enhancing the verticality of the cylinder.
Conclusion
You now have a complete library of 9 distinct macramé cat hammock patterns, ranging from the classic boho spiral to the architecturally strict pink cylinder.
Creating these hammocks is about more than just knotting rope; it is about crafting a sanctuary. Whether you chose the Spiral Sanctuary for its elegance, the Geometric Square for its modern lines, or the Blush Pink Cylinder for a pop of color, you have built something with your own hands that adds value to your home and comfort to your pet’s life.
Remember, the key to professional-looking macramé is consistency. Keep your tension even, measure your cords twice before cutting, and take your time with the finishing touches like fringing and trimming. These details transform a simple DIY project into a premium piece of pet furniture.
Now, hang your masterpiece, invite your cat to inspect their new throne, and enjoy the cozy, handmade vibe you have brought into your living space. Happy knotting!


