
Paper flower bouquets are a timeless craft that combines creativity, elegance, and versatility. Whether you want to surprise a loved one, decorate your home, or simply indulge in a therapeutic art project, making paper flower bouquets can be both rewarding and enjoyable. Unlike fresh flowers, paper flowers last indefinitely, making them a perfect choice for keepsakes and sustainable gifting. In this comprehensive guide, we will explore 8 Paper Flower Bouquet DIY ideas in detail, each with step-by-step explanations, design variations, and practical tips to help you create stunning floral arrangements.
Essential Materials for Paper Flower Bouquets
To create any of the 8 Paper Flower Bouquet DIY projects below, you’ll typically need:
- Colored craft paper or cardstock
- Scissors or craft knife
- Glue or hot glue gun
- Floral tape
- Green craft paper for stems/leaves
- Wooden sticks or floral wires
- Wrapping paper for the bouquet
- Ribbons for finishing touches
- Optional: Glitter, markers, buttons, or beads for flower centers
Having all materials ready before you begin will help the crafting process flow smoothly.
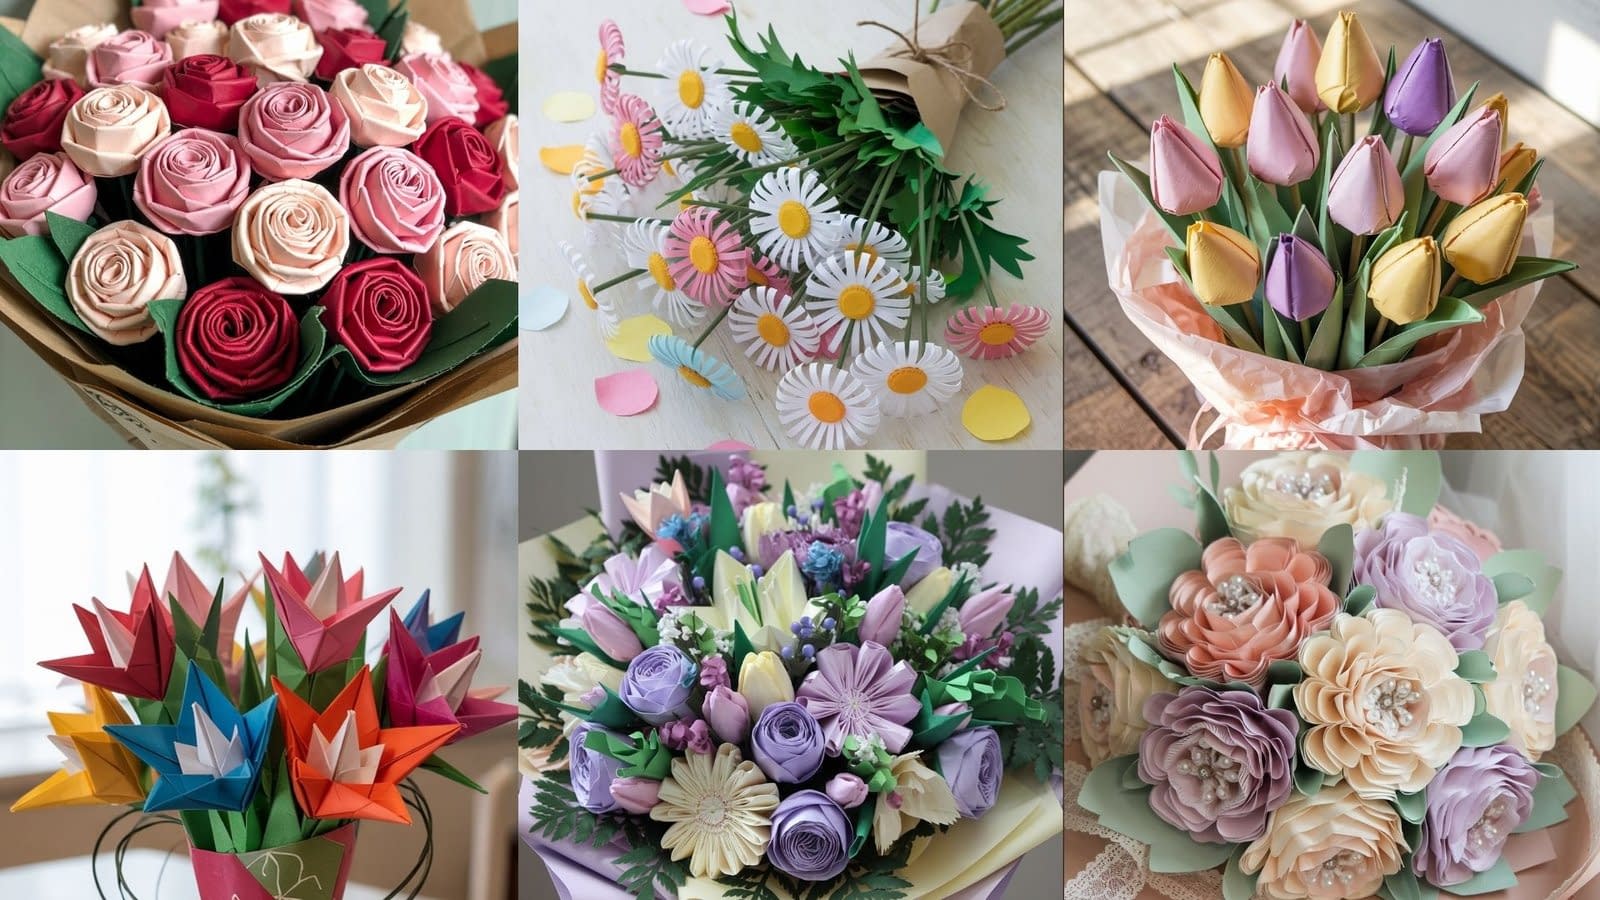
1. Rolled Paper Rose Bouquet

Rolled roses are one of the most popular paper flower designs due to their realistic look and simple process.
Steps:
- Draw and cut a spiral: Take a square piece of cardstock and draw a spiral, leaving about 1–2 cm between each curve.
- Cut along the spiral: Carefully cut along the lines until you reach the center.
- Start rolling: Beginning from the outer edge, roll the spiral tightly using a toothpick or thin stick.
- Loosen slightly: Once rolled, let the paper relax a bit for a natural rose shape.
- Glue the base: Secure the rolled flower at the center using hot glue.
- Add a stem: Glue a floral wire to the base and wrap with green floral tape.
- Repeat: Make multiple roses in different shades.
Bouquet Assembly:
Arrange 12–15 roses together. Add green leaves between them for contrast. Wrap in pastel or kraft paper and finish with a satin ribbon.
Tip: Use ombre-colored paper or paint the edges of petals with watercolor for a more lifelike finish.
2. Origami Flower Bouquet

Origami flowers bring a geometric and stylish touch to your bouquet.
Steps:
- Choose your flower: Popular origami flowers include lilies, tulips, and irises.
- Use square paper: Begin with perfectly square sheets of origami paper.
- Fold carefully: Follow folding patterns (many tutorials are available online for each flower style). Precision is key to neat results.
- Add stems: Insert a floral wire through the base of the flower and secure with tape.
- Shape petals: Slightly curl or bend petals outward for dimension.
Bouquet Assembly:
Combine 6–10 origami flowers. For a fuller look, make several types of origami flowers and mix them together. Add folded green leaves for balance.
Variation: Use metallic origami paper to create a dazzling bouquet for special occasions.
3. Giant Paper Flower Bouquet

Oversized flowers create a bold and eye-catching arrangement that is perfect for statement décor.
Steps:
- Cut large petals: Use thick cardstock for sturdiness. Cut petals in three sizes (large, medium, small).
- Shape the petals: Curl the edges using a pencil or round stick.
- Layer and glue: Start with the largest petals, then medium, and finally small ones in the center.
- Make the flower center: Roll a strip of fringed paper and glue it in the middle.
- Attach a stem: Use a wooden dowel wrapped with green tape for strength.
Bouquet Assembly:
Create 3–5 giant flowers. Bundle them with long stems and wrap with fabric or wide ribbon for a dramatic display.
Tip: These bouquets are perfect for wedding backdrops or photo props.
4. Paper Tulip Bouquet

Tulips are elegant and simple, making them a beginner-friendly project.
Steps:
- Prepare petals: Cut out four petal shapes for each tulip.
- Form the bulb: Glue the petals together, overlapping slightly to create a tulip shape.
- Insert the stem: Glue the flower onto a floral wire and wrap with green tape.
- Add leaves: Cut long, thin leaves and attach them to the stem.
Bouquet Assembly:
Gather 8–12 tulips of different colors. Bundle them with tissue or kraft paper for a spring-inspired arrangement.
Variation: Use crepe paper for tulips to get natural texture and curves.
5. Mixed Paper Flower Bouquet

A combination of different flower styles gives a natural and lush look.
Steps:
- Create a variety of flowers: Make roses, tulips, daisies, and origami lilies.
- Balance the bouquet: Place larger flowers at the center and smaller ones around the edges.
- Add fillers: Use paper ferns, leaves, or small blossoms to fill empty spaces.
Bouquet Assembly:
Arrange 10–15 flowers together in a circular shape. Secure with floral tape and wrap in colored paper. Tie with a decorative ribbon.
Tip: Stick to a color theme, such as all pastels, or bold primary colors for a vibrant effect.
6. Kusudama Flower Bouquet

The Kusudama technique from Japanese origami results in beautiful spherical flowers.
Steps:
- Fold petals: Start with square paper and fold into triangular shapes.
- Make units: Each flower requires five folded units.
- Glue units together: Form a full flower by joining five units.
- Add stems: Secure each flower onto floral wire.
Bouquet Assembly:
Create 6–8 Kusudama flowers. Cluster them together and wrap in simple colored paper to showcase their geometry.
Variation: String several Kusudama flowers together to create a cascading bouquet.
7. 3D Layered Paper Bouquet

Layered flowers give a realistic, textured effect that mimics natural blossoms.
Steps:
- Cut petals: Use templates to cut petal shapes in 3–4 different sizes.
- Layer carefully: Start with the largest petals at the bottom and stack smaller petals on top.
- Shape petals: Curl and bend edges for realism.
- Glue layers: Secure layers with glue and finish with a contrasting center.
- Attach stem: Glue to a floral wire wrapped in green tape.
Bouquet Assembly:
Use 8–10 layered flowers for a medium bouquet. Add paper greenery for fullness. Wrap in soft pastel paper and tie with lace ribbon.
Tip: Use glitter or pearl beads in the flower centers for an elegant touch.
8. Paper Daisy Bouquet

Daisies symbolize purity and happiness, making them a cheerful bouquet option.
Steps:
- Cut petals: Use white paper to cut thin, elongated petals.
- Create centers: Cut yellow circles or use buttons/beads for the middle.
- Assemble flowers: Glue petals around the yellow center.
- Attach stems: Secure onto green floral wires and add leaves.
Bouquet Assembly:
Gather 12–15 daisies for a lively bunch. Arrange with a mix of short and tall stems for a natural look. Wrap in kraft paper and tie with twine for a rustic finish.
Variation: Make daisies in playful colors like pink, orange, and blue for a whimsical bouquet.
Wrapping & Presentation Ideas
The final step in your 8 Paper Flower Bouquet DIY project is presentation. A bouquet is incomplete without beautiful wrapping. Here are some creative wrapping ideas:
- Use kraft paper for a rustic aesthetic.
- Choose glossy wrapping paper for a modern finish.
- Add lace or fabric for an elegant look.
- Tie with satin or jute ribbons depending on the occasion.
- Insert a small handwritten note or tag for a personalized touch.
Tips for Success
- Always curl and shape petals for a natural effect.
- Use a hot glue gun for stronger bonding.
- Experiment with color gradients for a realistic appearance.
- Don’t overcrowd the bouquet—balance is key.
- Try mixing paper textures like crepe, cardstock, and tissue paper for variety.
Final Thoughts
Crafting paper flower bouquets is a rewarding creative process that allows you to design meaningful gifts and décor pieces. With these 8 Paper Flower Bouquet DIY ideas, you can experiment with different flower types, styles, and arrangements to suit any occasion. Whether you’re crafting a romantic rose bouquet, playful daisies, or bold origami flowers, each project offers endless opportunities for personalization.
By following these detailed tutorials, your handmade paper bouquets will not only stand out as beautiful works of art but also serve as lasting keepsakes filled with creativity and care.


