
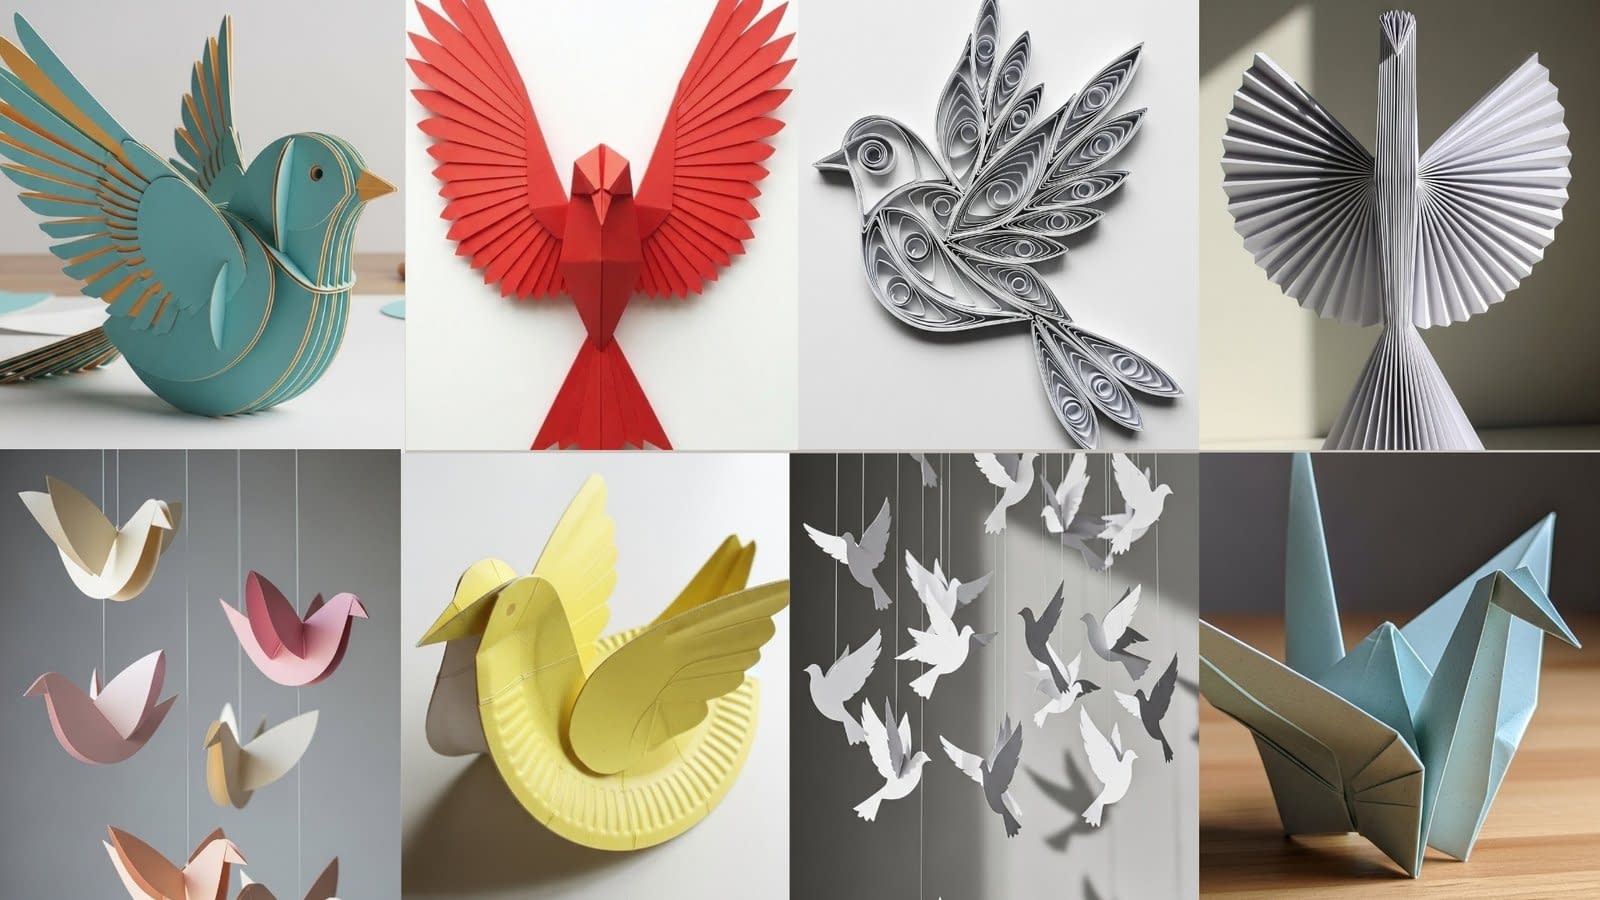
Paper bird craft projects have remained popular for generations because they combine creativity, simplicity, and endless customization. Whether you are folding a delicate origami crane, assembling a layered cardstock bird, or shaping a playful paper plate bird with children, paper bird crafts offer something for every age and skill level.
This guide on 8 paper bird craft ideas is designed to be comprehensive and beginner-friendly while still offering enough depth for experienced crafters. Each tutorial focuses on clear construction methods, including how to fold accurately, where to cut for clean edges, when to apply glue for durability, and how to achieve a polished final look.
These paper bird craft projects are ideal for home décor, classroom activities, spring and nature-themed displays, handmade gifts, or simply as a relaxing creative hobby. By following the detailed steps below, you will be able to recreate each bird confidently and understand the logic behind every fold and cut.
In this first section, you will learn how to make three foundational paper bird crafts that introduce key techniques used throughout paper crafting.
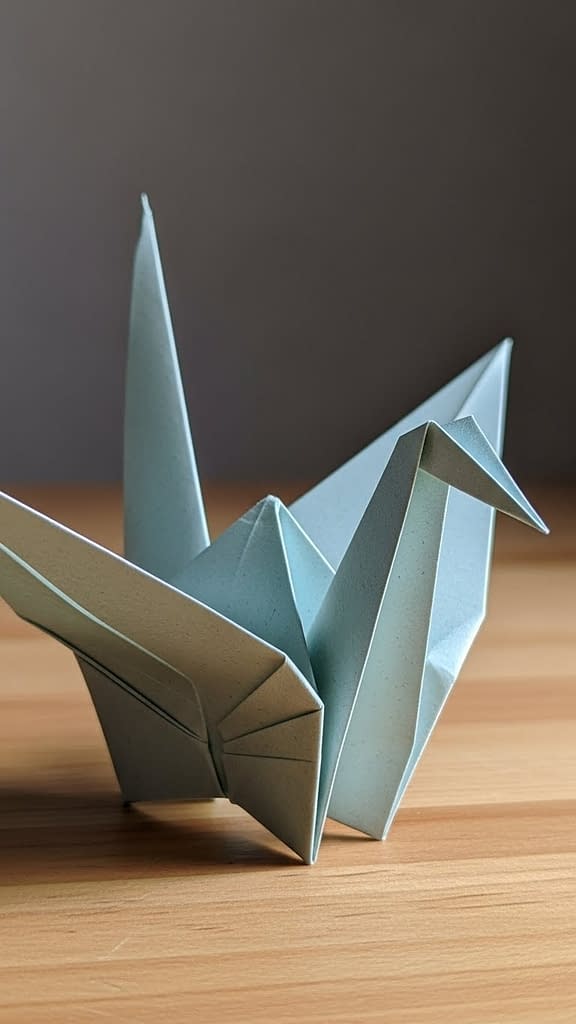
Tutorial 1: Classic Origami Paper Bird (Single-Sheet Fold)
Overview and Skill Level
This classic origami paper bird is made from a single square sheet of paper with no cutting or glue required. It focuses entirely on precise folding and symmetry, making it an excellent introduction to paper bird craft techniques.
Skill level: Beginner to intermediate
Time required: 10–15 minutes
Materials needed:
- One square sheet of origami paper or lightweight craft paper
- Flat surface for folding
Paper Selection and Preparation
Choose a square sheet of paper with a matte finish for better grip during folding. If using patterned paper, place the patterned side face down at the beginning so the design appears on the outside later.
Make sure the paper edges align perfectly before each fold. Accurate alignment is essential for a clean, balanced bird shape.
Step-by-Step Folding Instructions
Step 1: Create the Base Triangle
Place the paper flat on the table in a diamond orientation. Fold the paper in half diagonally by bringing the bottom corner up to meet the top corner. Press the crease firmly using your fingernail or a bone folder, then unfold.
Repeat this diagonal fold in the opposite direction, forming an “X” crease pattern across the paper.
Step 2: Form the Preliminary Base
Turn the paper over. Fold it horizontally from left to right and crease well, then unfold. Fold it vertically from top to bottom and crease again.
Using the existing creases, gently collapse the paper inward so it forms a smaller square with four layered flaps. This is known as the preliminary base.
Step 3: Shape the Bird Body
Position the square so the open ends face downward. Take the top layer of the right flap and fold it inward toward the center crease. Repeat on the left side, creating a kite shape.
Flip the paper over and repeat the same folds on the other side.
Step 4: Create the Head and Tail
Lift the top flap upward and fold it back down along the existing crease line to form a long diamond. Reverse fold the top point downward to create the bird’s head. The angle of this fold determines how long or short the beak will appear.
For the tail, reverse fold the bottom point slightly upward.
Step 5: Final Wing Folds
Fold the bird in half lengthwise so the wings meet. Carefully fold each wing downward at a slight angle, ensuring both sides match evenly.
Adjust the wings gently to help the bird stand upright if desired.
Finishing Touches
No glue is needed for this paper bird craft. You can lightly adjust the wings and tail by pinching the folds for a sharper finish. This origami bird works beautifully as a tabletop decoration or hanging ornament.
Tutorial 2: 3D Folded Paper Bird (Cut-and-Fold Style)
Overview and Skill Level
This 3D paper bird craft uses cutting, folding, and gluing to create a sturdy, sculptural bird with layered wings and a rounded body. It is ideal for those who want a more dimensional look than traditional origami.
Skill level: Intermediate
Time required: 30–45 minutes
Materials needed:
- Medium-weight colored cardstock
- Pencil and ruler
- Scissors or craft knife
- Glue (white craft glue or tacky glue)
- Optional: scoring tool
Preparing the Template
Begin by sketching or printing a simple bird template consisting of:
- One body piece with extended wing flaps
- Two wing layers
- One tail piece
Transfer the template onto cardstock using a pencil. Cut all pieces carefully, keeping edges smooth and clean.
Folding and Shaping the Body
Step 1: Score the Fold Lines
Before folding, lightly score along all fold lines using a scoring tool or the back of a craft knife. This helps create crisp folds without cracking the cardstock.
Step 2: Shape the Body
Fold the body piece along the central line so it forms a rounded, tent-like shape. Gently curve the paper by running it over the edge of a table to soften the stiffness and create a more natural bird body.
Wing Construction and Assembly
Step 3: Fold the Wings
Take each wing piece and fold along the marked lines to create layered feather sections. Slightly curve the wings outward to give them dimension.
Step 4: Glue the Wings
Apply a thin, even layer of glue to the base of each wing. Press them firmly onto the sides of the bird body. Hold in place for 20–30 seconds to ensure proper adhesion.
Avoid excess glue, as it can warp the paper or seep out along the edges.
Tail and Final Details
Step 5: Attach the Tail
Fold the tail piece along its center line. Apply glue to the base and attach it to the back of the bird body, angling it slightly upward.
Step 6: Let the Bird Stand
If the bird does not stand on its own, gently flatten the bottom edges or add a small folded paper support underneath the body.
Finishing Touches
Allow the glue to dry fully before handling. This paper bird craft works well as shelf décor or part of a paper sculpture display.
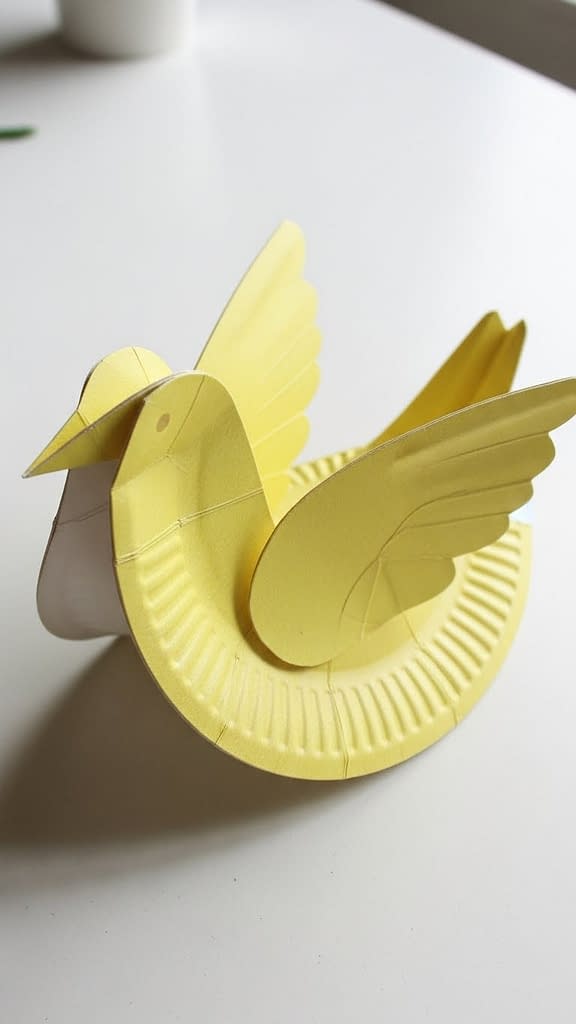
Tutorial 3: Paper Plate Bird Craft
Overview and Skill Level
This paper bird craft uses a simple paper plate to create a bold, playful bird shape. It is especially popular for classroom activities and family craft sessions.
Skill level: Beginner
Time required: 20–30 minutes
Materials needed:
- One paper plate
- Scissors
- Glue
- Colored paper or paint
- Marker or pencil
Preparing the Plate
Step 1: Folding the Plate
Fold the paper plate in half without creasing too sharply. This fold creates the bird’s body and wing shape. Open the plate slightly so it forms a gentle curve.
Cutting the Bird Shape
Step 2: Create the Beak
From one edge of the folded plate, cut a small triangular notch. This notch will form the beak when the plate is opened slightly.
Step 3: Shape the Wings
Round the top edges of the plate with scissors to soften the wing outline. Do not cut too deeply, as the plate needs structure to hold its shape.
Decorating and Assembly
Step 4: Add Color
Paint the plate or cover it with colored paper. Allow paint to dry completely before proceeding.
Step 5: Glue Decorative Elements
Cut feathers, eyes, or wing details from colored paper. Apply glue sparingly and press each piece firmly onto the plate.
Final Adjustments
Once everything is dry, gently bend the plate again to reinforce the bird’s shape. This paper bird craft can be displayed flat or slightly propped up on a table.
Tutorial 4: Paper Quilled Bird Craft
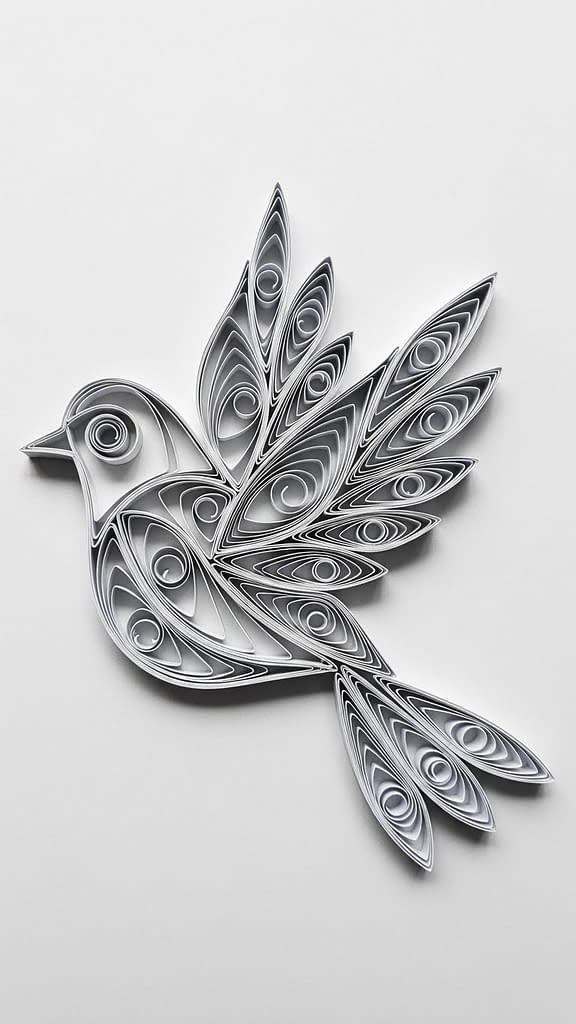
Overview and Skill Level
Paper quilling is a decorative paper bird craft technique that uses thin paper strips rolled into coils and shaped into forms. This bird design focuses on careful placement and gentle gluing rather than complex cutting or folding, making it approachable for beginners with patience.
Skill level: Beginner to intermediate
Time required: 45–60 minutes
Materials needed:
- Quilling paper strips (3–5 mm width recommended)
- Quilling tool or toothpick
- White craft glue
- Tweezers
- Pencil
- Flat background paper or cardstock
Planning the Bird Layout
Before applying glue, lightly sketch the outline of a bird on your background paper. This guide helps position each quilled shape correctly and keeps the proportions balanced.
Decide which shapes will be used:
- Tight coils for the head
- Teardrop shapes for wings
- Marquise shapes for tail feathers
Rolling the Paper Strips
Step 1: Create Tight Coils
Insert one end of a paper strip into the quilling tool. Roll the strip tightly until the entire length is coiled. Remove it carefully and apply a small dot of glue to secure the end.
Repeat this process to create several tight coils of similar size.
Step 2: Form Loose Coils
Roll a strip and release it slightly so it expands naturally. Glue the end once it reaches the desired size. These loose coils will be shaped into wings and body elements.
Shaping the Bird Components
Step 3: Shape the Body
Take a loose coil and gently pinch one side to create a teardrop shape. This will form the bird’s body. Adjust the curve by pressing lightly with your fingers.
Step 4: Shape Wings and Tail
For wings, pinch both ends of a loose coil to form an eye or marquise shape. For tail feathers, create multiple narrow teardrops and curve them slightly for movement.
Assembling the Quilled Bird
Step 5: Glue Placement
Apply glue sparingly to the bottom edge of each quilled shape. Use tweezers to place the shapes onto the sketched outline, starting with the body, then wings, then tail.
Press gently and hold for a few seconds until the glue grips.
Step 6: Add Head and Details
Attach a tight coil for the head. For the beak, cut a tiny triangle from paper and glue it between the head and body.
Finishing Touches
Allow the entire design to dry flat. This paper bird craft works beautifully framed or mounted on greeting cards or wall art.
Tutorial 5: Accordion Fold Paper Bird
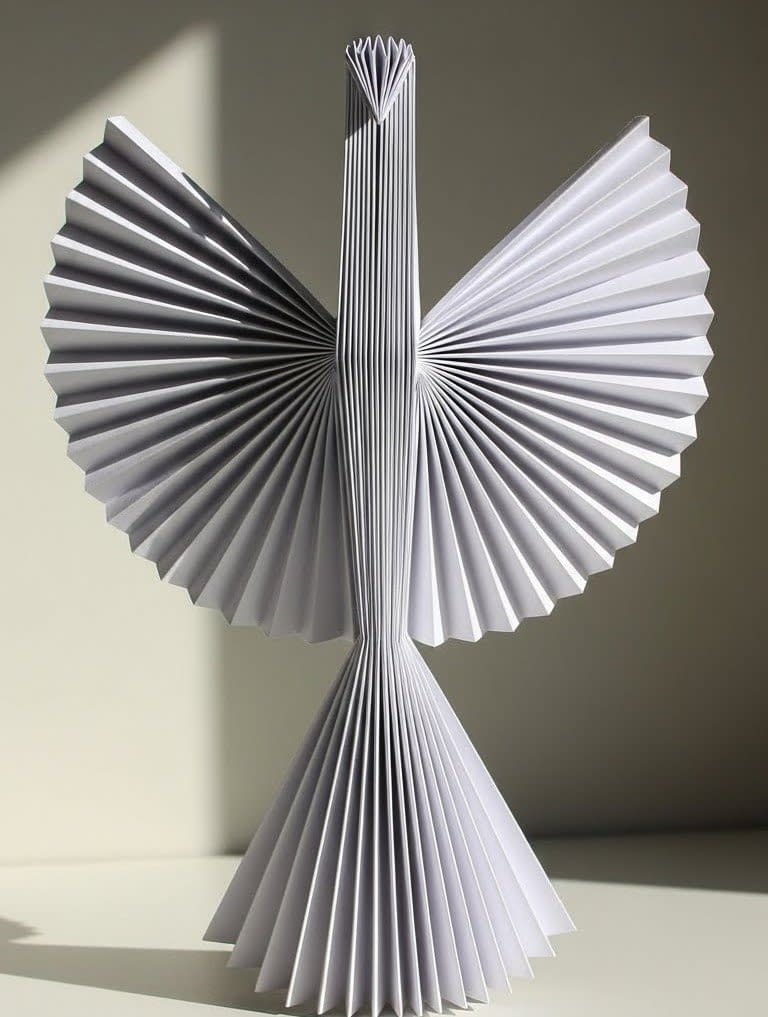
Overview and Skill Level
This accordion fold paper bird uses repeated even folds to create a fan-like structure. It is lightweight, visually striking, and perfect for decorations or hanging displays.
Skill level: Beginner
Time required: 25–35 minutes
Materials needed:
- Rectangular paper (lightweight craft paper)
- Ruler
- Pencil
- Glue
- Scissors
Preparing the Paper
Step 1: Mark Folding Lines
Lay the paper horizontally. Using a ruler, lightly mark evenly spaced lines across the paper, approximately 1 cm apart. These marks guide consistent accordion folds.
Creating the Accordion Folds
Step 2: Fold the Paper
Fold the paper back and forth along the marked lines, alternating directions to form an accordion. Press each fold firmly to maintain sharp edges.
Shaping the Bird
Step 3: Form the Body
Fold the accordion in half at its center. Apply a small amount of glue at the midpoint and press together to create a semi-circular fan shape.
Step 4: Create Wings
Repeat the accordion folding with a second piece of paper. Glue it behind the body to form wings that spread outward symmetrically.
Adding Head and Beak
Step 5: Cut and Attach Head
Cut a small circle from paper for the head. Glue it to the front of the body fold.
Step 6: Beak Construction
Cut a small triangle and glue it between the head and body.
Final Adjustments
Adjust the folds gently to create balance. This paper bird craft stands well on flat surfaces or can be suspended using string.
Tutorial 6: Hanging Paper Bird Mobile (Delicate Silhouettes)
Overview and Skill Level
This hanging paper bird mobile is an elegant craft that turns simple paper into a lightweight, airy decoration. It focuses on cutting precise bird silhouettes, suspending them with transparent thread, and creating a balanced vertical display. This project is ideal for beginners who enjoy both cutting and assembly crafts.
Skill level: Beginner to intermediate
Time required: 1–2 hours
Materials needed:
- Thin white paper or lightweight cardstock (preferably smooth finish)
- Pencil or fine-tip marker
- Scissors or craft knife
- Transparent nylon or fishing line
- Small wooden ring, embroidery hoop, or stick for the mobile base
- Glue (optional for securing knots)
- Ruler
Planning the Mobile
Step 1: Decide the Number of Birds
Plan how many birds you want in your mobile. A common arrangement is 5–8 birds per mobile, spaced vertically. Sketch a rough layout on paper to visualize the vertical flow.
Step 2: Draw Bird Silhouettes
Draw each bird silhouette freehand or use a printable template. The birds should have flowing wings for an elegant effect. Ensure varying sizes for depth and visual interest — smaller birds can go at the top, larger ones toward the bottom.
Cutting the Birds
Step 3: Prepare Paper
Place the thin paper on a flat surface. If using multiple sheets, cut each bird separately to maintain precise shapes.
Step 4: Cut Each Bird
Carefully cut along the drawn outlines using sharp scissors or a craft knife. Smooth edges are important, as rough cuts can disrupt the delicate appearance. For beginners, scissors are recommended; for more precise edges, a craft knife on a cutting mat works best.
Preparing the Hanging Threads
Step 5: Measure Threads
Cut transparent nylon threads to varying lengths according to your design. Longer threads allow birds to hang lower, creating a cascading effect. Prepare a few extra threads in case adjustments are needed.
Step 6: Attach Birds to Thread
Punch a small hole at the top of each bird silhouette using a needle or the tip of scissors. Thread the nylon through the hole and tie a secure knot. If desired, add a tiny drop of glue to reinforce the knot.
Assembling the Mobile
Step 7: Prepare the Base
Choose a mobile base — a wooden ring, embroidery hoop, or a thin stick works well. Ensure it is lightweight and stable. If using a stick, sand the ends lightly to avoid fraying the threads.
Step 8: Attach Threads to the Base
Tie each bird’s thread to the base at evenly spaced intervals. Start with the shortest threads near the center and the longest toward the edges to create a balanced vertical composition. Use a small dab of glue on each knot for extra security if needed.
Step 9: Balance the Mobile
Hold the mobile by the top and check its balance. Adjust the thread lengths or spacing if necessary so the mobile hangs evenly and each bird has room to move slightly without tangling.
Final Touches
Step 10: Hang and Display
Hang the mobile in a location with gentle airflow. Natural light enhances the airy, floating effect of the birds. Avoid hanging near fans or high-traffic areas where threads may tangle.
Step 11: Optional Styling
For a layered look, experiment with birds facing different directions or slightly bending the wings upward. This adds dimension and mimics the natural flutter of birds in flight.
Tutorial 7: Small Chunky Origami Birds (Tabletop Display)
Overview and Skill Level
These small chunky paper bird crafts focus on compact shapes and rounded bodies. They are sturdy and perfect for minimalist décor.
Skill level: Beginner
Time required: 10 minutes per bird
Materials needed:
- Small square paper
- Smooth folding surface
Folding the Base
Step 1: Square to Triangle
Fold the paper diagonally to form a triangle. Crease firmly.
Step 2: Create Thickness
Fold the triangle again to create a smaller, thicker shape.
Shaping the Bird
Step 3: Body Formation
Fold the sides inward slightly to create a rounded body. Do not crease too sharply, as softness gives the bird its chunky look.
Step 4: Head and Tail
Reverse fold one corner for the head. Fold the opposite corner slightly upward to form a tail.
Finishing Touches
Adjust the folds until the bird balances. These paper bird crafts look best grouped together on shelves or desks.
Tutorial 8: Handheld Spread-Wing Paper Bird (Bold Cardstock Design)
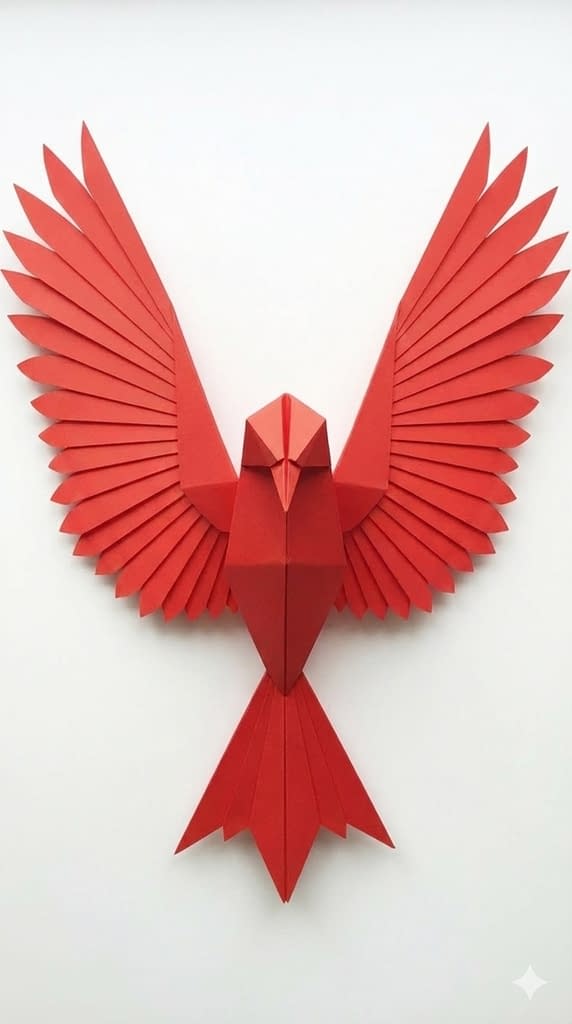
Overview and Skill Level
This paper bird craft focuses on a dramatic spread-wing design made from sturdy cardstock. Unlike traditional folded birds, this project combines precise cutting, controlled folding, and careful gluing to create wide, feather-like wings with strong visual impact. It is beginner-friendly as long as measurements and steps are followed slowly.
Skill level: Beginner to intermediate
Time required: 35–50 minutes
Materials needed:
- Bright-colored cardstock (medium to heavy weight)
- Pencil
- Ruler
- Scissors or craft knife
- Glue (tacky glue or white craft glue)
- Optional: bone folder for clean folds
Preparing the Bird Template
Step 1: Draw the Body Shape
On cardstock, draw a vertical diamond or elongated oval shape for the bird’s body. The top point will become the head, and the bottom point will form the tail. Keep the body narrow so the wings remain the main visual focus.
Cut the body shape carefully, keeping edges smooth.
Step 2: Draw the Wings
Draw two long wing shapes extending outward horizontally. Each wing should resemble a stretched triangle or leaf shape. Mark evenly spaced vertical lines along each wing section. These lines will guide where feather cuts and folds will be made.
Cut out both wings as a single connected piece if possible, or as two mirrored pieces if easier to manage.
Creating the Feather Effect
Step 3: Cut Feather Slits
Using scissors, cut along the marked lines on the wings, stopping about 1–1.5 cm before reaching the center of the wing base. These cuts create individual feather segments.
Make sure all cuts are parallel and evenly spaced to maintain symmetry.
Step 4: Fold the Feathers
Gently fold each feather segment slightly upward or outward. Do not crease sharply. The goal is to create movement and dimension, not flat folds.
Alternate the direction of some folds for a more natural wing spread.
Shaping the Body
Step 5: Create the Head
At the top of the body piece, fold a small triangular section forward to form the bird’s head. Then reverse fold the tip slightly to create a pointed beak.
Adjust the angle carefully, as small changes significantly affect the bird’s expression.
Step 6: Form the Tail
At the bottom of the body, make a short upward fold to create a tail point. This fold adds balance and visual completion.
Assembling the Bird
Step 7: Attach the Wings
Apply a thin line of glue along the center back of the wing piece. Position the body over the glued area so the wings extend evenly on both sides.
Press gently and hold for 30–40 seconds to ensure a strong bond. Avoid pressing the feather sections flat.
Step 8: Reinforce Structure
If the cardstock is heavy, add a small folded paper strip behind the body as reinforcement. Glue it vertically to support the wings and prevent sagging.
Final Adjustments and Display
Step 9: Balance and Shape
Once the glue has dried, gently adjust each feather segment. Curve the wings slightly forward to enhance the spread-wing effect.
This paper bird craft is designed to be handheld or displayed upright using a small stand. It works especially well for photo styling, decorative centerpieces, or bold wall displays.
Conclusion: Bringing Creativity to Life with Paper Bird Crafts
These 8 paper bird craft tutorials demonstrate how versatile and rewarding paper crafting can be. From precise origami folds to decorative quilling and playful plate designs, each project teaches foundational skills while allowing room for creativity.
By following the detailed folding, cutting, and gluing instructions in this guide, beginners can confidently explore paper bird craft techniques and build beautiful handmade pieces that last. Whether used for decoration, learning, or gifting, paper bird crafts remain a timeless and accessible art form.


