
Fingerless gloves are one of the most versatile and practical accessories you can knit. Unlike full mittens, they keep your hands warm while still allowing you to type, text, knit, or sip your coffee without restriction. Whether you’re looking to make a cozy winter staple, a stylish accessory, or a thoughtful handmade gift, knit fingerless gloves are a wonderful project that blends function with creativity.
What makes them even more appealing is their adaptability—you can keep the design simple with basic stitches or elevate them with cables, lace patterns, or ribbing. They don’t require a huge amount of yarn, making them a great stash-busting project, and they’re often quick to knit up, giving you a sense of accomplishment without weeks of work.
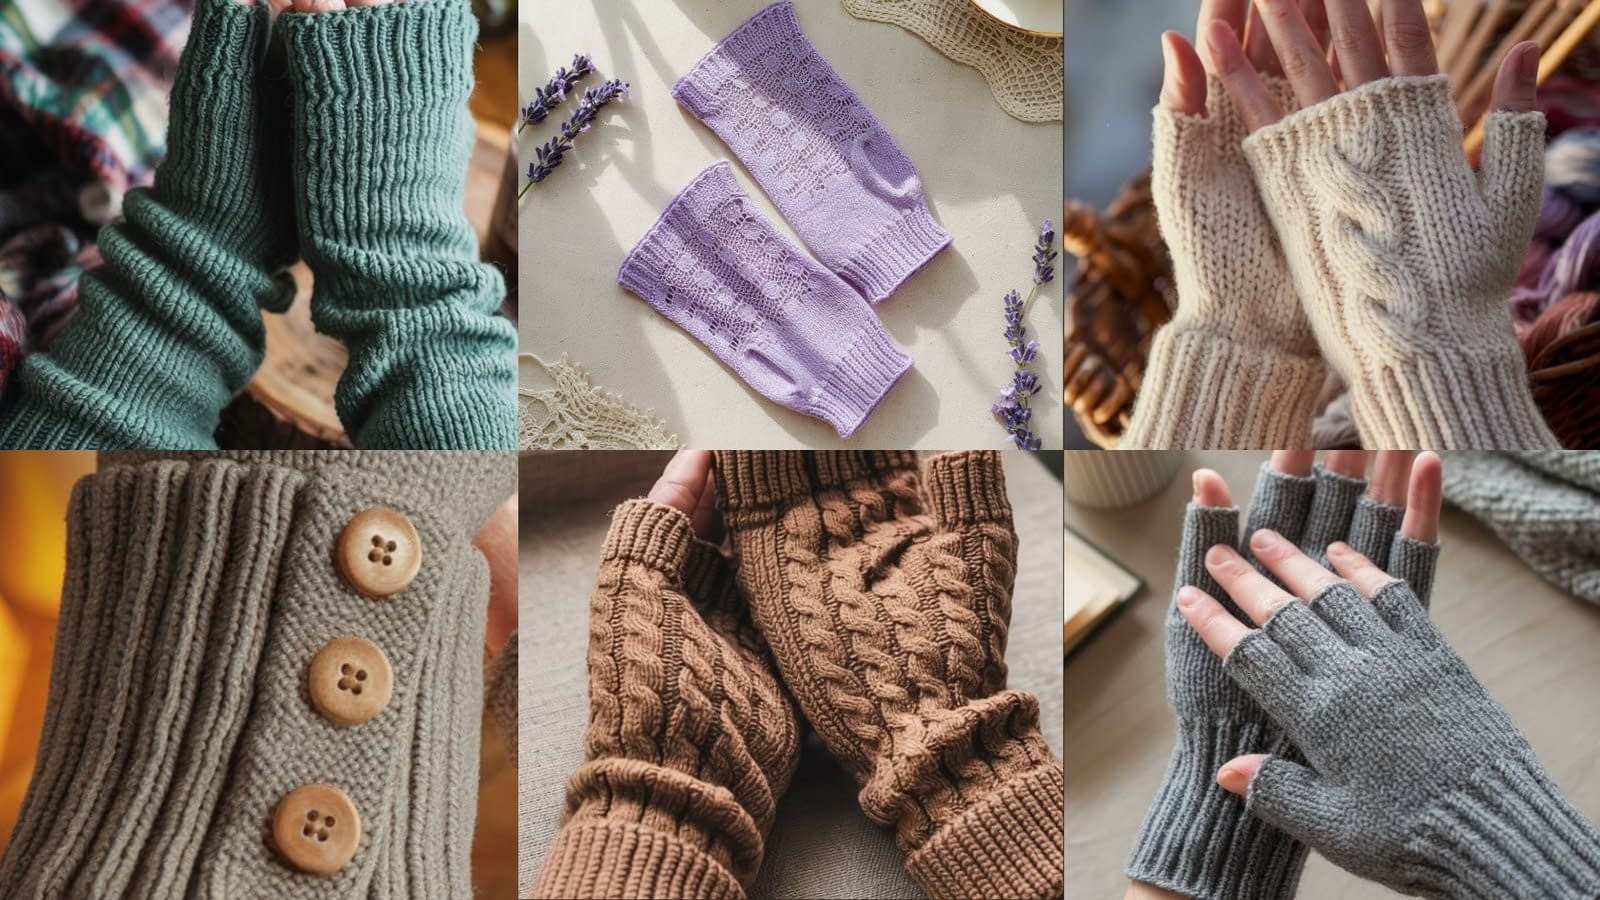
In this post, I’ll guide you through 8 knit fingerless gloves patterns, each with detailed instructions, skill level notes, materials, size adjustments, and finishing tips. The structure will follow a clear step-by-step approach, so whether you’re a beginner picking up your needles for the first time or a seasoned knitter looking for fresh ideas, you’ll have everything you need to create a pair of cozy gloves.
1. Ribbed Knit Fingerless Gloves Pattern
Skill level: Beginner (simple ribbing, minimal shaping)
Finished size: About 7″ circumference × 8″ long; easily adjustable by adding or subtracting stitches/rows.
Materials:
- Worsted weight (#4) yarn, approx. 150 yards
- Knitting needles US 7 (4.5 mm), straight or circular
- Yarn needle, scissors
- Optional: Stitch markers for thumb opening
Notes:
These ribbed fingerless gloves are knit flat and then seamed, making them perfect for knitters who aren’t comfortable working in the round yet. The stretchy ribbing ensures a snug fit on most hand sizes.
Instructions — Step by Step
- Cast on 36 stitches (or multiple of 2 for desired width).
- Work in ribbing (k1, p1) across every row until your piece measures about 7.5″.
- Tip: Check the width by wrapping around your hand; it should feel snug but not too tight.
- Thumb opening: When your fabric reaches 5″, knit 1.5″ in plain stitch (knit across each row) instead of ribbing—this creates a looser section for the thumb opening.
- Resume ribbing until the total length reaches 8″.
- Bind off in ribbing, leaving a long tail for sewing.
- Seam: Fold the fabric lengthwise and whip stitch up the side, leaving a 1.5″ gap for the thumb hole.
Finishing & Variations
- Add a decorative edge by working a crochet shell border around the top and bottom.
- Use a self-striping yarn for a colorful look.
- Adjust the length to make wrist warmers or arm warmers.
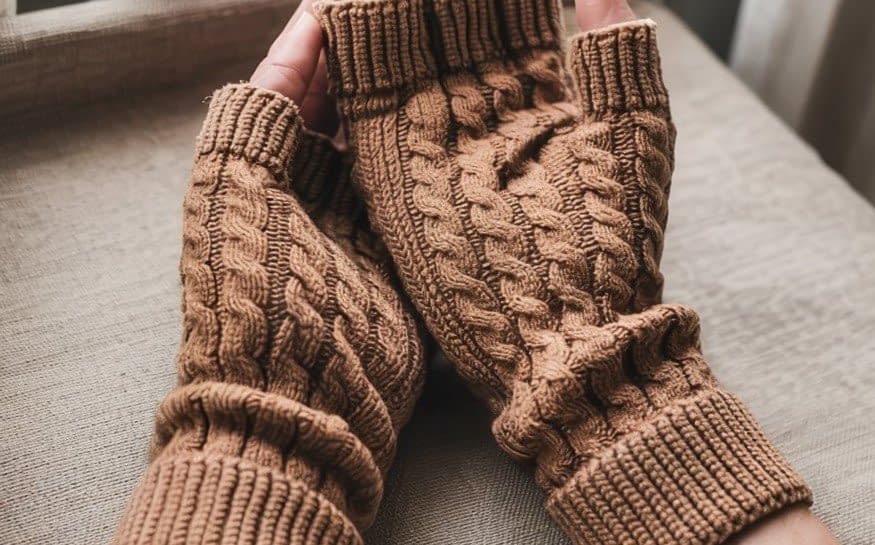
2. Chunky Cable Fingerless Gloves Pattern
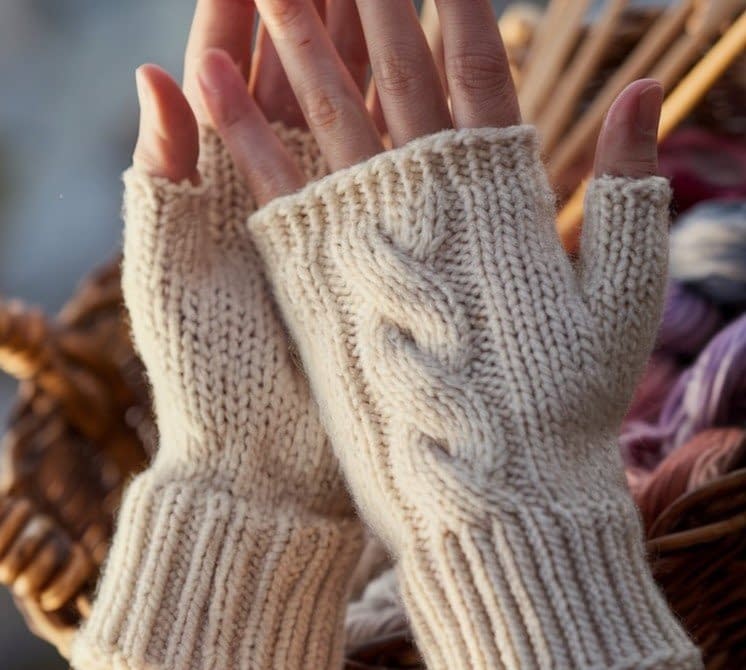
Skill level: Intermediate (requires basic cable knitting)
Finished size: 7.5″ circumference × 9″ long; fits medium adult hand.
Materials:
- Bulky weight (#5) yarn, approx. 120 yards
- Knitting needles US 9 (5.5 mm), cable needle
- Yarn needle, scissors
Notes:
The bold cables add a touch of sophistication to these gloves, making them perfect as a handmade gift. Knit in the round for a seamless finish.
Instructions — Step by Step
- Cast on 32 stitches using a stretchy long-tail cast-on. Join in the round, being careful not to twist.
- Work cuff ribbing: k2, p2 rib for 2″.
- Begin cable pattern:
- Rounds 1–4: k2, p2, cable 6 front, p2, k2, p2 repeat.
- Round 5: Work cable twist (slip 3 stitches onto cable needle, hold in front, knit 3, then knit from cable needle).
- Continue in this pattern until glove measures 5″.
- Thumb opening: On next round, knit 3 stitches, bind off 5 stitches, continue across round.
- Next round: knit 3 stitches, cast on 5 stitches over the gap, continue in pattern.
- Continue cable pattern until total length is 9″.
- Bind off loosely.
Finishing & Variations
- Try mirrored cables (twist one left, one right).
- Make them shorter for a more stylish wrist cuff look.
- Add buttons along the wrist for decorative flair.
3. Lace Knit Fingerless Gloves Pattern
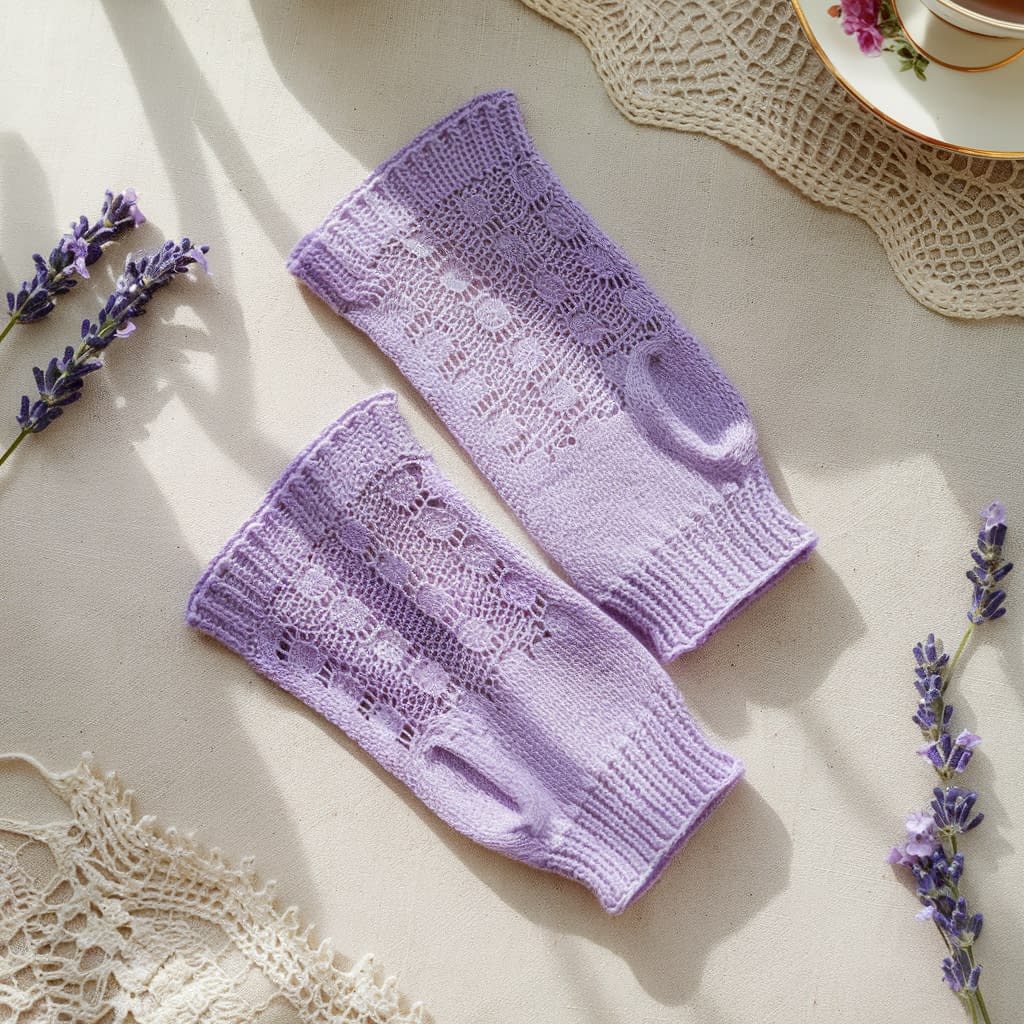
Skill level: Intermediate (basic lace stitches, yarn overs, decreases)
Finished size: 7″ circumference × 7.5″ long (adjustable)
Materials:
- Fingering weight (#1) yarn, approx. 200 yards
- Knitting needles US 3 (3.25 mm), straight or circular
- Yarn needle, scissors
- Optional: Beads for embellishment
Notes:
These lace fingerless gloves have a delicate, airy design that’s perfect for spring or as an elegant accessory. They’re worked flat and seamed, making them accessible to knitters who aren’t comfortable working in the round.
Instructions — Step by Step
- Cast on 42 stitches.
- Work edging: Knit 4 rows in garter stitch (knit every row).
- Begin lace pattern (multiple of 6 + 2):
- Row 1 (RS): k2, yo, k2tog, k2, ssk, yo, repeat to last 2, k2.
- Row 2 (WS): purl across.
- Row 3: k2, k1, yo, k2tog, ssk, yo, k1, repeat to last 2, k2.
- Row 4: purl across.
- Repeat rows 1–4 until the fabric measures 7″.
- Thumb opening: Work 1.5″ in stockinette stitch (knit RS, purl WS) instead of lace pattern.
- Resume lace pattern for another 1″.
- Bind off loosely in pattern.
- Seam the side edges, leaving a 1.5″ gap for the thumb.
Finishing & Variations
- Block the lace gently to open the design.
- Add beads into the yarn overs for sparkle.
- Make them longer to resemble lace arm warmers.
4. Striped Knit Fingerless Gloves Pattern
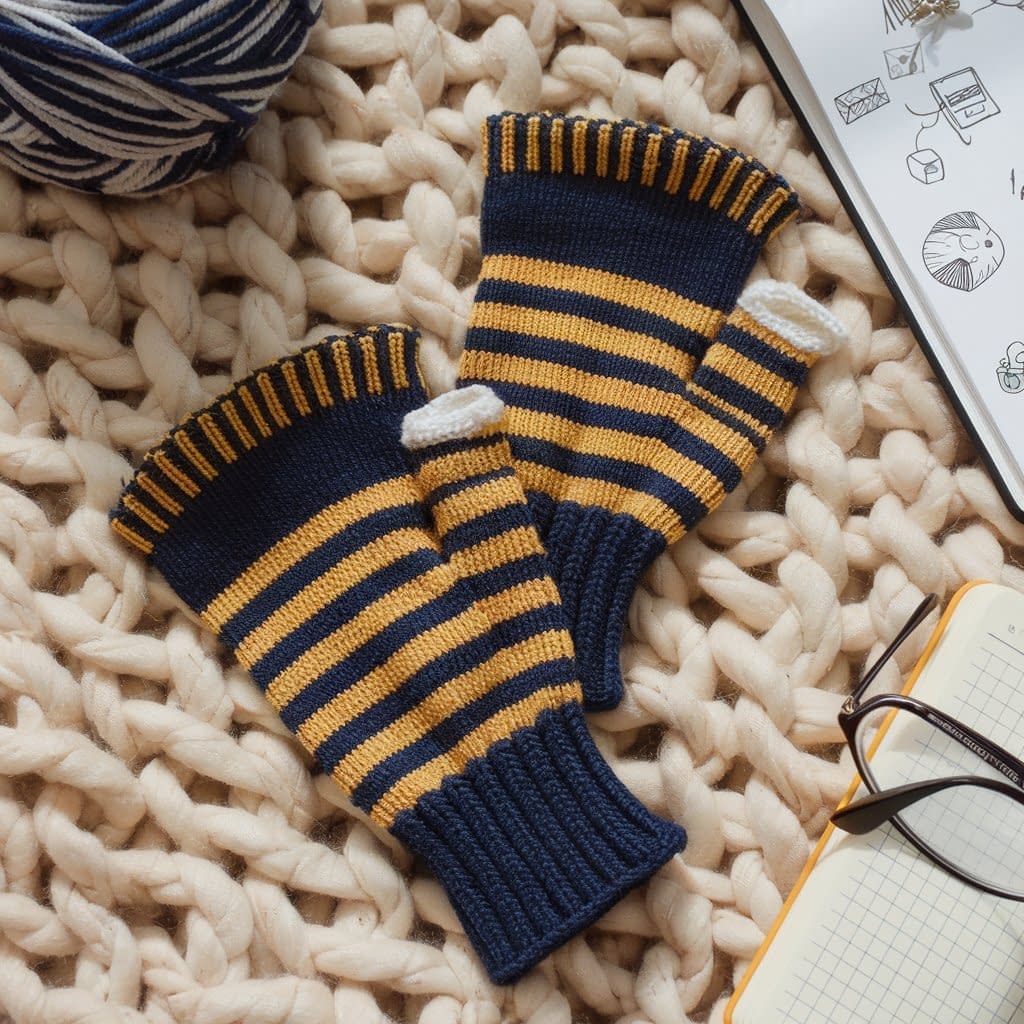
Skill level: Beginner–Intermediate (color changes, minimal shaping)
Finished size: 8″ circumference × 9″ long
Materials:
- Worsted weight (#4) yarn, approx. 100 yards each of two contrasting colors
- Knitting needles US 7 (4.5 mm), circular or straight
- Yarn needle, scissors
Notes:
These striped gloves are a great way to practice color changes and use up scrap yarn. They can be knit flat and seamed or in the round for a seamless finish.
Instructions — Step by Step
- Cast on 40 stitches with Color A.
- Work cuff ribbing: k2, p2 rib for 1.5″.
- Begin stripes:
- Switch to Color B, knit 6 rows (stockinette).
- Switch back to Color A, knit 6 rows.
- Continue alternating until piece measures 7″.
- Thumb opening: Knit 1.5″ in Color A stockinette stitch.
- Resume stripes for another 1″.
- Bind off loosely.
- Seam edges, leaving space for the thumb.
Finishing & Variations
- Use 3 or more colors for rainbow stripes.
- Try thinner stripes for a more delicate look.
- Add a contrasting crochet edge around the top and bottom.
5. Buttoned Knit Fingerless Gloves Pattern
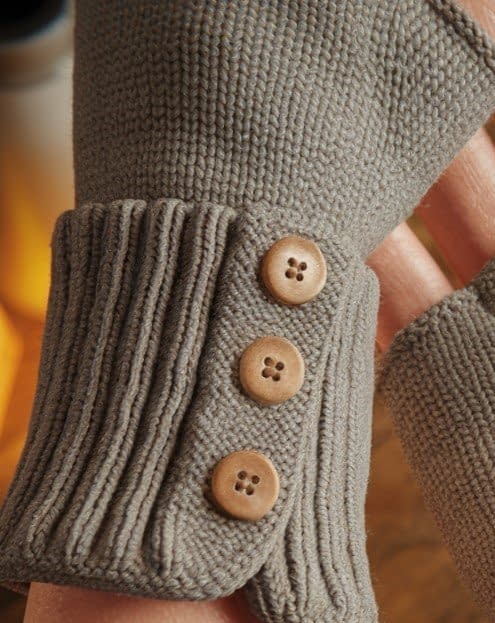
Skill level: Intermediate (buttonholes + shaping)
Finished size: 7.5″ circumference × 8.5″ long
Materials:
- DK weight (#3) yarn, approx. 150 yards
- Knitting needles US 5 (3.75 mm), straight
- 3 small buttons per glove
- Yarn needle, scissors
Notes:
These gloves feature a buttoned flap design on the wrist, giving them a stylish and customizable finish. They’re knit flat with a built-in button band.
Instructions — Step by Step
- Cast on 44 stitches.
- Work cuff with buttonholes:
- Rows 1–6: k2, p2 rib across.
- Row 7 (RS): work buttonhole by binding off 2 sts, then casting on 2 in next row. Place buttonholes evenly along cuff (about 1.5″ apart).
- Continue ribbing until cuff measures 2″.
- Hand section: Switch to stockinette stitch, knit until glove measures 5.5″.
- Thumb opening: Knit 1.5″ in garter stitch (knit every row).
- Resume stockinette for 1″.
- Bind off.
- Seam edges, leaving thumb gap. Sew buttons onto ribbed cuff.
Finishing & Variations
- Use decorative wooden or metallic buttons for a unique touch.
- Make a longer cuff with more buttons for a dramatic look.
- Try contrast-colored buttons for fun.
6. Slouchy Knit Fingerless Gloves Pattern
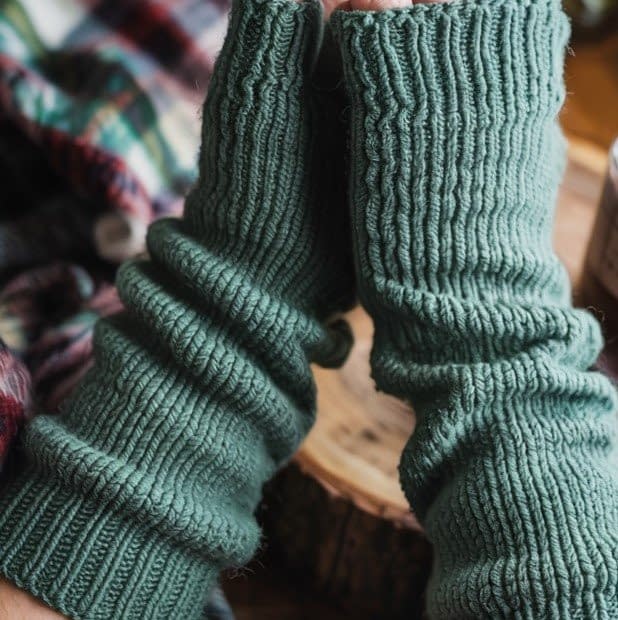
Skill level: Beginner–Intermediate (loose shaping, no complicated techniques)
Finished size: 9″ circumference × 10″ long
Materials:
- Aran weight (#4) yarn, approx. 200 yards
- Knitting needles US 8 (5 mm), circular
- Yarn needle, scissors
Notes:
These gloves have a relaxed, slouchy fit, making them comfortable and stylish. They’re worked in the round with extra length so they can be scrunched at the wrist.
Instructions — Step by Step
- Cast on 44 stitches, join in the round.
- Work cuff: k2, p2 rib for 2″.
- Body: Knit all rounds in stockinette for 6.5″.
- Thumb opening: On next round, knit 4 stitches, bind off 6, knit across.
- Next round: knit 4 stitches, cast on 6 over the gap, knit across.
- Continue stockinette for 1.5″.
- Bind off loosely.
Finishing & Variations
- Add stripes or marled yarn for texture.
- Work a cable down the back for extra detail.
- Make them extra long to double as arm warmers.
7. Faux Cable Rib Fingerless Gloves Pattern
Skill level: Intermediate (twisted stitches + ribbing)
Finished size: 7.5″ circumference × 9″ long
Materials:
- Worsted weight (#4) yarn, approx. 160 yards
- Knitting needles US 7 (4.5 mm)
- Yarn needle, scissors
Notes:
This design mimics cables without needing a cable needle by using twisted stitches. It’s faster and easier than real cables but gives the same textured effect.
Instructions — Step by Step
- Cast on 40 stitches.
- Work cuff ribbing: k2, p2 for 1.5″.
- Begin faux cable rib pattern:
- Row 1: k2tog but do not slip off needle, knit first stitch again, then slip both sts off; p2 across.
- Row 2: k2, p2 across.
- Repeat Rows 1–2 for 6.5″.
- Thumb opening: Switch to stockinette for 1.5″.
- Resume faux cable rib for final 1″.
- Bind off loosely.
- Seam edges with thumb gap.
Finishing & Variations
- Make them longer for dramatic wrist warmers.
- Use a soft alpaca or merino blend yarn for a luxurious feel.
- Add a decorative picot edge at the wrist.
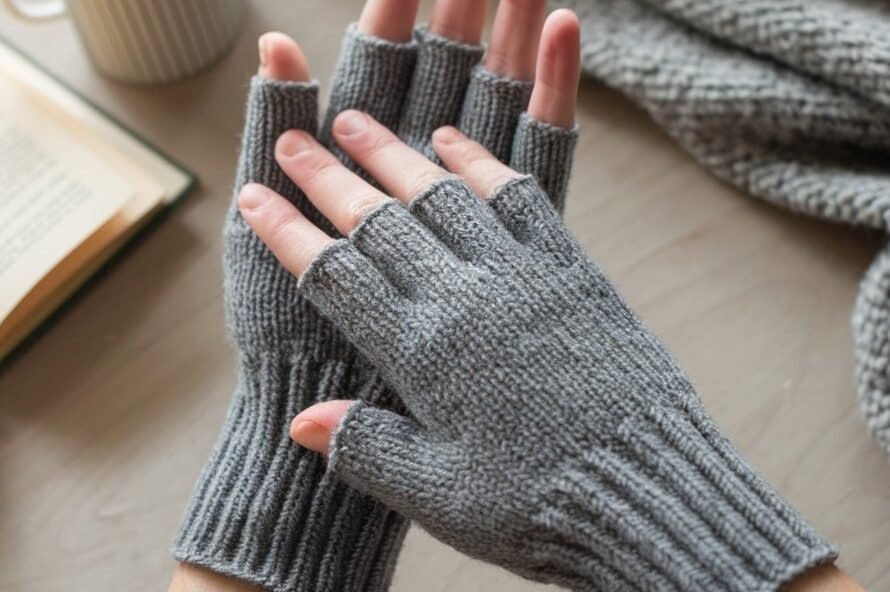
8. Textured Seed Stitch Fingerless Gloves Pattern

Skill level: Beginner (basic knit and purl stitches only)
Finished size: 7″ circumference × 8″ long
Materials:
- Worsted weight (#4) yarn, approx. 140 yards
- Knitting needles US 7 (4.5 mm)
- Yarn needle, scissors
Notes:
The seed stitch pattern creates a beautifully textured fabric that looks complex but is very easy to knit. This is a great project for beginners ready to move beyond stockinette.
Instructions — Step by Step
- Cast on 42 stitches.
- Begin seed stitch:
- Row 1: k1, p1 across.
- Row 2: p1, k1 across.
- Repeat these two rows for entire glove body.
- Knit until fabric measures 7″.
- Thumb opening: Switch to stockinette for 1.5″.
- Resume seed stitch for 0.5″.
- Bind off in pattern.
- Seam edges, leaving thumb gap.
Finishing & Variations
- Use variegated yarn to highlight the texture.
- Add ribbed cuffs for extra snugness.
- Make them longer to wear as arm warmers.
Conclusion
With these 8 knit fingerless gloves patterns, you now have a collection of stylish, practical, and customizable projects to suit every taste and skill level. From the delicate lace and faux cables to the bold stripes and cozy seed stitch, each design gives you a chance to practice different techniques while ending up with something wearable and useful.
The beauty of fingerless gloves is their adaptability—you can change yarn weights, colors, or lengths and instantly transform the look. They also make wonderful gifts, especially during colder months, and are a fantastic way to use up leftover yarn.


