
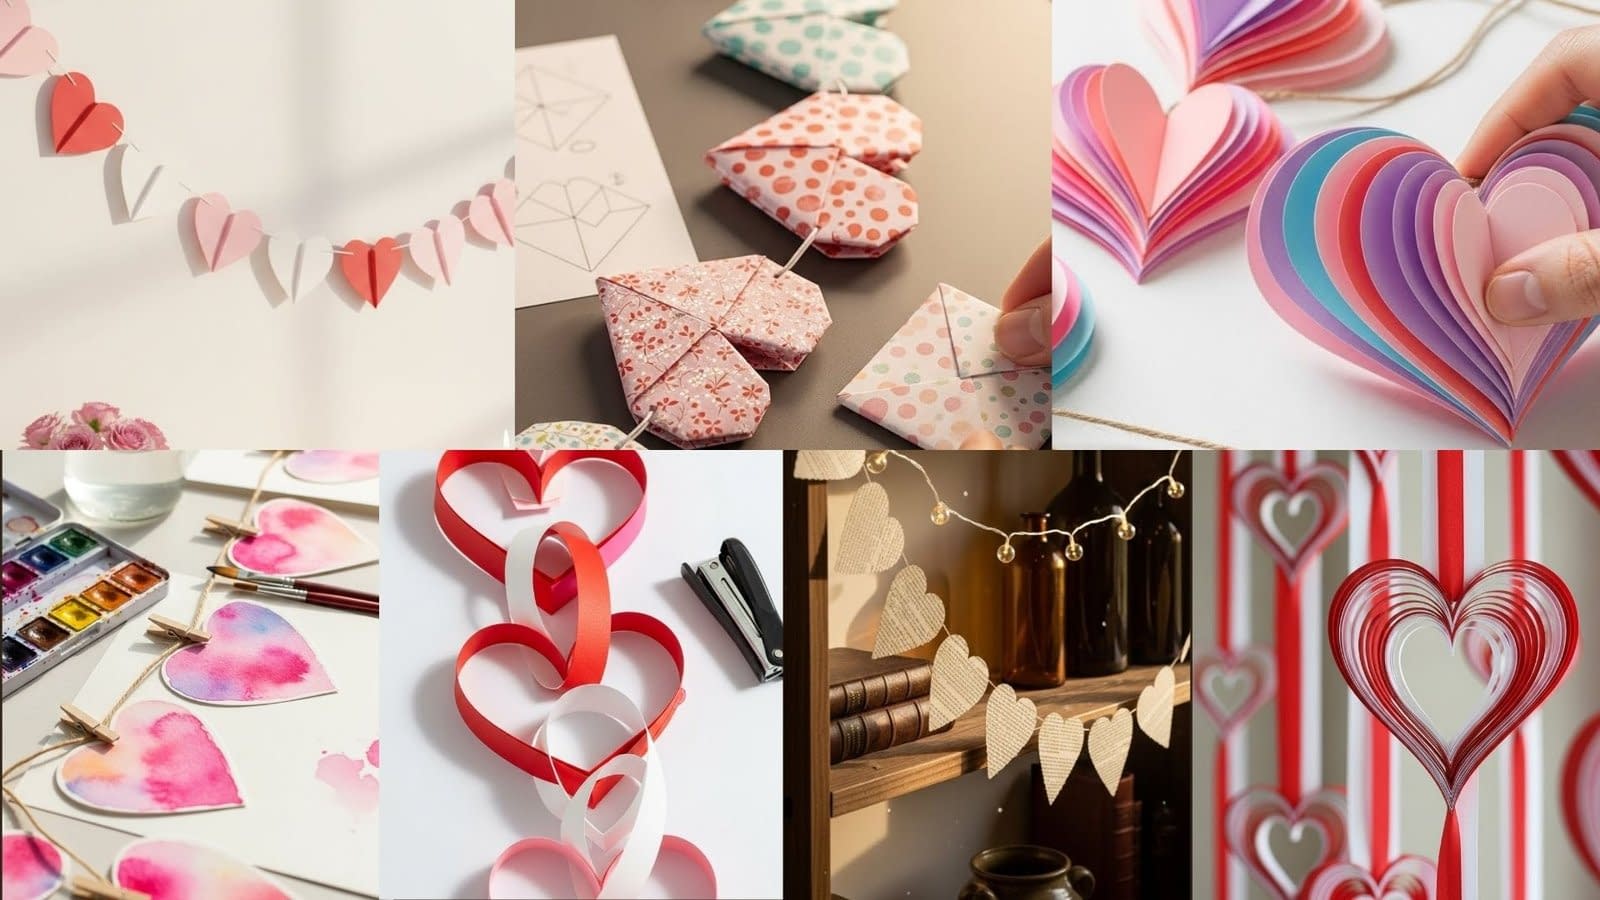
Paper heart garlands are one of the most charming and adaptable decorations you can make at home. They work beautifully for parties, weddings, seasonal décor, children’s rooms, craft displays, or simply for adding a warm and handmade touch to your home. The best part is that paper heart garlands require only simple materials, yet the design possibilities are nearly endless. With the right guidance, each garland can look polished, visually appealing, and professionally crafted, even if you’re a complete beginner.
In this post, we’ll walk through six paper heart garland tutorials, each offering a different style, structure, and creative approach. These include classic folded hearts, layered 3D designs, origami hearts, looped hearts, soft watercolor hearts, and vintage book-page hearts. Every section contains clear measurements, details on folding angles, tips for achieving clean cuts, instructions on where and how to apply glue, and suggestions for how to display your finished garland beautifully.
This guide is designed to be long, detailed, reader-focused, and easy to follow, even if this is your first time working with paper crafts. By the end, you will not only have six complete garland designs to choose from but also the confidence to modify and experiment with your own variations.
Classic Folded Paper Heart Garland
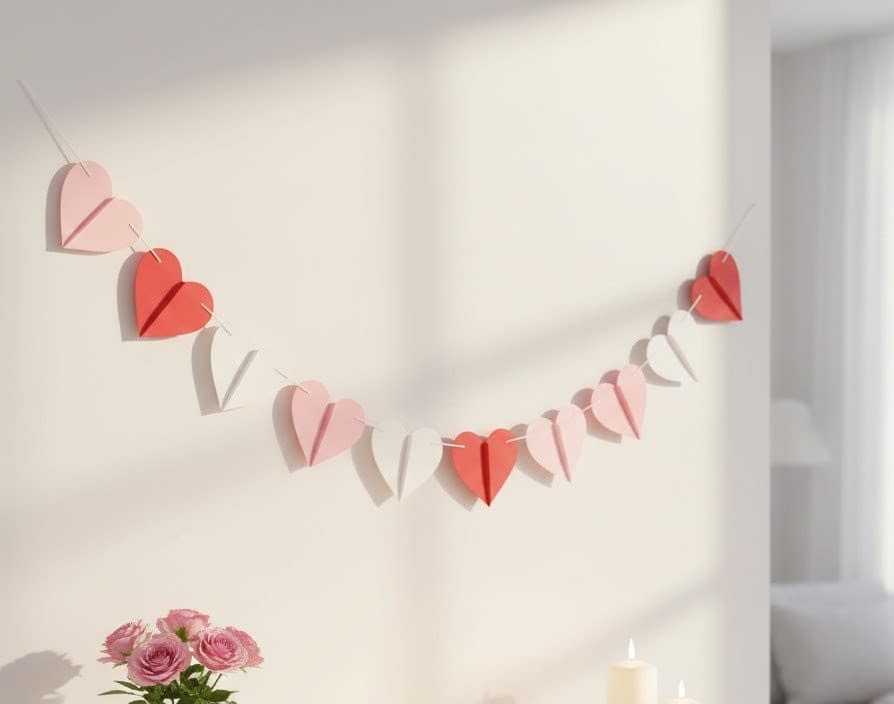
The classic folded paper heart garland is timeless, simple, and perfect for beginners. It uses symmetrical hearts created by folding cardstock or colored paper in half, guaranteeing clean edges and uniform shapes.
Materials Needed
• Medium-weight colored paper or cardstock
• Scissors with sharp tips
• Pencil
• Ruler
• Hole puncher or thin string needle
• String, twine, or thin ribbon
How to Make the Hearts
Step 1: Prepare the Paper
Choose your colors and cut them into rectangles or squares. A recommended size for consistent hearts is 4 x 6 inches or 5 x 5 inches. Using rectangles gives slightly elongated hearts, while squares create more rounded designs.
Step 2: Fold the Paper Correctly
Fold each piece of paper in half vertically, aligning the edges carefully. Crease the fold firmly with your fingertip or the flat side of your scissors. This crease is essential because it determines the symmetry of your heart.
Step 3: Draw the Heart Outline
On the folded side, lightly sketch half of a heart shape with a pencil. The top curve should start near the folded edge and rise smoothly before curving down to form a tapered bottom point. Make sure the bottom point reaches the open side of the paper so your heart shape is proportional.
Step 4: Cut the Heart
Cut along your pencil line with slow, steady movements. Keep your scissors perpendicular to the paper to avoid angled cuts. Once the cutting is done, unfold the shape to reveal a full symmetrical heart. If any uneven lines appear, trim lightly for a clean finish.
How to Assemble the Garland
Step 5: Punch Holes or Thread Through
Either punch small holes near the top on each side of the heart or thread the string by sewing it through the center fold line. Punching creates a cleaner hanging look, while threading directly through the fold produces a cascading effect.
Step 6: String the Hearts
Thread your hearts onto a string, spacing them evenly. Allow around one inch between each for a balanced appearance.
Step 7: Display the Garland
Hang it across a wall, headboard, window frame, or party table. This simple paper heart garland looks elegant even when minimal.
Layered 3D Paper Heart Garland
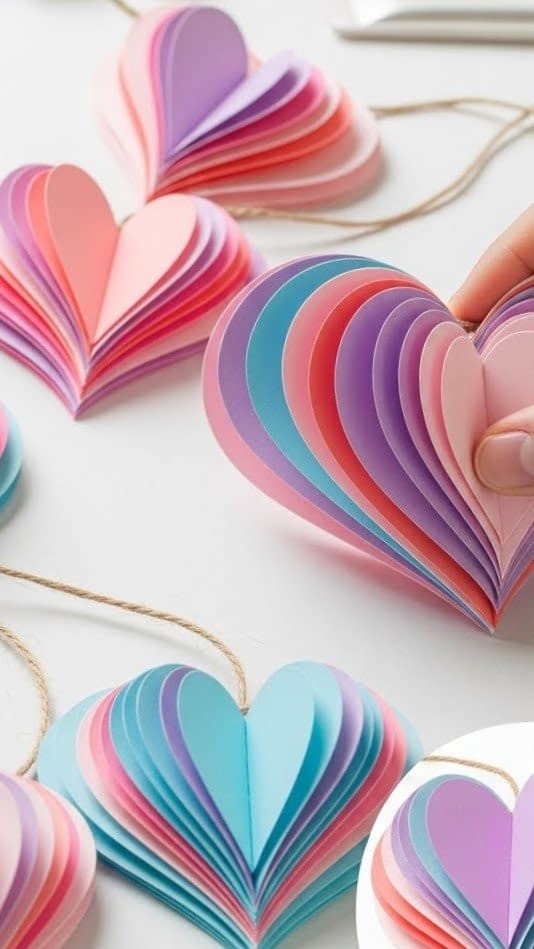
A layered 3D paper heart garland creates volume and depth using multiple folded hearts stacked together. These hearts expand outward, making the garland appear full and dimensional.
Materials Needed
• Cardstock in various colors
• Scissors
• Pencil
• Glue stick or craft glue
• String or twine
How to Make the Hearts
Step 1: Cut Multiple Matching Heart Shapes
Cut out three to four identical hearts per unit. Use a template to ensure every piece matches in size and shape. A good size for 3D hearts is about 3 to 4 inches wide.
Step 2: Fold Each Heart in Half
Fold every individual heart vertically down the center. Press your crease firmly to ensure the heart holds its shape.
Step 3: Glue the Heart Layers Together
Apply glue on the outside of one folded heart’s interior. Press a second folded heart against it so the folded edges align. Glue the third and fourth hearts the same way until all pieces are attached along their fold lines. When opened slightly, the hearts should form a rounded 3D effect with evenly curved sides.
How to Assemble the Garland
Step 4: Attach the String
You can either glue the string along the center fold before completing the final closure or thread the string through a small hole punched near the top. If gluing, apply a thin line of glue along the fold and press the string into place before closing the heart around it.
Step 5: Space and Secure
Place one 3D heart every three to five inches on the string. Make sure to let the glue dry completely before hanging.
Step 6: Display the Garland
Hang the garland where natural light can highlight the shadows and depth. This style is ideal for celebrations and nursery décor.
Origami Paper Heart Garland
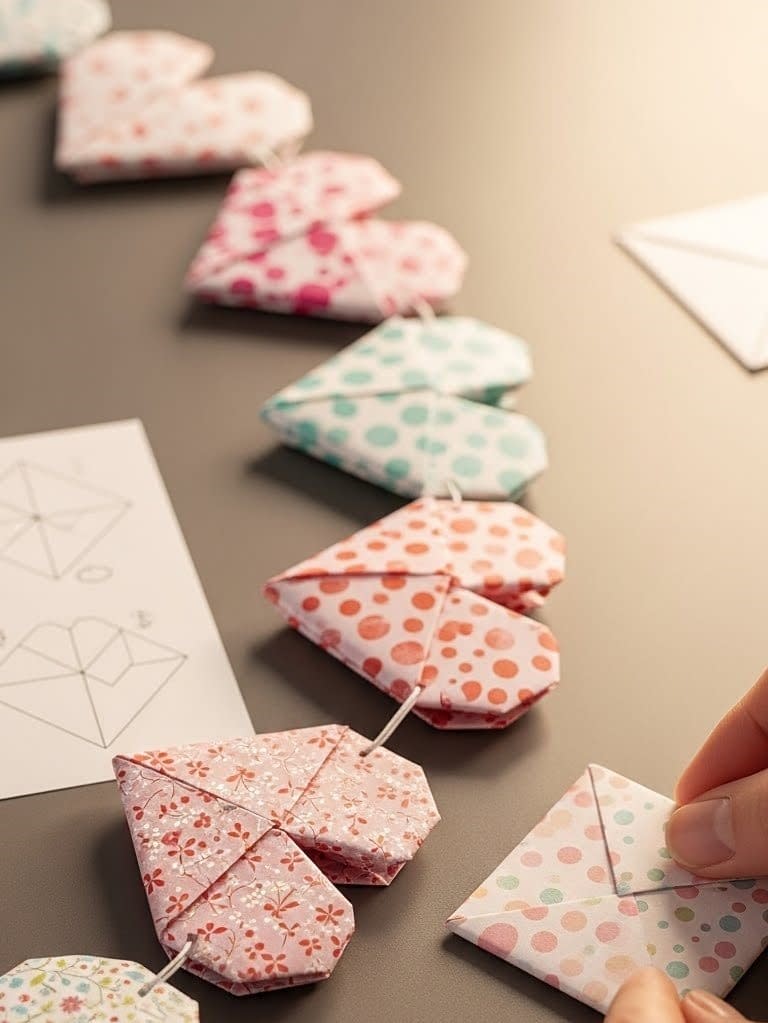
Origami hearts offer clean angles and beautifully structured folds. They work especially well for patterned paper or thin origami sheets.
Materials Needed
• Origami paper or lightweight patterned paper
• Ruler
• String or thin thread
• Needle or adhesive
How to Make the Hearts
Step 1: Start with a Perfect Square
Each heart should begin with a square paper sheet, ideally 6 x 6 inches. A larger square produces a more dramatic heart.
Step 2: Fold the Sheet Diagonally
Fold the square diagonally to make a triangle. Then unfold it and fold diagonally the opposite way. Unfold both. You should now see two intersecting crease lines.
Step 3: Fold the Top Edge to the Center
Bring the top corner of the square down to meet the center point where the diagonal creases intersect.
Step 4: Fold the Bottom Corner Up
Lift the bottom corner and fold it upward until it reaches the top horizontal edge. This creates the main body of the heart.
Step 5: Shape the Heart
Fold the left and right corners inward to round the heart. Then fold the top two corners down slightly to soften the upper curves. Tighten all creases to maintain structure.
How to Assemble the Garland
Step 6: Attach the String
Origami hearts have a naturally sturdy central area. Use a needle to thread string through the top section or glue the back of the heart gently onto the string.
Step 7: Create a Clean Arrangement
Align all hearts at the same level for symmetry. Keep about one inch of spacing.
Step 8: Display
The clean geometric structure of origami hearts adds a sophisticated touch to walls, bookshelves, and minimalist spaces.
Double-Heart Loop Garland
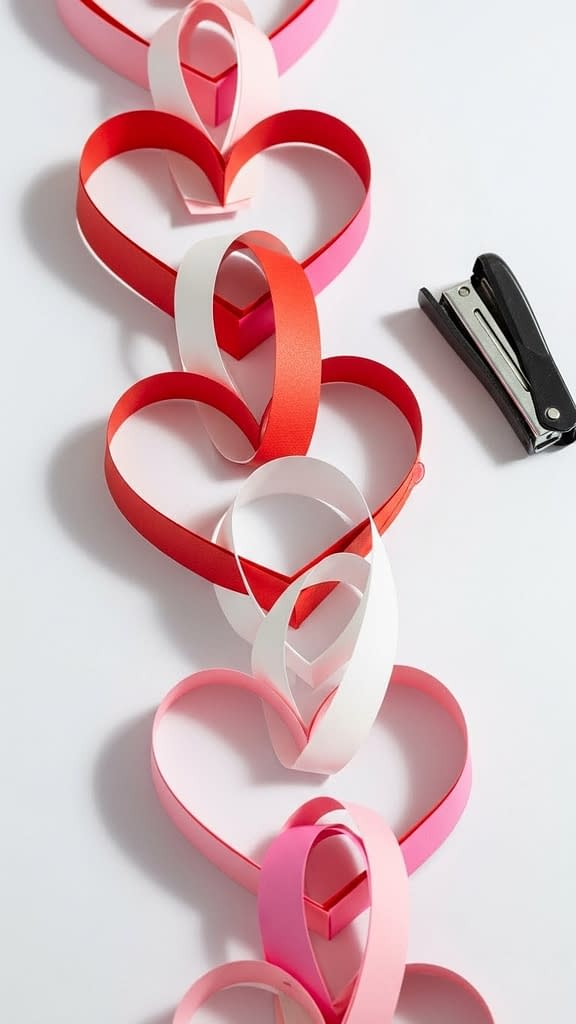
This garland uses strips of paper looped into heart shapes, then linked together. It’s visually eye-catching and requires no drawing templates.
Materials Needed
• Colored paper strips (1 inch wide, 8–10 inches long)
• Stapler or clear tape
• Scissors
• Ribbon or string
How to Make the Hearts
Step 1: Prepare the Strips
Cut the paper into even strips. Use a ruler to maintain consistent width.
Step 2: Form the First Heart
Take one strip and fold it in half, aligning both ends. Curve both ends inward until they meet at the bottom. This curved shape forms the top arches and the pointed end of the heart. Staple the ends together or use strong tape.
Step 3: Create Interlocking Links
Before closing the next heart, slide its folded strip through the center of the finished heart. Then repeat the same folding and stapling technique to secure it. Every heart links into the next, forming a chain.
How to Assemble the Garland
Step 4: Continue Adding Hearts
Add as many hearts as needed for the length you want. Keep all strips facing the same direction for a uniform look.
Step 5: Attach to Hanging String
Tie each end of the garland to your display string, or hang the chain directly if strong enough.
Step 6: Display
This style is especially decorative for doorways, windows, and large backdrops.
Watercolor Painted Paper Heart Garland
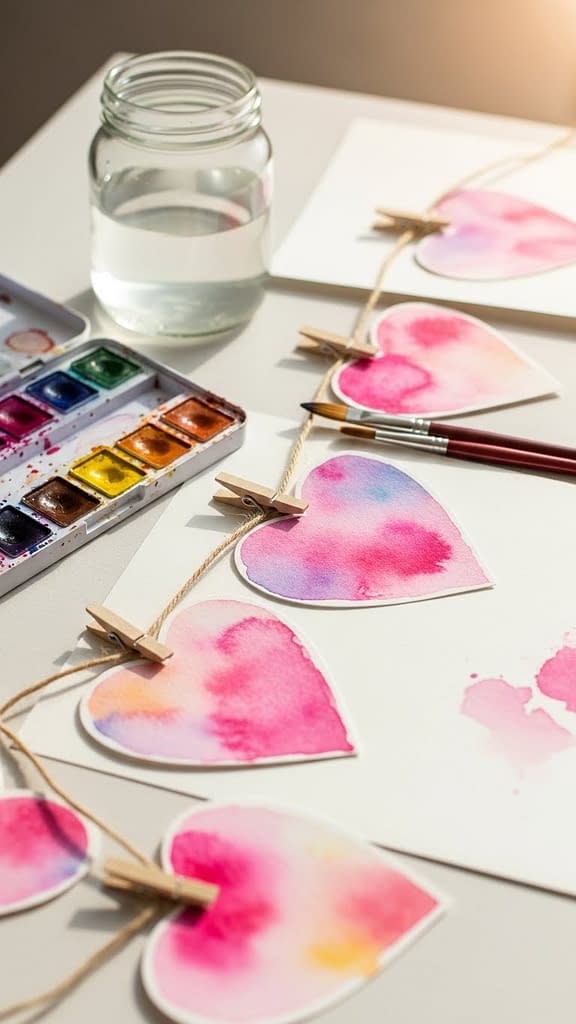
Watercolor hearts allow soft blends and artistic variations. This garland looks hand-painted and elegant.
Materials Needed
• Watercolor paper
• Watercolor paints
• Round paintbrush
• Water jar
• Scissors
• String or twine
• Mini clothespins or glue
How to Make the Hearts
Step 1: Paint the Paper
Start with a sheet of watercolor paper. Use diluted paints in soft peach, lilac, rose, or blush tones. Apply gentle strokes, blending colors while the paper is still wet. Allow the sheet to dry completely.
Step 2: Draw Heart Shapes
Once dry, draw heart shapes on the painted sheet. For consistency, use a light pencil outline and a heart template. Hearts 3 to 4 inches wide work well.
Step 3: Cut the Hearts
Use sharp scissors to follow your pencil lines. Watercolor paper is thick, so cut slowly for smooth edges.
How to Assemble the Garland
Step 4: Choose Attachment Style
Either attach the hearts onto twine with mini clothespins or glue the hearts directly onto the string. If gluing, apply a thin, even line of glue along the top back edge of the heart and press gently onto the twine.
Step 5: Arrange the Hearts
Space hearts about two inches apart. Watercolor designs look best when alternating colors and shapes.
Step 6: Display
This garland adds a gentle artistic glow to bedrooms, nurseries, studios, and event backdrops.
Vintage Book Page Heart Garland
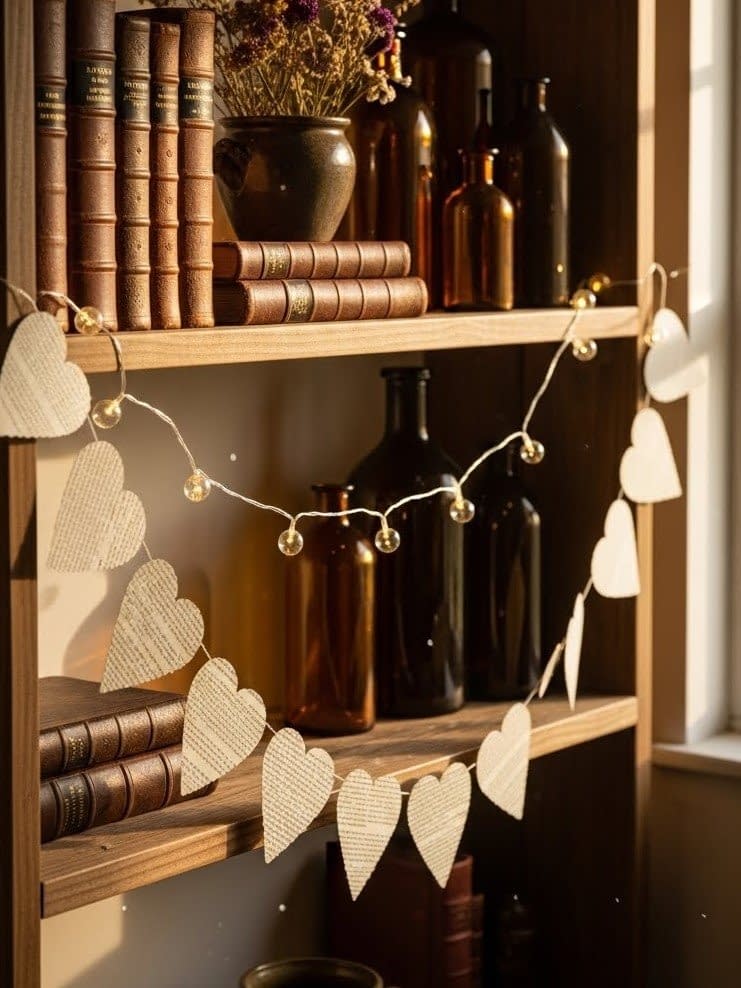
This design uses pages from old books, music sheets, or decorative vintage paper. It’s perfect for rustic, cottage-style, or literary themes.
Materials Needed
• Old book pages or printed vintage paper
• Scissors
• Pencil
• String or twine
• Glue or clothespins
• Heart template
How to Make the Hearts
Step 1: Prepare the Paper
Choose pages with visible text or soft illustrations. For more texture, use slightly yellowed or aged paper. Cut the pages into rectangles or squares.
Step 2: Fold for Symmetry
Fold each rectangle in half vertically. Crease the fold sharply, as this crease ensures that every heart becomes symmetrical.
Step 3: Draw the Heart Shape
Draw half a heart along the folded side. Keep the outline simple and natural.
Step 4: Cut the Heart
Cut along the drawn line with small, careful movements to avoid tearing the aged paper. Unfold to reveal the full heart shape.
How to Assemble the Garland
Step 5: Attach to the String
Use glue to adhere the hearts along a twine string. Apply glue gently along the fold line or the top half of the heart, depending on the design you want.
Step 6: Add Spacing
Leave at least one inch between each heart to maintain readability of the text on each piece.
Step 7: Display
Hang the garland against a wooden shelf, vintage mirror, or neutral wall to enhance the rustic charm.
Hanging Layered Paper Heart Curtain Garland Tutorial
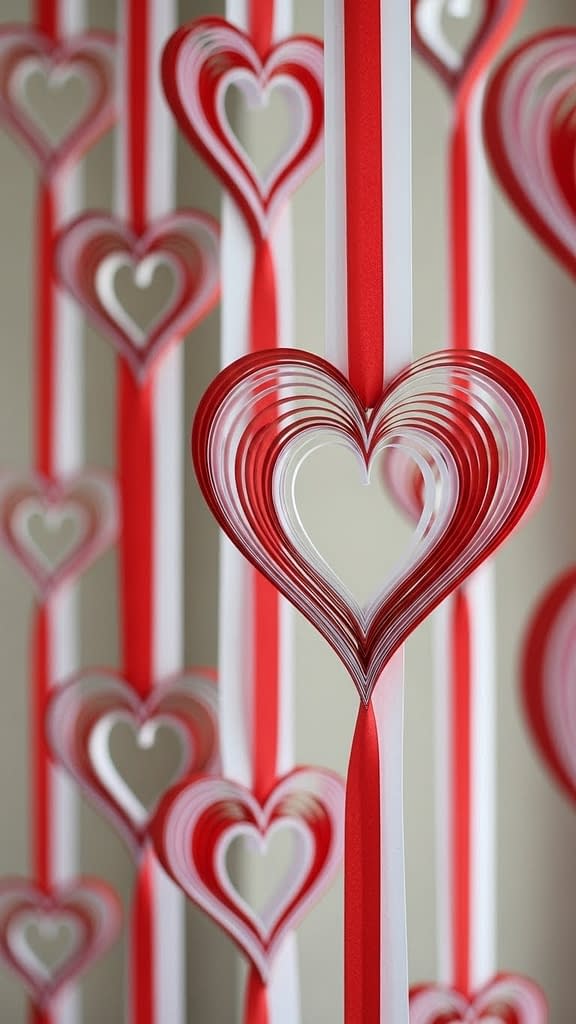
This design creates a beautiful cascading curtain of layered hearts using long paper strips. It works perfectly for bedrooms, parties, weddings, Valentine’s Day, or simple romantic decor.
Materials You’ll Need
- Red paper strips (about 1–2 cm wide, long pieces)
- White paper strips (same width as red)
- Long vertical ribbon (red and white)
- Glue or a glue gun
- Scissors
- A ruler (optional)
- Tape or hooks for hanging
Step-by-Step Tutorial
Step 1: Prepare the Paper Strips
Cut several strips of red and white paper.
For each heart, you’ll need:
- 2 long red strips
- 2 medium red strips
- 2 short red strips
- 2 white strips (medium-length)
(These create the inner contrast layer.)
The idea is:
- Longest strips form the outer heart
- Shorter strips form the inner curves
Step 2: Group the Strips for One Heart
Arrange your strips in this exact order (from outside to inside):
- Long red strip
- Medium red strip
- Short red strip
- White strip
- White strip
- Short red strip
- Medium red strip
- Long red strip
Make sure all bottom ends line up together.
Step 3: Shape the Heart
- Hold all strips together at the bottom.
- Glue the bottom tips together tightly.
- Now fold the top ends inward so they curve naturally like a heart.
The longest strips will create the biggest curve, and the shorter strips create smaller nested hearts inside.
Glue the top ends together to complete the layered heart shape.
Step 4: Create Many Hearts
Repeat the same process to make 20–40 hearts depending on how wide you want your curtain.
Step 5: Attach Hearts to Long Ribbons
Cut long vertical ribbons (red and white), each tall enough for your wall.
Glue 3–5 hearts onto each ribbon, spacing them evenly from top to bottom.
This creates vertical hanging strands.
Step 6: Hang the Curtain
Attach the ribbons to your wall using:
- Wall hooks
- Tape
- A curtain rod
- A wooden dowel
Arrange them in alternating colors (red ribbon, white ribbon) just like in the picture.
This gives the cascading layered look.
Final Tips for Crafting Perfect Paper Heart Garlands
Choose the Right Paper
Lighter paper folds more cleanly, while heavier cardstock creates durability. Watercolor paper offers texture, and book pages provide character and vintage appeal.
Pay Attention to Symmetry
Always fold precisely before cutting if your design relies on symmetrical shapes.
Apply Glue Sparingly
Excess glue can wrinkle the paper. A thin, even layer is enough for most garlands.
Plan the Color Arrangement
Alternating colors, gradients, neutral tones, or a mix of prints can dramatically elevate your final design.
Hang Where Light Enhances the Garland
Natural light highlights details like watercolor blends and 3D shadows.
Conclusion
These six paper heart garland tutorials offer a complete set of projects suitable for any skill level. Whether you enjoy classic folded hearts, dimensional 3D designs, origami structures, looped heart chains, watercolor artistry, or vintage book aesthetics, this guide provides everything you need to create beautiful, durable, and display-ready garlands.
By following the detailed instructions, focusing on folds, cuts, glue placement, and arrangement, you can create professional-looking decorations that feel personal and meaningful. These garlands bring warmth to any room and can be adapted endlessly with new colors, paper types, and finishes.


