
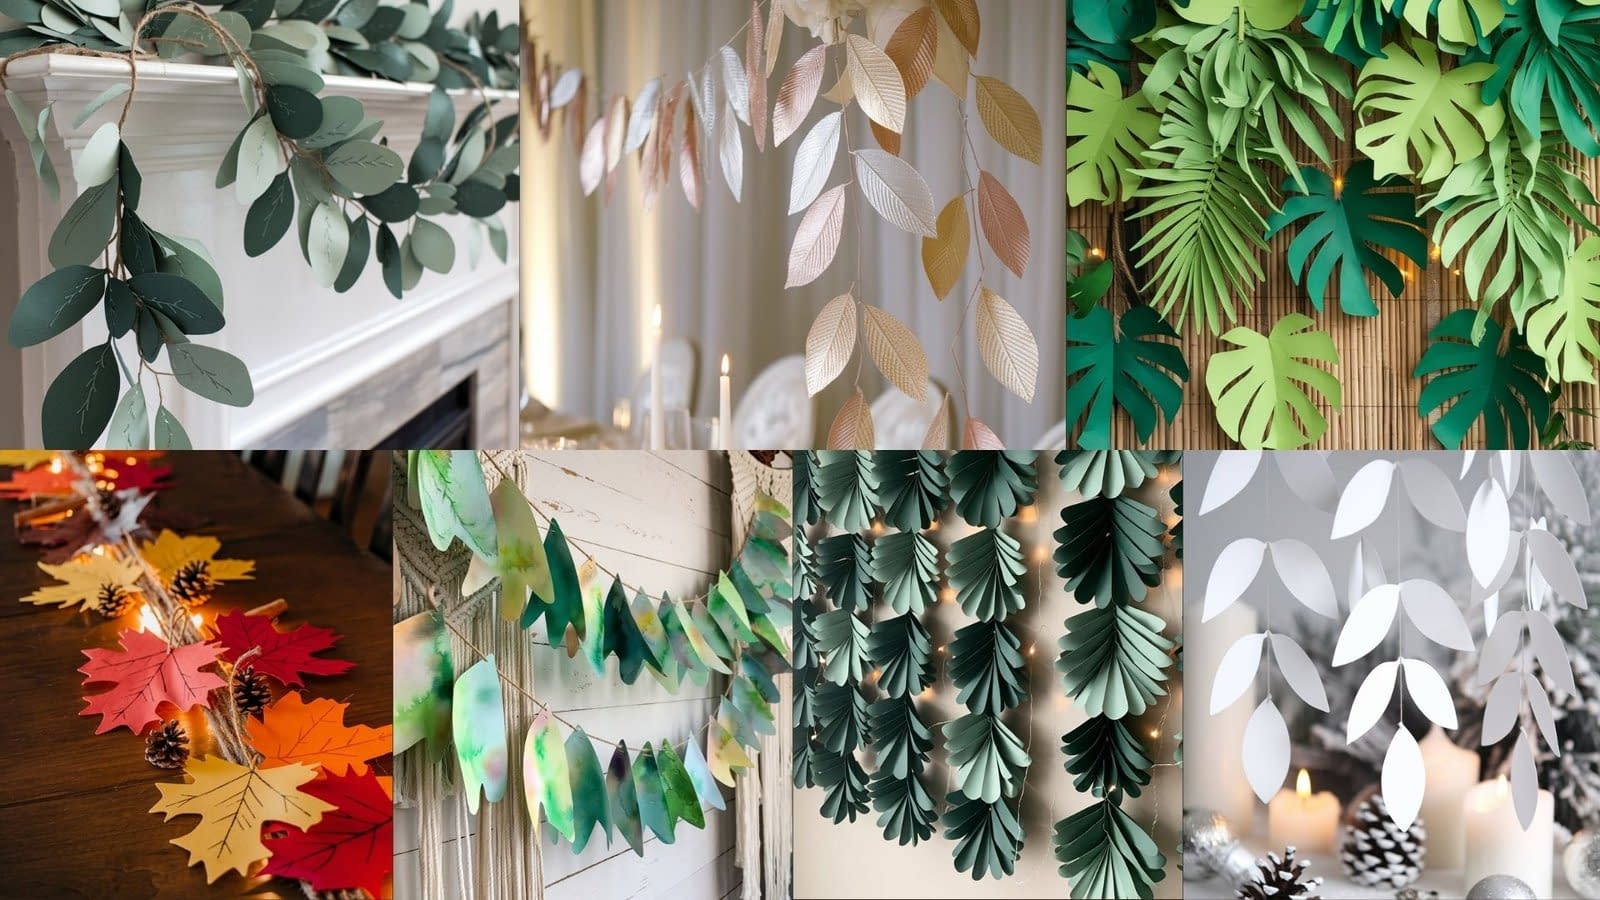
If you’re searching for a décor project that’s simple yet incredibly impactful, paper leaf garlands might just be the perfect choice. They’re budget-friendly, customizable, and can instantly transform the atmosphere of a room or event. Unlike real foliage, they last much longer, and you can play with shapes, colors, and styles to suit any occasion—from weddings and birthdays to seasonal decorations and minimalist home styling.
In this article, we’ll explore 7 Paper Leaf Garland DIY ideas with highly detailed tutorials. Each section includes step-by-step instructions, tips for customization, and styling suggestions so you can create unique garlands that look professional, even if you’re a beginner.
1. Classic Green Paper Leaf Garland

The classic green garland is timeless and versatile. It mimics natural leaves and can be styled in almost any setting.
Materials Needed:
- Green construction paper or cardstock (use at least 2–3 shades for variety)
- Pencil for sketching leaf shapes
- Scissors or a craft knife
- String, jute twine, or embroidery thread
- Hot glue gun or double-sided tape
- Hole punch (optional)
Step-by-Step Instructions:
- Sketch Your Leaf Templates: Start by drawing a few basic leaf shapes such as ovals, elongated eucalyptus leaves, or teardrop forms. Once you have a few templates, you can reuse them for cutting multiple leaves.
- Cut Out Leaves: Use your scissors to carefully cut out each leaf. Make around 50–70 leaves for a standard 6-foot garland (you can adjust based on how full you want it to look).
- Add Details: Use your pencil or the blunt edge of scissors to draw faint veins down the middle of the leaves. This small touch makes them look more realistic.
- Thread or Glue: If using a hole punch, create small holes at the bottom of each leaf and thread them onto twine. If gluing, attach the leaves directly by overlapping them slightly along the string.
- Assemble the Garland: Alternate light and dark green shades to mimic the variation of natural foliage. Continue until your garland reaches the desired length.
Styling Ideas:
- Use this garland to drape across a mantel, frame a window, or decorate a dining table centerpiece.
- Add mini paper flowers or berries between the leaves for a seasonal upgrade.
2. Autumn-Inspired Paper Leaf Garland
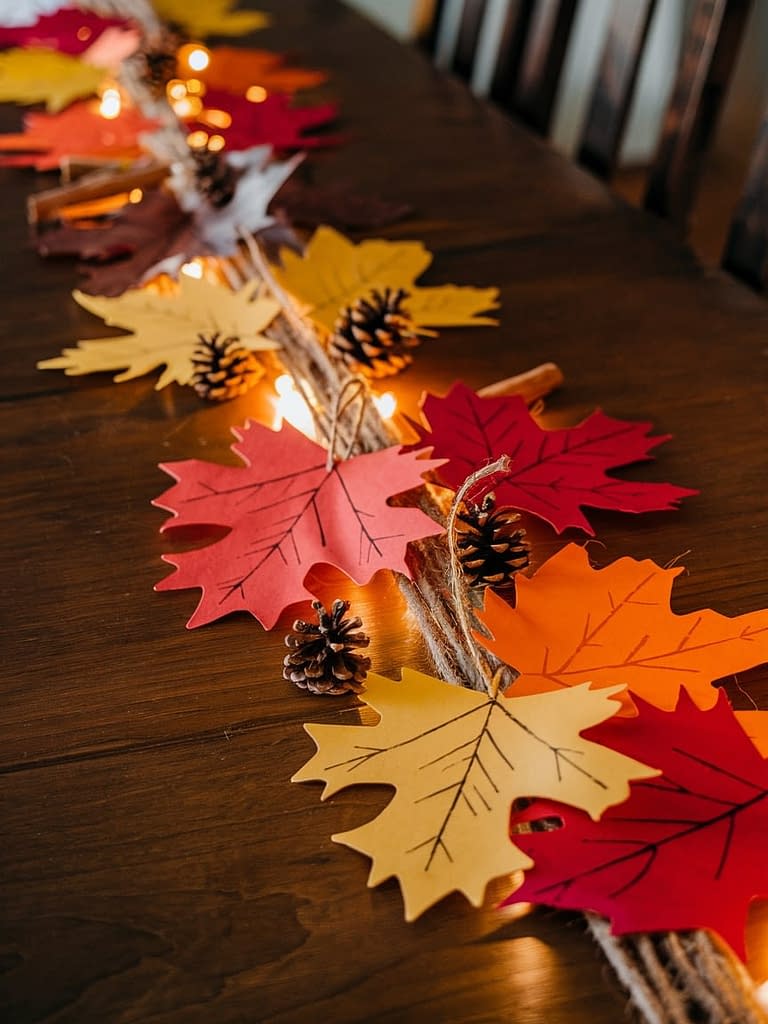
This garland captures the warmth of fall with bold shades of red, orange, yellow, and brown.
Materials Needed:
- Cardstock in autumn colors
- Leaf stencils (maple, oak, birch, etc.)
- Pencil and scissors
- Jute string or rustic ribbon
- Hot glue or double-sided tape
Step-by-Step Instructions:
- Choose Your Stencils: Print or draw outlines of classic fall leaves. Trace them onto cardstock in autumn colors.
- Cut and Shape Leaves: Cut out the leaves and gently fold them down the middle to create dimension. Crease slightly at the edges for a crisper look.
- Add Veins for Realism: Draw veins with a fine-tip pen or emboss them by pressing gently with a craft knife (without cutting through).
- Prepare the Garland Base: Stretch out your jute string and mark where you want each leaf to go (about 2 inches apart for balance).
- Attach Leaves: Apply glue to the back of each leaf and press it firmly onto the string. Alternate shapes and colors to create a layered effect.
- Finishing Touches: Add small pinecones, paper acorns, or cinnamon sticks tied with twine for a rustic harvest theme.
Styling Ideas:
- Perfect for Thanksgiving tablescapes.
- Use as a wall backdrop for cozy fall family photos.
3. Tropical Paper Leaf Garland
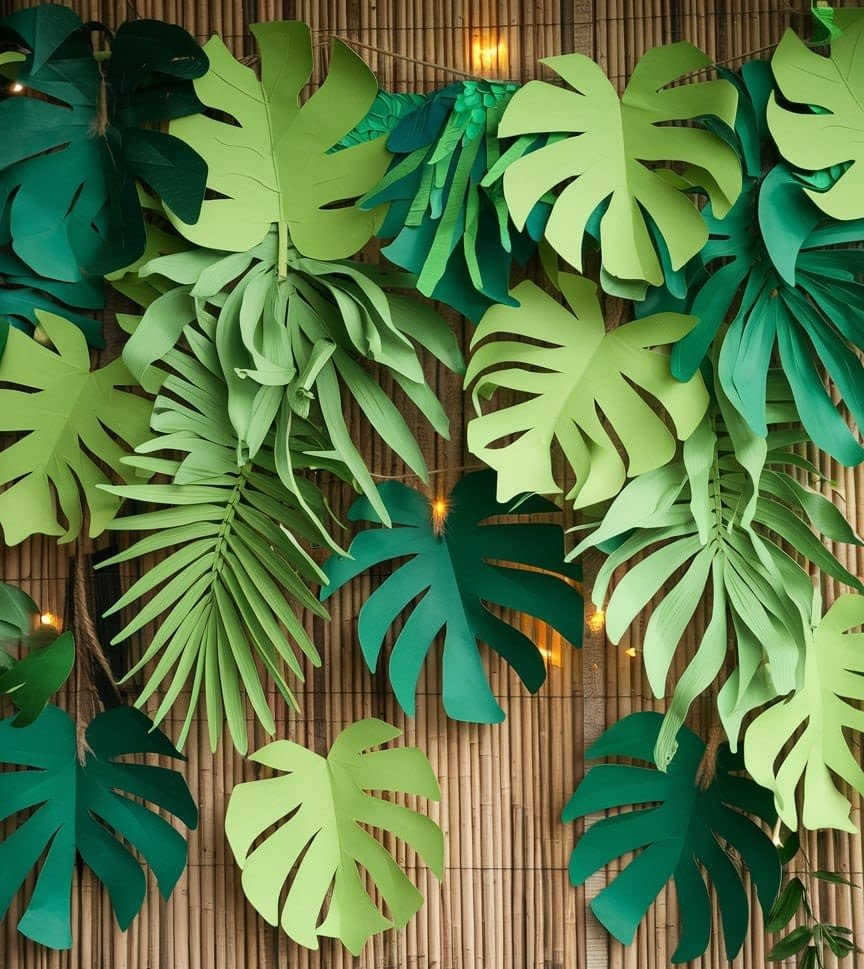
If you want to bring vacation vibes indoors, a tropical garland is the way to go.
Materials Needed:
- Large sheets of green cardstock or poster paper
- Templates for monstera, banana, and palm leaves
- Pencil, scissors, and craft knife
- Hot glue gun
- Thick rope, twine, or fishing line
Step-by-Step Instructions:
- Select Leaf Templates: Trace bold tropical leaf shapes (monstera and palm work best).
- Cut Out in Layers: Cut each leaf in varying sizes for a layered effect. Use a craft knife to cut slits and holes (like those in monstera leaves).
- Shape the Leaves: Slightly curl edges by rolling the paper gently around a pencil. This gives a natural, flowing look.
- Assemble: Attach the larger leaves first, spacing them evenly along the rope. Layer smaller leaves in between.
- Fill Gaps: Add tiny paper flowers or hibiscus blooms for more tropical flair.
Styling Ideas:
- Use for summer parties, beach-themed weddings, or luau events.
- Pair with fairy lights or lanterns for a lively evening atmosphere.
4. Metallic Paper Leaf Garland

A metallic garland adds luxury and elegance, making it perfect for weddings or formal gatherings.
Materials Needed:
- Metallic cardstock in gold, silver, or rose gold
- Scissors
- Hole punch
- Satin ribbon (thin or medium width)
Step-by-Step Instructions:
- Cut Sleek Leaf Shapes: Choose elongated oval leaves for a sophisticated look.
- Punch Holes: Make a small hole at the base of each leaf.
- Thread Ribbon: Thread the leaves onto a satin ribbon, alternating metallic shades for shimmer.
- Secure and Space: Tie a knot around each leaf to hold it in place and prevent sliding.
- Add Details: Emboss veins with a blunt tool for subtle texture.
Styling Ideas:
- Drape across wedding arches or photo booths.
- Combine with string lights for a glowing metallic effect.
5. Watercolor Effect Paper Leaf Garland

This is a more artistic take, where every leaf looks unique with watercolor washes.
Materials Needed:
- Heavy watercolor paper
- Watercolors in green, blue, and yellow tones
- Brushes, water jar, and palette
- Scissors
- Twine or clear nylon thread
Step-by-Step Instructions:
- Paint the Paper: Apply watercolor washes in different shades. Blend colors for natural gradients. Let dry fully.
- Cut Out Leaf Shapes: Trace and cut different leaf forms from the painted sheets.
- Add Dimension: Slightly fold each leaf in the center for depth.
- Assemble the Garland: Attach leaves to twine, mixing colors randomly for a whimsical vibe.
Styling Ideas:
- Ideal for boho weddings, art exhibitions, or kids’ rooms.
- Works beautifully when paired with dreamcatchers or macramé.
6. Layered 3D Paper Leaf Garland
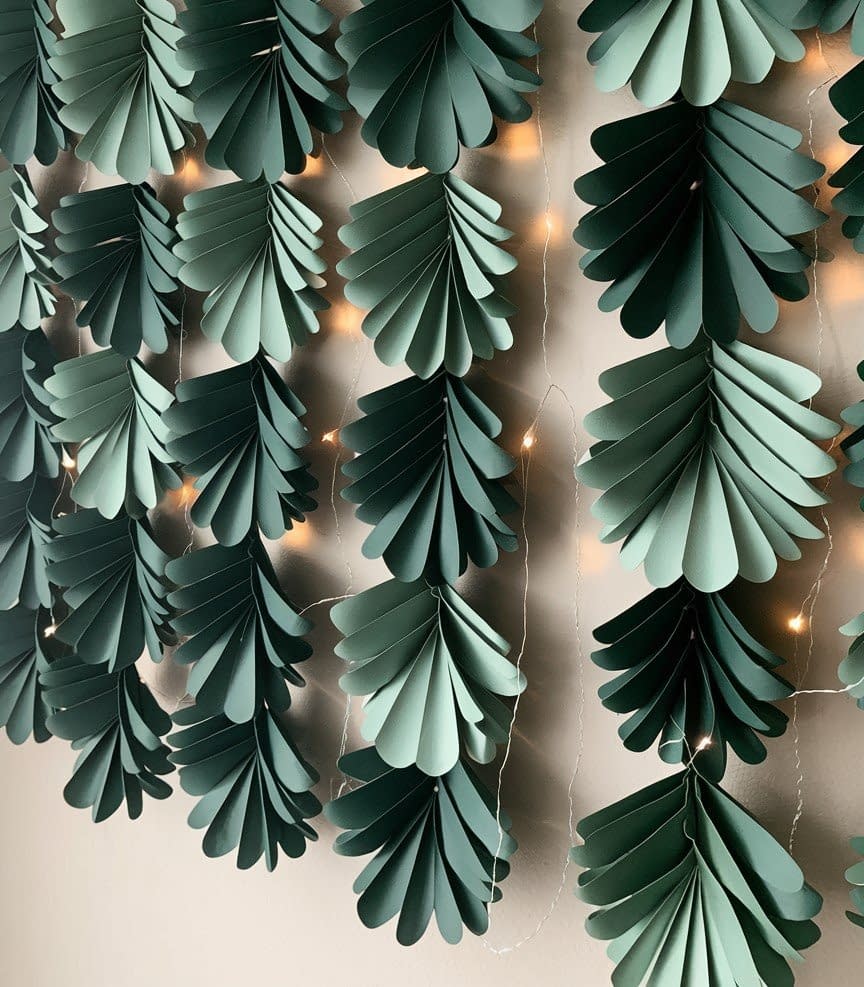
For a bold and dimensional look, a 3D garland is perfect.
Materials Needed:
- Cardstock in multiple shades of the same color family
- Scissors and glue gun
- Strong cord or ribbon
Step-by-Step Instructions:
- Cut Multiple Leaf Sizes: Use at least 3 sizes (small, medium, large).
- Layer Leaves: Glue smaller leaves on top of larger ones. Slightly bend edges for volume.
- Add Texture: Draw or emboss veins for more detail.
- Assemble: Glue each layered leaf cluster to your cord, spacing them evenly.
Styling Ideas:
- Excellent for backdrops at birthdays or weddings.
- Use as a statement piece over fireplaces or stair railings.
7. Minimalist White Paper Leaf Garland

This design emphasizes simplicity and elegance.
Materials Needed:
- White cardstock or textured paper
- Scissors
- Cotton string or fishing line
- Hot glue gun
Step-by-Step Instructions:
- Cut Simple Leaf Shapes: Stick to clean outlines, like eucalyptus or olive leaves.
- Keep It Minimal: Don’t add veins or shading—let the plain white aesthetic shine.
- Attach to String: Secure with hot glue, spacing leaves evenly.
- Add Layers: For a fuller look, overlap two strands of garland.
Styling Ideas:
- Perfect for winter weddings, Christmas, or minimalist home décor.
- Works beautifully with candles, silver ornaments, or pinecones.
Additional Tips for Success
- Choose the Right Paper: Cardstock holds shape better than thin craft paper.
- Experiment with Lengths: Short garlands are great for table runners; long ones work for walls and arches.
- Mix Styles: Combine tropical with metallic for modern fusion looks.
- Preserve for Reuse: Store flat in a dry box to keep leaves crisp.
Conclusion
These 7 Paper Leaf Garland DIY tutorials prove that something as simple as paper can become an elegant and versatile décor piece. From classic green designs to metallic luxury and tropical vibrancy, each garland offers a unique way to personalize your space. With the detailed steps and tips provided, you can craft garlands that look professional yet carry the warmth of being handmade.


