
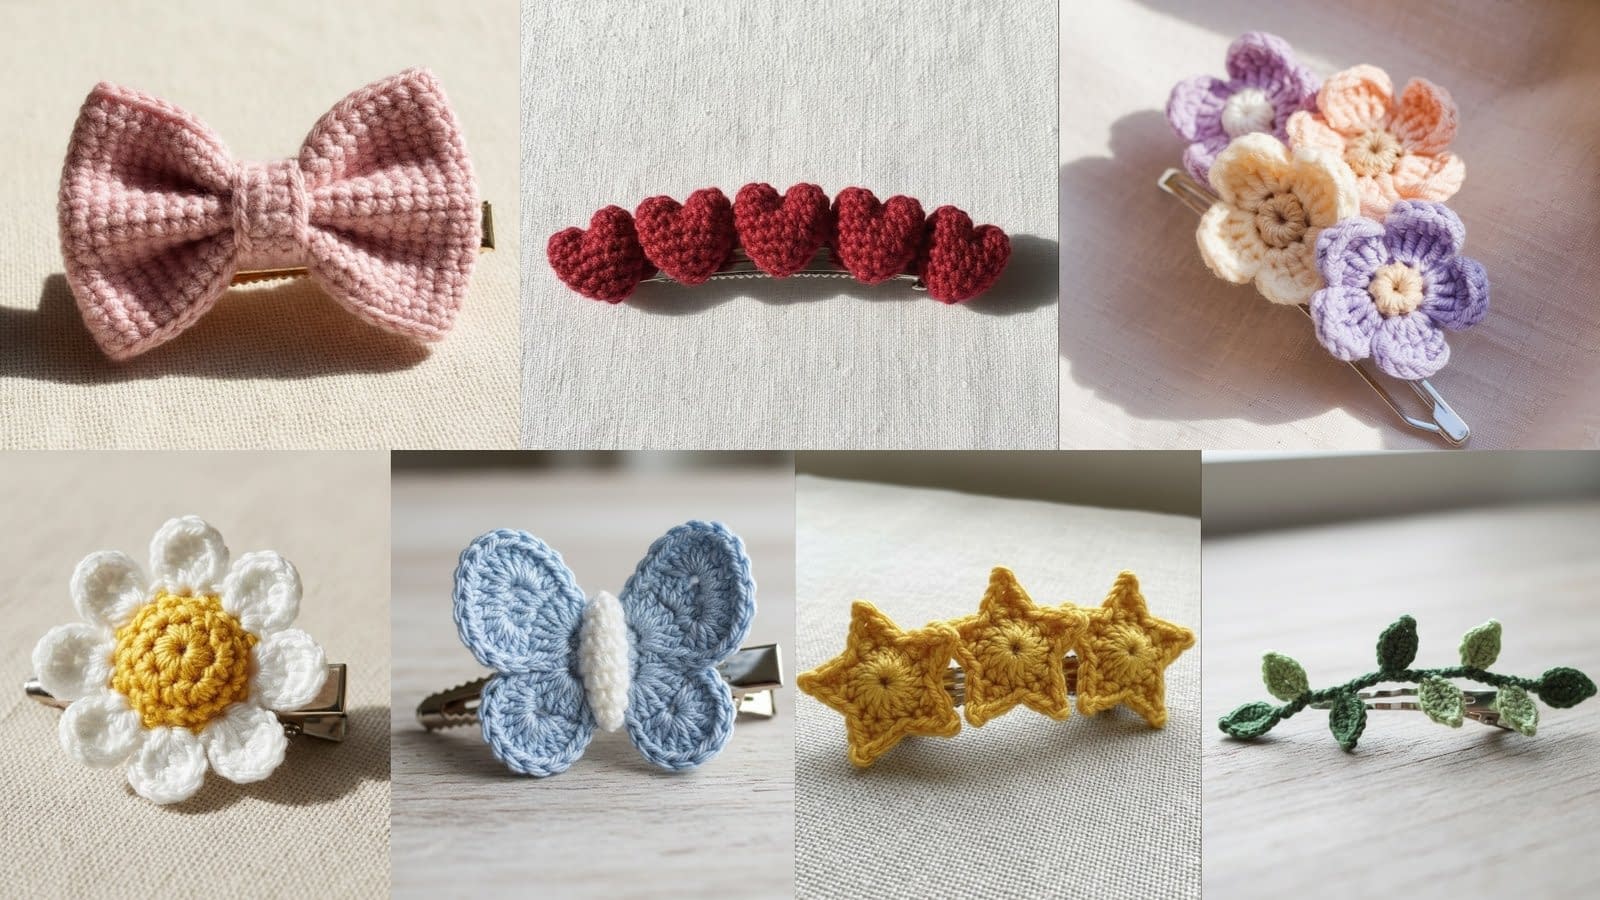
Crochet hair clips are one of the most delightful little projects to make — quick, fun, and endlessly customizable. Whether you love soft florals, playful motifs, or simple textured shapes, these mini crochet hair clip patterns are the perfect way to turn small bits of yarn into wearable art.
Each pattern in this collection focuses on small, detailed designs that can be attached to a clip, barrette, or bobby pin. They are perfect for adding a handmade touch to everyday hairstyles, creating matching accessories for kids, or crafting thoughtful gifts for friends. Even better, most of these mini clips take less than an hour to make and require only a small amount of yarn, making them great stash-buster projects.
This guide includes seven detailed crochet hair clip patterns, each explained step-by-step with materials, notes, and assembly instructions. The skill levels range from beginner to intermediate, with easy-to-follow instructions written in full stitch names to ensure clarity for crocheters of all experience levels.
Before we begin, gather your favorite small skeins of yarn, a few metal hair clips, and a 3.0 mm to 4.0 mm crochet hook — and get ready to create a collection of charming, handmade accessories that you can proudly wear or gift.
Pattern 1: Mini Crochet Daisy Hair Clip
Skill Level: Beginner–Intermediate (basic shaping and sewing)
Finished Size: Approximately 2 inches in diameter (adjust by changing hook size or yarn thickness)
Materials:
- Light weight or sport weight yarn in white (for petals) and yellow (for center)
- Crochet hook size 3.0 mm
- Yarn needle
- Scissors
- Metal snap clip or alligator clip
- Hot glue or fabric glue for attaching the flower
Notes:
This simple daisy hair clip uses two main colors — yellow for the flower center and white for the petals. You can easily adjust the size of the daisy by using thicker yarn or adding extra petals. Each petal is worked directly around the center ring, creating a smooth, rounded flower that holds its shape well on a clip.
Instructions:
Step 1: Create the Center of the Daisy
- Begin with yellow yarn and make a small magic ring.
- Insert your hook into the ring and chain 2 (this will count as your first half double crochet).
- Work 9 more half double crochet stitches into the ring, so you have a total of 10 half double crochet stitches.
- Pull the tail of the magic ring gently to close the circle tightly.
- Slip stitch into the top of the first half double crochet to join the round.
- Fasten off the yellow yarn and weave in the short tail neatly at the back of the center.
This round forms a smooth yellow circle — the perfect base for attaching the white petals.
Step 2: Crochet the Petals
- Attach white yarn in any stitch around the yellow circle.
- Chain 4 (this will form the start of your petal).
- In the same stitch, work one triple crochet stitch, followed by another chain 4.
- Slip stitch into the next stitch to secure the petal.
- Repeat this pattern — chain 4, triple crochet, chain 4, slip stitch in the next stitch — around the circle until you have 10 petals.
- At the end, join with a slip stitch to the base of the first petal and fasten off.
Your daisy should have evenly spaced white petals with a bright yellow center.
Step 3: Attach to the Hair Clip
- Lay the daisy flat with the back facing upward.
- Apply a small dot of hot glue or fabric glue to the center of your clip.
- Press the flower gently onto the glued area and hold for several seconds until secure.
- Allow the glue to dry completely before using.
You now have a cheerful, handmade daisy clip that adds a fresh, delicate touch to any hairstyle.
Tip:
If you want a double-layered look, make two daisies — one slightly smaller — and sew them together before attaching to the clip. This gives the flower a full, dimensional appearance.
Pattern 2: Mini Crochet Bow Hair Clip
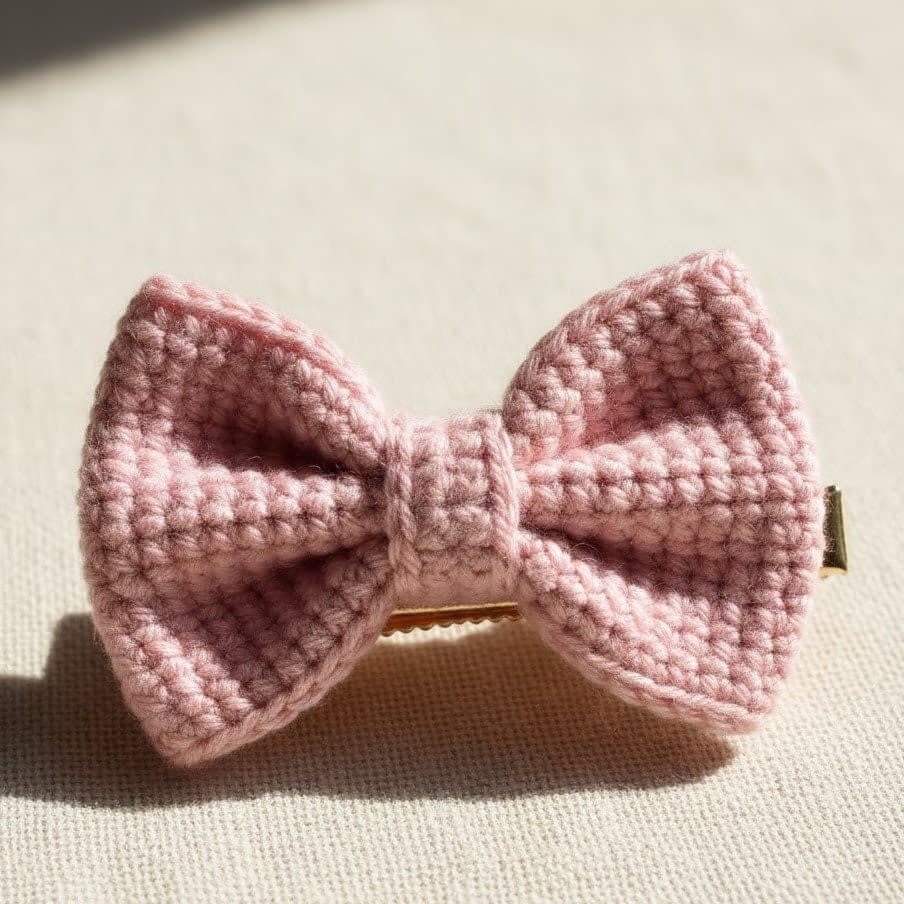
Skill Level: Beginner (simple shaping)
Finished Size: Approximately 3 inches wide × 1 inch tall
Materials:
- Worsted weight (#4) yarn in any color (cotton or acrylic works well)
- Crochet hook size 4.0 mm (G)
- Yarn needle
- Scissors
- Metal hair clip or barrette
- Hot glue or sewing thread for attachment
Notes:
This mini bow is crocheted in one rectangular piece and cinched in the middle to form the bow shape. It is one of the easiest crochet accessories to make and can be customized by changing yarn color, texture, or size.
Instructions:
Step 1: Crochet the Bow Base
- Begin with a slip knot and chain 18.
- In the second chain from your hook, work one single crochet stitch.
- Continue to work one single crochet stitch in each chain across (you will have 17 single crochet stitches in total).
- Chain 1 and turn your work.
- Work one single crochet stitch in each stitch across again.
- Repeat this process for 6 total rows to form a neat rectangle.
- Fasten off, leaving a long tail of yarn for wrapping the center later.
You now have a small crocheted rectangle — this will form the base of your bow.
Step 2: Shape the Bow
- Lay the rectangle flat and locate the center point.
- Fold the sides inward slightly so the fabric gathers at the middle.
- Using the yarn tail, wrap the center tightly several times to form the cinched bow shape.
- Secure the wrapped yarn at the back with a knot or a few stitches using your yarn needle.
Step 3: Attach to Hair Clip
- Position the back of the bow against your metal hair clip.
- Apply hot glue along the top surface of the clip and press the bow in place.
- Hold for several seconds until the glue sets.
- For a neater finish, you can crochet a small strip (chain 8, work single crochet across) and wrap it around the center before gluing.
Your mini crochet bow hair clip is now ready to wear — soft, cute, and suitable for both kids and adults.
Variation Ideas:
- Use metallic yarn or add a small pearl bead at the center for a dressy look.
- Make a two-tone bow by changing colors halfway through the rectangle.
- Add a small crocheted leaf on each side for a nature-inspired style.
Pattern 3: Tiny Crochet Heart Hair Clip
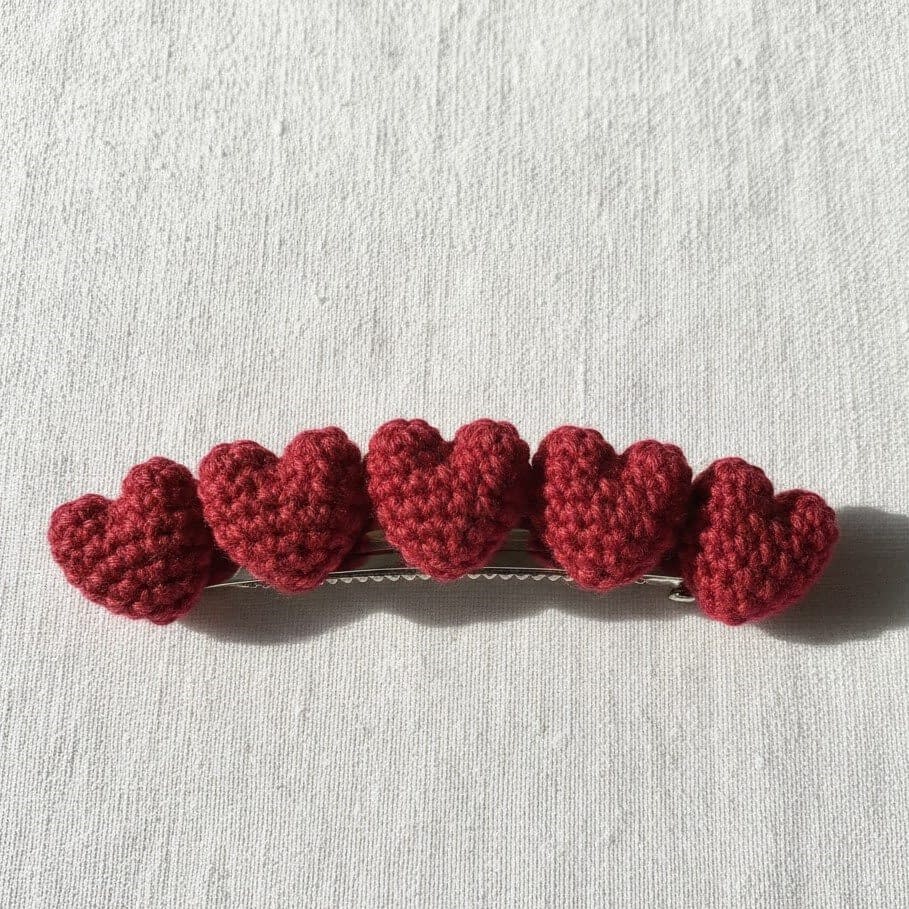
Skill Level: Beginner (quick shaping and joining)
Finished Size: About 1.5 inches wide
Materials:
- Light or medium weight yarn in red, pink, or any desired shade
- Crochet hook size 3.5 mm
- Yarn needle
- Scissors
- Metal snap clip or bobby pin
- Hot glue for assembly
Notes:
This tiny heart hair clip is a quick and charming project — ideal for Valentine’s Day, gift sets, or everyday wear. The heart is worked in a single round using a magic ring technique.
Instructions:
Step 1: Create the Heart Shape
- Begin with a magic ring.
- Chain 3 (this will count as your first double crochet).
- Into the ring, work the following stitches all in order:
- 3 double crochet stitches
- 3 half double crochet stitches
- 1 chain stitch
- 1 double crochet stitch (this will form the bottom point of the heart)
- 1 chain stitch again
- 3 half double crochet stitches
- 3 double crochet stitches
- Chain 3
- Slip stitch into the center of the ring to close the shape.
- Pull the tail tightly to close the magic ring and form a small heart.
- Fasten off, leaving a tail for sewing if desired.
You now have a tiny crocheted heart that curves neatly at the top and points cleanly at the bottom.
Step 2: Attach to Hair Clip
- Place the heart flat on a table with the back facing upward.
- Apply a small dot of hot glue to the top of your clip.
- Press the heart firmly onto the clip and allow it to set.
- Optionally, you can sew the heart directly to the clip using a yarn needle for extra durability.
Finishing Touches:
You can make multiple hearts in different colors and attach them side by side on one clip for a playful look, or layer two hearts together for a fuller effect.
Tip:
To make a puffy heart, crochet two identical hearts and stitch them together around the edges, lightly stuffing the center with fiberfill before closing. This gives your clip a soft, 3D texture.
Pattern 4: Mini Crochet Butterfly Hair Clip
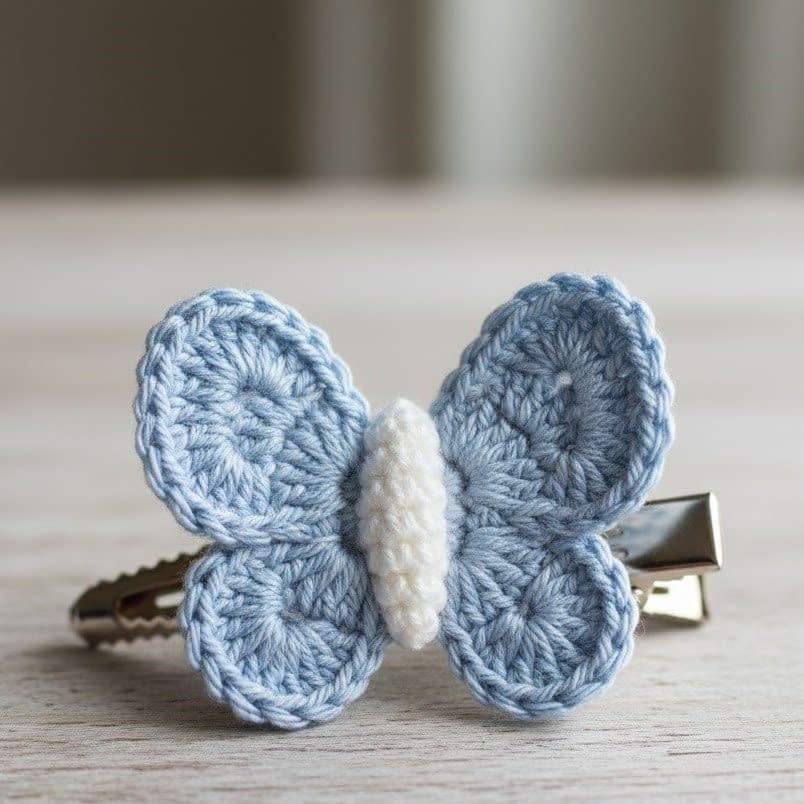
Skill Level: Beginner–Intermediate (requires basic knowledge of color changes and shaping)
Finished Size: Approximately 2.5 inches wide × 2 inches tall
Materials:
- Lightweight cotton or acrylic yarn in two contrasting colors (one for the wings, one for the body)
- Crochet hook size 3.0 mm
- Yarn needle
- Scissors
- Small metal alligator clip or snap clip
- Hot glue or fabric glue for assembly
Notes:
This delicate butterfly is created from a small crocheted circle that folds in half to form symmetrical wings. Once folded, a separate yarn strand is tied around the center to form the butterfly’s body and antennae. This simple yet clever construction makes the project fast and visually appealing.
Instructions:
Step 1: Create the Butterfly Base Circle
- Begin with your chosen wing color yarn and make a magic ring.
- Chain 3 (this will count as your first double crochet stitch).
- Work 2 double crochet stitches into the ring, followed by one chain stitch.
- Continue with this pattern — 3 double crochet stitches, chain 1 — seven times total around the ring. You will have eight groups of 3 double crochet stitches separated by chain 1 spaces.
- Slip stitch into the top of the beginning chain 3 to close the round.
- Fasten off and pull the ring tight.
You will now have a small round piece with eight chain spaces evenly spaced around the edge.
Step 2: Add the Wing Details
- Join your second yarn color (for wing edging) into any chain 1 space.
- In this space, work the following sequence: chain 3, 2 double crochet stitches, chain 3, slip stitch.
- Repeat this same sequence in each chain 1 space around to create eight small scalloped edges that will become butterfly wings.
- Fasten off and weave in ends neatly.
You now have a beautiful, lacy circle with scalloped edges.
Step 3: Fold and Form the Butterfly
- Fold the circle exactly in half so that the scallops on one side match those on the other.
- Cut a long piece of yarn (about 8 inches) in the contrasting color.
- Wrap this yarn tightly around the center of the folded circle to create the butterfly’s body.
- Tie a firm knot at the top and trim the ends to about 1 inch to form antennae.
Step 4: Attach to Hair Clip
- Apply a small line of hot glue across the top of your clip.
- Press the butterfly gently in place, making sure the wings are spread evenly.
- Hold until the glue cools and hardens.
You now have a charming mini butterfly hair clip that looks delicate yet sturdy enough for regular wear.
Variation Ideas:
- Use a metallic or glitter yarn for the body to make the butterfly sparkle.
- Add small beads or embroidery details along the wing edges for extra texture.
- Try gradient yarn for a naturally blended two-toned effect on the wings.
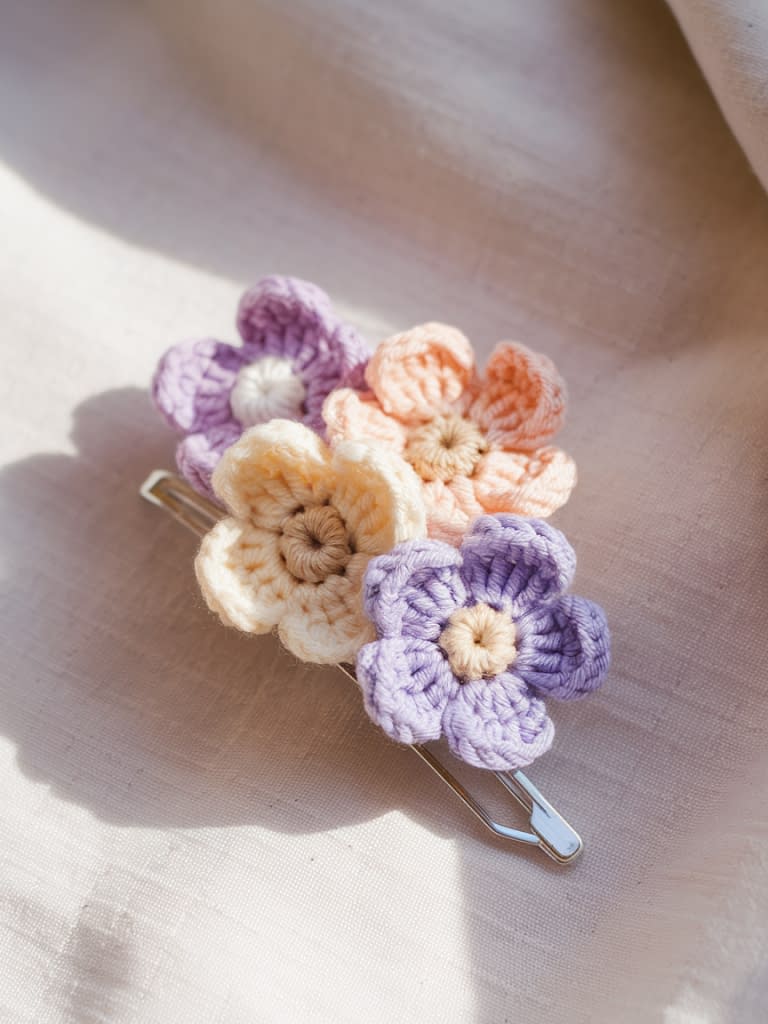
Pattern 5: Mini Crochet Flower Cluster Hair Clip
Skill Level: Intermediate (multiple small motifs joined together)
Finished Size: Approximately 3.5 inches wide (adjustable based on number of flowers)
Materials:
- Lightweight cotton yarn in three complementary colors
- Crochet hook size 3.0 mm
- Yarn needle
- Scissors
- Metal hair clip or barrette
- Hot glue or sewing thread for attachment
Notes:
This flower cluster design combines several mini flowers in different shades to create a lively, textured look. You can customize the layout by arranging the flowers side-by-side or layering them slightly for volume.
Instructions:
Step 1: Crochet the Mini Flowers
- Begin with your first flower color and create a magic ring.
- Chain 2 (this will count as your first half double crochet).
- Work 9 more half double crochet stitches into the ring (10 total).
- Slip stitch to join the round and pull the ring closed tightly.
- For the petals: Chain 2, work 2 double crochet stitches in the next stitch, chain 2, slip stitch into the same stitch.
- Repeat this petal pattern around the circle, one petal for each stitch (you should have about 5 petals total).
- Fasten off and weave in ends.
Make three to five mini flowers in various colors to form your cluster.
Step 2: Arrange the Cluster
- Lay all the flowers flat on a table and experiment with placement until you like the layout.
- Slightly overlap some flowers to give a natural, layered look.
- Once satisfied, use your yarn needle and matching thread to stitch the flowers together at the back, joining only at a few central points so they remain flexible.
Step 3: Attach to Hair Clip
- Apply a thin layer of hot glue across the top of your clip.
- Press the entire flower cluster onto the glue.
- Hold in place until secure.
- Optionally, sew the flowers to a small felt strip before gluing it to the clip for extra stability.
Variation Ideas:
- Add small crocheted leaves behind the flowers for a nature-inspired touch.
- Use all pastel colors for a soft spring look or bright colors for a summer style.
- Attach to a larger clip for a fuller, statement piece.
Pattern 6: Mini Crochet Star Hair Clip
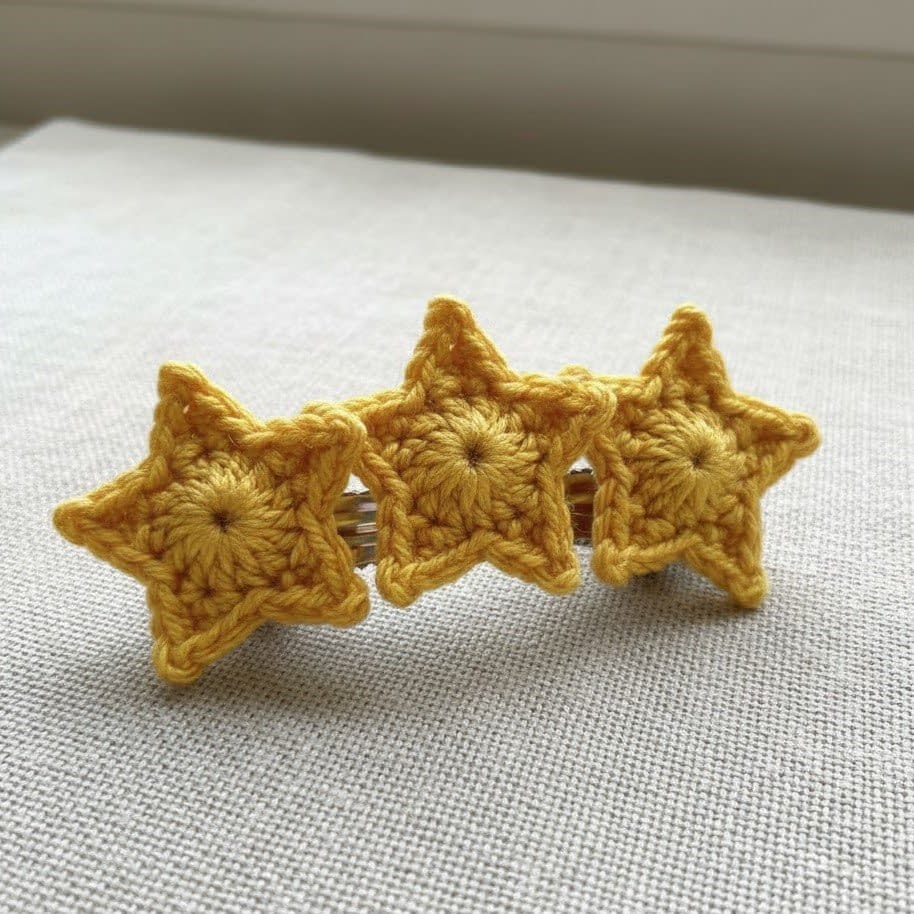
Skill Level: Beginner (simple increases and shaping)
Finished Size: About 2 inches across
Materials:
- Lightweight cotton yarn in yellow or gold
- Crochet hook size 3.0 mm
- Yarn needle
- Scissors
- Hair clip or barrette
- Hot glue for assembly
Notes:
This mini crochet star adds a playful, whimsical charm to any hairstyle. It is made in a single round and is perfect for both kids and festive occasions.
Instructions:
Step 1: Form the Star Base
- Begin with a magic ring.
- Chain 2 (counts as first half double crochet).
- Work 9 more half double crochet stitches into the ring.
- Pull the ring tightly closed and slip stitch to the first half double crochet.
You will have a small circular base of 10 stitches.
Step 2: Create the Star Points
- Chain 4.
- In the second chain from your hook, work one single crochet.
- In the next chain, work one half double crochet.
- In the next chain, work one double crochet.
- Skip one stitch on the round, then slip stitch into the next stitch to secure the point.
- Repeat this process five times around to form five points of the star.
- Slip stitch to finish, then fasten off and weave in ends.
You will now have a neat five-pointed star.
Step 3: Attach to Hair Clip
- Apply hot glue along the top of your clip.
- Center the star and press gently to secure.
- Let the glue dry completely before use.
Variation Ideas:
- Add a small white bead or sequin at the center for sparkle.
- Make two stars of different sizes and layer them for a 3D effect.
- Crochet multiple stars and line them across a longer barrette for a celestial look.
Pattern 7: Mini Crochet Leaf and Vine Hair Clip
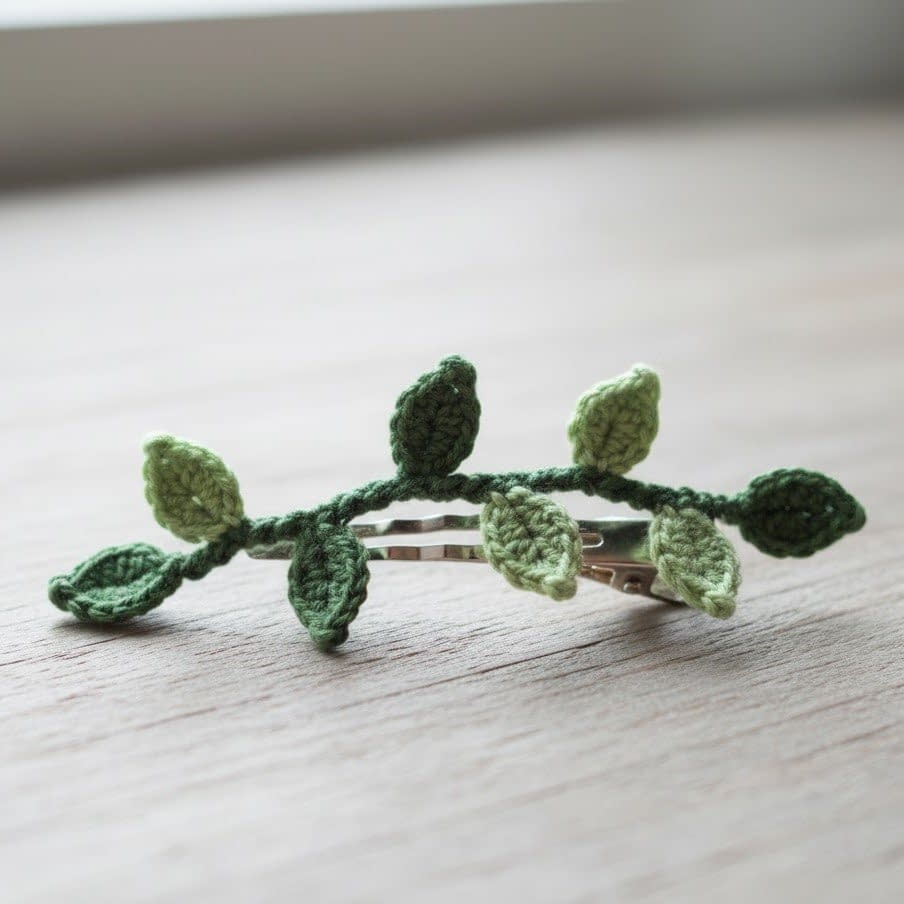
Skill Level: Intermediate (basic shaping and connecting motifs)
Finished Size: About 4 inches long
Materials:
- Lightweight yarn in green (or a mix of light and dark green)
- Crochet hook size 3.0 mm
- Yarn needle
- Scissors
- Hair clip or barrette
- Hot glue for finishing
Notes:
This nature-inspired design features a delicate vine with small leaves that curve along the clip. It pairs beautifully with the flower cluster or butterfly clips if you want to make a themed set.
Instructions:
Step 1: Create the Vine Base
- With green yarn, chain 35.
- Starting in the second chain from your hook, work one single crochet stitch.
- Continue working one single crochet in each chain across.
- Chain 1 and turn your work.
- Work one single crochet in each stitch again to strengthen the vine.
- Fasten off and set aside.
Step 2: Crochet the Mini Leaves
- Chain 7 to begin each leaf.
- In the second chain from your hook, work one single crochet stitch.
- In the next chain, work one half double crochet.
- In the next chain, work one double crochet.
- In the next chain, work one half double crochet again.
- In the next chain, work one single crochet, and then slip stitch into the last chain to close the leaf tip.
- Fasten off and leave a small tail for sewing.
Make five to seven small leaves in total.
Step 3: Assemble the Vine
- Lay your vine base flat and arrange the leaves along one side, spacing them evenly.
- Using your yarn needle, sew each leaf to the vine base, making sure the shape curves slightly like a natural branch.
- Trim any excess yarn ends neatly.
Step 4: Attach to Hair Clip
- Apply a thin line of hot glue across the clip.
- Press the vine onto it, adjusting gently so the leaves curve naturally.
- Hold until the glue cools and sets completely.
Your crochet leaf and vine hair clip is now complete — simple yet graceful, ideal for pairing with floral or nature-themed outfits.
Variation Ideas:
- Add small crocheted flowers or beads along the vine.
- Use two shades of green for a realistic look.
- Attach the vine diagonally across a larger clip for a statement design.
Conclusion
Crochet hair clips are the perfect small projects for practicing new stitches, experimenting with color, and expressing your creativity. Whether you make one for yourself, a friend, or as a handmade gift, each clip carries the charm and personality of your craftsmanship.
From cheerful daisies to delicate butterflies and elegant leaves, these 7 mini crochet hair clip patterns show how easily yarn can transform into wearable art. Each pattern can be customized by changing yarn types, colors, or clip sizes, so you can make endless variations to match different moods and styles.
These mini accessories require minimal materials and time, yet they deliver maximum satisfaction — proving that even the smallest crochet pieces can make the biggest impact.
So choose your favorite pattern from this collection, and start creating your own beautiful crochet hair clip set today. Whether you prefer soft florals, playful motifs, or natural designs, there is a mini crochet hair clip pattern here to inspire your next handmade creation.


