
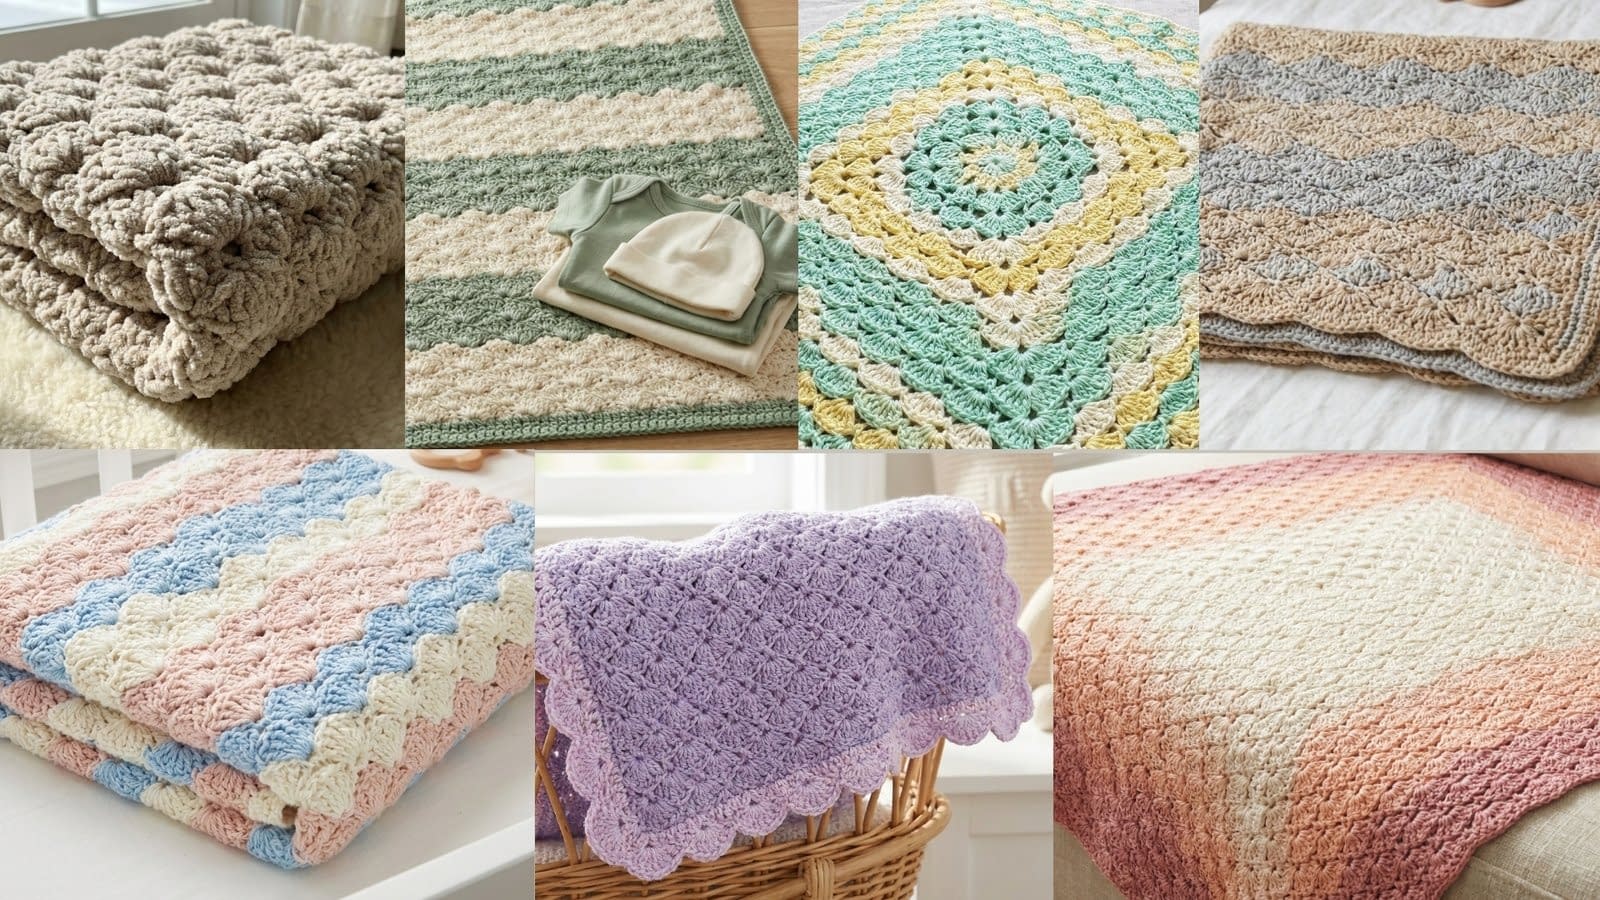
Crochet shell stitch baby blankets are among the most loved handmade baby items because they combine beauty, softness, and durability. The shell stitch forms repeating fan-like clusters that create a gentle wave texture across the fabric. This texture is not only decorative but also flexible, allowing the blanket to drape comfortably around a baby without feeling stiff or bulky.
In this guide to 7 crochet shell stitch baby blanket patterns, each pattern explores a different visual style while keeping the construction beginner-friendly. The instructions are written slowly and clearly, assuming no prior experience with large crochet projects. Every step explains what to do, why it is done, and how to fix common mistakes.
Important note for beginners: crochet baby blankets are never glued, cut into shapes, or assembled with adhesive. All structure is created through stitches. Yarn is only cut when changing colors or finishing sections, and all ends are secured by weaving them into the fabric.
Tools, Materials, and Preparation (Applies to All Patterns)
Yarn Selection
Choose soft, baby-safe yarn. Good options include:
- Acrylic baby yarn
- Cotton or cotton-blend yarn
- Bamboo blends
Avoid rough wool or textured novelty yarns, as they can irritate sensitive skin.
Hook Size
Use the hook size listed on your yarn label. Most baby blankets work well with a 4.5 mm to 5.5 mm hook. Beginners should avoid hooks that are too small, as tight stitches make shell patterns harder to see.
Additional Tools
- Scissors for cutting yarn
- Yarn needle for weaving in ends
- Measuring tape
- Stitch markers (optional)
Workspace Preparation
Work on a flat, clean surface. Keep yarn balls untangled and nearby. Good lighting is important so you can clearly see stitch placement.
Pattern 1: Classic Pastel Shell Stitch Baby Blanket
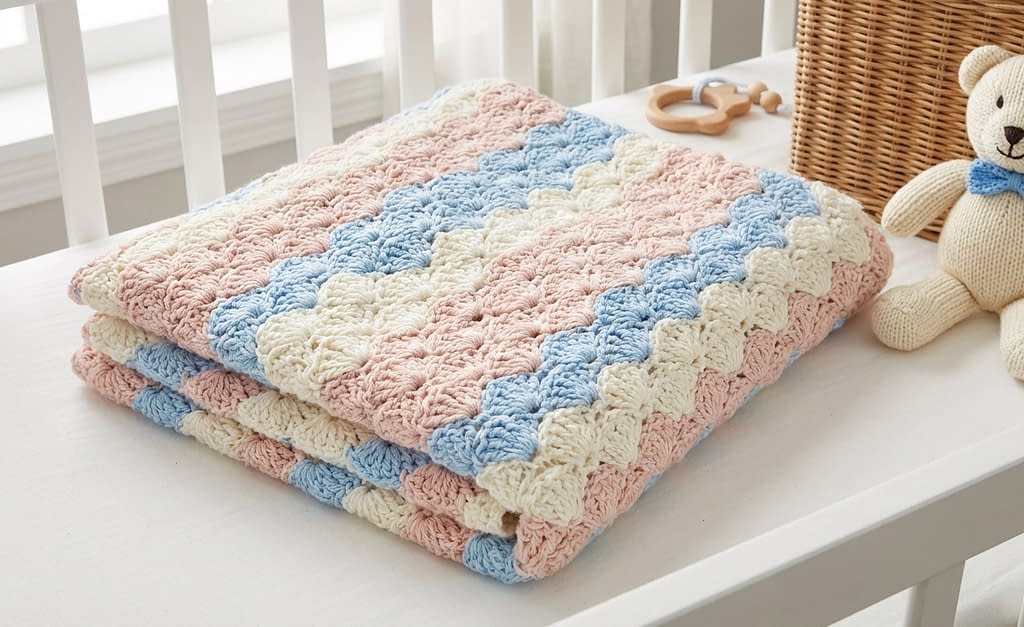
Design Overview
This classic shell stitch baby blanket uses soft pastel colors arranged in gentle waves. The evenly spaced shell clusters create a calming texture that feels cozy but breathable. This pattern is ideal for beginners because it uses a simple two-row repeat and consistent stitch placement.
Color Planning
Choose three pastel shades such as blush pink, baby blue, and creamy white. Decide whether you want wide color bands or frequent changes. Beginners are encouraged to change colors every two rows for a balanced look.
Foundation Chain Setup
Create a slip knot and place it on your hook.
Chain a multiple of 6, then add 2 extra chains for turning.
For a standard baby blanket width:
- Chain 120–150 stitches
Keep your chain loose. If the chain feels tight, restart using a larger hook just for the foundation chain.
Shell Stitch Pattern Instructions
Row 1
- Work 1 double crochet into the fourth chain from the hook
- Skip 2 chains
- Work 5 double crochets into the next chain (this forms one shell)
- Skip 2 chains
- Work 1 double crochet
- Repeat across the row
- Turn your work
Row 2
- Chain 3
- Work 2 double crochets into the first stitch
- Skip 2 stitches
- Work 1 double crochet
- Skip 2 stitches
- Work 5 double crochets into the next stitch
- Repeat across
- Turn
Repeat Rows 1 and 2 until the blanket reaches the desired length.
Changing Colors Correctly
Finish the last stitch of the old color by pulling through the new color on the final yarn-over. Cut the old yarn, leaving a tail about 10 cm long.
Never tie knots. All yarn tails must be woven in later.
Finishing and Securing Ends
After completing the final row:
- Cut the yarn
- Pull it through the last loop to fasten off
Thread each yarn tail onto a yarn needle and weave it back and forth through the stitches on the wrong side of the blanket. Trim excess only after it is fully secure.
Folding and Storage
Lay the blanket flat. Fold it lengthwise once, then fold into thirds. Store in a breathable cotton bag or drawer away from moisture.
Pattern 2: Two-Color Striped Shell Stitch Baby Blanket
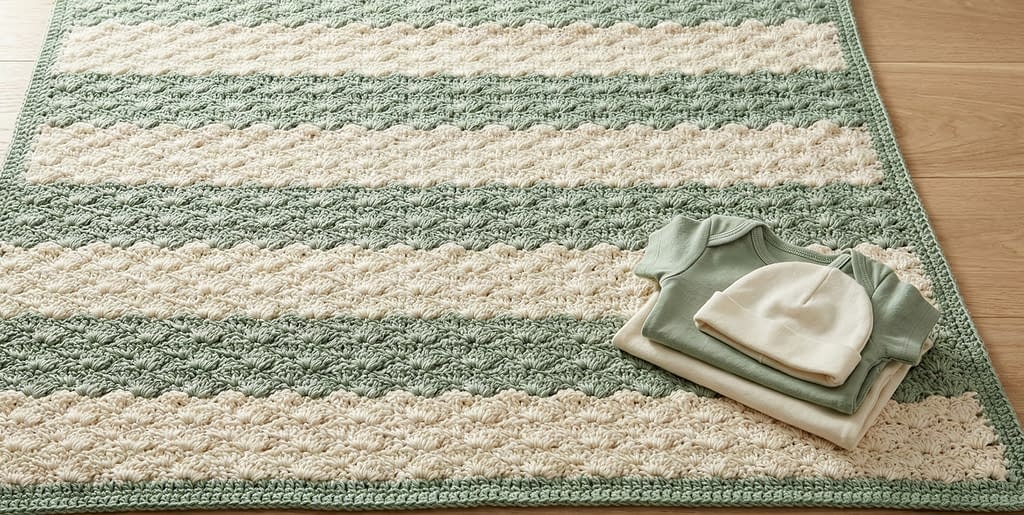
Design Overview
This pattern highlights the shell stitch texture using alternating two-color stripes. The clean color changes create a modern look while maintaining softness and flexibility.
Choosing Colors
Pick one neutral color (such as ivory) and one soft accent color (such as sage green). Avoid harsh contrasts.
Wind both yarns into separate balls before starting.
Foundation Chain
Chain a multiple of 6 plus 2, exactly as in Pattern 1. Use the lighter color for the foundation row to keep edges visually clean.
Stripe Construction Method
Work two full rows in Color A. At the end of the second row:
- Change to Color B
- Cut Color A, leaving a tail
Repeat two rows per color throughout the blanket.
Managing Yarn Ends
Keep all yarn tails on the same side of the blanket. This makes weaving easier and keeps the front tidy.
Weave in ends only after the blanket is complete to avoid distortion.
Edge Control and Shape
If the blanket begins to ripple:
- Use a smaller hook for the last few rows
- Maintain even tension, especially when switching colors
Folding and Presentation
Fold the blanket into a neat rectangle. For gifting, wrap in plain tissue paper and place in a breathable box.
Pattern 3: Shell Stitch Baby Blanket with Scalloped Border
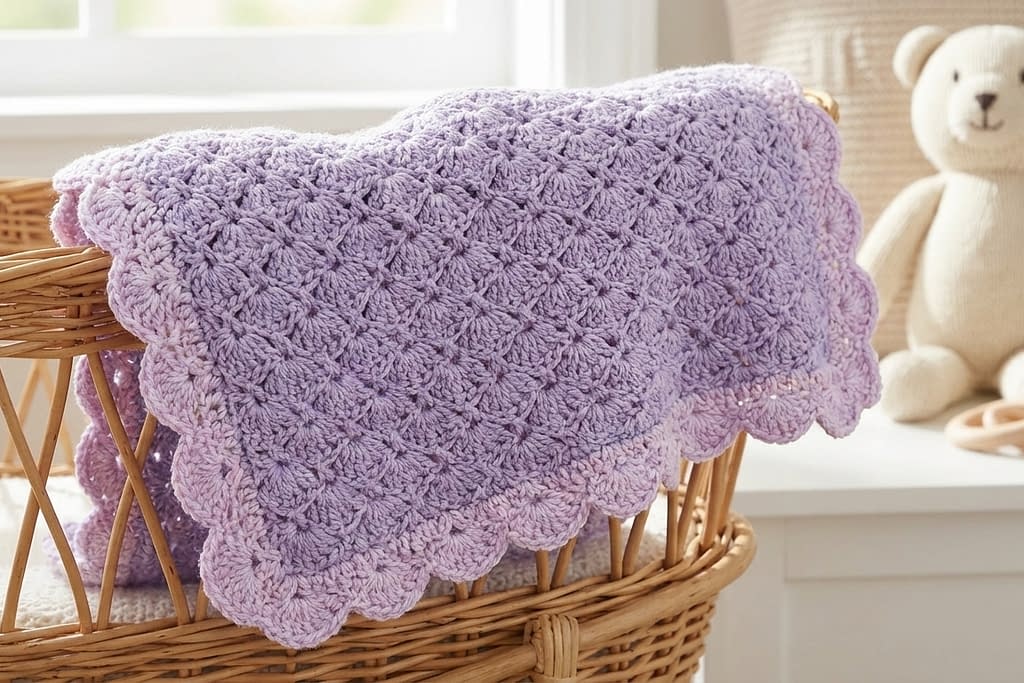
Design Overview
This design features a classic shell stitch body finished with a decorative scalloped border. The border mirrors the shell texture and gives the blanket a refined, polished edge.
Main Blanket Construction
Work the shell stitch body in a single color (such as lavender) using the same instructions as Pattern 1. Continue until the desired length is reached.
Do not fasten off after the final row. You will work the border directly onto the blanket.
Preparing for the Border
Rotate the blanket so you are working along the side edge. Evenly space stitches along the edge to prevent puckering.
Scalloped Border Instructions
Round 1
- Attach border color with a slip knot
- Work single crochets evenly around the entire blanket
- Place 3 single crochets in each corner
- Join with a slip stitch
Round 2 (Scallops)
- Skip 2 stitches
- Work 5 double crochets into the next stitch
- Skip 2 stitches
- Slip stitch into the next stitch
- Repeat around
Adjust spacing slightly if needed to keep scallops flat.
Finishing the Border
Fasten off and weave in all ends carefully along the border stitches.
Folding and Care
Fold gently to avoid flattening the scallops. Store flat when possible to preserve edge shape.
Pattern 4: Ombre Shell Stitch Baby Blanket
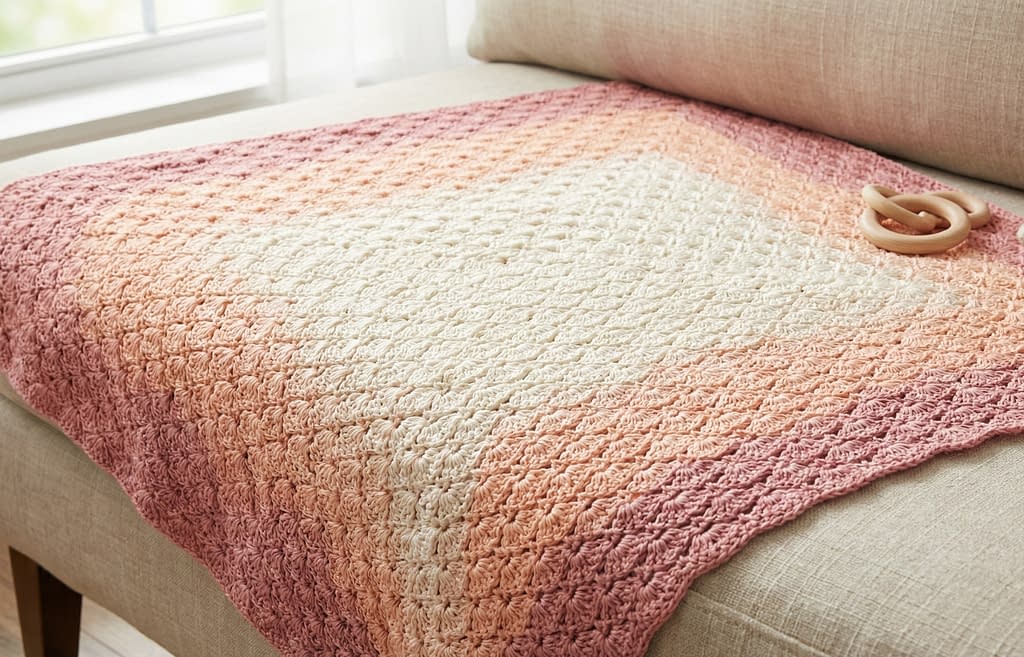
Design Overview
This blanket features a smooth ombre transition, shifting gradually from creamy white at the center to soft peach and dusty rose at the edges. The shell stitch remains the foundation, allowing colors to flow naturally while creating gentle waves across the fabric. The design is elegant, calm, and perfect for gifting or nursery decor.
Yarn Selection and Color Planning
Select three to four yarn shades that transition seamlessly. For example:
- Center: Creamy white
- Middle: Soft peach
- Outer edges: Dusty rose
Wind each color into separate balls. Make a plan for when each color will start to blend.
Foundation Chain
Chain a multiple of 6 plus 2. Use the lightest color for the foundation row to ensure smooth blending.
Shell Stitch Instructions
Follow the classic shell stitch pattern:
- Row 1: Double crochet shells across the foundation chain
- Row 2: Reverse the shell placement as usual
Continue alternating rows. Change colors gradually:
- Introduce new color by working the last double crochet of the row with the new shade
- Weave in tails as you go to avoid tangles
Blending Colors
For smooth ombre:
- Use the new color for the last 2–3 stitches of the previous color before fully switching
- This softens the visual transition
Finishing the Blanket
Once the blanket reaches desired size, fasten off and weave in all ends. Ensure the ends are hidden along shell clusters for a seamless look.
Folding and Display
Lay flat and fold into halves or thirds for storage. To display, drape diagonally over a crib rail or sofa, showing the ombre gradient.
Pattern 5: Chunky Shell Stitch Baby Blanket (Textured Look)
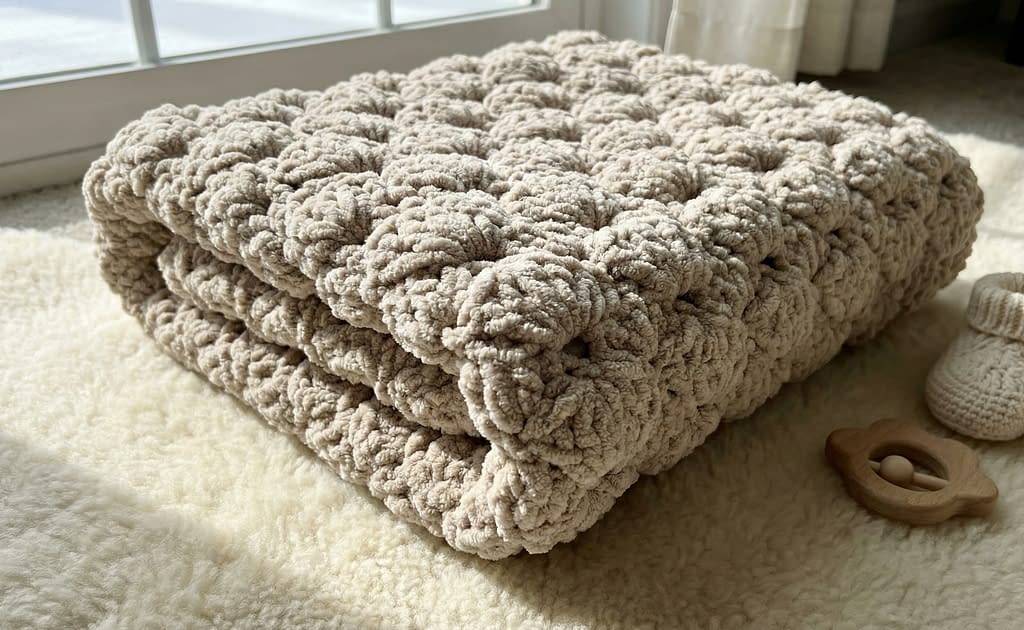
Design Overview
This version uses thick, chunky yarn to create deep, pronounced shell clusters. The resulting fabric is cushioned, plush, and extremely cozy—ideal for colder climates or a luxurious feel.
Yarn and Hook
Use chunky or super bulky yarn with a large hook (8–10 mm) to maintain stitch definition. Make sure yarn is soft and washable.
Foundation Chain
Chain a multiple of 6 plus 2. For a chunky blanket, fewer stitches are needed because stitch height is taller.
Shell Stitch Instructions
- Row 1: Work one shell cluster into every 6-chain group
- Row 2: Reverse shell placement as usual
- Repeat until the blanket reaches desired size
Tips for Chunky Yarn
- Work slowly; chunky yarn can split if stitches are too tight
- Keep consistent tension for even texture
- If the blanket begins curling, gently block it after completion by dampening and laying flat
Finishing and Weaving Ends
Cut yarn leaving a 15 cm tail. Pull through last loop, then weave in all ends along the back of shells. The bulky yarn makes it easy to hide ends.
Folding and Storage
Fold gently to maintain shell depth. Store flat or rolled loosely to avoid flattening the texture.
Pattern 6: Shell Stitch Baby Blanket with Floral Center Accent
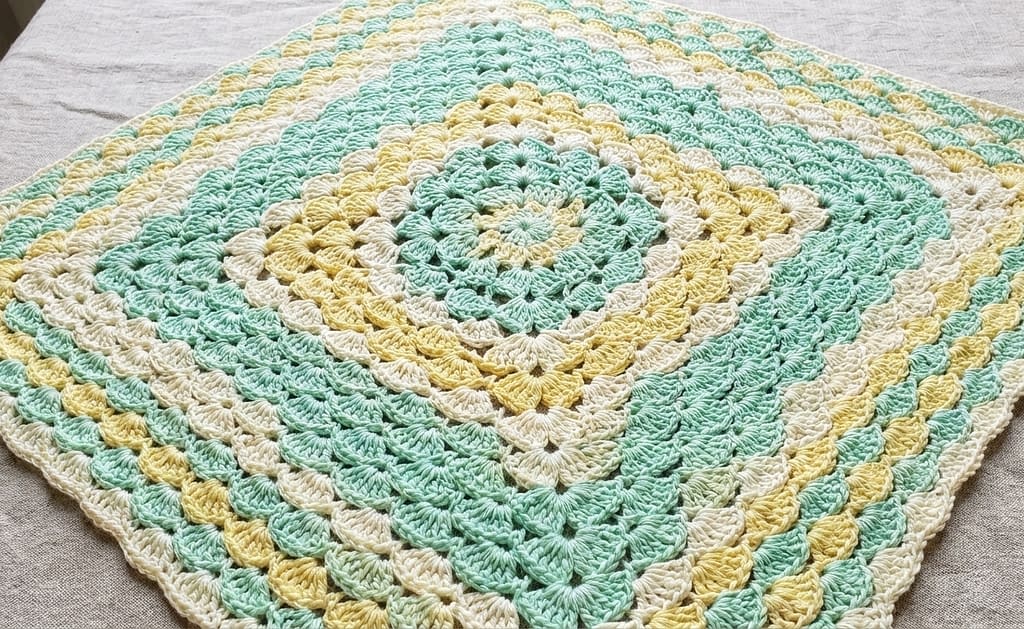
Design Overview
This blanket features a subtle floral-inspired motif at the center, surrounded by traditional shell stitch rows. The circular center gives a decorative focal point while the shells provide warmth and flexibility.
Yarn Selection
Use lightweight, smooth yarn in 3 complementary colors. Suggested palette:
- Center: Mint green
- Petal detail: Pale yellow
- Outer shells: White
Center Motif Construction
- Begin with a magic ring
- Work 12 double crochets into the ring
- Chain 3, skip 1 stitch, shell into the next stitch
- Continue around until the circle expands to desired center size
Shell Stitch Body
Once the floral center is complete:
- Begin working horizontal shell stitch rows outward
- Maintain consistent stitch spacing to ensure the blanket remains flat
Color Changes
- Change color at the beginning of a row
- Cut old yarn leaving 10 cm tail for weaving
Finishing
Fasten off after desired size is reached. Weave in all ends along both the floral motif and shell stitch body.
Folding and Use
Fold blanket from sides toward center, keeping the floral motif visible. Ideal for gifting or as a display piece in a crib.
Pattern 7: Neutral Shell Stitch Baby Blanket (Gender-Neutral Design)

Design Overview
This neutral shell stitch baby blanket is perfect for a minimalist, gender-neutral nursery. Using warm beige and soft gray tones, the blanket emphasizes subtle texture over bright color, making it versatile for any baby’s room. The gentle wave-like shell stitch creates a soft, breathable fabric that is cozy yet lightweight. This pattern is ideal for parents or crafters who want a timeless, modern design that pairs easily with other nursery decor.
Yarn Selection
For this blanket, choose soft, baby-safe yarn in neutral shades. Recommended options:
- Medium-weight cotton or cotton-blend yarn for breathability and durability
- Soft acrylic yarn for easy care and machine-washable convenience
- Colors: light beige for the main color and soft gray for accent rows or borders
Wind each color into separate balls before beginning to prevent tangling during color changes.
Tools
- Crochet hook appropriate for your yarn (usually 4.5 mm–5.5 mm)
- Scissors for trimming yarn
- Yarn needle for weaving in ends
- Measuring tape to track width and length
- Stitch markers (optional for keeping track of rows)
Foundation Chain
- Chain a multiple of 6, then add 2 extra chains for turning.
- Keep the chain loose to prevent the edges from curling.
- For a standard baby blanket, aim for 120–150 chains depending on the desired width.
Shell Stitch Body
Row 1
- Start in the fourth chain from the hook.
- Work 1 double crochet, skip 2 chains, then work 5 double crochets into the next chain (forming a shell).
- Skip 2 chains, work 1 double crochet, and repeat across the row.
- Turn your work.
Row 2
- Chain 3 to begin.
- Work 2 double crochets into the first stitch.
- Skip 2 stitches, work 1 double crochet, skip 2 stitches, work 5 double crochets into the next stitch.
- Repeat across the row and turn.
Continue repeating these two rows until the blanket reaches the desired length, keeping tension consistent. The shells should form neat wave-like clusters that give the blanket texture without bulking it up.
Adding Accent Rows (Optional)
For visual interest, alternate every 6–8 rows with the soft gray yarn:
- Join the accent color at the beginning of a row by pulling it through the last loop of the previous stitch.
- Work two rows in the accent color using the shell stitch.
- Switch back to the main beige color after two rows.
Make sure to leave yarn tails 10–12 cm long for weaving in. Do not knot yarns.
Border Finishing
Once the blanket reaches your preferred size, add a simple border to stabilize edges:
- Round 1: Single crochet evenly around the entire blanket. Place 3 single crochets in each corner to maintain a square or rectangular shape.
- Round 2: Create small shell scallops along the border by skipping 2 stitches and working 5 double crochets into the next stitch. Repeat around.
Adjust stitch spacing slightly if corners or sides start to ripple. The border gives a polished, professional finish to the blanket.
Securing and Weaving Ends
- Cut yarn after completing the border, leaving a 15 cm tail.
- Thread all yarn tails through a yarn needle and weave them into the back of the stitches along the border or shell rows.
- Check that all ends are fully secured to prevent unraveling during washing or use.
Folding, Storage, and Gift Presentation
- Lay the blanket flat on a clean surface.
- Fold lengthwise once, then fold into thirds to form a neat rectangle.
- If gifting, wrap in plain tissue paper or a cotton drawstring bag to keep it clean.
- Store folded in a dry area, or drape over a crib or chair for decorative display.
Tips for Maintaining Neutral Designs
- Wash the blanket in cold water on a gentle cycle to prevent color fading.
- Avoid harsh detergents or bleach, which can damage natural yarn fibers.
- Block the blanket occasionally to keep shell stitches flat and edges even.
This neutral shell stitch baby blanket combines subtle style with practical functionality, making it a timeless piece that works in any nursery or as a thoughtful, handmade gift.
Conclusion
Crochet shell stitch baby blankets combine elegance, texture, and functionality, making them cherished handmade items. Across these 7 patterns, you have explored:
- Classic pastel waves for a timeless look
- Two-color stripes for a modern style
- Scalloped edges for refined detail
- Ombre gradients for artistic color flow
- Chunky textures for warmth and plush comfort
- Floral center accents for decorative focus
- Neutral, gender-neutral options for versatility
Each blanket follows the core shell stitch principle but demonstrates how variations in color, yarn weight, and edging techniques can dramatically change the appearance and feel. By following these detailed, beginner-friendly instructions, you can create blankets that are not only beautiful but durable, practical, and safe for babies. Careful attention to color changes, weaving in ends, and proper folding ensures your finished blanket will look polished, be gift-ready, and provide years of cozy comfort.
These patterns serve as both a practical guide and a source of creative inspiration, allowing crocheters of all skill levels to explore the endless possibilities of the shell stitch.


