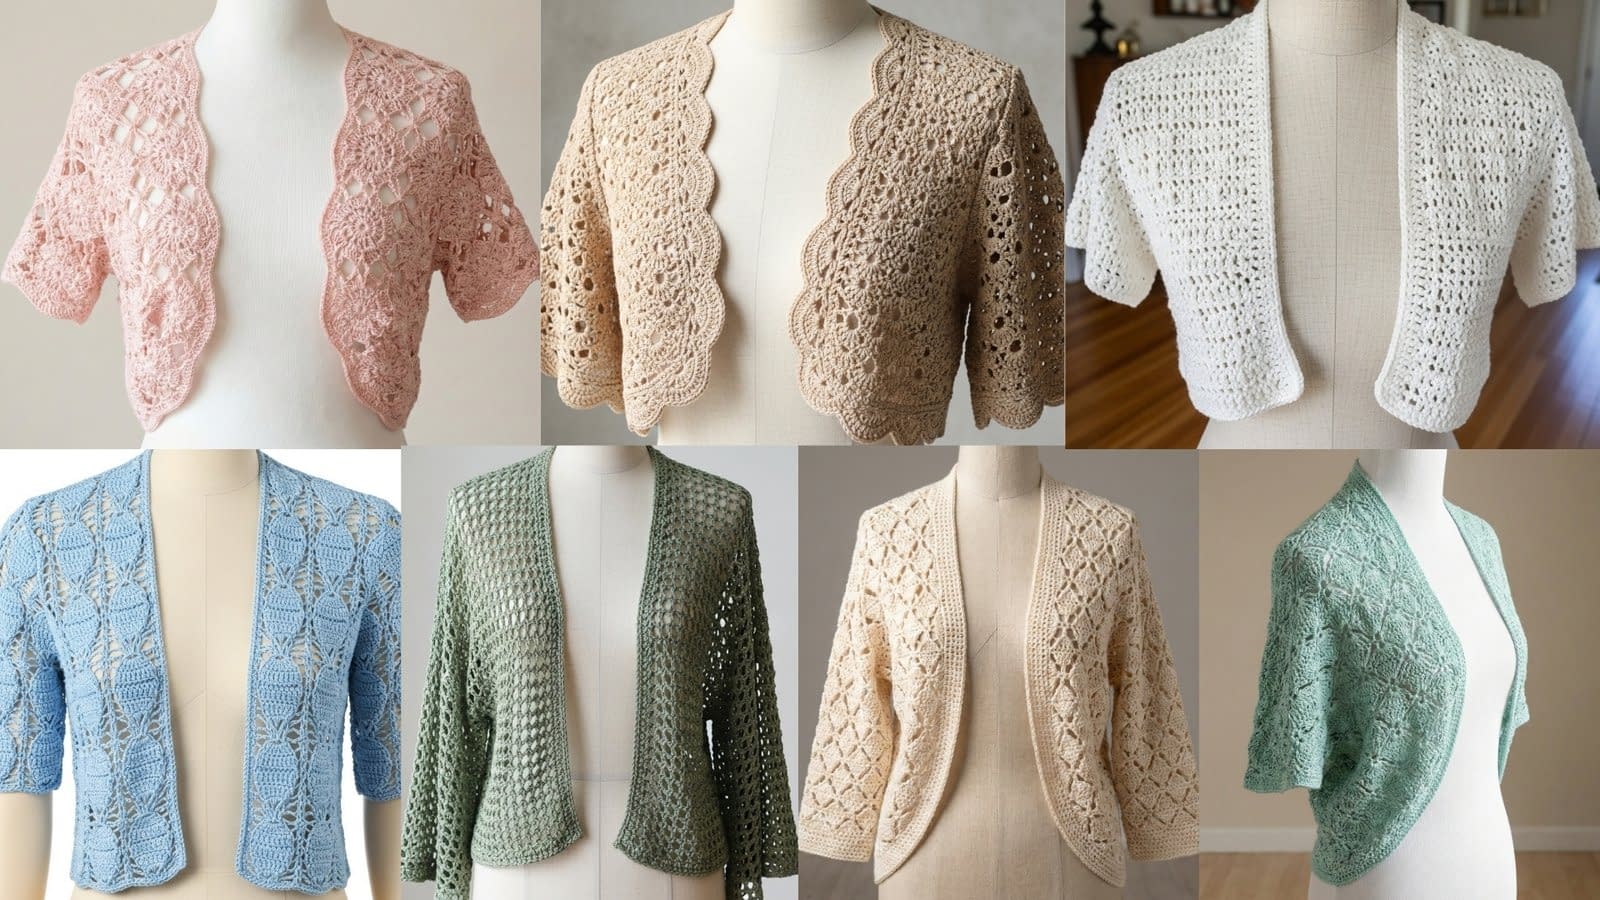
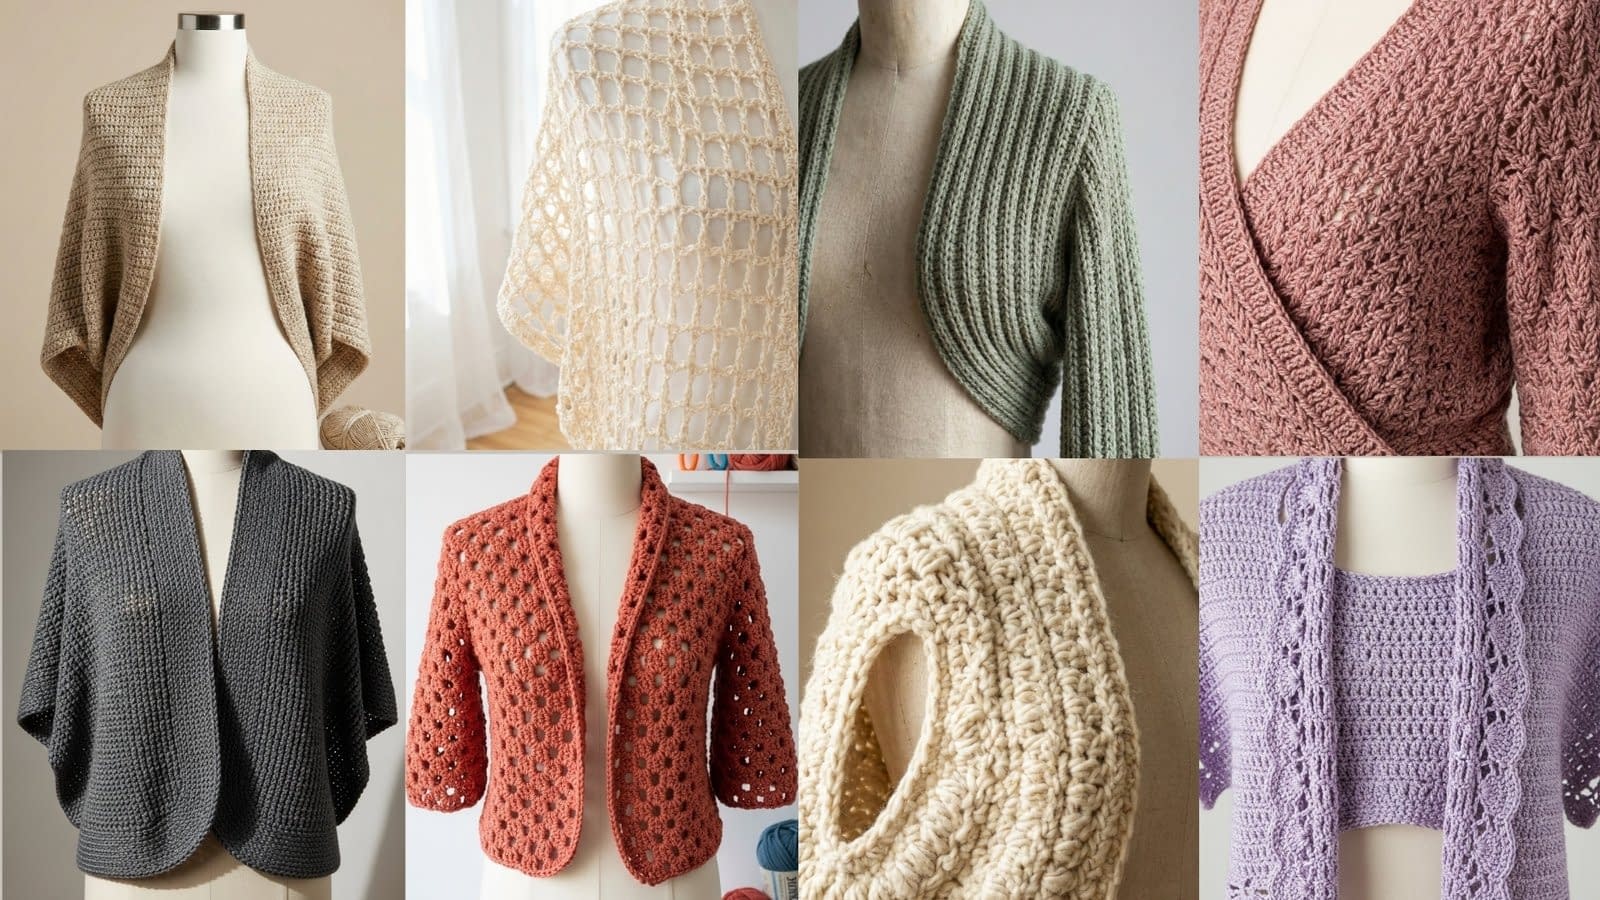
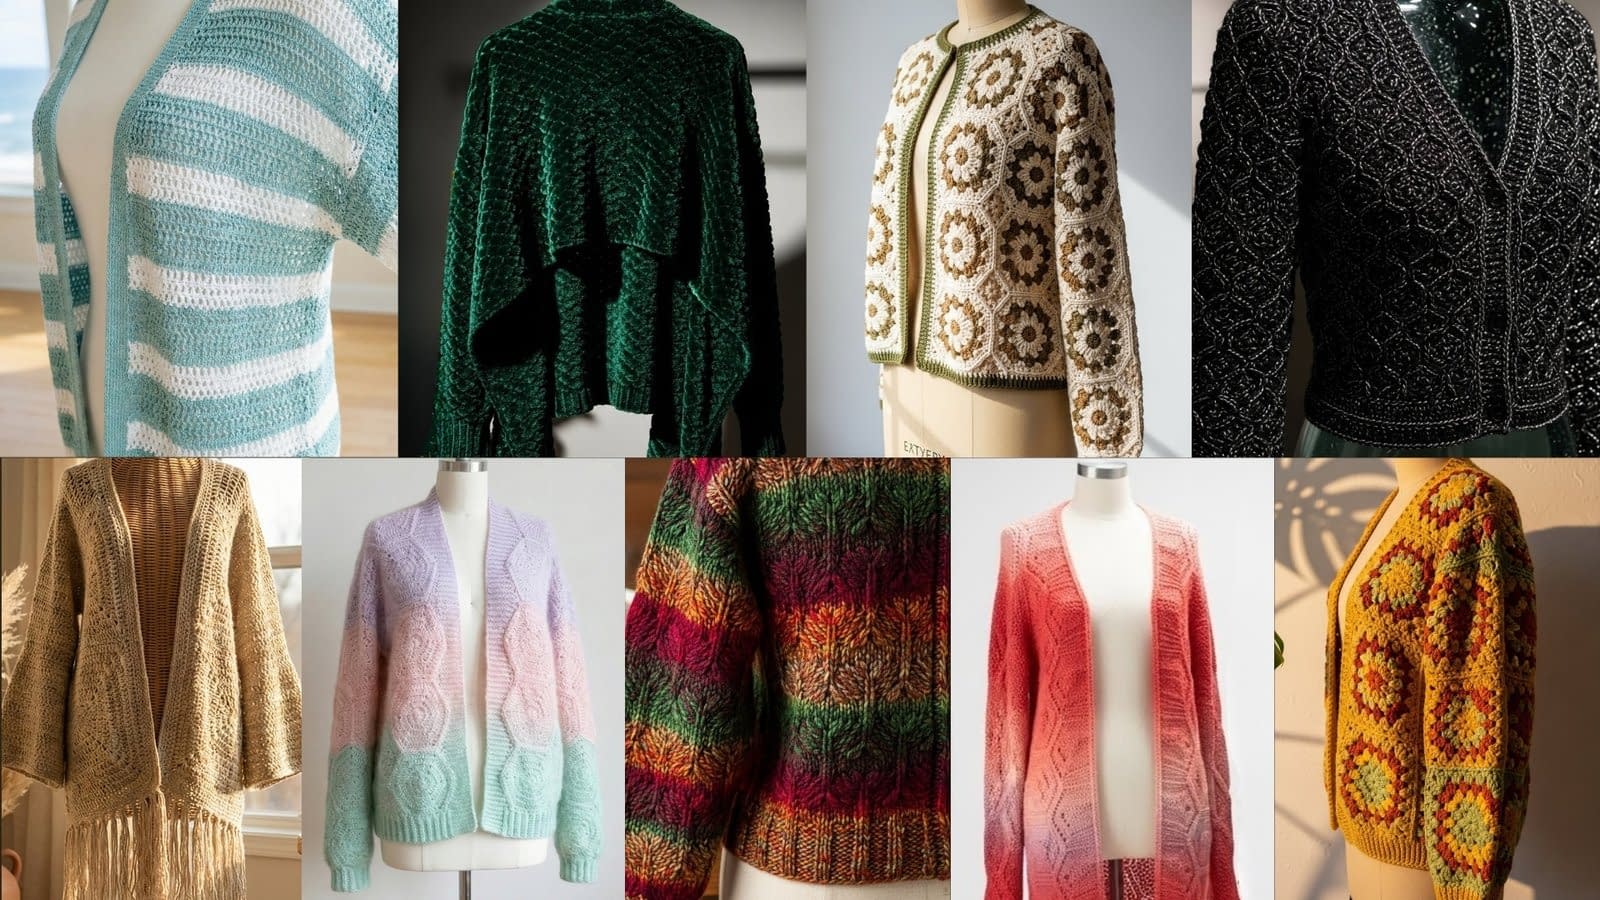
Knit tank tops are versatile wardrobe staples that travel easily from casual weekends to layered office looks. Whether you prefer a body-hugging ribbed silhouette, an airy lace yoke, an athletic racerback, or a flirty cropped cami, mastering a few reliable tank top patterns will expand your handmade wardrobe significantly. This post, titled 7 Basic Knit Tank Top Patterns, begins with four complete, highly detailed pattern tutorials that walk you through every step: materials and gauge, size options, full row-by-row instructions, shaping, and finishing. Each pattern is written with clarity for knitters who identify as beginner to intermediate, with careful explanations of stitch techniques and constructive tips for tailoring fit.
Read each pattern fully before you cast on. Swatching and checking gauge are essential for accurate fit. If a specific measurement or shaping looks unfamiliar, follow the step-by-step sections under each pattern and consult the finishing and troubleshooting sections near the end of this article. When you are ready, you may ask me to continue with the remaining three patterns.
General materials, tools, and terminology
Before beginning any tank pattern, gather consistent tools and learn the terminology used throughout the tutorials. This section explains the materials and the knitting techniques that the patterns rely upon.
Materials and tools (general)
- Yarn: All patterns in this post are designed for sport-weight or light worsted yarns as noted in each pattern. Substitute yarns of similar weight and fiber content will change drape and gauge; always swatch.
- Needles: Circular needles in the size recommended for the yarn and gauge. Circular needles allow easy handling of larger stitch counts and permit working flat or in the round as specified. Also have a set of double-pointed needles on hand for very small circumferences if needed.
- Stitch markers: Smooth markers for marking beginning of round or shaping points.
- Tapestry needle: For weaving in ends and mattress stitching seams where required.
- Tape measure and ruler: For measuring gauge swatches and project dimensions.
- Blocking tools: Blocking mats and rust-free pins or blocking wires.
- Optional: Row counter, stitch holders or scrap yarn, and a small ball of contrasting yarn for provisional cast-on if the pattern requires it.
Terminology and stitch explanations
This post uses full stitch names and descriptive instructions rather than abbreviations. Below are the essential stitches and techniques used in the patterns:
- Cast on: The method of placing the initial stitches on the needle. Use the long-tail cast-on or the cast-on method you prefer.
- Knit stitch: Insert the right-hand needle into the front of the next stitch from left to right, wrap the working yarn around the right-hand needle, draw the loop through, and slip the original stitch off the left-hand needle to form a knit stitch.
- Purl stitch: Bring the working yarn to the front of the work, insert the right-hand needle into the next stitch from right to left, wrap the working yarn around the right-hand needle, draw the loop through, and slip the original stitch off the left-hand needle to form a purl stitch.
- Stockinette stitch: One row or round of knit stitches followed by one row of purl stitches when working flat; in the round, stockinette stitch is achieved by knitting every stitch.
- Ribbing: Alternating knit and purl stitches within a row to create a vertically elastic fabric. For two-by-two ribbing, knit two stitches followed by purl two stitches for the width of the pattern repeat.
- Increase: Add extra stitches to shape the fabric. Common increases include knitting into the front and back of the stitch and a make-one increase worked by lifting the strand between stitches and knitting into it.
- Decrease: Reduce the number of stitches to shape the fabric. Common decreases include knitting two stitches together and slip-slip-knit.
- Bind off: The method of finishing stitches to prevent unravelling by passing one stitch over the next.
- SSK (slip, slip, knit): Slip two stitches knitwise one at a time to the right-hand needle, insert the left-hand needle into the fronts of the two slipped stitches and knit them together through the back loops to produce a left-leaning decrease. Full instructional description given in-step where SSK is used.
- Mattress stitch: A seaming technique used to join pieces with an invisible finish. Instructions are given in the finishing sections.
Swatching and gauge
Swatch before starting every pattern. Work a swatch large enough to measure accurately: a square of at least four inches by four inches in the main stitch pattern, blocked the same way you plan to block the finished garment. Measure the number of stitches across four inches and the number of rows across four inches, then calculate how many stitches you need for the desired garment measurements. Adjust needle size if gauge differs.
Pattern 1: 2×2 Ribbed Fitted Tank
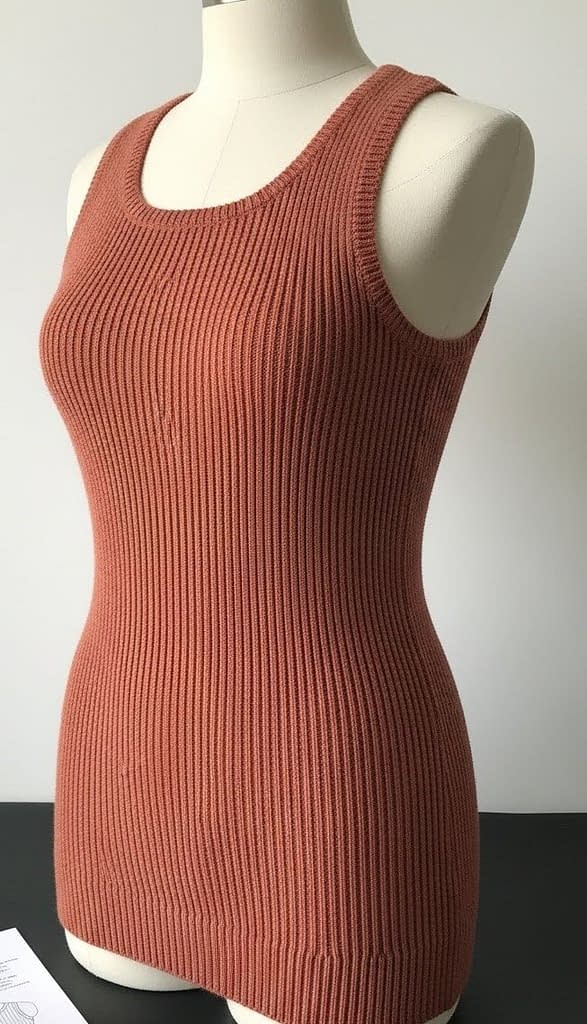
Skill level
Beginner to intermediate. This pattern uses simple shaping and finishing, with emphasis on ribbed tension and clean armhole edges.
Finished measurements
This pattern is written for three sizes: Small (Medium, Large). Finished bust circumference when worn with slight negative ease for a fitted silhouette is approximately:
- Small: 32 inches
- Medium: 36 inches
- Large: 40 inches
Length from shoulder to hem is approximately 20 inches for the base pattern. Feel free to shorten for a cropped fit or lengthen into a tunic.
Materials
- Yarn: Sport-weight merino-blend yarn. For Small: 600 yards; Medium: 700 yards; Large: 800 yards.
- Needles: One circular needle sized to achieve the gauge; suggested starting size is 4.0 millimeter (size US 6) circular needle, 24 to 32 inches in cable length depending on preference.
- Stitch markers, tapestry needle, tape measure, and blocking supplies.
Gauge
Ribbed fabric has vertical stretch; measure gauge in two-by-two ribbing after blocking.
- Gauge: 22 stitches and 30 rows in two-by-two ribbing = 4 inches by 4 inches.
Adjust needle size to match gauge.
Notes and design overview
This tank is worked flat from the bottom hem to the armholes in a two-by-two rib pattern to produce a body-hugging fit. The front and back are shaped identically until the armhole bind-off; then the front neckline is shaped slightly to create a gentle scoop. The rib pattern provides vertical elasticity that conforms to the body, so negative ease of 1 to 3 inches is recommended for a fitted look. If you prefer a less fitted style, increase finished bust measurements by 2 to 4 inches.
Instructions — Back panel
- Cast on the number of stitches required for your size to create the back width. Using the gauge of 22 stitches = 4 inches, calculate the number of stitches for your target back width. For the purpose of guided instruction, the pattern provides cast-on numbers for three sizes:
- Small: cast on 176 stitches.
- Medium: cast on 198 stitches.
- Large: cast on 220 stitches.
- Work ribbing for the hem.
- Row 1: Knit two stitches, purl two stitches across until the end of the row.
- Continue working two-by-two ribbing for twelve rows to form a stable hem. This will create a neat edge and prevent rolling.
- Establish body in rib.
- After completing the hem ribbing, continue in two-by-two ribbing for the body, maintaining the established pattern and ensuring that each knit column remains stacked over the knit column from the hem if that is visually important to you. Continue until the panel measures approximately 14 inches from the cast-on edge to the point where you will begin armhole shaping. This measurement can be adjusted for torso length.
- Begin armhole shaping.
- To create clean armholes without disturbing the vertical rib, bind off stitches at the beginning of the next two rows as follows:
- Bind off 5 stitches at the beginning of the next two rows to form a gentle armhole slope.
- After the initial bind-offs, decrease one stitch at each armhole edge every other row until the armhole height measures approximately 8 inches from the first bound-off stitch or until the desired armhole depth is reached. Perform decreases as follows:
- Right-side decrease row: work rib pattern until three stitches remain before the armhole edge, then knit two stitches together through the back loop to maintain the rib texture, and complete the row.
- Left-side decrease row: on the next decrease row, slip one stitch knitwise, knit the following stitch, then pass the slipped stitch over the knit stitch to form a left-leaning decrease that preserves the rib alignment.
- Continue paired decreases on both sides until the total number of stitches decreased equals 10 additional stitches per side beyond the initial bind-off, or until the armhole height equals eight inches.
- To create clean armholes without disturbing the vertical rib, bind off stitches at the beginning of the next two rows as follows:
- Work to shoulder shaping.
- After the armhole shaping is complete, continue in rib until the total length from cast-on to the shoulder is 18 inches for the small size, 18.5 inches for the medium size, and 19 inches for the large size, or until you reach your desired shoulder point. Measure from the hem.
- Shoulder bind-offs.
- Divide the stitches into two shoulder sections and a back neck section. For the small size, a suggested division is 44 stitches for the left shoulder, 88 stitches for the neck, and 44 stitches for the right shoulder. Adjust proportions for medium and large accordingly by maintaining shoulder widths approximately 3.5 to 4 inches per shoulder.
- Bind off the shoulder stitches in two stages to create a gentle shoulder slope. For example:
- Bind off the first 22 shoulder stitches at the beginning of the next two right-side rows, then bind off the remaining shoulder stitches on the following right-side rows to create a stepped slope. Repeat for the opposite shoulder.
- When both shoulders are bound off, transfer the center neck stitches to a stitch holder or scrap yarn for later finishing if you are working flat.
Instructions — Front panel
- Cast on the same number of stitches as the back and work the hem ribbing exactly as you did for the back.
- Continue body ribbing until the front panel measures the same length as the back to the start of the armhole shaping. This ensures that armhole edges align.
- Work armhole shaping identically to the back.
- Front neckline shaping.
- When the armhole height reaches approximately 6 inches—for a slightly lower front neckline—begin shaping the neck as follows:
- Place the center 20 stitches on a stitch holder for a shallow scoop or place more stitches on the holder for a deeper scoop. For the sample sizes:
- Small: hold center 20 stitches.
- Medium: hold center 22 stitches.
- Large: hold center 24 stitches.
- Place the center 20 stitches on a stitch holder for a shallow scoop or place more stitches on the holder for a deeper scoop. For the sample sizes:
- Work each side of the neckline separately. At the neck edge, decrease one stitch every other row three to five times to shape the scoop. Use left-leaning and right-leaning decreases that preserve rib alignment:
- Right-side neckline shaping: on right-side rows, knit two stitches together through the back loop at the neck edge to form a right-leaning decrease while maintaining the rib columns.
- Left-side neckline shaping: on right-side rows, slip-slip-knit at the neck edge to form a left-leaning decrease.
- Continue until the neckline reaches the depth you prefer. Keep shoulder lengths consistent with the back so that the shoulder bind-offs match.
- When the armhole height reaches approximately 6 inches—for a slightly lower front neckline—begin shaping the neck as follows:
- Finish shoulder bind-offs as for the back panel, mirroring the steps to maintain symmetry.
Finishing
- Block both front and back panels gently to shape and open the ribbed fabric slightly.
- Align side seams and mattress stitch the side edges from hem up to the underarm. Because the rib is elastic, use a loose tension for seaming so the seam does not become rigid.
- Sew the shoulder seams with mattress stitch, matching the rib columns across the seam as closely as possible.
- Neck and armhole finishing.
- For clean armhole edges, pick up stitches evenly around the armhole on a circular needle and work two to three rounds of two-by-two ribbing, then bind off loosely in pattern to allow elasticity.
- For the neckline, pick up stitches around the neck and work two to three rounds of two-by-two ribbing. If you prefer a narrow facing, pick up fewer stitches and work one round of ribbing followed by a stretchy bind-off.
- Weave in ends and block gently once more to settle stitches.
Customization notes
- To reduce bust shaping pressure, add an inch or two to the cast-on count.
- To convert this pattern to a seamless version, work in the round to the armholes and then divide for armholes, working each piece flat. Adjust decreases for continuity of rib columns.
Pattern 2: Lace-Yoke Knit Tank
Skill level
Beginner to intermediate. The lace yoke requires familiarity with yarn overs and paired decreases. The body is worked in stockinette stitch for simplicity.
Finished measurements
This pattern is written for Small (Medium, Large). Approximate finished bust circumference:
- Small: 34 inches (for slightly positive ease)
- Medium: 38 inches
- Large: 42 inches
Length from shoulder to hem is approximately 21 inches.
Materials
- Yarn: Lightweight cotton-linen sport-weight yarn. For Small: 700 yards; Medium: 800 yards; Large: 900 yards.
- Needles: Circular needle sized to obtain gauge; suggested starting size 4.0 millimeter (US 6).
- Stitch markers, tapestry needle, blocking tools.
Gauge
- Gauge: 20 stitches and 28 rows in stockinette stitch = 4 inches by 4 inches after blocking.
Work a lace swatch to ensure the lace pattern opens as intended.
Notes and design overview
This tank features an airy lace panel across the upper chest and shoulders that transitions into a smooth stockinette stitch body. The lace yoke provides delicate breathability and visual interest without compromising structure. The pattern is worked flat; however, you may work the body in the round and pick up onto circular needles for the lace yoke if you prefer circular knitting and a seamless side.
Lace pattern
The lace used in this tutorial is a short and repeatable six-row chart that creates a delicate diamond motif. The lace pattern uses yarn overs to create openness and paired decreases to maintain stitch count. Work the lace pattern over a multiple of eight stitches plus two border stitches.
Provide a textual lace repeat for clarity:
- Lace row one, right-side: Knit two for selvage, then repeat across: knit one, yarn over, knit two together, knit two, slip-slip-knit, yarn over, knit one. End with knit two for selvage.
- Lace rows two, four, and six, wrong-side: Purl all stitches, maintaining yarn overs as purl bumps.
- Lace row three, right-side: Knit across, working yarn overs and decreases as they present.
- Lace row five, right-side: Knit two for selvage, then repeat across: yarn over, knit one, slip-slip-knit, knit two together, knit two together, knit one, yarn over. End with knit two for selvage.
Note: Follow the written repeat carefully and practice a lace swatch before starting the yoke.
Instructions — Lower body (worked first for this pattern)
- Cast on the number of stitches required for the lower body to achieve the desired bust circumference with positive ease. For convenience, the pattern uses multiples that accommodate the lace repeat when the yoke is joined later. Suggested cast-on counts:
- Small: cast on 160 stitches.
- Medium: cast on 176 stitches.
- Large: cast on 192 stitches.
- Hem and body.
- Work two inches of one-by-one ribbing if you desire a neat hem. One-by-one ribbing is created by alternating knit one, purl one across the row.
- After the hem, switch to stockinette stitch and work until the body measures approximately 6 inches below the underarm or until your preferred length before the lace yoke begins. The body will be joined to the lace yoke later when assembling the front and back.
- Shape the side seams.
- If you plan to seam the sides, continue until the body measures the full length to the underarm. If you prefer a tapered waist, decrease one stitch at each side every eight rows two to four times.
- Set aside the lower body panels or continue working as part of combined construction depending on the assembly method you choose. For simplicity, this pattern instructs working the lower body panels for front and back separately.
Instructions — Lace yoke and upper shaping
- Work two identical lace yoke panels for the front and back of the tank, or work a single long lace yoke that will be joined at the shoulders; both methods are described here.
- To work a separate front lace yoke panel, cast on the number of stitches that correspond to the upper chest width. The lace repeat requires a multiple of eight stitches plus two border stitches. For example:
- Small front yoke: cast on 82 stitches.
- Medium front yoke: cast on 90 stitches.
- Large front yoke: cast on 98 stitches.
- Work the lace pattern as described across the desired yoke height, typically 3 to 4 inches for an airy look. Repeat the lace motif until the yoke reaches the measurement from the upper chest to the top of the shoulder, usually approximately 6 inches from the underarm to the shoulder for most sizes; measure on the body for accuracy.
- Join lace yoke to body.
- If you worked the lower body and lace yoke separately, you will now join the lower body to the lower edge of the lace yoke. Align the lace panel with the top of the stockinette body, matching stitch counts carefully.
- Use an invisible join or grafting method if you prefer a seamless connection. Alternatively, use mattress stitch to seam the knit fabric to the lace panel. Be mindful to avoid stretching the lace panel while seaming.
- For a single yoke worked across the full width, pick up stitches evenly across the top of the body panels and work the lace in the round or flat as desired. When working in the round for the yoke, take care to maintain pattern repeats and place stitch markers at repeat boundaries.
Instructions — Armhole and shoulder shaping
- After the lace yoke is attached to the body, shape the armholes by binding off a small number of stitches at the underarm area. A suggested bind-off is four stitches at each underarm edge.
- Continue the lace pattern or stockinette to the shoulder. If the lace continues to the shoulder edge, maintain the motif and then bind off shoulder stitches to form the slope. For the front, shape the neckline by setting aside center stitches and working each side separately as in the ribbed tank, but allow the lace to form a gently scalloped neckline if desired.
- To preserve the lace motif at the neckline, consider binding off with a decorative edge such as a picot bind-off or work a small applied i-cord along the neckline for a neat finish.
Finishing
- Block the lace thoroughly to open the lace motif and even the fabric. Use blocking wires if available to produce straight edges.
- Seam the side seams using mattress stitch.
- For armhole and neckline finishing, pick up stitches around the armhole and work two rounds of single crochet or a narrow rib to stabilize the opening. If you prefer a softer edge, work a row of slip stitches in the round followed by a decorative picot edge.
- Weave in ends and press lightly, avoiding excessive heat when working with cotton-linen blends.
Variations
- Shorten the body to create a cropped lace-yoke cami that pairs easily with high-waisted skirts.
- Add a lining or a lightweight interfacing to the stockinette body for extra modesty while retaining the open lace yoke.
Pattern 3: Racerback Sport Knit Tank
Skill level
Beginner to intermediate. This pattern emphasizes shaping for an athletic silhouette and requires attention to the racerback curve and armhole finish.
Finished measurements
- Small: finished bust 36 inches for comfortable fit.
- Medium: finished bust 40 inches.
- Large: finished bust 44 inches.
Length from shoulder to hem: approximately 22 inches.
Materials
- Yarn: Smooth nylon-blend sport-weight yarn for structure and recovery. Small: 650 yards; Medium: 750 yards; Large: 850 yards.
- Needles: Circular needle sized to obtain gauge; suggested starting size 4.0 millimeter (US 6).
- Stitch markers, tapestry needle, blocking supplies.
Gauge
- Gauge: 22 stitches and 30 rows in stockinette stitch = 4 inches by 4 inches after blocking.
Notes and design overview
The racerback tank offers an athletic silhouette with a narrower back and prominent shoulder shaping to keep straps centered while allowing a full range of motion. The pattern uses alternating micro-rib panels to provide breathability and slight compression. The tank may be worked seamlessly in the round to the underarm and then separated into front and back panels for shaping.
Instructions — Working the tank in the round to the underarms
- Cast on the number of stitches required for your size to create the full circumference at the lower hem. Suggested cast-on numbers based on gauge:
- Small: cast on 176 stitches.
- Medium: cast on 196 stitches.
- Large: cast on 216 stitches.
- Hem and lower body.
- Work three inches of one-by-one ribbing to form a stable hem.
- After the hem, transition to the alternating micro-rib pattern across the body. For example, alternate sections of knit two, purl two ribbing with sections of stockinette to create subtle micro-ribbed panels. Continue this pattern until the piece measures approximately 14 inches from the cast-on edge to the underarms.
- Divide for armholes and shape the upper body.
- At the underarm, divide the work into front and back. Place front stitches on one needle and back stitches on another if working in the round; you will now work the front and back separately in flat rows to shape the racerback and neckline.
- For each side seam, bind off a small number of stitches at the beginning of the next two rows, typically five stitches per side, to start the armhole curve. Continue decreasing one stitch at each side every other row for three to five times as needed to shape the armhole slope.
Instructions — Back shaping for racerback curve
- The racerback narrowing begins once armhole shaping has created the underarm curve. For the back panel, continue working the micro-rib pattern while decreasing at the center back to create the narrow racerback shape.
- To create the racerback, decrease at the center back as follows:
- On the first right-side row after separating the back panel, work the micro-rib pattern until 10 stitches remain at the center back, then knit two stitches together to draw the fabric inward. Place a marker at the center back.
- On subsequent right-side rows, decrease one stitch on each side of the center back marker every fourth row until the back width equals approximately the shoulder strap width you desire, usually 4 to 5 inches across at the narrowest point.
- Once the racerback reaches the target narrow width, bind off the center section for the neck opening, leaving remaining stitches on shoulder sections to be bound off later after matching to the front panel.
- Shape the top of the shoulder with a small bind-off to create a slope. Bind off the shoulder stitches in two stages, for example binding off half the shoulder stitches at the beginning of one row and then binding off the remaining half two rows later to form a gentle slope.
Instructions — Front shaping and neckline
- Work the front panel flat and maintain the micro-rib panels so the vertical texture lines remain aligned with the back.
- When you reach the point where the racerback will meet the front shoulder, shape a slightly lower neckline by placing central stitches on hold and working each side separately. Decrease at the neck edge every other row two to four times to achieve a scoop or V-neck shape depending on preference.
- Ensure that the shoulder slopes on the front match those on the back in terms of length and bind-off style for a seamless join.
Finishing
- Block each piece to open the stitch structure and ensure consistent measurements.
- Seam the side seams using mattress stitch. Because this tank is athletic and may be worn close to the body, use a seaming tension that preserves elasticity.
- Sew the shoulder seams, aligning the racerback edges with the front shoulder slopes.
- Pick up stitches around the armholes and work two rounds of one-by-one ribbing for a clean, compressive finish. Bind off loosely in pattern.
- For the neckline, pick up stitches and work a narrow rolled edge or a single round of slip stitches followed by a decorative bind-off that retains elasticity.
- Weave in ends neatly and block once more if desired.
Fit and performance notes
- Nylon-blend yarn provides recovery and helps the tank retain its shape under movement. Avoid overly heavy yarns to maintain breathability.
- For enhanced support, consider working a narrow band of elastic thread held together with the yarn across the lower hem if the tank will be worn for high-intensity activity.
Pattern 4: Cropped Knit Cami Tank
Skill level
Beginner. This pattern is straightforward and focuses on short length, narrow straps, and neat edge finishing.
Finished measurements
This cropped cami is intended to sit at the natural waist or slightly above depending on body length. Finished bust measurement for the base size is approximately 34 inches with options to increase or decrease by altering cast-on count.
Length from shoulder to hem is approximately 15 inches in the base version. To convert to full length, add the required number of stockinette inches.
Materials
- Yarn: Cotton sport-weight yarn. For base size: 450 yards.
- Needles: Circular needle sized to achieve gauge; suggested starting size 3.5 to 4.0 millimeter.
- Stitch markers, tapestry needle, and blocking tools.
Gauge
- Gauge: 22 stitches and 30 rows in stockinette stitch = 4 inches by 4 inches after blocking.
Notes and design overview
This cropped cami focuses on simple construction: stockinette body with narrow straps and a decorative picot hem. The picot hem is created at the lower edge for a feminine finishing detail. Straps can be knit as part of the shoulder shaping or worked separately and sewn in for greater control.
Instructions — Body
- Cast on for the lower edge. For a base bust measurement of 34 inches, cast on 176 stitches to create a fitted circumference. Adjust the cast-on number to achieve desired bust width; maintain multiples to preserve pattern symmetry.
- Hem and lower shaping.
- Work two inches of stockinette stitch folded hem or work a picot hem as follows:
- For picot hem: Work an even number of rows such as four rows of single crochet equivalent on the wrong side to create a base, then work a decorative bind-off where you cast on three stitches and bind off three stitches in sequence across to form picot points. Alternatively, create a knit picot by working a few rounds of single crochet and then binding off with a generated picot edge.
- After the hem, switch to stockinette stitch and work until the piece measures 12 inches from the cast-on for a short cropped height.
- Work two inches of stockinette stitch folded hem or work a picot hem as follows:
- Armhole shaping.
- Bind off three to five stitches at the beginning of the next two rows to create a shallow armhole curve.
- Decrease one stitch at each armhole edge every fourth row three times to refine the armhole.
Instructions — Straps and neckline
- Shoulder shaping and strap creation.
- When the front reaches your desired neckline depth, place the center 16 to 20 stitches on a holder for the scoop. Work each shoulder strap separately as follows:
- Continue working the pattern in stockinette across the shoulder area and shape the strap by working a narrow band in garter stitch or single rib to create structure for the narrow strap.
- For a 1.5-inch wide strap, work approximately 10 to 12 stitches in garter stitch until the strap length measures 6 to 8 inches depending on shoulder slope.
- When the front reaches your desired neckline depth, place the center 16 to 20 stitches on a holder for the scoop. Work each shoulder strap separately as follows:
- Alternative method: Work the straps separately.
- Cast on the number of stitches needed for the strap width and knit a small rectangle of the desired length. Attach the strap by mattress stitching to the upper edge of the front and back shoulder areas to control strap placement exactly.
- Finishing strap attachment and neckline.
- After attaching straps, pick up stitches around the neckline and work one or two rounds of single crochet or narrow rib to finish the edge. Bind off in a stretchy manner.
Finishing
- Weave in ends and block gently to shape.
- Press the picot hem carefully if your fiber can tolerate heat to enhance the decorative edge.
- For optional reinforcement, add a stitched lining or narrow elastic band along the interior hem for support under light garments.
Variations
- Change the picot hem to a scalloped crochet edge for contrast.
- Add decorative lace along the neckline by picking up small numbers of stitches and working a single lace motif.
Customization, fit adjustments, and general finishing tips
Adjusting for size and ease
- Determine how much negative or positive ease you prefer. For fitted tanks, subtract one to three inches of ease from bust measurement. For relaxed fits, add two to four inches.
- To adjust width, calculate stitches using your swatch gauge. Multiply the desired finished measurement in inches by the number of stitches per inch from your swatch to determine cast-on count. Round to the nearest number that preserves stitch pattern multiples.
Adjusting length
- Measure on your body from shoulder to desired hem and subtract an inch for neck drop and ribbing if applicable. Add or subtract rows proportionally based on your stitch row gauge.
Shoulder and strap alterations
- For narrow or wider shoulders, decrease or increase the shoulder stitch counts before the shoulder bind-off. Keep the shoulder slope in proportion so that seams meet evenly.
Neat finishing techniques
- Use mattress stitch for invisible side and shoulder seams. Insert the tapestry needle into the horizontal bars between stitches on each side and pull snug to create a flat seam.
- Block every piece before final seaming to ensure accurate measurements and to open lace or rib textures properly.
- When picking up stitches for neck and armhole facings, pick up loosely to avoid puckering.
Troubleshooting common issues
- Ribbing looks too loose or too tight: Adjust needle size and re-swatch. Remember that ribbed fabric stretches horizontally; use a slightly smaller needle if the rib is too loose.
- Lace does not open: Block the knitted piece more vigorously with steam or pins to open the eyelets. Confirm that you used the correct number of yarn overs.
- Armhole is too shallow: Unpick to the point before armhole shaping and rework with fewer bind-off stitches or fewer decreases.
- Seams pull the fabric: Use a longer mattress stitch tail and slightly looser tension to keep seams flexible.
Pattern 5: Tunic-Length Side-Slit Tank
Skill level
Beginner to intermediate. The Tunic-Length Side-Slit Tank is forgiving in fit and construction, but it requires attention to even texture and clean slit finishing. Familiarity with working textured stitches and picking up stitches for finishing is helpful.
Finished measurements
This tunic is written to finish with a relaxed drape. Example finished measurements for three sizes:
- Small: bust 38 inches, hip 44 inches
- Medium: bust 42 inches, hip 48 inches
- Large: bust 46 inches, hip 52 inches
Finished length from shoulder to hem: tunic length approximately 30 inches. Side slit height: approximately 10 inches measured from hem upward. You may adjust length and slit height to suit personal preference.
Materials
- Yarn: Aran-to-sport transitional cotton-blend yarn to give relaxed drape with defined texture. Yardage estimates:
- Small: 1000 yards
- Medium: 1150 yards
- Large: 1300 yards
- Needles: Circular needle sized to obtain the given gauge; suggested starting size 4.5 millimeter (US 7) circular needle with a long cable to accommodate many stitches.
- Stitch markers, tapestry needle, tape measure, blocking mat and pins, and a set of stitch holders or scrap yarn for holding stitches.
- Optional: small amount of lightweight fusible interfacing if you plan to apply a narrow facing for reinforcement at the slit top.
Gauge
- Gauge: 18 stitches and 24 rows in the broken rib or textured stitch pattern = 4 inches by 4 inches after blocking.
Make a large swatch and block it exactly as you will block the finished tunic to ensure accurate gauge and drape.
Design overview and notes
The Tunic-Length Side-Slit Tank is built to highlight vertical length and a subtle, relaxed texture such as a broken rib or a simple twisted-stitch pattern. The design is worked in two flat panels or worked seamlessly in the round and then split for side slits; this tutorial uses the flat-panel method for clarity. Deep side slits allow movement and layering while keeping the silhouette clean. This tunic has minimal shaping: slight bust darts or optional waist shaping may be added if a more tailored fit is desired.
Stitch pattern
A subtle broken rib gives texture without bulk. Work the pattern over a multiple of four stitches plus two selvage stitches as follows for a four-row repeat:
- Row one, right-side: Knit two for the selvage, purl one, knit three; repeat from the asterisk across, end with knit two for the selvage.
- Row two, wrong-side: Knit two for the selvage, knit one, purl three; repeat across, end with knit two for the selvage.
- Row three, right-side: Knit two for the selvage, purl two, knit two; repeat across, end with knit two for the selvage.
- Row four, wrong-side: Knit two for the selvage, knit two, purl two; repeat across, end with knit two for the selvage.
Practice the repeat until the texture lies flat and consistent.
Instructions — Back panel
- Cast on the number of stitches for your size, making certain the total is a multiple of four plus two selvage stitches.
- Small: cast on 200 stitches.
- Medium: cast on 224 stitches.
- Large: cast on 248 stitches.
- Work a two-inch one-by-one ribbing for a stable hem, alternating knit one, purl one across each row.
- Transition to the broken rib textured stitch and maintain this pattern for the body of the back panel. Work until the back measures approximately 20 inches from the cast-on edge to the point where you will begin the side slit division. Measure on your body if you prefer a different tunic length.
- Begin side-slit separation.
- To create side slits, you will leave a vertical gap unseamed that extends from the hem upward. For each side slit, identify the desired slit width. A comfortable slit width is two to three inches of fabric left unseamed, but the visual effect is usually created by seaming up to the starting point, leaving the slit open.
- For the back panel, work the textured stitch until the side slit starting point is reached. Place the edge stitches that will align with the front slit onto stitch holders if desired to facilitate later finishing.
- Continue working the remainder of the back above the slit in the textured stitch until you reach the underarm line where side seams will stop, typically 10 inches above the hem for a 10-inch slit.
- Shape shoulder and neckline.
- For the back neckline, bind off the center stitches to create a shallow neck, leaving equal shoulder stitch counts on each side. For example, bind off the center 40 stitches for Small, 44 stitches for Medium, and 48 stitches for Large. Work the shoulders flat and bind off shoulder stitches in two steps for a gentle slope: bind off half of the shoulder stitches at the beginning of a right-side row, then bind off the remaining shoulder stitches two rows later.
Instructions — Front panel
- Cast on the same number of stitches as the back and work the hem and textured stitch to the same length as the back until you reach the side slit starting point.
- For the front, decide whether you wish to create a deeper front neckline or a straight front. For a relaxed tunic look, a moderate front neckline equal in depth to the back is common; for a more feminine profile, shape a small scoop.
- Begin the front neckline shaping when the panel reaches the same height as the back at the underarm. Place the center stitches on a stitch holder and work each side separately. Decrease at the neck edge by working a knit two together at the beginning of right-side rows at the neck edge for a right-leaning decrease and slip, slip, knit at the neck edge for a left-leaning decrease. Perform these decreases every fourth row for three to five decreases depending on the neckline depth you desire.
- Continue the rest of the front panel to match the shoulder length of the back. Bind off shoulder stitches in the same staged manner as the back to ensure matching shoulder slopes.
Assembly and side-slit finishing
- Block both panels gently to open the texture and ensure accurate dimensions.
- Seam shoulder edges using mattress stitch.
- Seam the side edges from the underarm down to the top of the side slit. Because the slit is left open, seam only from the underarm to the desired slit height. Use mattress stitch, aligning textured pattern repeats as closely as possible.
- To finish the raw edge of the slit and prevent stretching, pick up and knit stitches along the slit edge and work a neat facing. For example:
- With the right side facing, pick up one stitch for every row along the slit edge using a circular needle and work a narrow two-inch facing in garter stitch or single rib. Bind off loosely in pattern. Repeat for the opposite slit edge.
- Alternatively, work a small applied i-cord along the slit edge for a clean and resilient finish. To work the applied i-cord, pick up the same number of stitches and knit an i-cord of three to five stitches along the edge, sewing the i-cord to the edge as you go.
- Finish the hem and neckline.
- For the neckline, pick up stitches and work one or two rounds of a narrow one-by-one rib or single crochet edge. Bind off loosely.
- For the hem, ensure the one-by-one rib remains elastic by using a bind-off method that stretches such as a knitted bind-off or chain-bind-off alternative.
- Weave in all ends and block again to set the seams and facings.
Variations and styling ideas
- Create a side-slit tunic with contrasting side panels by working a different color or stitch texture for the slit edges for visual interest.
- Add pockets by knitting small patch pockets and sewing them onto the side seams above the slit for convenient styling.
- Convert the tunic to an asymmetric hem by decreasing or increasing the stitch counts along one side for a slanted hemline.
Troubleshooting specific to long garments
- If the fabric skews, ensure that increases and decreases are balanced across the stitch pattern and that you have not inadvertently altered the stitch multiple at the side edges.
- Long tunics may carry more weight. If you observe stretching along the hem or slits over time, add a few rows of ribbing at the hem held together with a strand of lightweight elastic to preserve shape.
Pattern 6: Seamless Two-Color Knit Tank
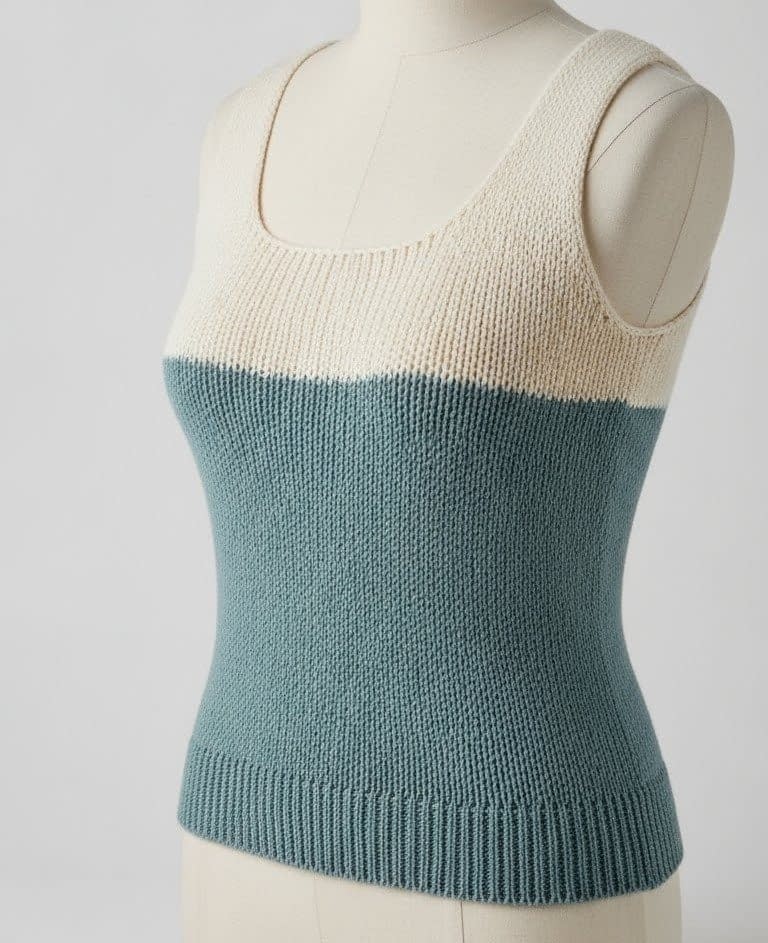
Skill level
Intermediate. The Seamless Two-Color Knit Tank requires skills in working with two-color intarsia or stranded techniques and managing tension for invisible color changes while maintaining a seamless finish.
Finished measurements
This pattern is designed for a semi-fitted silhouette. Example finished bust measurements:
- Small: 36 inches
- Medium: 40 inches
- Large: 44 inches
Length from shoulder to hem: 20 inches. The color transition is placed across the bust with careful shaping for smooth visual alignment.
Materials
- Yarn: Sport-weight cotton in two colors — cream (main) and muted teal (contrast). Yardage estimates:
- Small: 650 yards total (approximately 400 yards main color, 250 yards contrast)
- Medium: 750 yards total
- Large: 850 yards total
- Needles: Circular needles sized for the gauge; suggested 4.0 millimeter (US 6) circular needle.
- Additional tools: bobbins or small separate balls of the contrast color to avoid long floats, stitch markers, tapestry needle, blocking supplies.
Gauge
- Gauge: 22 stitches and 30 rows in stockinette stitch = 4 inches by 4 inches after blocking.
Design overview and color technique
This tank is worked seamlessly from the bottom up to the armholes in the round and then divided for the neckline and armhole shaping. The two-color section spans across the bust with a clean, invisible color change achieved by changing color at a stitch boundary and managing the float length carefully. The pattern uses a simple color join technique: carry a short float across the back if the color change is narrow, or work an intarsia seam using bobbins for larger blocks. The seamless construction minimizes bulky seams and produces a smooth color transition across the garment.
Colorwork guidelines
- For small-to-medium horizontal stripes, alternate colors by working a full round in one color and then switching for the next round, twisting yarns at the join to avoid gaps.
- For a single band or a shaped color block across the bust that requires changing colors within a row, use intarsia with bobbins: secure each color segment on its own bobbin and twist yarns at color joins to avoid holes.
- Maintain consistent tension when carrying color along the back; do not pull floats too tightly as this will pucker the fabric.
Instructions — Body (worked in the round)
- Cast on the total number of stitches for your size and join in the round, taking care not to twist stitches.
- Suggested cast-on:
- Small: cast on 176 stitches.
- Medium: cast on 196 stitches.
- Large: cast on 216 stitches.
- Suggested cast-on:
- Work three inches of one-by-one ribbing in the main color to create a stable hem.
- Transition to stockinette stitch in the main color and continue working until you reach the row where the two-color transition will begin. For a color band across the bust, this is typically 6 to 8 inches above the hem; for a seamless invisible transition across the bust line, measure on the body to identify the proper placement.
- Implement the two-color section.
- Option A — Narrow band or stripe: Change to the contrast color and work the desired number of rounds in contrast. At the moment of color change, twist the two yarns around each other at the join to secure the stitch and prevent holes. After the contrast band, return to the main color, twisting yarns at the join again.
- Option B — Shaped two-color across the bust: For a shaped color block that requires changing color within the round or row, prepare bobbins and work intarsia: when you reach the color boundary, drop the main color and pick up the contrast color bobbin. At the subsequent color change, twist the yarns and pick up the main color bobbin. Keep bobbins organized to avoid tangles. Mind the float lengths on the reverse side; for large color blocks, do not carry yarn across long distances—introduce a new bobbin.
- After the color section, continue in the main color until the piece reaches the underarm depth specified in your size, typically 14 inches from the hem.
Instructions — Divide for armholes and shaping
- When you reach underarm depth, divide the work for front and back by placing the front half of the stitches onto a stitch holder or spare circular needle.
- Work the back flat first, shaping armholes and shoulders as described in prior patterns: bind off a small number of stitches at each underarm edge and decrease at the side edges as needed to shape the armhole curve. Maintain the color transition lines carefully across decreases so that color continuity is preserved.
- Work the front flat, shaping the neckline as you approach the top. For a clean, invisible color join across the bust, ensure that the color pattern aligns when the front and back are joined at the shoulders. Use stitch markers to mark color boundaries and match them across panels.
- For seamless shoulder joining, leave live stitches on holders for the front and back shoulders and use three-needle bind-off or grafting for a smooth join. To preserve the seamless look, a three-needle bind-off with wrong sides together produces a sturdy and neat shoulder seam that also maintains color continuity.
Finishing color joins and tension
- When seaming the side and shoulder seams, pay attention to the color transitions so that the visible front maintains an uninterrupted colorline. Use mattress stitch and match color floats across seams.
- For the neckline and armholes, pick up stitches and work a narrow facing in the main color. If the color transition crosses into the neckline area, prefer to finish in the main color for continuity unless you intentionally want the contrast color to edge the neckline.
- Blocking is essential for colorwork. Wet block gently to allow the stockinette stitch and the color joins to settle evenly. Use blocking wires where possible to create straight edges and a smooth color transition.
Variations
- Reverse the color placement for a dominant contrast look by working the body mostly in the contrast color with cream accents.
- Create a multi-color striped version by repeating the color change technique across more than two colors.
- Add a narrow selvedge in a third accent color at the hem or armholes for a designer detail.
Troubleshooting color issues
- If the color join shows a gap, rewind the color change and insert a small twist between the colors at the join so that the first stitch of the new color is anchored.
- If the back shows uneven floats, consider using a stranded technique across the back with even tension or convert the long floats into small decorative purl bumps to stabilize them.
Pattern 7: Chevron Rib Knit Tank (Directional Texture)

Skill level
Intermediate. The Chevron Rib Knit Tank uses directional ribbing composed of alternating left- and right-leaning ribs to form a chevron or V-shaped pattern. It requires careful stitch counting and attention to decreases and increases that form the chevron alignment.
Finished measurements
This tank is designed with a fitted to semi-fitted silhouette. Example finished bust measurements:
- Small: 36 inches
- Medium: 40 inches
- Large: 44 inches
Length from shoulder to hem: approximately 20 inches. The chevron apex should land at center front for visual balance.
Materials
- Yarn: Smooth cotton-blend sport-weight yarn in muted sage green. Yardage estimates:
- Small: 650 yards
- Medium: 750 yards
- Large: 850 yards
- Needles: Circular needle to obtain gauge; suggested 4.0 millimeter (US 6).
- Stitch markers, tapestry needle, blocking tools.
Gauge
- Gauge: 22 stitches and 30 rows in the chevron rib = 4 inches by 4 inches after blocking.
Design overview and stitch mechanics
The chevron effect is created by alternating short sections of left-leaning rib and right-leaning rib so that columns of knit stitches converge to form a V shape. The visual movement is achieved by paired decreases and increases aligned along a center panel. The chevron may be designed symmetrically with the apex at center front and center back.
Chevron rib stitch pattern
Work the pattern over a multiple of twelve stitches plus two center stitches for the apex. A single chevron repeat is created by combining left-leaning decreases with right-leaning decreases across the repeat as follows in a six-row pattern:
- Row one, right-side: Knit two for the selvage, slip one knitwise, knit two together through the back loop to make a right-leaning decrease while preserving rib columns, then yarn over to create a corresponding increase, knit two, yarn over, slip, slip, knit to create a left-leaning decrease; repeat from the asterisk, end with knit two for the selvage.
- Row two, wrong-side: Purl all stitches or purl according to the established rib pattern to maintain vertical texture.
- Row three, right-side: Continue aligning decreases and yarn overs to move the placement of the knit columns one stitch outward toward the sides, thereby forming the chevron shape.
- Rows four through six: Repeat the corresponding wrong-side and shaping rows as required to complete the repeat.
Because the chevron is directional, charted instructions are highly recommended when knitting visually complex chevrons. If you prefer text-only, keep a stitch count and place markers at the beginning and end of the repeat to avoid losing alignment.
Instructions — Back panel
- Cast on stitches for your size ensuring that the total respects the stitch multiple for chevron repeats and includes two center apex stitches.
- Small: cast on 180 stitches.
- Medium: cast on 200 stitches.
- Large: cast on 220 stitches.
- Work two inches of one-by-one ribbing for the hem.
- Establish the chevron rib pattern and begin working the body. Place a stitch marker at center back to identify the apex alignment. Work the chevron pattern until the back measures the desired length to the underarm, typically 14 inches.
- Shape armholes by binding off a small number of stitches at each side and then decreasing at the side edges with the chevron pattern in mind. When you decrease or bind off, adjust the chevron repeat at the edges so that the directional flow continues without abrupt interruptions.
- Work shoulder shaping and neckline as described in prior patterns, taking care to preserve chevron symmetry across the shoulders.
Instructions — Front panel and centering the apex
- Cast on and work the front panel mirroring the back. Center the chevron apex at the center front by ensuring your stitch count places the two apex stitches directly at the center.
- When you reach the point for the neckline shaping, transfer apex alignment visually and maintain the chevron so that the V-shape continues into the upper chest without being cut off irregularly.
- For a lower scoop neckline, divide the center right at the apex and shape each side separately. Use decreases at the neckline edge that preserve the chevron columns by performing decreases that lean away from the center and by compensating with yarn overs where necessary.
Finishing and blocking
- Because directional texture is sensitive to blocking, wet block gently and pin the chevron lines so that they align straight from center apex toward the hem. Use blocking wires if available to preserve long straight lines.
- Seam the sides and shoulders using mattress stitch and match chevron ribs across seams. This may require slight adjustments in seaming tension to maintain visual continuity.
- Pick up stitches for the armholes and neckline and work narrow rib facings to frame the chevron without competing with it. A one-by-one rib facing will echo the vertical texture and give a professional finish.
Variations
- Offset the chevron apex slightly to one side for an asymmetric modern look.
- Combine chevron ribs with colorblocking by working the chevron texture in one color and the upper yoke in a contrasting color for visual separation.
- Make the chevron more pronounced by using a heavier yarn or larger needles to increase stitch definition.
Troubleshooting directional textures
- If the chevron appears lopsided, check that increases and decreases are performed consistently on both sides of the apex and that slip-stitch conventions are followed uniformly.
- If the apex does not sit at the center front visually, recount stitch repeats and adjust by adding or removing a full repeat to restore symmetry.
Conclusion
These seven basic knit tank top patterns provide a strong foundation for anyone looking to build confidence in garment knitting. From simple ribbed structures to subtle lace details and seamless construction, each pattern focuses on essential techniques that are practical, wearable, and easy to customize. By working through these designs, knitters gain hands-on experience with shaping, stitch consistency, finishing, and fit adjustments, all while creating versatile pieces suitable for everyday wear. Whether you are knitting your first tank top or refining your skills with clean, classic designs, these patterns offer reliable starting points that can be adapted across seasons, yarn choices, and personal style preferences.