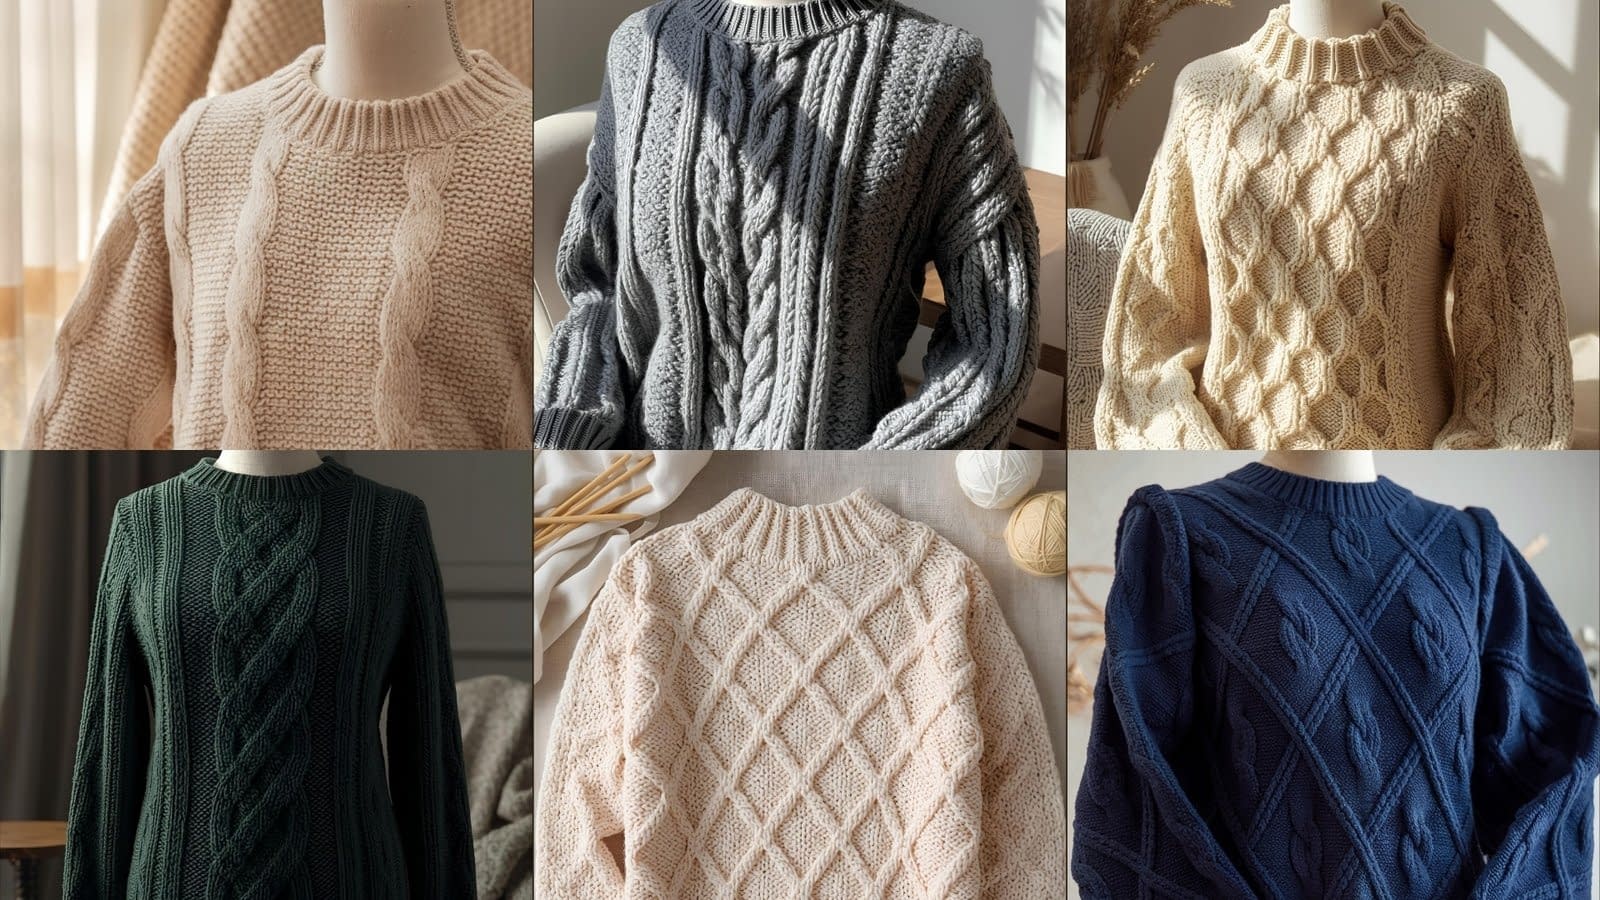
Cable knit sweaters are timeless pieces that bring both warmth and texture to any wardrobe. Each cable design tells its own story — from bold, interlacing braids to delicate honeycomb patterns — creating sweaters that are both visually striking and cozy to wear.
This collection, “7 Basic Cable Knit Sweater Patterns,” features seven distinct designs that are elegant, unique, and fully detailed. Each pattern provides comprehensive instructions on materials, construction, shaping, and finishing touches. Whether you are knitting for yourself or creating a gift, these sweaters offer a rich combination of artistry and functionality.
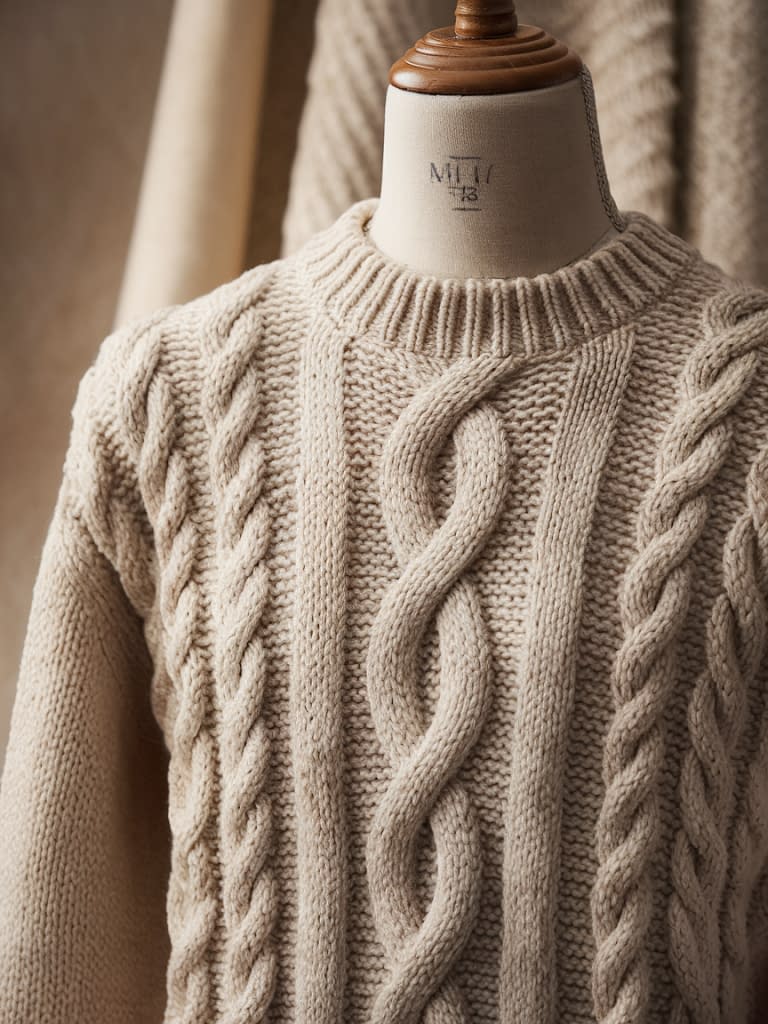
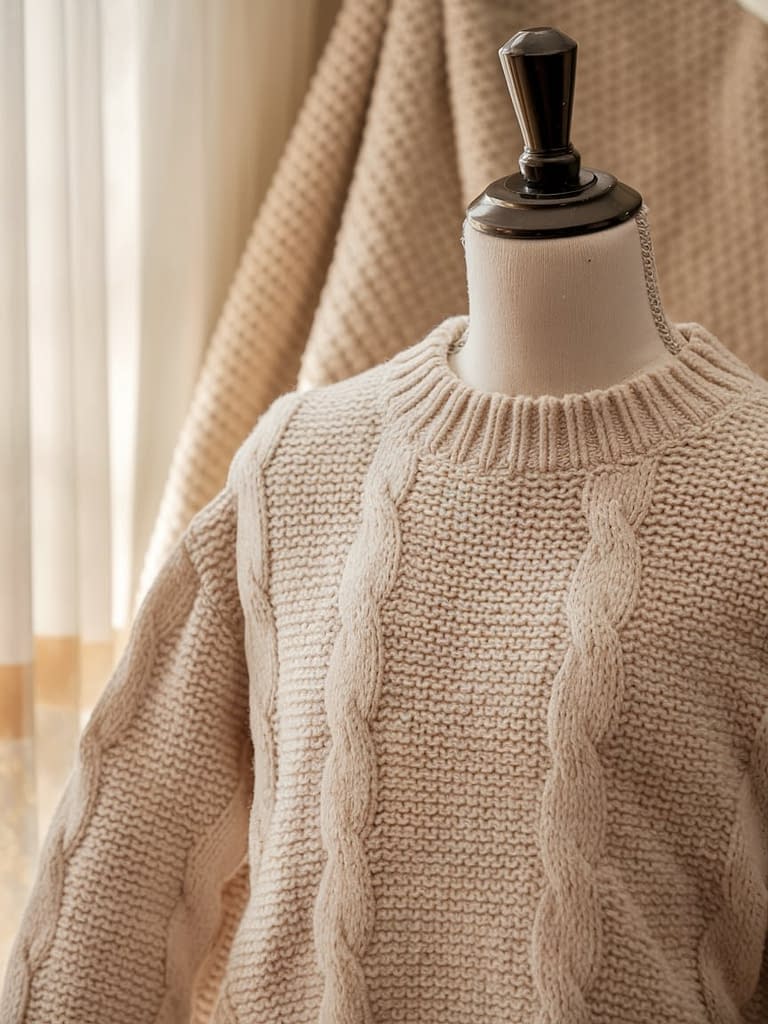
1. Classic Aran Cable Knit Sweater Pattern
Skill Level: Intermediate – requires cable work and shaping
Finished Size: Fits bust sizes from thirty-four inches to forty-four inches (can be customized)
Materials:
- Worsted weight yarn, approximately twelve hundred to fifteen hundred yards, in a natural or cream color for a traditional Aran look
- Knitting needles, US size eight (five millimeters)
- Cable needle
- Tapestry needle, stitch markers, and scissors
Pattern Notes
This sweater celebrates the traditional Irish Aran design, featuring rope cables and textured moss stitches. It is constructed in panels and seamed together for structure and fit.
Front Panel Instructions
- Cast on ninety-four stitches. Work ten rows in a two-by-two ribbing, alternating two knit stitches and two purl stitches.
- Establish the cable pattern:
- On the right side, knit four stitches, purl two stitches, cross six stitches by holding three stitches in front of the work and knitting the next three stitches, then knit the three held stitches, purl two stitches, knit six stitches, purl two stitches, cross six stitches by holding three stitches in back and knitting three stitches, then knit the three held stitches, purl two stitches, knit four stitches.
- On the wrong side, work each stitch as it appears; knit the knit stitches and purl the purl stitches.
- Repeat this cable pattern, crossing stitches every eighth row, until the front panel measures twenty-four inches from the cast-on edge.
- Shape the neckline by binding off the center fourteen stitches. Work each side separately, decreasing one stitch at the neckline edge every other row three times.
Back Panel Instructions
Work the back panel identically to the front panel, omitting the neckline shaping.
Sleeve Instructions
- Cast on fifty stitches. Work in two-by-two ribbing for eight rows.
- Begin the same cable pattern, centering the cable across the sleeve.
- Increase one stitch on each side every sixth row until the sleeve reaches seventy-two stitches.
- Continue the cable pattern until the sleeve measures nineteen inches from the cast-on edge.
Finishing
Block all pieces to even out the stitches. Seam the shoulders first, then attach the sleeves, and finally seam the sides of the sweater. Pick up stitches around the neckline and work ten rounds in one-by-one ribbing. Bind off loosely to maintain elasticity.
2. Braided Cable Knit Sweater Pattern

Skill Level: Intermediate – intricate braided cables
Finished Size: Fits bust sizes from thirty-six inches to forty-six inches
Materials:
- Worsted or aran weight yarn with medium drape
- Knitting needles, US size seven (four and a half millimeters)
- Cable needle and tapestry needle
Pattern Notes
This design highlights wide braided cables that create a rich, interlacing texture down the front and sleeves. The braids provide a three-dimensional appearance that stands out in any wardrobe.
Front Panel Instructions
- Cast on ninety-six stitches and work eight rows in two-by-two ribbing.
- Begin the braid pattern:
- Knit four stitches, purl two stitches, cross twelve stitches by holding six stitches in front, knitting six stitches, then knitting the held six stitches, purl two stitches, knit four stitches; repeat this sequence across the row.
- Cross the braid every tenth row to maintain the braided appearance.
- Continue until the front panel measures twenty-two inches.
- Shape the neckline by binding off sixteen center stitches and decreasing one stitch at each neck edge every other row for three additional rows.
Back Panel Instructions
Work identically to the front panel, without neckline shaping.
Sleeve Instructions
Cast on forty-eight stitches and work in ribbing for eight rows. Include a single braid cable centered along the sleeve length. Increase one stitch at each side every eighth row until the sleeve reaches seventy stitches.
Finishing
Block all pieces gently. Seam the shoulders and sleeves, then attach sides. Pick up stitches for a neckline and work in ribbing for ten rounds.
3. Honeycomb Cable Knit Sweater Pattern

Skill Level: Advanced – complex cable repeats
Finished Size: Fits bust sizes from thirty-four inches to forty-four inches
Materials:
- Light worsted yarn, approximately thirteen hundred to fifteen hundred yards
- Knitting needles, US size six (four millimeters)
- Cable needle and stitch holders
Pattern Notes
The honeycomb cable pattern resembles interlocking hexagonal cells, producing a raised, padded texture that is both visually striking and warm.
Front Panel Instructions
- Cast on ninety-eight stitches and work six rows in one-by-one ribbing.
- Begin the honeycomb pattern:
- Row one: Knit two stitches, cross four stitches in front, and repeat across the row.
- Row two: Purl all stitches.
- Row three: Cross four stitches in back, then knit two stitches, repeating across the row.
- Row four: Purl all stitches.
Repeat these four rows until the panel reaches twenty-five inches.
- Shape the neckline by binding off center stitches and decreasing at the neckline edges as desired.
Sleeve Instructions
Use the same honeycomb pattern, adjusting the width to fit the sleeve circumference.
Finishing
Seam the panels, block gently, and add ribbing to the neckline if desired. This design pairs beautifully with casual or dressy outfits due to its rich texture.
4. Lattice Cable Knit Sweater Pattern

Skill Level: Advanced – grid-like cable crossings
Finished Size: Fits bust sizes from thirty-six inches to forty-eight inches
Materials:
- DK or light worsted yarn, approximately fourteen hundred yards
- Knitting needles, US size seven (four and a half millimeters)
Pattern Notes
This sweater features a lattice design with cables and twisted stitches forming a diamond grid across the body, creating an airy and elegant texture.
Front Panel Instructions
- Cast on one hundred and ten stitches and work ten rows in one-by-one ribbing.
- Begin the lattice pattern:
- Row one: Knit two stitches, cross two stitches in front, purl two stitches, repeat across the row.
- Row three: Offset the cable crossings by two stitches to form diamond shapes.
Continue crossing stitches every sixth row to create the lattice design.
- Work until the front panel reaches twenty-three inches. Shape the neckline by binding off twenty center stitches and decreasing one stitch at each side for four rows.
Back Panel Instructions
Work identical to the front panel.
Sleeve Instructions
Maintain the lattice on the central twenty stitches, and knit stockinette stitches on each side.
Finishing
Block carefully to open up the lattice texture. Seam the panels, and add a simple ribbed neckline to frame the pattern.
5. Diamond Twist Cable Knit Sweater Pattern

Skill Level: Intermediate to Advanced
Finished Size: Fits bust sizes from thirty-four inches to forty-two inches
Materials:
- Worsted or aran weight yarn, solid colors recommended
- Knitting needles, US size eight (five millimeters)
Pattern Notes
This sweater features repeated diamond cables filled with twisted stitches, creating a geometric and sophisticated design.
Front Panel Instructions
- Cast on ninety-two stitches and work ten rows in two-by-two ribbing.
- Begin the diamond cable pattern:
- Knit four stitches, purl two stitches, work a sixteen-stitch diamond cable pattern, purl two stitches, knit four stitches.
- Each diamond cable is sixteen rows tall before repeating.
- Continue until the front panel reaches twenty-four inches. Shape the neckline by binding off twelve center stitches and decreasing one stitch at each neck edge every other row three times.
Back Panel and Sleeve Instructions
Work the back panel similarly, adjusting the diamond placement symmetrically. For the sleeves, center the diamond cables and knit stockinette stitches around them, increasing evenly for fit.
Finishing
Seam all panels and add ribbing to neckline, cuffs, and hem. Lightly block to define the diamond cable textures.
6. Rope Cable Knit Sweater Pattern
Skill Level: Intermediate
Finished Size: Fits bust sizes from thirty-six inches to forty-six inches
Materials:
- Worsted weight yarn, approximately thirteen hundred yards
- Knitting needles, US size seven (four and a half millimeters)
Pattern Notes
The rope cable sweater emphasizes simple vertical twisted cables, giving a clean, refined, and structured look.
Front Panel Instructions
- Cast on eighty-eight stitches and work eight rows in two-by-two ribbing.
- Rope cable pattern:
- Knit two stitches, purl two stitches, cross four stitches in front, purl two stitches, repeat across the row.
- Cross the cables every eighth row to maintain the rope effect.
- Continue until the front panel measures twenty-two inches. Shape the neckline by binding off fourteen center stitches and decreasing at the neck edges every other row.
Back Panel and Sleeves
Work the back panel in the same manner. For the sleeves, place two rope cables centered and knit stockinette stitches on each side, increasing stitches for proper fit.
Finishing
Seam all pieces, block gently, and add ribbing to the neckline, hem, and cuffs. Neutral or earthy tones complement the clean rope texture.
7. Celtic Knot Cable Knit Sweater Pattern

Skill Level: Advanced
Finished Size: Fits bust sizes from thirty-six inches to forty-eight inches
Materials:
- Wool or wool-blend yarn, approximately fifteen hundred yards
- Knitting needles, US size eight (five millimeters)
- Cable needle
Pattern Notes
The Celtic Knot pattern features interlacing cables inspired by Celtic artwork. Its symmetry and complexity give it an elegant, heirloom-quality appearance.
Front Panel Instructions
- Cast on one hundred and twelve stitches and work eight rows in ribbing.
- Begin the knot motif:
- Work a central panel of twenty-four stitches in Celtic knot cables, surrounded by moss stitch panels.
- Cross cables every twelfth row using combinations of six-stitch and eight-stitch cable crossings to form interlacing knots.
- Continue until the front panel measures twenty-six inches. Shape the neckline gently.
Back Panel and Sleeves
Work the back panel in moss stitch with a single vertical cable centered. Sleeves feature moss stitch with a central cable for visual continuity.
Finishing
Seam all pieces carefully to preserve cable alignment. Block gently to define the knotwork. Add a simple ribbed neckline to frame the intricate design.
Conclusion
Cable knit sweaters offer endless possibilities for creativity and style. From traditional Aran braids to intricate Celtic knots, these seven patterns demonstrate the diversity and elegance that cables can bring to a garment.
With patience and careful attention to detail, these sweaters can become cherished pieces in any wardrobe. Whether for personal use or gifting, each pattern provides structure, texture, and timeless beauty that will be admired for years.