
Crochet tulip stitch scarves have become one of the most loved handmade accessories because they combine texture, softness, and visual charm in a way that feels both cozy and decorative. The tulip stitch creates raised, petal-like shapes that resemble small flowers arranged neatly across the fabric. This makes the stitch ideal for scarves, where texture and warmth matter just as much as appearance.
In this detailed guide on 7 Crochet Tulip Stitch Scarf Patterns, you will find designs that range from soft pastel gardens to playful kawaii styles and sweet, dessert-inspired color themes. Each pattern is written with beginners in mind, using full stitch names and descriptive explanations instead of crochet shorthand. The goal is to help you clearly understand what you are doing at every step, so you can crochet with confidence rather than confusion.
This post is structured to feel like a professional crochet tutorial rather than a quick summary. Each scarf pattern includes an overview, skill level, finished size guidance, materials, stitch explanation, and a very detailed step-by-step construction process. The tutorials are carefully aligned with the provided visuals so that what you read matches what you see in the images.
In this first part of the series, you will find the first three scarf tutorials. When you are ready, you can ask me to continue with the remaining four tulip stitch scarf patterns.
1. Pastel Tulip Garden Scarf (Cute and Soft Look)
Overview and design inspiration
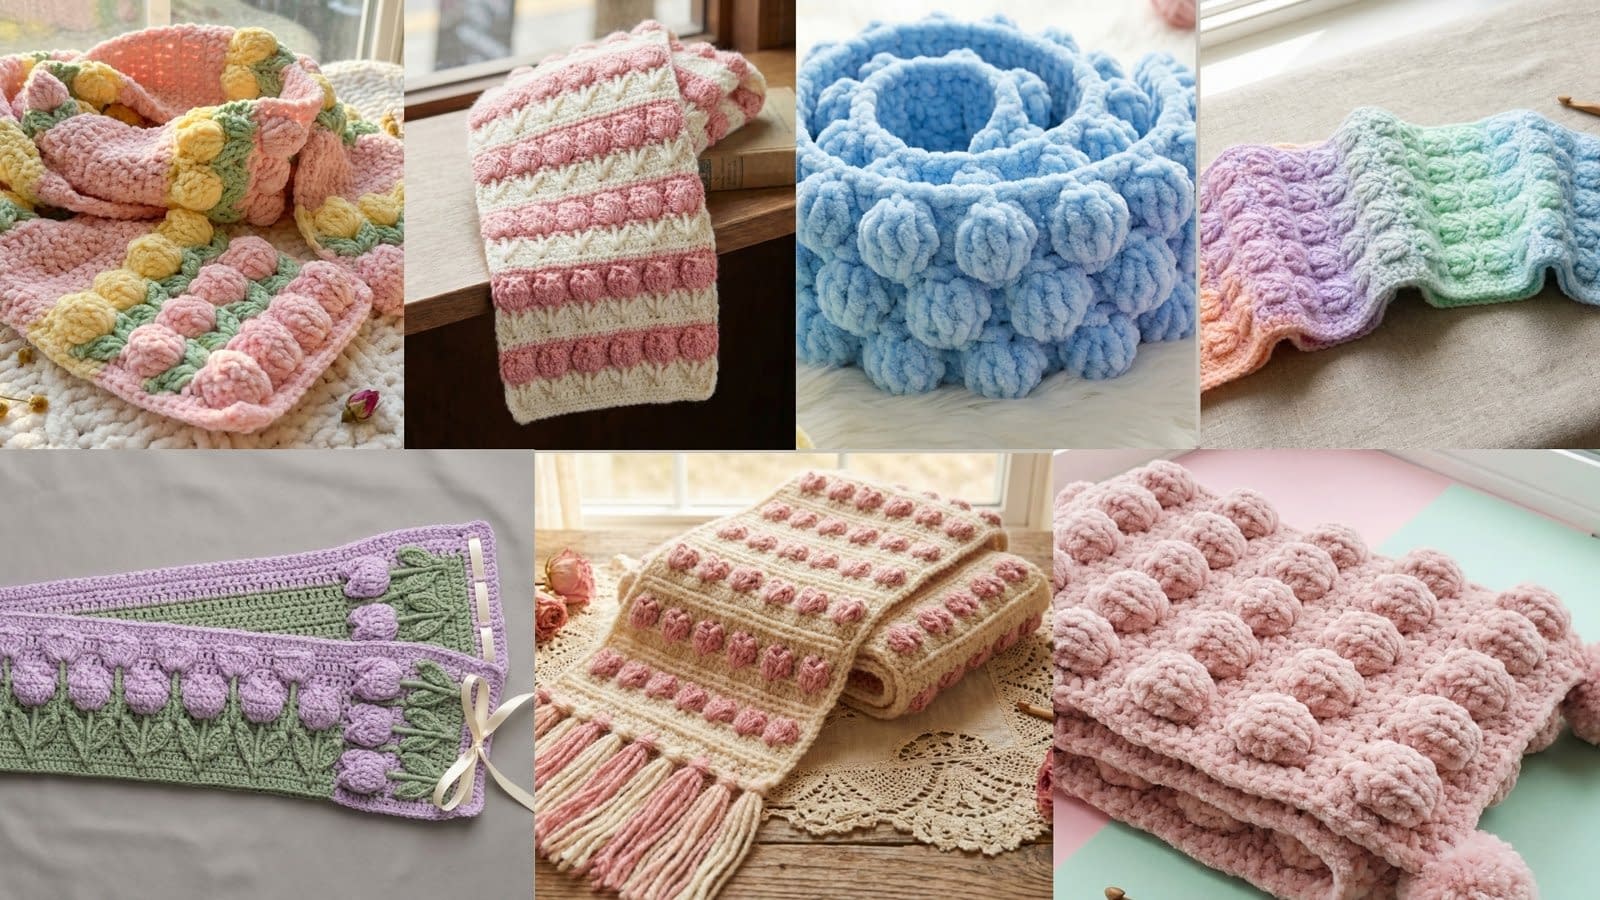
The Pastel Tulip Garden Scarf is inspired by the gentle colors of spring flowers and soft garden mornings. This design uses pastel pink, butter yellow, and baby green yarn to create rows of plump tulip stitch petals that feel calm, warm, and visually soothing. The raised tulip texture gives the scarf depth, while the color placement keeps it light and airy rather than heavy.
This scarf is ideal for everyday wear, gifting, or even styling for lifestyle photography. The finished fabric focuses on softness, clear stitch definition, and a relaxed drape.
Skill level
Beginner to intermediate. This pattern is suitable for confident beginners who are comfortable with basic crochet stitches and are ready to learn a textured stitch pattern worked in rows.
Finished size
Approximately 60 inches long and 7 inches wide. You can easily adjust the length by working more rows, or adjust the width by changing the starting chain count in multiples required by the tulip stitch pattern.
Materials
Medium weight yarn, also known as worsted weight yarn, in three colors:
Soft pastel pink as the main background color
Butter yellow for tulip accents
Baby green for leaf-style contrast rows
Crochet hook size 5.0 millimeters
Yarn needle for weaving in ends
Scissors
Measuring tape
Stitch pattern explanation
The tulip stitch is a textured stitch that creates raised, rounded shapes by working groups of stitches into the same space and anchoring them with single crochet rows between textured rows. In this scarf, the tulip stitches are arranged in neat horizontal rows, with color changes helping each tulip shape stand out clearly.
This pattern is worked flat, back and forth in rows, rather than in the round.
Step-by-step instructions
Foundation chain
Begin by making a slip knot and placing it on your crochet hook. Chain a number that is a multiple of four, then add two extra chains for turning. For a scarf approximately seven inches wide, chain thirty-four stitches.
Make sure your chain is not too tight. A flexible foundation chain helps the scarf drape naturally when worn.
Row one: Base row
Insert your hook into the second chain from the hook. Work one single crochet into that chain. Continue working one single crochet into each chain across the row. When you reach the end, chain one and turn your work.
This row creates a stable base and helps even out the foundation chain.
Row two: Preparation row
Work one single crochet into each stitch across the row again. This row creates a clean surface for placing the tulip stitches and ensures consistent height.
Chain one and turn at the end of the row.
Row three: First tulip stitch row
Change to your butter yellow yarn. Begin with one single crochet in the first stitch. Skip the next stitch. Into the following stitch, work a group of five double crochet stitches, all into the same stitch. This creates one tulip petal.
Skip the next stitch, then work one single crochet into the next stitch. Repeat this sequence across the row: skip one stitch, work five double crochet stitches into the next stitch, skip one stitch, then work one single crochet.
When you reach the end of the row, chain one and turn.
Take your time in this row. Keeping your tension even will help the tulip petals look rounded and uniform.
Row four: Securing row
Switch back to pastel pink yarn. Work one single crochet into each stitch across the entire row. This row anchors the tulip petals and creates a smooth contrast between textured rows.
Chain one and turn at the end.
Row five: Color accent row
Switch to baby green yarn. Work one half double crochet into each stitch across the row. This adds a subtle texture difference and gives the illusion of leaves beneath the tulips.
Chain one and turn.
Row six: Repeat tulip row
Change back to butter yellow yarn and repeat the tulip stitch row exactly as in row three. Make sure the tulip petals line up neatly between the petals of the previous tulip row.
Continue repeating rows four through six until the scarf reaches your desired length.
Finishing
After completing the final row, cut your yarn leaving a six-inch tail. Pull the yarn through the last loop to secure it. Use a yarn needle to weave in all loose ends neatly along the back of the scarf.
Lightly steam block the scarf if desired, being careful not to flatten the tulip texture.
2. Kawaii Tulip Stitch Scarf with Mini Pom-Pom Ends
Overview and design inspiration
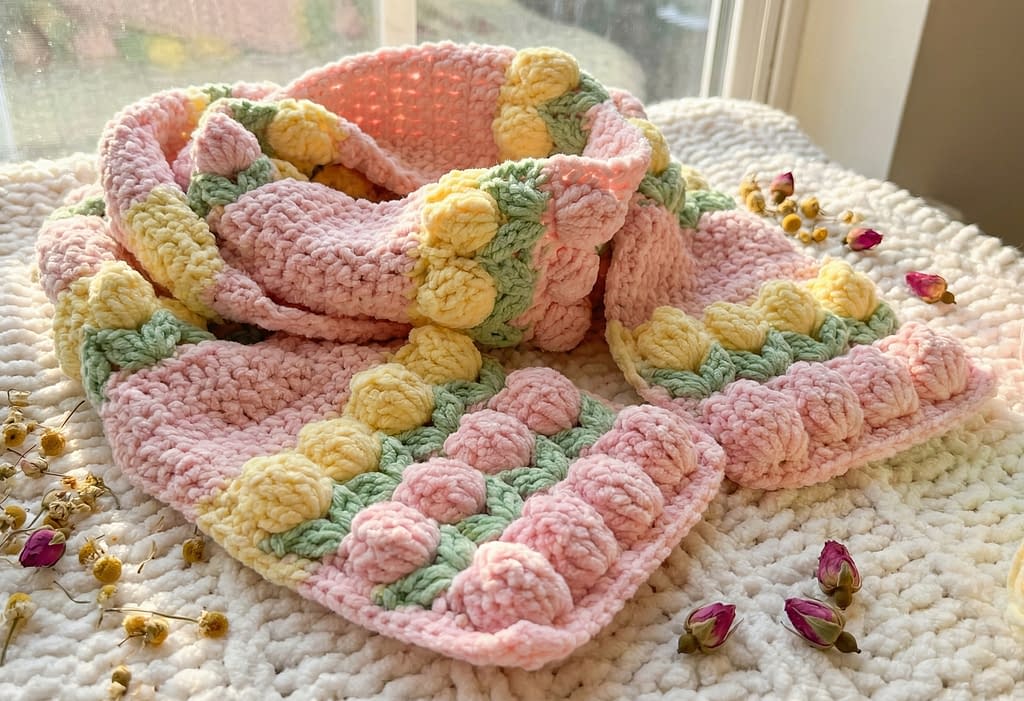
The Kawaii Tulip Stitch Scarf is playful, sweet, and full of charm. Made using blush pink yarn and finished with small matching pom-poms at both ends, this scarf is perfect for those who love cute handmade accessories. The tulip stitch petals appear rounded and fluffy, enhancing the soft and youthful look of the design.
This scarf is especially popular for gifts, pastel-themed outfits, and cozy indoor styling.
Skill level
Beginner to intermediate. The tulip stitch itself is beginner-friendly, and the pom-poms add a simple finishing touch without complex techniques.
Finished size
Approximately 55 inches long and 6.5 inches wide, not including pom-poms. Length can be adjusted easily.
Materials
Medium weight yarn in blush pink
Crochet hook size 5.0 millimeters
Yarn needle
Scissors
Pom-pom maker or cardboard circles
Measuring tape
Stitch pattern explanation
This pattern uses the same basic tulip stitch structure but keeps the color palette simple to emphasize texture over contrast. The pom-poms add movement and softness to the finished scarf.
Step-by-step instructions
Foundation chain
Create a slip knot and chain thirty chains, then add two turning chains. Keep the chain loose and even.
Row one: Single crochet base
Insert your hook into the second chain from the hook. Work one single crochet into each chain across. Chain one and turn.
Row two: Tulip stitch row
Work one single crochet into the first stitch. Skip one stitch. Into the next stitch, work five double crochet stitches into the same stitch. Skip one stitch, then work one single crochet.
Repeat this pattern across the row. Chain one and turn.
Row three: Securing row
Work one single crochet into each stitch across the row. This locks the tulip petals into place.
Chain one and turn.
Row four and beyond
Repeat rows two and three until the scarf reaches your desired length. Keep your stitch tension relaxed to maintain softness.
Pom-pom edging
Create small pom-poms using leftover yarn. Aim for evenly sized pom-poms to keep the ends balanced. Attach three to five pom-poms evenly spaced along each short end of the scarf using a yarn needle. Secure tightly and trim excess yarn.
Finishing
Weave in all loose ends carefully. Gently shape the scarf with your hands to encourage the tulip petals to sit neatly.
3. Strawberry Milk Tulip Stitch Scarf (Cute Color Theme)
Overview and design inspiration
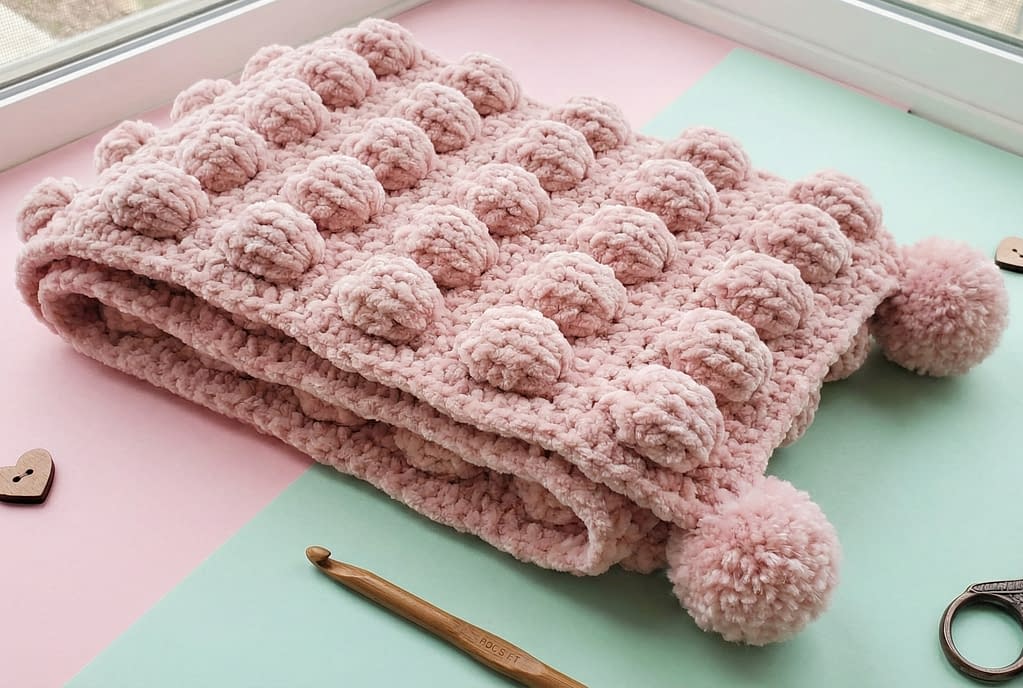
The Strawberry Milk Tulip Stitch Scarf uses creamy white and soft strawberry pink yarn to create a sweet, café-inspired look. The alternating colors highlight the tulip stitch petals, making each row of flowers stand out clearly. This design feels cozy, warm, and slightly nostalgic.
Skill level
Beginner to intermediate. Color changes are simple and occur at the end of rows.
Finished size
Approximately 62 inches long and 7 inches wide.
Materials
Medium weight yarn in creamy white
Medium weight yarn in strawberry pink
Crochet hook size 5.0 millimeters
Yarn needle
Scissors
Measuring tape
Stitch pattern explanation
This scarf alternates background rows and tulip rows using different colors. The color contrast emphasizes the raised tulip texture and gives the scarf a layered look.
Step-by-step instructions
Foundation chain
Chain thirty-four stitches plus two turning chains.
Row one: Base row
With creamy white yarn, work one single crochet into each chain across. Chain one and turn.
Row two: Tulip row
Switch to strawberry pink yarn. Work one single crochet in the first stitch, skip one stitch, work five double crochet stitches into the next stitch, skip one stitch, then work one single crochet.
Repeat across the row. Chain one and turn.
Row three: Background row
Switch back to creamy white yarn. Work one single crochet into each stitch across. Chain one and turn.
Row four: Second tulip row
Repeat the tulip stitch row in strawberry pink. Ensure the petals sit neatly between the petals of the previous tulip row.
Continue alternating rows three and four until the scarf reaches your desired length.
Finishing
Fasten off and weave in all ends securely. Lightly steam block if needed, keeping the iron at a safe distance.
4. Fairycore Tulip Stitch Scarf with Ribbon Accent
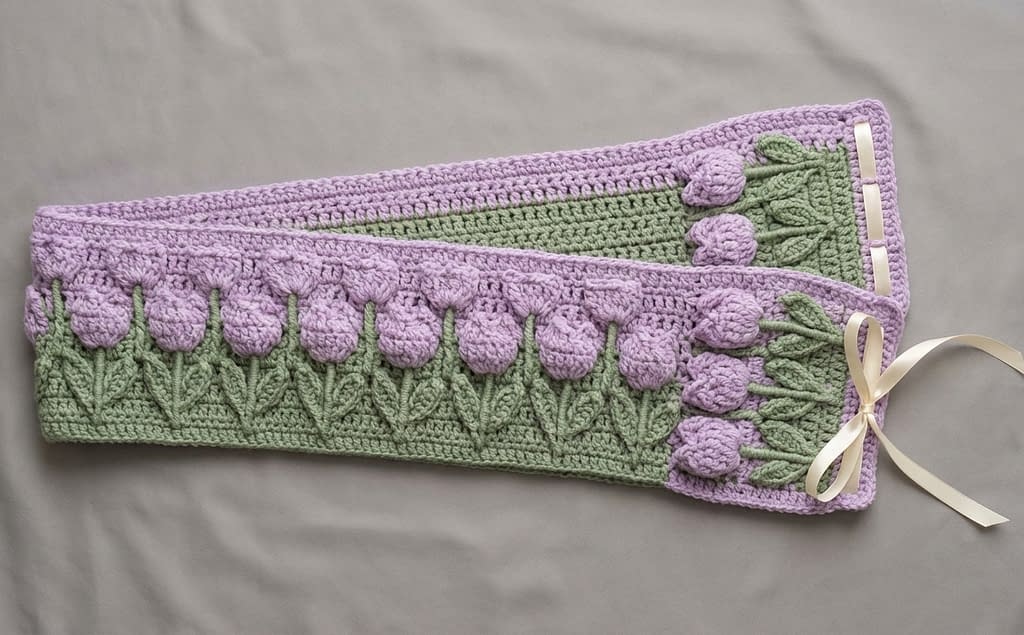
Overview and design inspiration
The Fairycore Tulip Stitch Scarf is designed for crocheters who enjoy soft elegance with a refined, decorative finish. This scarf combines lavender and sage green yarns to create a calm, botanical color palette that feels dreamy yet mature. What sets this design apart is the thin satin ribbon threaded through the end rows, adding a delicate accent without overpowering the crochet texture.
Unlike more playful styles, this scarf leans toward minimalism and balance. The tulip stitch remains the star of the design, while the ribbon acts as a subtle finishing detail that enhances the handcrafted quality.
Skill level
Intermediate beginner. This pattern is suitable for beginners who are comfortable with basic stitches and are ready to manage clean color changes and careful finishing details.
Finished size
Approximately 58 inches long and 6.5 inches wide. Width and length can be adjusted easily.
Materials
Medium weight yarn in lavender
Medium weight yarn in sage green
Crochet hook size 5.0 millimeters
Yarn needle
Scissors
Thin satin ribbon in a neutral or matching color, approximately 40 inches long
Measuring tape
Stitch pattern explanation
This scarf alternates tulip stitch rows and single crochet rows, with color changes used to highlight the floral texture. The ribbon is added after the crochet work is complete and does not affect the structure of the scarf.
Step-by-step instructions
Foundation chain
With lavender yarn, create a slip knot and chain thirty-two stitches, then add two turning chains. Keep the chain loose to maintain a soft drape.
Row one: Base row
Insert your hook into the second chain from the hook. Work one single crochet into each chain across the row. Chain one and turn.
Row two: Tulip stitch row
Switch to sage green yarn. Work one single crochet into the first stitch. Skip the next stitch. Into the following stitch, work five double crochet stitches into the same stitch to form a tulip petal. Skip one stitch, then work one single crochet.
Repeat this sequence across the row. Chain one and turn.
Row three: Securing row
Switch back to lavender yarn. Work one single crochet into each stitch across the row. This row secures the tulip petals and creates a smooth contrast.
Chain one and turn.
Row four: Repeat pattern
Repeat rows two and three until the scarf reaches the desired length. Make sure your color changes are neat by pulling the new yarn color gently at the start of each row.
Preparing the ribbon edge
Once the crochet portion is complete, finish with two additional rows of single crochet in lavender yarn at each end of the scarf. These rows provide a stable base for threading the ribbon.
Adding the ribbon
Cut the satin ribbon to your desired length. Using a yarn needle or safety pin, gently weave the ribbon through the spaces between stitches in the final single crochet rows. Tie a soft bow or leave the ends loose for a flowing finish.
Finishing
Weave in all yarn ends securely. Lightly shape the scarf by hand to encourage the tulip petals to sit evenly.
5. Bubble Tulip Stitch Scarf (Extra Puffy and Cute)
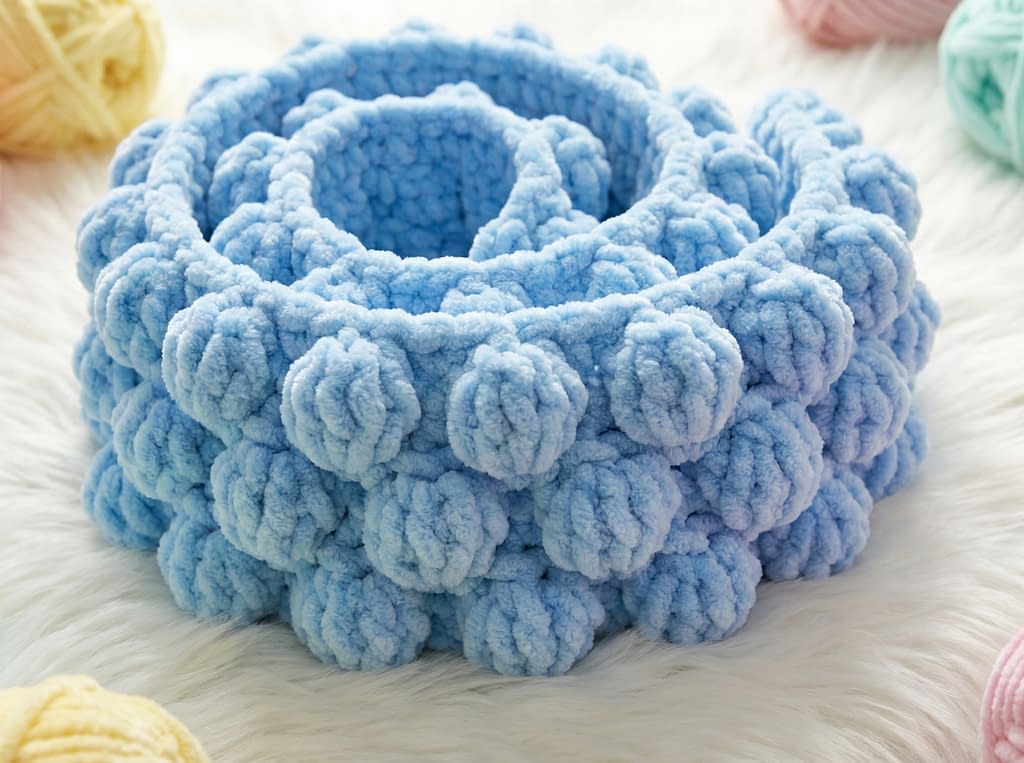
Overview and design inspiration
The Bubble Tulip Stitch Scarf focuses on maximum texture and softness. Made with plush, velvety yarn in soft sky blue, this scarf emphasizes exaggerated tulip petals that resemble small bubbles stacked in neat rows. The result is a scarf that feels playful, cozy, and irresistibly soft.
This design is perfect for cold weather accessories, lounging scarves, or statement handmade pieces.
Skill level
Beginner to intermediate. The stitch pattern is simple, but managing thick yarn requires patience and relaxed tension.
Finished size
Approximately 50 inches long and 7 inches wide. Plush yarn creates extra volume, so the scarf feels thicker than standard designs.
Materials
Plush or velvet-style medium to bulky weight yarn in sky blue
Crochet hook size 6.0 millimeters
Yarn needle
Scissors
Measuring tape
Stitch pattern explanation
This pattern uses a modified tulip stitch with slightly larger stitch groups to enhance the puffed appearance. The plush yarn naturally exaggerates the stitch texture.
Step-by-step instructions
Foundation chain
Create a slip knot and chain twenty-eight stitches plus two turning chains. Do not pull the chain tightly, as plush yarn needs space to maintain softness.
Row one: Single crochet base
Work one single crochet into the second chain from the hook and into each chain across. Chain one and turn.
Row two: Puffy tulip stitch row
Work one single crochet into the first stitch. Skip one stitch. Into the next stitch, work six double crochet stitches into the same stitch to create an extra-puffy tulip petal.
Skip one stitch, then work one single crochet. Repeat across the row. Chain one and turn.
Row three: Anchoring row
Work one single crochet into each stitch across the row. This row keeps the puffed petals stable and evenly spaced.
Chain one and turn.
Repeating the pattern
Continue alternating rows two and three until the scarf reaches your desired length. Frequently check that your stitches are not tightening, as plush yarn can compress if worked too firmly.
Finishing
Fasten off and weave in all ends carefully, hiding them within the thick fabric. Avoid heavy blocking; gently shape the scarf with your hands instead.
6. Cottagecore Tulip Stitch Scarf with Tassels
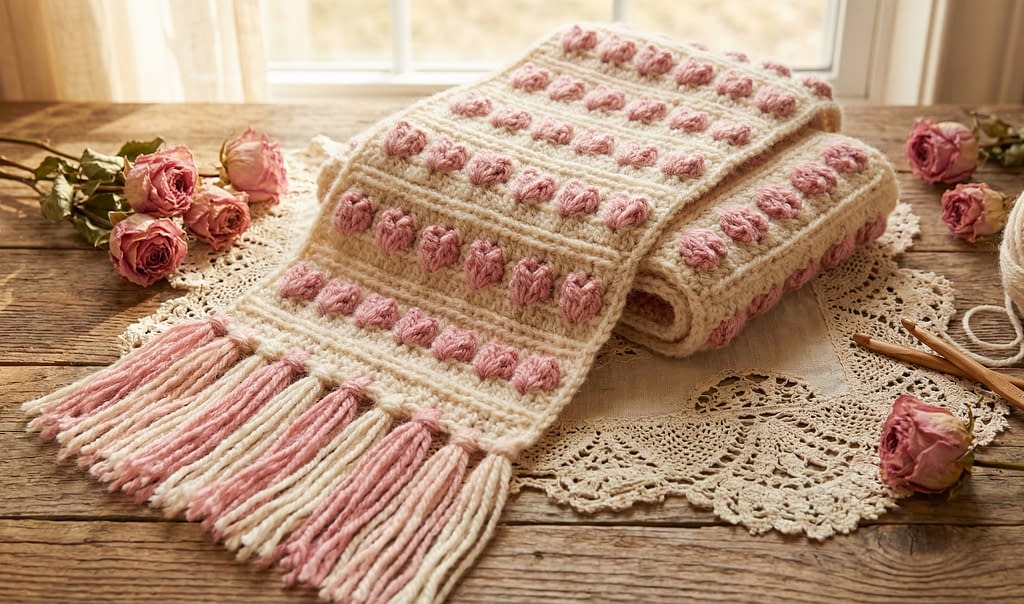
Overview and design inspiration
The Cottagecore Tulip Stitch Scarf captures warmth, nostalgia, and handcrafted charm. Using warm cream and soft floral pink yarn, this design feels romantic and timeless. Long tassels at each end add movement and a relaxed, vintage-inspired finish.
This scarf pairs beautifully with neutral clothing and rustic styling.
Skill level
Beginner to intermediate. Tassel making is simple and adds an excellent finishing skill for beginners to learn.
Finished size
Approximately 65 inches long and 7.5 inches wide, not including tassels.
Materials
Medium weight yarn in cream
Medium weight yarn in floral pink
Crochet hook size 5.0 millimeters
Yarn needle
Scissors
Cardboard or book for tassel making
Measuring tape
Stitch pattern explanation
The tulip stitch is worked in alternating color rows, with cream acting as the base and pink highlighting the petals. Tassels are added after the scarf is complete.
Step-by-step instructions
Foundation chain
With cream yarn, chain thirty-six stitches plus two turning chains.
Row one: Base row
Work one single crochet into the second chain from the hook and across the row. Chain one and turn.
Row two: Tulip stitch row
Switch to floral pink yarn. Work one single crochet, skip one stitch, work five double crochet stitches into the next stitch, skip one stitch, then work one single crochet.
Repeat across the row. Chain one and turn.
Row three: Background row
Switch back to cream yarn. Work one single crochet into each stitch across. Chain one and turn.
Repeating rows
Continue alternating rows two and three until the scarf reaches the desired length.
Making tassels
Wrap yarn around a piece of cardboard approximately eight inches tall. Cut one end to create strands. Gather several strands together and tie tightly near the top to form a tassel. Trim the ends evenly.
Attach tassels evenly along both ends of the scarf using a yarn needle.
Finishing
Weave in all loose ends and gently steam block if desired, keeping the tassels away from direct heat.
7. Rainbow Pastel Tulip Stitch Scarf (Cute but Soft)
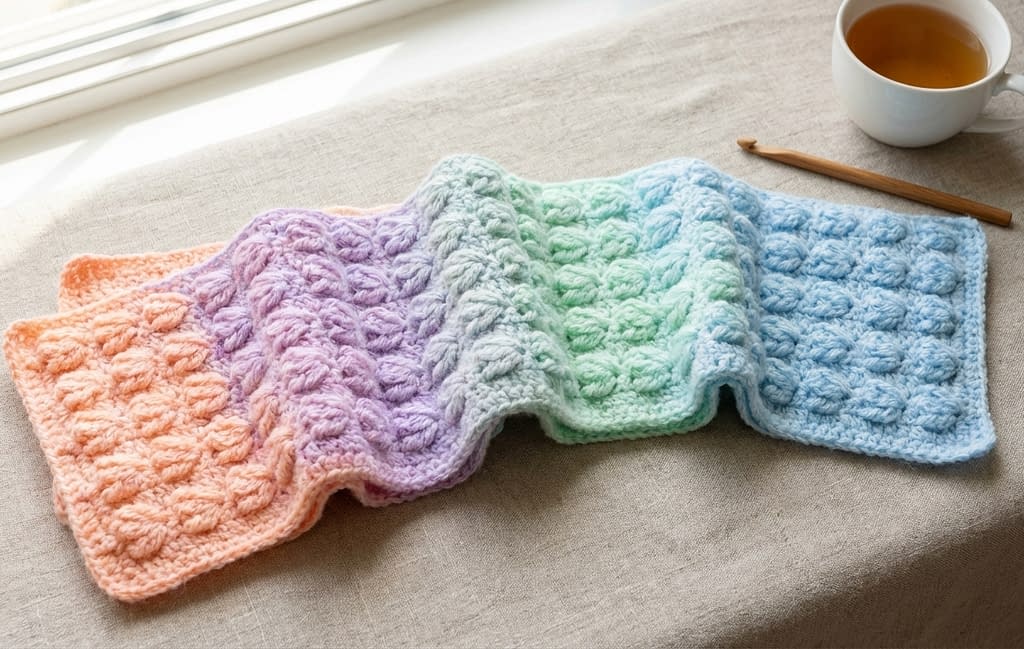
Overview and design inspiration
The Rainbow Pastel Tulip Stitch Scarf celebrates color without overwhelming the eye. Soft transitions between peach, lavender, mint, and baby blue create a cheerful yet calming effect. The consistent tulip stitch pattern keeps the design cohesive across color changes.
This scarf is ideal for showcasing leftover yarn or creating a joyful handmade accessory.
Skill level
Beginner to intermediate. Color transitions are simple and occur at row changes.
Finished size
Approximately 60 inches long and 7 inches wide.
Materials
Medium weight yarn in pastel peach
Medium weight yarn in pastel lavender
Medium weight yarn in pastel mint
Medium weight yarn in baby blue
Crochet hook size 5.0 millimeters
Yarn needle
Scissors
Measuring tape
Stitch pattern explanation
This scarf uses the same tulip stitch throughout, with color changes at regular intervals to create a soft rainbow effect.
Step-by-step instructions
Foundation chain
Chain thirty-four stitches plus two turning chains using your first color.
Row one: Base row
Work one single crochet into each chain across. Chain one and turn.
Row two: Tulip stitch row
Work the tulip stitch pattern: one single crochet, skip one stitch, five double crochet stitches into the next stitch, skip one stitch, one single crochet.
Chain one and turn.
Row three: Securing row
Work one single crochet into each stitch across. Chain one and turn.
Color changes
After completing four to six rows in one color, switch to the next pastel shade at the end of a row. Continue the same stitch pattern, allowing the colors to flow naturally.
Finishing
Fasten off after the final row and weave in all ends neatly along the back of the scarf. Lightly shape the scarf to enhance stitch definition.
Conclusion
The 7 Crochet Tulip Stitch Scarf Patterns collection demonstrates just how versatile and expressive the tulip stitch can be. From elegant fairycore designs to playful bubble textures and soft rainbow transitions, each pattern offers a unique approach while remaining beginner-friendly and clearly structured. By working through these tutorials, you not only create beautiful scarves but also build confidence in textured crochet, color control, and finishing techniques. Whether you crochet one design or all seven, these tulip stitch scarves are timeless pieces that highlight the beauty of handmade craftsmanship.


