Mini tote bags have become one of the most loved crochet accessories in recent years. They are compact, stylish, and surprisingly practical. A well-made crochet mini tote bag can hold everyday essentials such as a phone, wallet, cosmetics, or small craft supplies while also acting as a beautiful handmade statement piece.
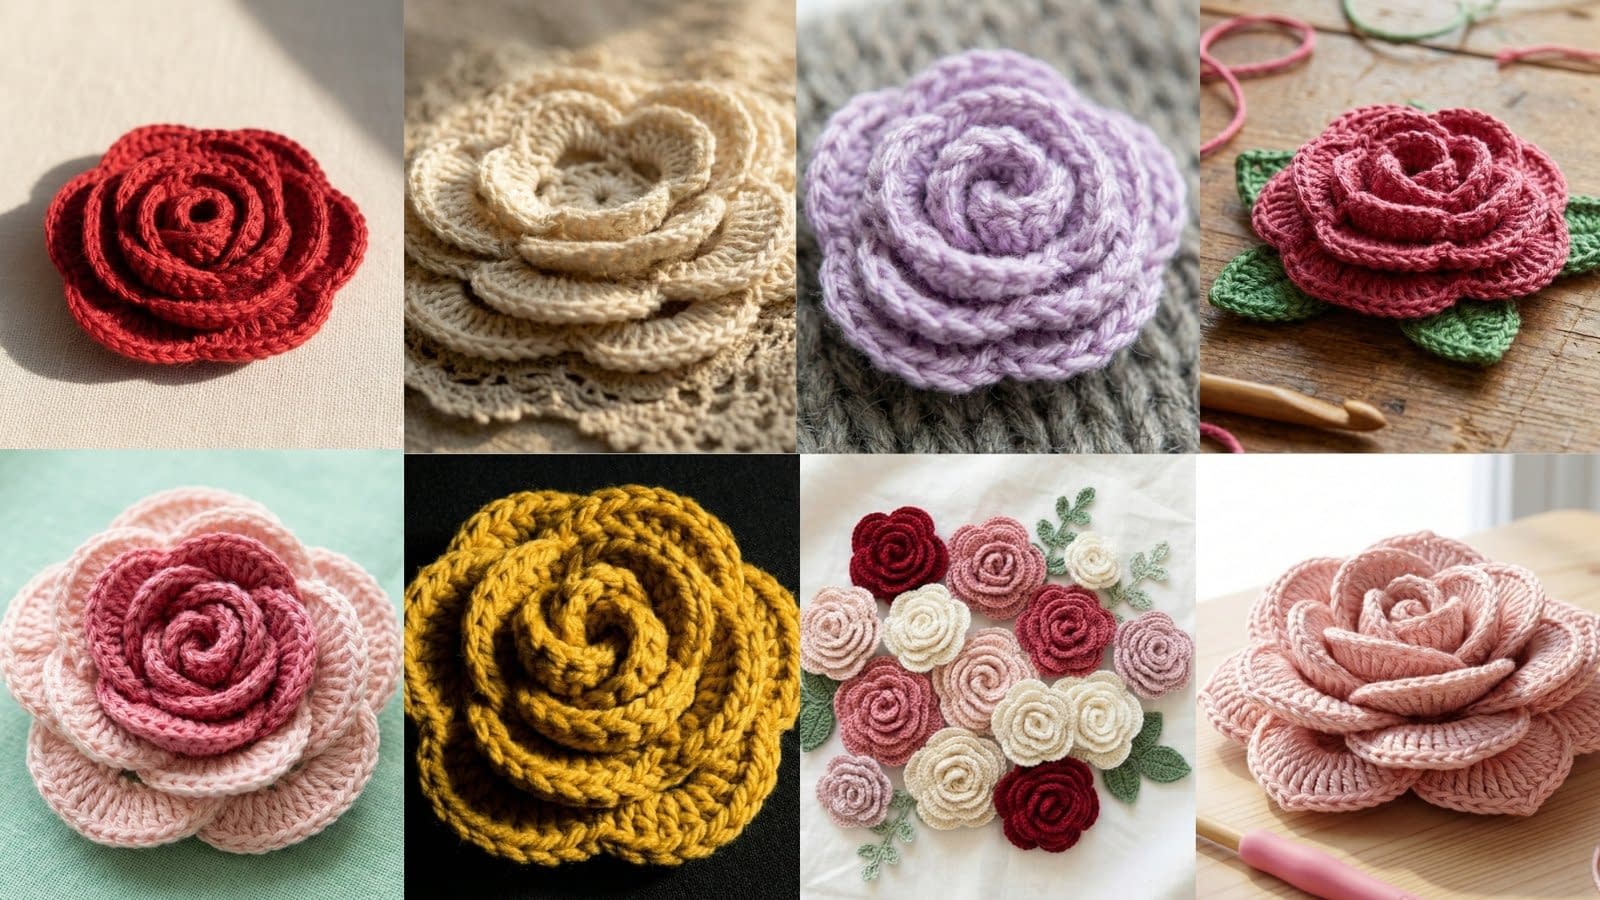
These 6 Beautiful Crochet Mini Tote Bag Patterns showcase a variety of textures, techniques, and decorative elements. Some designs rely on simple stitches that create elegant texture, while others use appliqué, motif joining, or fringe details to create eye-catching bags.
This guide is written especially for beginners who want very clear instructions. Every tutorial explains how to build the bag step by step, including shaping, attaching handles, sewing pieces together, and finishing details. You will also learn how to position decorative pieces, when to stitch or glue them, and how to ensure the bag keeps a sturdy structure.
The first three tutorials include:
• A soft textured tote with decorative crochet bobbles
• A daisy granny square mini tote bag
• A boho textured tote bag with fringe
Each project produces a durable mini tote that is both functional and beautiful.
Tools and Materials for Crochet Mini Tote Bags
Before starting the tutorials, gather the following basic supplies.
Yarn
Cotton yarn is the best option for tote bags because it provides structure and durability. Medium weight yarn (worsted weight or category 4) works perfectly for most mini totes.
Recommended yarn types include:
• 100% cotton yarn
• Cotton blend yarn
• T-shirt yarn for extra structure
Crochet Hook
Use the hook size recommended for your yarn. Most of these projects work well with:
4 mm – 5 mm crochet hooks
Using a slightly smaller hook than recommended can help create tighter stitches, which prevents stretching.
Other Supplies
You will also need:
• Yarn needle for sewing pieces together
• Sharp scissors
• Stitch markers
• Fabric glue or craft glue (optional for appliqué support)
• Measuring tape
• Pins for positioning decorative elements
Tutorial 1: Textured Bobble Crochet Mini Tote Bag
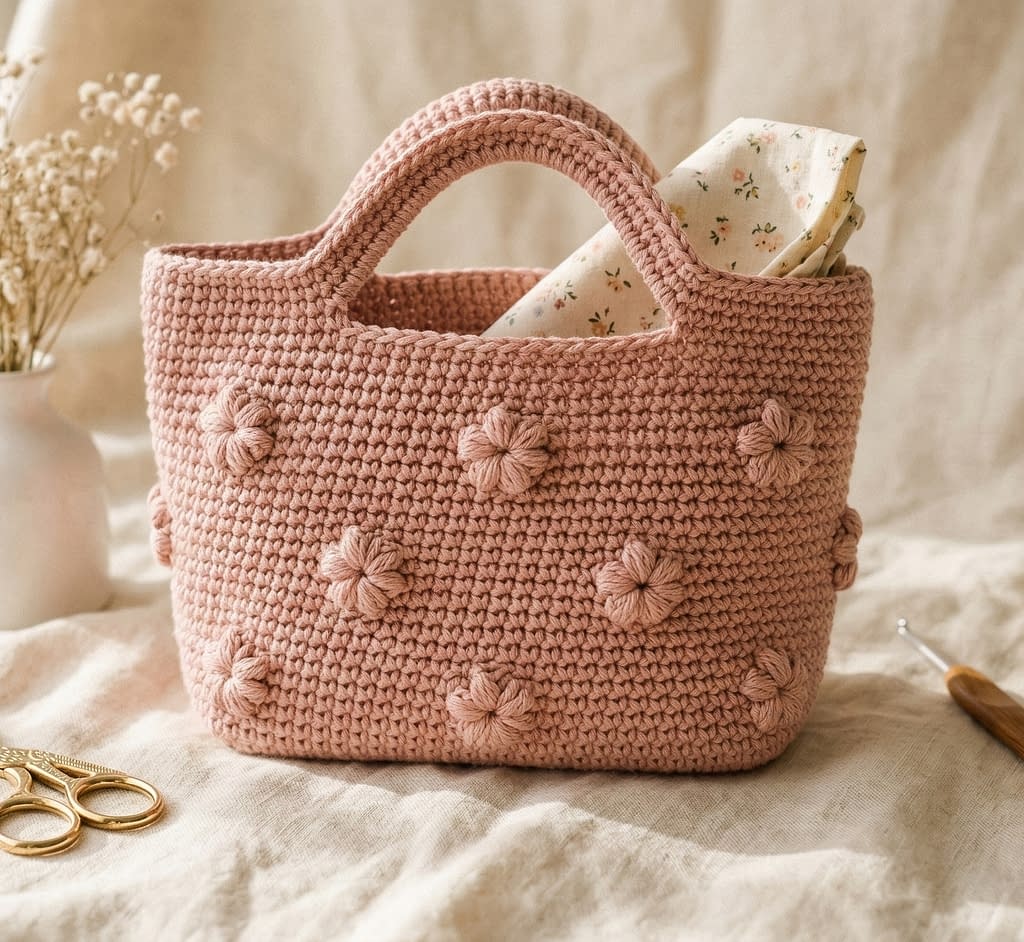
This bag matches the soft pink tote shown in the image with small raised decorative dots across the surface.
The texture is created using bobble stitches, which add dimension and a playful look.
Materials
• 200 g cotton yarn (soft pink or beige)
• 4.5 mm crochet hook
• Yarn needle
• Stitch marker
• Scissors
Finished Size
Approximately 24 cm wide and 20 cm tall (excluding handles)
Stitches Used
Chain (ch)
Single crochet (sc)
Half double crochet (hdc)
Bobble stitch
Creating the Base
Step 1: Starting the Foundation
Begin by creating a slip knot and chaining 26 stitches.
The foundation chain should be loose enough that the hook easily passes through each chain without stretching the yarn.
Step 2: First Row
Insert the hook into the second chain from the hook and work one single crochet.
Continue placing one single crochet in each chain across the row.
You should now have 25 stitches.
Chain 1 and turn your work.
Step 3: Building the Base Rectangle
Work single crochet stitches across the next rows until the base rectangle measures about 8 cm tall.
This usually takes around 10–12 rows.
Try to keep tension consistent so the edges stay straight.
Step 4: Crocheting Around the Base
Once the rectangle is complete, do not turn.
Instead, begin crocheting around the entire rectangle to create the bag sides.
Work one single crochet in each stitch across the top.
When reaching the corner, place three single crochets in the same stitch to create a rounded corner.
Continue along the side edge, placing single crochets evenly along the rows.
Repeat this process around the entire rectangle.
You should now have a complete round base.
Creating the Bobble Texture Body
Step 1: First Body Round
Chain 1 and work half double crochet in each stitch around.
Join with a slip stitch.
Step 2: Bobble Placement Round
Chain 1.
Work the following repeat:
3 half double crochet
1 bobble stitch
Continue repeating this pattern around the bag.
The bobble stitch should pop outward from the surface.
Step 3: How to Make a Bobble Stitch
To create a bobble:
Yarn over and insert the hook into the stitch.
Pull up a loop.
Yarn over and pull through two loops.
Repeat this process four more times in the same stitch.
You should now have several loops on the hook.
Yarn over and pull through all loops.
The bobble will puff outward.
Step 4: Alternate Rounds
The next round should be all half double crochet.
Then repeat the bobble round again.
Continue alternating these two rounds until the bag height reaches about 18 cm.
Creating the Top Edge
Once the desired height is reached, crochet two rounds of single crochet.
This strengthens the opening of the bag and prevents stretching.
Creating the Handles
Step 1: Mark Handle Positions
Place stitch markers about 6 cm from each side seam.
Each handle will span roughly 12 stitches.
Step 2: Creating the First Handle
Work single crochet stitches until reaching the first marker.
Chain 18 stitches.
Skip the stitches between the markers.
Continue single crochet across the remaining stitches.
Step 3: Reinforcing the Handle
On the next round, crochet single crochet stitches across the chains.
Make sure to insert the hook into each chain carefully so the handle stays even.
Repeat for the second handle.
Finishing
Cut the yarn leaving a 15 cm tail.
Thread the tail into a yarn needle and weave it through several stitches inside the bag.
Trim the excess yarn.
If desired, you can lightly steam block the bag to smooth the shape.
The result is a compact tote with beautiful raised bobble details.
Tutorial 2: Daisy Granny Square Mini Tote Bag
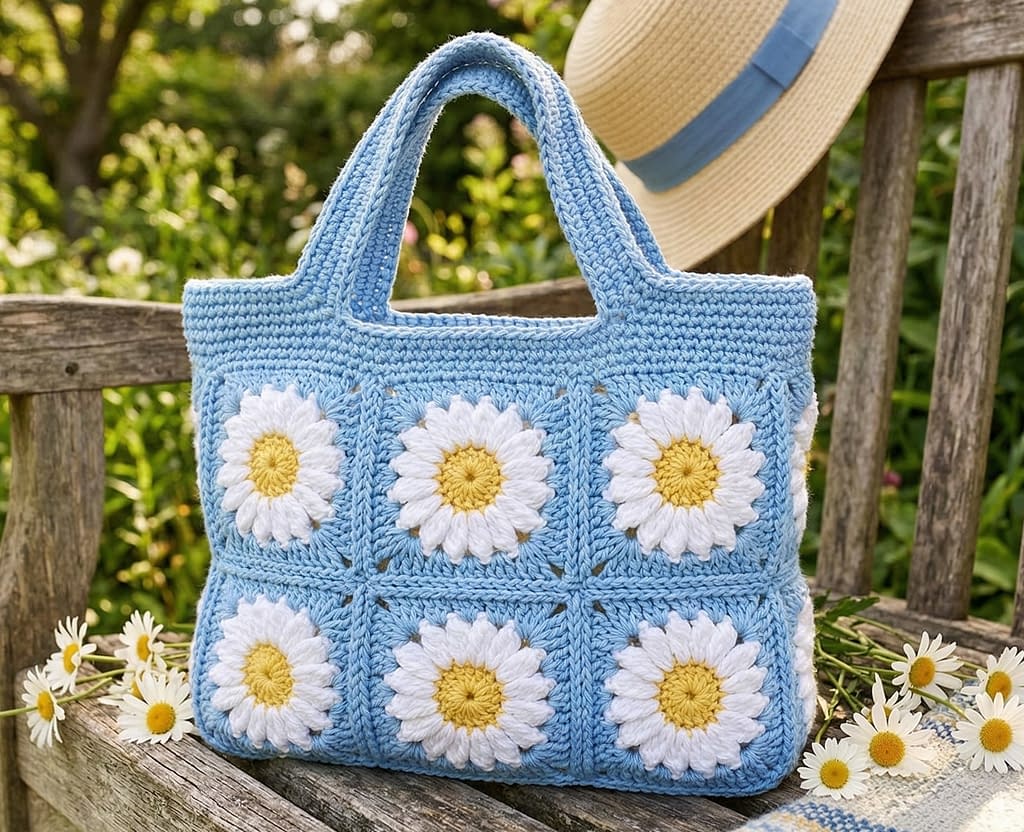
This design matches the blue tote bag with white and yellow daisy squares shown in the image.
It uses classic granny square construction with floral motifs.
Materials
• Light blue cotton yarn
• White yarn for petals
• Yellow yarn for flower centers
• 4 mm crochet hook
• Yarn needle
• Stitch markers
Finished Size
Approximately 26 cm wide and 22 cm tall.
Step 1: Creating Daisy Granny Squares
You will need six squares for the bag body.
Three for the front and three for the back.
Creating the Flower Center
Begin with yellow yarn.
Create a magic ring.
Work 12 single crochet stitches inside the ring.
Pull the ring tight and join with a slip stitch.
Fasten off the yellow yarn.
Creating the Petals
Attach white yarn to any stitch.
Chain 3.
Work 2 double crochet in the same stitch.
Chain 2.
Slip stitch into the next stitch.
This forms one petal.
Repeat around the circle until you have 12 petals.
Fasten off the white yarn.
Creating the Square Shape
Attach blue yarn between two petals.
Chain 3 and work 2 double crochet.
Chain 2.
Work 3 double crochet in the same space.
This forms the first corner.
Continue working clusters and corners around the flower to shape the square.
Each corner should have:
3 double crochet
chain 2
3 double crochet
Complete the square and fasten off.
Repeat until you have six squares.
Step 2: Blocking the Squares
Lay each square flat.
Lightly spray with water.
Use pins to hold the corners in a perfect square shape.
Allow them to dry completely.
This ensures the bag will assemble evenly.
Step 3: Joining the Squares
Arrange the squares into two panels of three squares each.
Use the mattress stitch or slip stitch join.
Insert the yarn needle through the outer loops of the stitches on both squares.
Pull the yarn gently so the seam stays flat.
Join three squares for the front panel and three for the back panel.
Step 4: Joining the Panels
Place the two panels with right sides facing outward.
Use slip stitches or a yarn needle to join the sides and bottom.
Leave the top open.
Step 5: Creating the Top Border
Attach blue yarn at the top edge.
Work single crochet stitches evenly around the entire opening.
Complete two rounds.
This strengthens the bag opening.
Step 6: Crocheting the Handles
Mark handle positions roughly 7 cm from the sides.
Work single crochet until reaching the marker.
Chain 20 stitches.
Skip the marked stitches.
Continue single crochet around.
On the next round, crochet single crochet stitches across the chains to reinforce the handles.
Finishing
Weave in all loose yarn ends carefully using a yarn needle.
Trim excess yarn.
You now have a charming floral mini tote bag with classic granny square charm.
Tutorial 3: Boho Textured Crochet Tote with Fringe
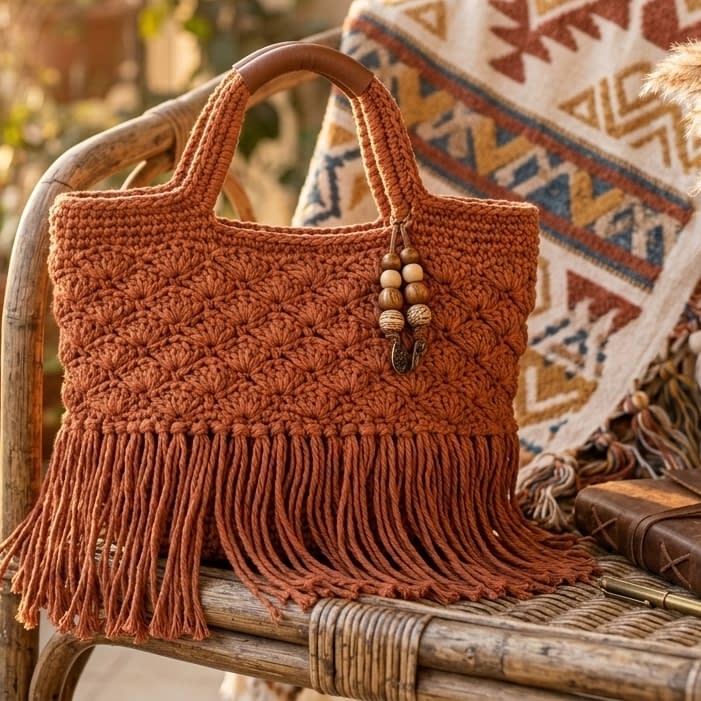
This bag corresponds to the warm brown tote with textured stitches and long fringe at the bottom.
It combines dense crochet fabric with decorative fringe for a bohemian style.
Materials
• 250 g cotton yarn (warm brown or terracotta)
• 5 mm crochet hook
• Yarn needle
• Scissors
Finished Size
Approximately 25 cm wide and 22 cm tall.
Step 1: Crocheting the Base
Create a foundation chain of 30 stitches.
Work single crochet in each stitch across.
Repeat rows until the base rectangle measures 10 cm tall.
Step 2: Building the Bag Walls
Without turning the work, begin crocheting around the rectangle.
Place single crochet stitches along each side and corner.
This creates a continuous round.
Step 3: Creating the Textured Stitch Pattern
The texture is formed using alternating front post and back post stitches.
Row Pattern
Round 1
Half double crochet in each stitch.
Round 2
Front post half double crochet in first stitch
Back post half double crochet in next stitch
Repeat around.
This creates a ribbed woven texture.
Continue repeating these rounds until the bag height reaches about 20 cm.
Step 4: Creating the Top Edge
Crochet two rounds of single crochet to stabilize the opening.
Step 5: Making the Handles
Mark two sections across from each other.
Chain 22 stitches for the handle span.
Skip the stitches beneath the chain.
On the next round, crochet single crochet stitches across the chain loops to reinforce the handle.
Repeat for the second handle.
Step 6: Creating the Fringe
Cut multiple strands of yarn about 30 cm long.
Fold one strand in half.
Insert the hook through a stitch at the bottom edge.
Pull the folded loop halfway through the stitch.
Pull the loose ends through the loop and tighten.
Continue attaching fringe along the entire bottom edge.
After attaching all strands, trim the fringe so the ends are even.
Use sharp scissors and cut across slowly to maintain a straight line.
Finishing
Turn the bag inside out briefly and check that all yarn tails are secured.
Weave loose ends with a yarn needle and trim carefully.
The finished bag has a relaxed boho style with soft fringe movement.
Tutorial 4: Strawberry Appliqué Crochet Mini Tote Bag
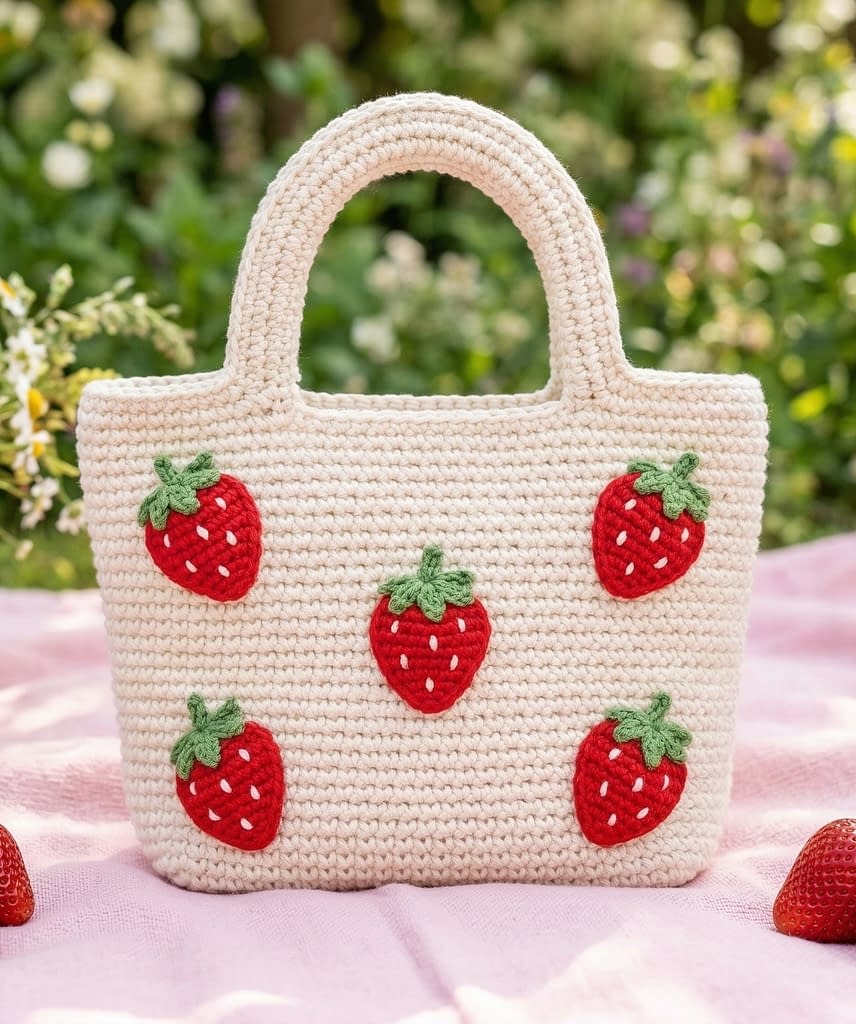
This tote corresponds to the cream-colored bag decorated with multiple red strawberry motifs. The design is playful, cheerful, and perfect for summer outings, picnics, or casual daily use. The strawberries are crocheted separately and then sewn or lightly secured with fabric glue onto the bag surface.
This tutorial carefully explains how to construct the base tote, crochet the strawberry shapes, and attach them neatly so the bag looks professional.
Materials
• 200–220 g cream or off-white cotton yarn (main bag color)
• Small amounts of red yarn for strawberries
• Small amount of green yarn for strawberry leaves
• 4.5 mm crochet hook
• Yarn needle
• Stitch markers
• Fabric glue (optional for securing motifs before sewing)
• Scissors
Finished Size
Approximately 26 cm wide and 22 cm tall
Creating the Bag Base
Step 1: Foundation Chain
Create a slip knot and chain 28 stitches.
Check the chain length by laying it flat on a table. It should measure roughly 18–20 cm. Avoid pulling the yarn tightly while chaining because tight chains can distort the base shape.
Step 2: First Row
Insert the hook into the second chain from the hook and make one single crochet.
Continue working one single crochet in each chain across the row.
You should have 27 stitches.
Chain 1 and turn your work.
Step 3: Building the Base Rectangle
Work rows of single crochet until the rectangle measures about 9 cm tall.
Usually this takes 12–14 rows depending on yarn thickness.
Make sure the edges remain straight. If the edges start pulling inward, loosen your tension slightly.
Step 4: Crocheting Around the Rectangle
Now begin forming the tote shape.
Without turning the work, begin crocheting around the rectangle perimeter.
Work one single crochet into each stitch along the top edge.
When you reach the corner, place three single crochets in the same stitch to create a rounded corner.
Continue along the side edge. Insert the hook into the ends of the rows and place one single crochet into each row edge.
Repeat this process around the entire base.
Join with a slip stitch to close the round.
Building the Tote Walls
Round 1
Chain 1.
Work half double crochet in every stitch around the base.
Join with a slip stitch.
Rounds 2–12
Continue working half double crochet stitches in continuous rounds.
To keep the seam less visible, insert the hook through the back loop only for a subtle ridge texture.
Work until the bag height reaches approximately 20 cm.
Creating the Top Border
Work two rounds of single crochet around the top opening.
These rounds stabilize the bag and prevent the edge from stretching over time.
Creating the Handles
Step 1: Mark Handle Placement
Lay the bag flat and place stitch markers to mark two handle openings. Each handle opening should span about 12 stitches and be positioned symmetrically.
Step 2: Creating the Handle Chains
Crochet single crochet stitches until you reach the first marker.
Chain 20 stitches.
Skip the stitches between the markers.
Continue crocheting single crochet stitches around the rest of the bag.
Repeat for the second handle.
Step 3: Reinforcing the Handles
On the next round, work single crochet stitches into each chain of the handle.
Insert the hook carefully under both loops of each chain so the handle remains strong.
Crocheting the Strawberry Motifs
Each strawberry is made in two small sections: the berry body and the leaf top.
Creating the Strawberry Body
Using red yarn, create a magic ring.
Work the following stitches inside the ring:
Chain 1
6 single crochet
Pull the ring tight.
Round 2:
Work 2 single crochet in each stitch.
You should have 12 stitches.
Round 3:
1 single crochet in first stitch
2 single crochet in next stitch
Repeat around.
Fasten off leaving a long tail for sewing.
Flatten the circle slightly so it forms a rounded strawberry shape.
Creating the Leaf Top
Attach green yarn to the top edge of the strawberry.
Chain 3.
Slip stitch in the next stitch.
Repeat this around the top edge to form small leaf points.
Fasten off and weave in the short end.
Attaching the Strawberries
Before attaching, arrange the strawberries across the tote front.
A balanced layout is usually 3 rows with 2 strawberries per row.
Positioning
Place the strawberries evenly spaced.
Use pins to hold them temporarily in position.
Securing with Glue (Optional)
Apply a very small amount of fabric glue to the back of each strawberry.
Press gently onto the bag and allow it to sit for a few minutes.
This step keeps the motifs from shifting while sewing.
Sewing the Motifs
Thread the long yarn tail through a yarn needle.
Insert the needle through the bag fabric and the strawberry edge.
Sew around the motif edge using small whip stitches.
Once complete, secure the yarn inside the bag and trim excess.
Finishing
Weave all yarn tails into the inside of the bag.
Turn the bag inside out and double-check that the stitches are secure.
The finished strawberry tote is playful and ideal for warm seasons.
Tutorial 5: Pastel Striped Crochet Mini Tote Bag
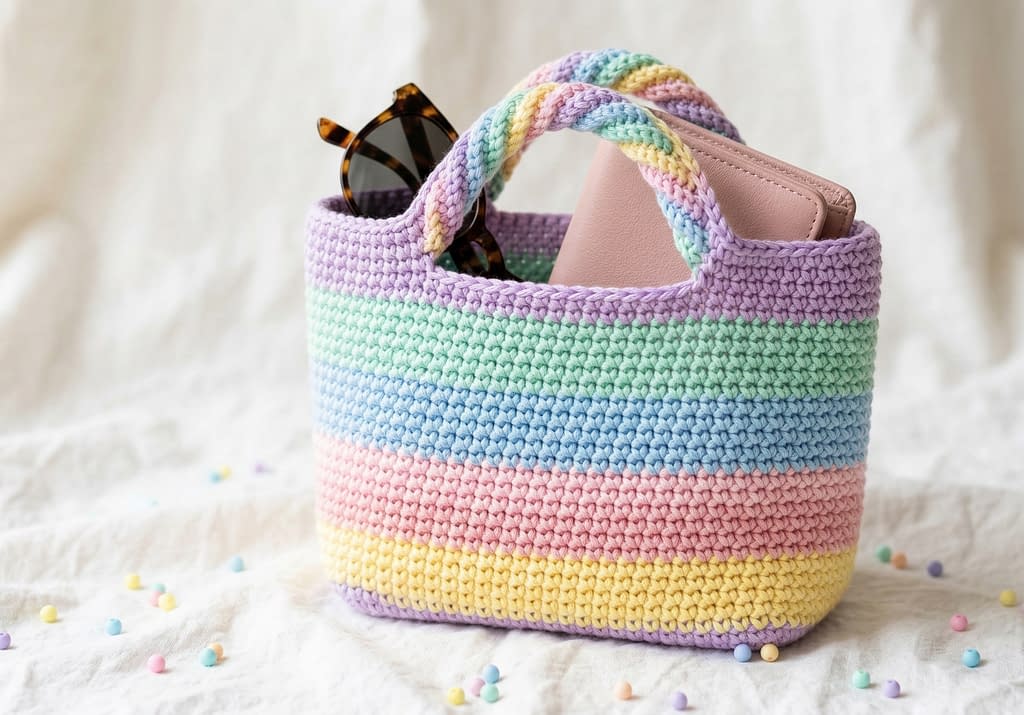
This tote corresponds to the soft rainbow pastel striped bag shown in the image. The design uses simple stitches but relies on color transitions to create a beautiful effect.
This is an excellent beginner project because it focuses on even stitching and smooth color changes.
Materials
• Cotton yarn in pastel colors (lavender, mint, yellow, peach, and baby blue)
• 4.5 mm crochet hook
• Yarn needle
• Stitch markers
• Scissors
Finished Size
Approximately 25 cm wide and 21 cm tall
Creating the Base
Step 1: Foundation Chain
Create a slip knot and chain 30 stitches.
Lay the chain flat and ensure it is not twisted.
Step 2: First Row
Insert the hook into the second chain from the hook.
Work one single crochet into each chain across.
You should have 29 stitches.
Chain 1 and turn.
Step 3: Forming the Rectangle
Continue crocheting rows of single crochet until the base measures around 8–9 cm tall.
This rectangle will become the bottom of the tote.
Step 4: Crocheting Around the Base
Begin working around the entire rectangle.
Place one single crochet in each stitch along the top edge.
At the corner stitch, place three single crochets to create a smooth curve.
Continue along the sides and bottom edges.
Join the round with a slip stitch.
Creating the Color Stripes
Each stripe will consist of two rounds.
When changing colors, finish the last stitch of the previous round by pulling the new color through the final yarn-over.
This method prevents visible color breaks.
Stripe Pattern Example
Round 1–2: Lavender
Round 3–4: Mint
Round 5–6: Yellow
Round 7–8: Peach
Round 9–10: Baby blue
Work half double crochet stitches in each round.
Repeat colors if you want additional stripes.
Continue until the bag reaches about 20 cm tall.
Creating the Top Edge
Work two rounds of single crochet using the same color as the final stripe.
This keeps the edge firm and consistent.
Crocheting the Handles
Step 1: Mark the Handle Areas
Lay the bag flat.
Place stitch markers about 7 cm from each side.
Step 2: Creating the Handle Opening
Work single crochet stitches until reaching the marker.
Chain 22 stitches.
Skip the stitches between the markers.
Continue crocheting around the bag.
Repeat on the opposite side.
Step 3: Strengthening the Handles
On the next round, work single crochet stitches across the chain loops.
Make sure to insert the hook into the center of each chain to avoid twisting.
Finishing
Cut the yarn leaving a 12 cm tail.
Use a yarn needle to weave the tail into the inner stitches.
Turn the bag inside out and trim excess yarn.
The finished tote has a soft pastel look that feels cheerful and light.
Tutorial 6: Minimalist Neutral Crochet Mini Tote Bag
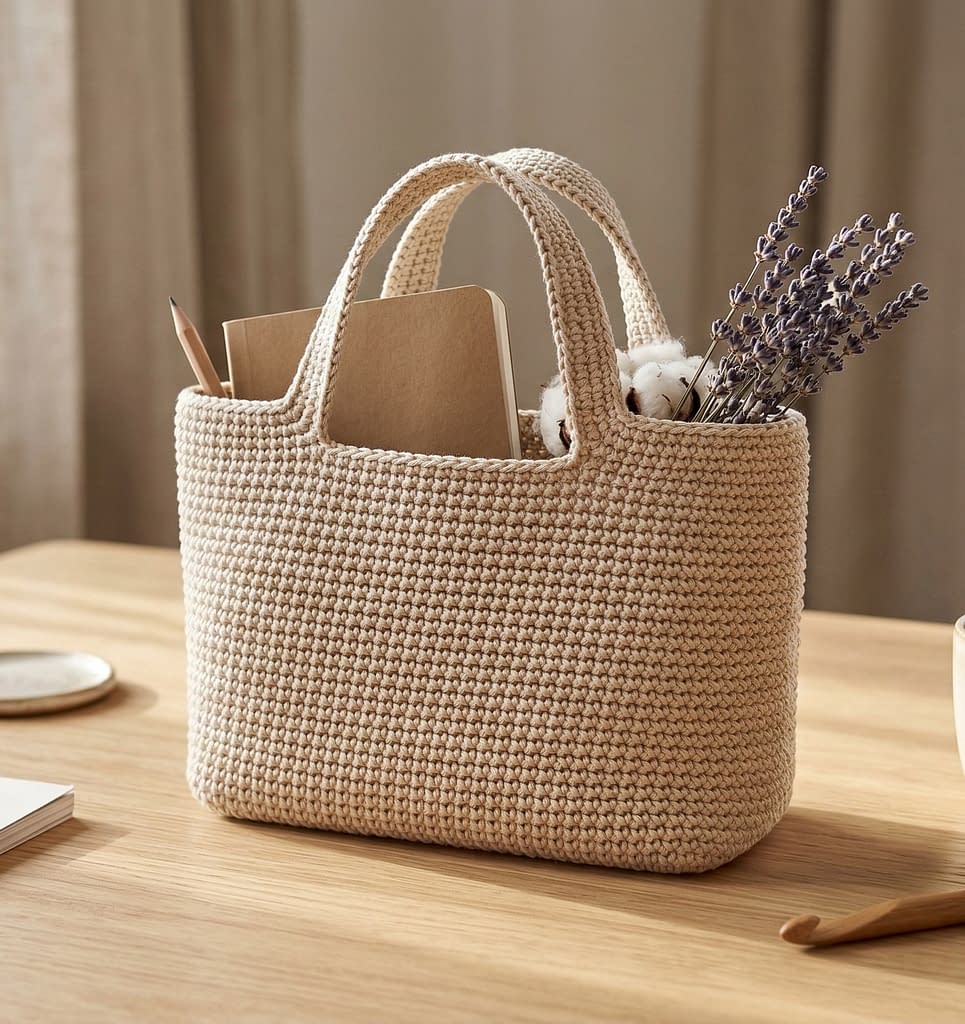
This tote corresponds to the final beige bag in the image. It has a clean, minimal design and relies on tight, consistent stitches to create a professional look.
Because of its simplicity, this tote pairs well with many outfits and works well as an everyday bag.
Materials
• 220 g beige or sand-colored cotton yarn
• 4 mm crochet hook
• Yarn needle
• Stitch markers
• Scissors
Finished Size
Approximately 26 cm wide and 22 cm tall
Creating the Base
Step 1: Foundation Chain
Create a chain of 32 stitches.
Ensure the chain is straight and not twisted.
Step 2: First Row
Insert the hook into the second chain from the hook.
Work single crochet stitches across the entire row.
Chain 1 and turn.
Step 3: Building the Rectangle
Continue rows of single crochet until the base measures around 9–10 cm tall.
This thicker base provides more durability.
Forming the Bag Walls
Begin crocheting around the rectangle without turning.
Place one single crochet in each stitch.
At each corner stitch, place three single crochets.
Continue around the entire perimeter.
Creating the Dense Texture
To produce the neat woven look of the bag, use the waistcoat stitch.
Waistcoat Stitch Instructions
Insert the hook directly into the center of the stitch below instead of the top loops.
Pull up a loop and complete the single crochet.
This stitch creates a knit-like appearance.
Continue working waistcoat stitches in rounds until the bag height reaches about 20 cm.
Creating the Reinforced Top Edge
Work two rounds of standard single crochet.
This slightly contrasts the texture and strengthens the opening.
Crocheting Thick Handles
Step 1: Mark Handle Locations
Place stitch markers about 6–7 cm from each side.
Each handle should cover roughly 14 stitches.
Step 2: Creating the Handle Chains
Work single crochet stitches until reaching the marker.
Chain 24 stitches.
Skip the stitches beneath.
Continue crocheting around the bag.
Repeat on the opposite side.
Step 3: Thickening the Handles
On the next round, work two single crochet stitches into each chain stitch.
This thickens the handle and prevents stretching.
Finishing
Weave in all yarn tails carefully using a yarn needle.
Block the bag lightly by stuffing it with soft fabric and misting it with water. Allow it to dry naturally so the shape sets.
The final tote has a modern minimalist style with excellent structure.
Conclusion
Crochet mini tote bags are a wonderful combination of creativity and practicality. Each of the designs in this collection offers a different personality and technique while still being accessible for beginners.
The bobble textured tote introduces dimensional stitches that add playful detail. The daisy granny square tote celebrates classic crochet motifs and colorful design. The boho fringe tote creates a relaxed and artistic style through textured stitches and decorative fringe.
The strawberry appliqué tote brings cheerful personality through carefully placed motifs. The pastel striped tote uses color transitions to create a light and cheerful aesthetic. Finally, the minimalist neutral tote proves that simple stitches and clean structure can produce an elegant everyday bag.
Working through these six beautiful crochet mini tote bag patterns will help beginners develop several important crochet skills, including shaping, motif joining, texture stitches, color changes, and handle construction. By following the detailed instructions, even someone new to crochet can confidently complete these projects.
Mini tote bags are also wonderful handmade gifts. Their compact size makes them practical for daily use, and the handmade nature of crochet adds warmth and uniqueness that store-bought bags cannot replicate.
As you continue practicing, you can easily customize these designs by changing yarn colors, adding lining fabric inside the bag, attaching buttons or tassels, or adjusting the size of the handles.
With patience and consistent stitching, each of these crochet mini tote bags can become a beautiful accessory that reflects your personal creativity while providing lasting function.