Creating a complete knitted baby set is one of the most rewarding projects for any knitter. Not only do these sets look beautiful, but they are also practical, thoughtful, and perfect for gifting. Each set in this guide includes five coordinated pieces—typically a romper or onesie, a cardigan or top, a bonnet or hat, booties, and sometimes pants or accessories.
In this detailed guide, you will learn how to recreate three stunning 5-piece knitted baby sets that match the visual references you provided. Each tutorial is written with beginners in mind, explaining every step clearly, including shaping, assembling, finishing, and detailing techniques.
Why 5-Piece Knitted Baby Sets Are Worth Making
A 5-piece set is more than just a knitting project—it is a complete outfit. These sets:
- Provide a cohesive and polished look
- Allow you to practice multiple knitting techniques in one project
- Make meaningful handmade gifts for newborns
- Help you build confidence as a knitter through structured learning
Each tutorial below is carefully designed to guide you through every detail so nothing feels confusing or overwhelming.
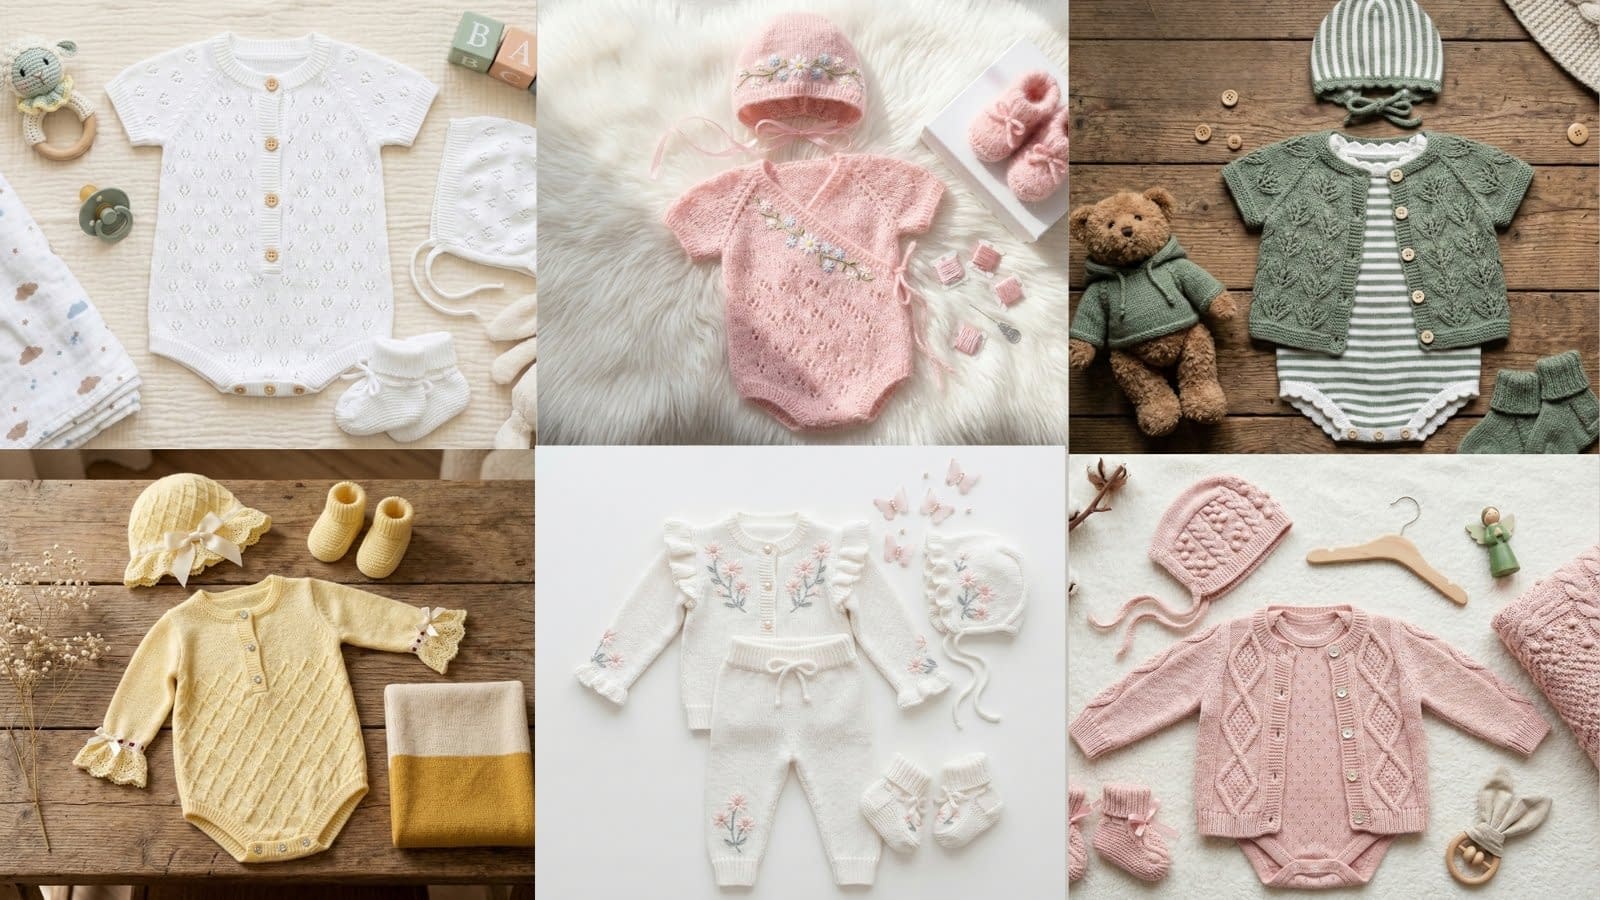
Tutorial 1: Classic White Lace Knit Baby Set
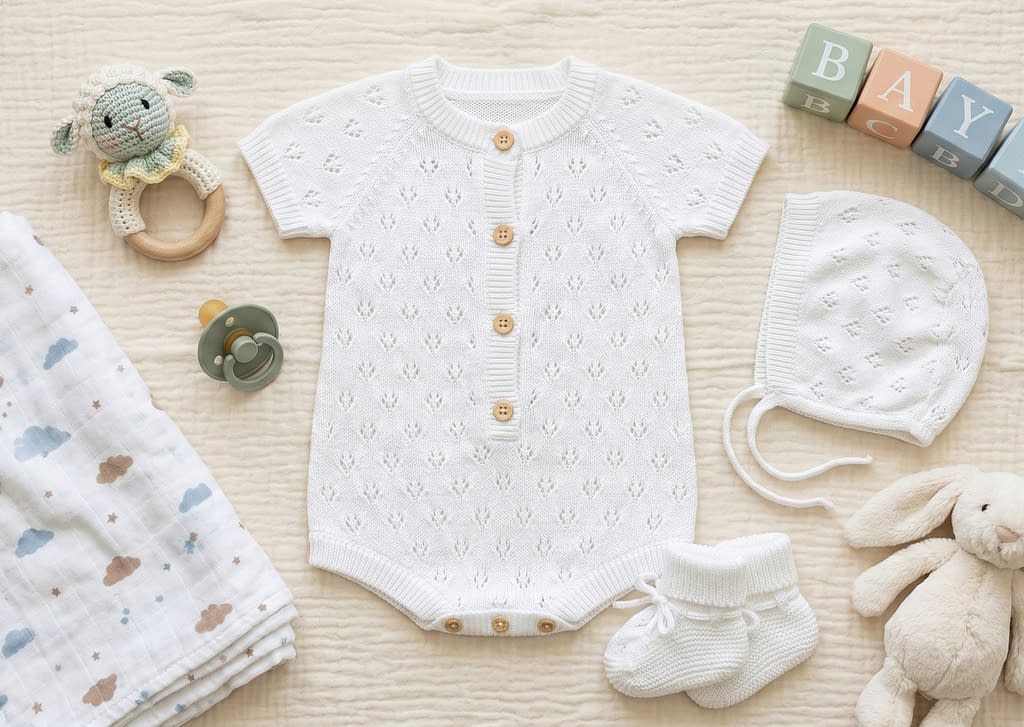
This set matches the top-left image: a soft white romper with delicate lace texture, paired with a bonnet and booties. The design is minimal yet elegant, making it perfect for newborn photos or special occasions.
Materials Needed
- Soft baby yarn (DK or light worsted weight, white)
- 3.5 mm and 4 mm knitting needles
- Stitch markers
- Yarn needle
- Small buttons (3–5 pieces)
- Scissors
Finished Pieces
- Lace knit romper
- Matching bonnet
- Booties
- Optional mittens (for full set completion)
Romper Instructions
Casting On and Base Structure
Cast on 60–70 stitches using 3.5 mm needles. Use a rib stitch (k1, p1) for the first 8–10 rows to create a soft, stretchy bottom edge.
Switch to 4 mm needles and begin the lace pattern:
- Row 1: Knit all stitches
- Row 2: Purl all stitches
- Row 3: Knit 2 together, yarn over, repeat across
- Row 4: Purl all stitches
Repeat this pattern to create the airy lace effect seen in the image.
Shaping the Body
Once the piece reaches about 20–22 cm:
- Divide the work into front and back panels
- Knit each side separately
- For armholes: decrease 1 stitch at the beginning of every row for 4 rows
Continue straight knitting until shoulder height is reached.
Button Placket
On the front panel, create a button band:
- Knit 4 stitches at the edge in garter stitch
- On every 6th row, make buttonholes by knitting 2 together and yarn over
Bonnet Instructions
Shaping the Crown
Cast on 50 stitches and knit in stockinette stitch for 10–12 rows.
To shape:
- Divide stitches into three sections
- Decrease evenly in the center section every row
This creates the rounded bonnet shape.
Side Ties
Pick up stitches along the sides and knit long i-cord ties:
- Knit 3 stitches continuously without turning
- Slide stitches back and repeat
Booties Instructions
Sole
Cast on 30 stitches and knit flat:
- Increase 1 stitch at both ends every other row for 4 rows
Upper Section
Switch to stockinette stitch and knit 10 rows.
Shaping Toe
- Knit 2 together across the center stitches
- Continue decreasing until rounded
Fold the sole inward and sew neatly using a yarn needle.
Finishing Tips
- Lightly block the pieces to enhance the lace pattern
- Sew buttons securely
- Weave in all ends carefully
Tutorial 2: Soft Pink Floral Embroidered Baby Set
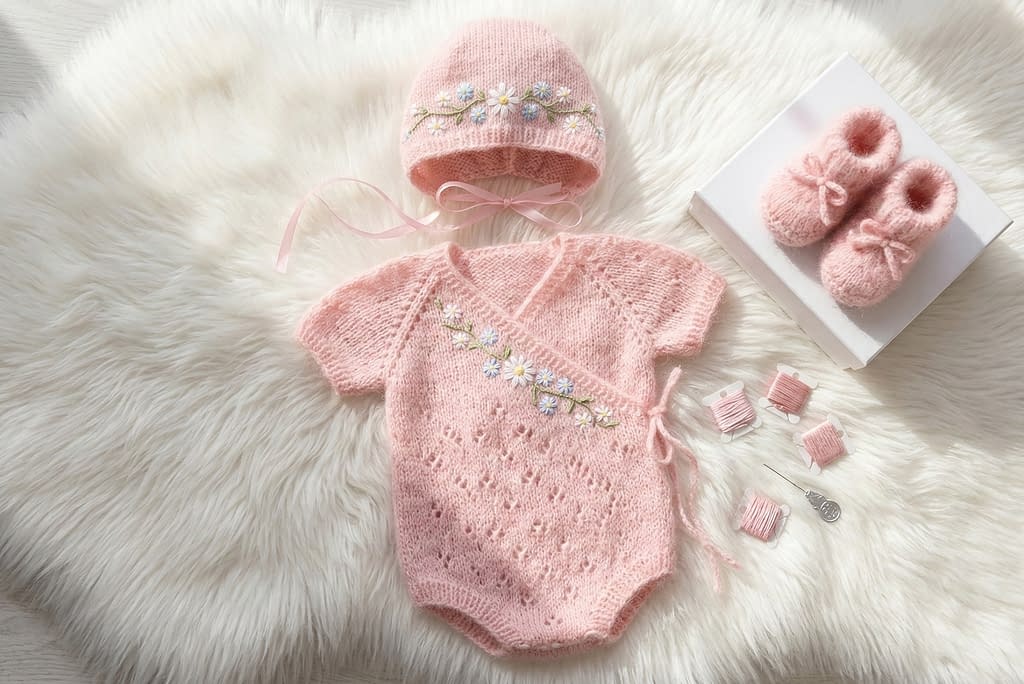
This set matches the top-middle image: a soft pink romper with delicate floral embroidery, paired with a bonnet and booties. It has a gentle, handmade charm with decorative surface details.
Materials Needed
- Baby yarn (soft pink)
- 3.5 mm needles
- Embroidery thread (pastel colors)
- Yarn needle
- Ribbon for ties
Romper Instructions
Base Construction
Cast on 65 stitches and work 8 rows in rib stitch.
Switch to stockinette stitch:
- Knit one row, purl one row
Continue until length reaches 18–20 cm.
Diagonal Front Panel
To recreate the wrap-style front:
- Divide stitches unevenly (40 front, 25 back)
- Knit front panel diagonally by decreasing 1 stitch at one edge every 4 rows
This creates the overlapping look visible in the image.
Embroidery Details
After finishing the knit:
- Use a yarn needle to stitch small flowers
- Create petals using simple straight stitches
- Add French knots for flower centers
Work gently and keep spacing even for a balanced look.
Bonnet Instructions
Base
Cast on 50 stitches and knit in stockinette for 12 rows.
Shaping
- Begin decreasing at the center
- Knit 2 together every other row
Booties Instructions
Construction
- Knit sole flat
- Pick up stitches around edges
- Knit in the round for the upper section
Decorative Finish
Add a small bow using ribbon:
- Thread ribbon through eyelet row
- Tie gently at the front
Assembly Tips
- Sew overlapping front panel neatly
- Attach embroidery after blocking for best results
- Ensure all seams are soft and baby-friendly
Tutorial 3: Green Cardigan and Striped Romper Set
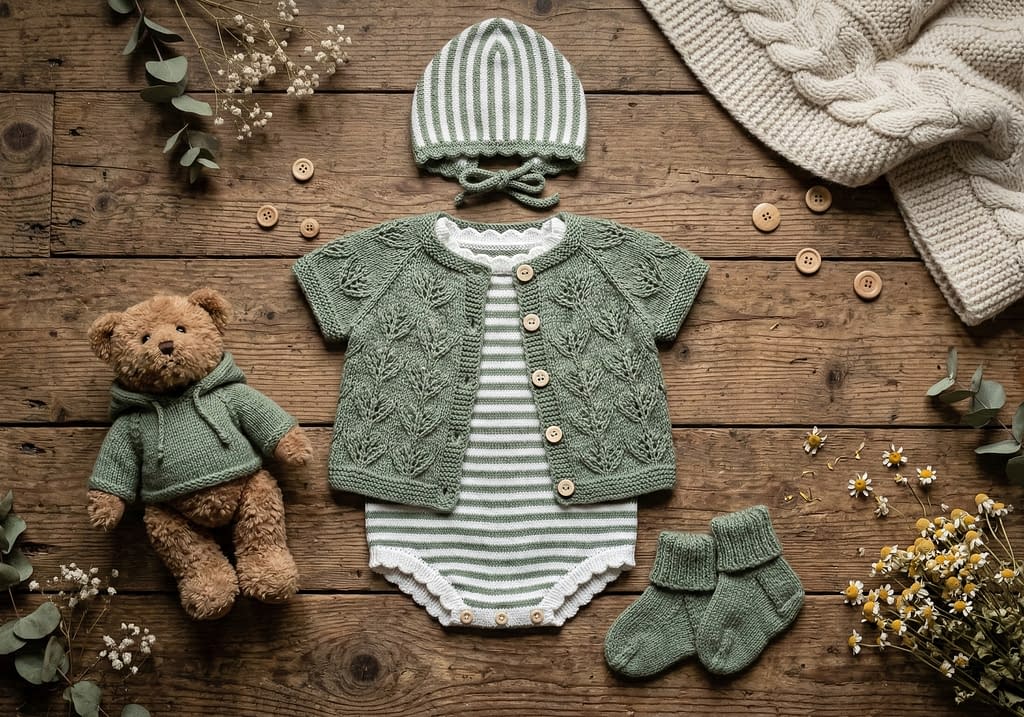
This set matches the top-right image: a green textured cardigan layered over a striped romper, with a matching hat and accessories. This design is slightly more advanced but still beginner-friendly with patience.
Materials Needed
- Green and white yarn (DK weight)
- 4 mm needles
- Stitch markers
- Buttons (4–5 medium size)
- Yarn needle
Striped Romper Instructions
Base
Cast on 70 stitches using white yarn.
Work in stripes:
- Knit 4 rows white
- Switch to green for 4 rows
- Continue alternating
Body Shaping
After 20 cm:
- Divide into front and back
- Shape armholes with decreases at edges
Cardigan Instructions
Back Panel
Cast on 60 stitches and knit in textured pattern:
- Row 1: Knit
- Row 2: Purl
- Row 3: Knit 2, purl 2 repeat
This creates the raised pattern seen in the cardigan.
Front Panels
Divide into two equal parts.
- Add button band using garter stitch
- Create buttonholes every 6–8 rows
Sleeves
Pick up stitches around armholes:
- Knit in the same textured pattern
- Decrease gradually for shaping
Hat Instructions
Ribbed Base
Cast on 50 stitches and knit:
- k2, p2 rib for 10 rows
Body
Switch to stockinette and knit 15 rows.
Crown
- Decrease evenly every row until closed
Booties Instructions
Follow a simple knit-in-the-round pattern:
- Create sole
- Build sides
- Shape toe with decreases
Finishing and Assembly
- Sew cardigan panels neatly
- Attach buttons securely
- Block lightly to enhance texture
Tutorial 4: Warm Yellow Textured Baby Set with Blanket
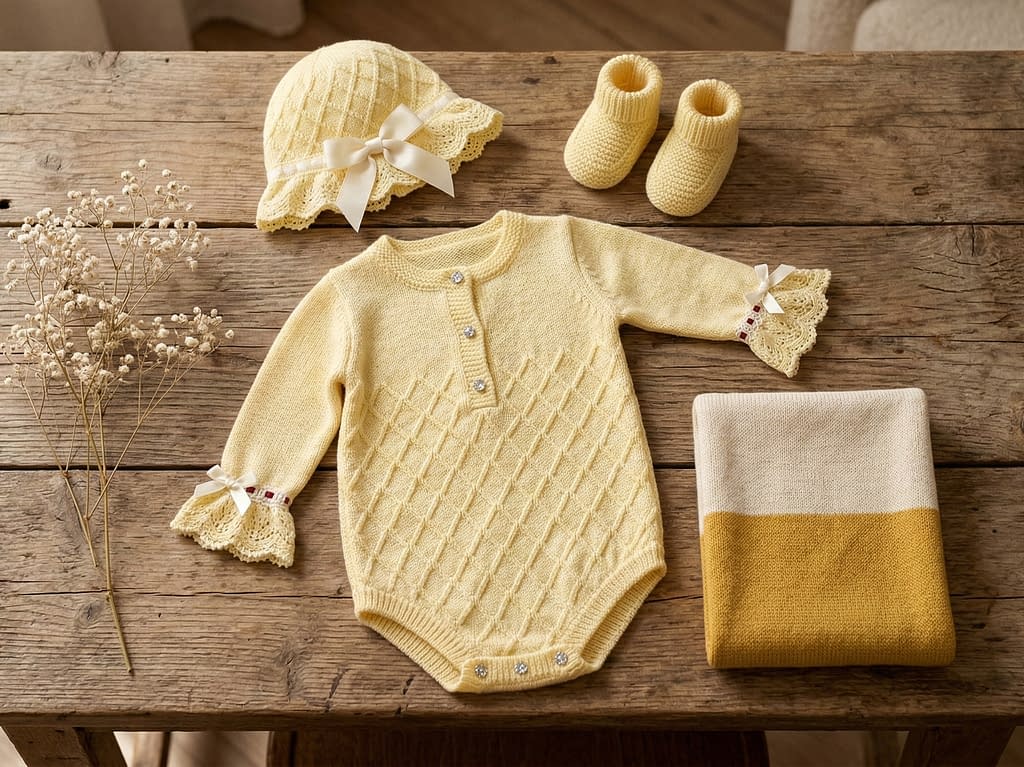
This set matches the bottom-left image: a cozy yellow romper with textured knit details, paired with a soft bonnet, booties, and a two-tone blanket. The warm tones and slightly rustic styling make this set perfect for everyday wear.
Materials Needed
- Soft baby yarn (yellow and cream tones)
- 4 mm knitting needles
- Stitch markers
- Yarn needle
- Scissors
Finished Pieces
- Textured romper
- Bonnet with lace edge
- Booties
- Two-tone blanket
- Optional mittens
Romper Instructions
Base and Ribbing
Cast on 64 stitches using yellow yarn.
- Knit 10 rows in k1, p1 rib stitch
- This creates a snug but flexible bottom edge
Switch to stockinette stitch for 6 rows to create a smooth transition.
Creating the Textured Pattern
To achieve the subtle vertical texture:
- Row 1: Knit all stitches
- Row 2: Purl all stitches
- Row 3: Knit 3, p1 repeat
- Row 4: Purl all stitches
Repeat this pattern until the piece measures about 20 cm.
Sleeve and Body Shaping
- Divide the work into front and back
- Decrease 1 stitch at both edges every other row (4 times) for armholes
- Continue straight knitting
For sleeves:
- Pick up stitches along armholes
- Knit 12–15 rows
- Finish with ribbed cuffs
Bonnet Instructions
Base Structure
Cast on 52 stitches.
- Knit 8 rows in garter stitch
Switch to stockinette stitch for 12 rows.
Lace Edge Detail
To create the delicate edge:
- Knit 2 together, yarn over across the row
- Follow with a purl row
This creates small eyelets.
Fold the edge slightly inward and stitch lightly to give a scalloped look.
Booties Instructions
Sole
Cast on 32 stitches.
- Increase at both ends every second row for 4 rows
Upper Section
- Knit 10 rows in stockinette
- Begin toe shaping by knitting 2 together at the center
Fold and sew carefully using a yarn needle. Keep seams flat and soft.
Blanket Instructions
Two-Tone Construction
Cast on 80 stitches using cream yarn.
- Knit 10 rows in garter stitch
Switch to yellow:
- Knit 20 rows
Alternate colors every 20 rows to create wide stripes.
Finishing the Blanket
- Bind off loosely
- Fold edges gently and block to even out shape
- Weave in yarn ends securely
Final Assembly Tips
- Attach bonnet ties using braided yarn strands
- Ensure all seams are smooth and comfortable
- Light blocking will enhance stitch definition
Tutorial 5: Elegant White Floral Knit Baby Set with Pants
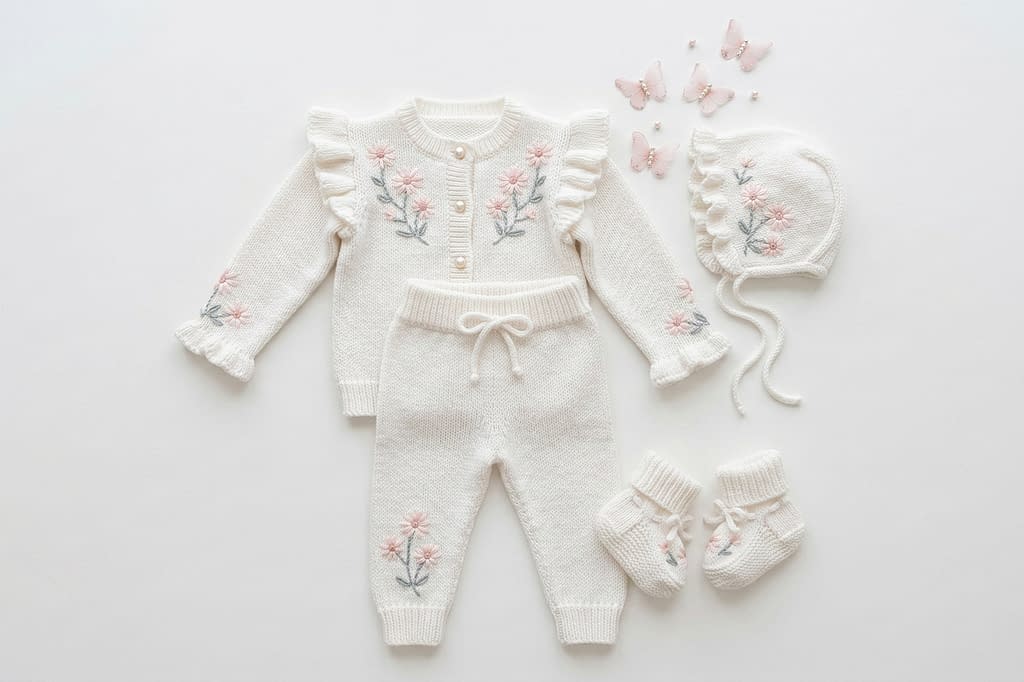
This set matches the bottom-middle image: a beautifully coordinated white outfit with embroidered floral details, including a cardigan-style top, pants, bonnet, and booties.
Materials Needed
- Soft white baby yarn
- 3.5 mm needles
- Pastel embroidery threads
- Yarn needle
- Stitch markers
Cardigan Instructions
Base Construction
Cast on 60 stitches.
- Knit 8 rows in rib stitch
Switch to stockinette for the body.
Adding Ruffle Shoulders
To create the soft ruffle detail:
- Increase 1 stitch every 2 stitches across the shoulder rows
- Knit 4 rows in garter stitch
This creates a gentle, gathered effect.
Button Band
- Knit 5 stitches in garter stitch along one edge
- Create buttonholes every 6 rows
Floral Embroidery
After knitting:
- Use a yarn needle to stitch small flowers
- Make petals with straight stitches
- Use French knots for centers
Keep spacing even and balanced across the chest and pant legs.
Pants Instructions
Waistband
Cast on 50 stitches.
- Knit in k1, p1 rib for 12 rows
Leg Construction
Divide stitches into two sections.
- Knit each leg separately
- Decrease gradually toward the ankle
Finish with ribbed cuffs.
Bonnet Instructions
- Cast on 50 stitches
- Knit in stockinette
- Shape crown by decreasing evenly
Add embroidered flowers to match the outfit.
Booties Instructions
- Knit flat sole
- Pick up stitches for upper
- Shape toe with decreases
Add small embroidered accents for consistency.
Assembly Tips
- Sew shoulders neatly
- Attach sleeves carefully
- Add embroidery after blocking
Tutorial 6: Soft Pink Cable Knit Baby Set
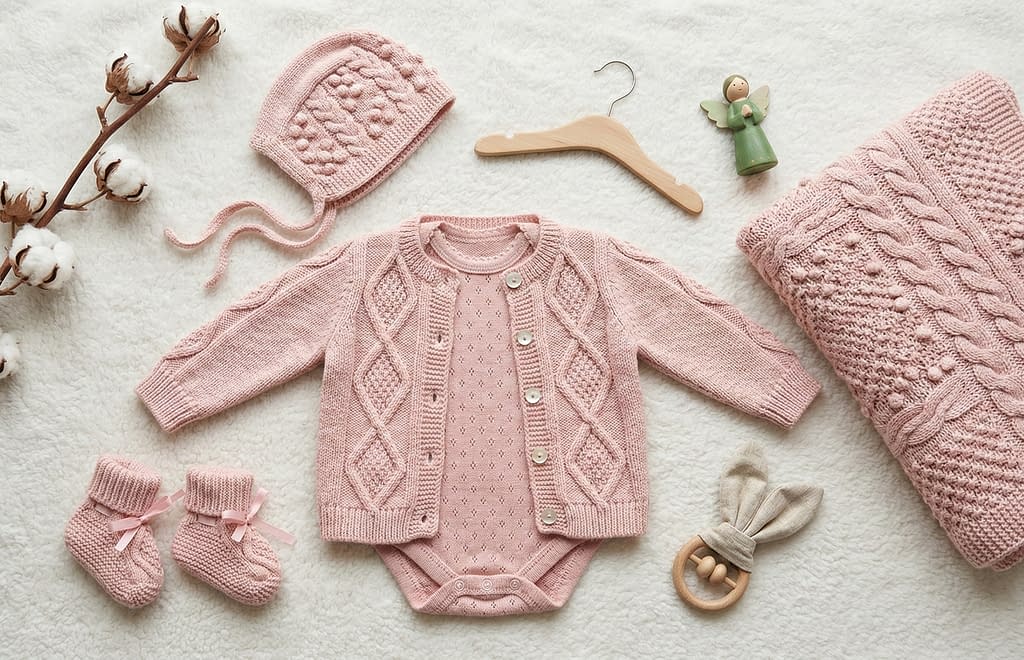
This set matches the bottom-right image: a soft pink cable-knit cardigan paired with a romper, bonnet, and booties. This design introduces simple cable knitting for added texture.
Materials Needed
- Soft pink baby yarn
- 4 mm knitting needles
- Cable needle
- Stitch markers
- Yarn needle
- Buttons
Cardigan Instructions
Casting On
Cast on 64 stitches.
- Knit 8 rows in rib stitch
Cable Pattern
To create the cable texture:
- Row 1: Knit
- Row 2: Purl
- Row 3: Slip 2 stitches to cable needle, knit next 2, then knit slipped stitches
Repeat this every 6 rows to form vertical cables.
Shaping
- Divide into front panels and back
- Add button band using garter stitch
- Create buttonholes evenly
Romper Instructions
- Cast on 60 stitches
- Knit in stockinette
- Add small textured details using purl stitches
Shape armholes and neckline as in previous tutorials.
Bonnet Instructions
- Cast on 48 stitches
- Knit in cable pattern for 10 rows
- Switch to stockinette
- Decrease for crown shaping
Booties Instructions
Sole
- Cast on 30 stitches
- Increase at edges
Upper and Cable Detail
- Knit 8 rows
- Add a small cable on top section
Finishing
- Sew all seams carefully
- Attach buttons securely
- Block lightly to define cables
Conclusion
Creating these 6 Stunning 5-Piece Knitted Baby Set Pattern Tutorials for Newborns is more than just following patterns—it is about building skill, confidence, and creativity. Each set introduces something new, from lacework and embroidery to texture and cables, allowing you to grow as a knitter while creating something meaningful.
As you work through these projects, focus on small details. Pay attention to stitch consistency, shaping accuracy, and finishing techniques. Take your time when sewing pieces together, folding edges, and securing yarn ends. These finishing steps are what transform a handmade project into a polished, professional-looking baby set.
Do not rush the process. Knitting for newborns requires softness, comfort, and care. Always check that seams are flat, buttons are securely attached, and materials are gentle against delicate skin.
You can also personalize each set by experimenting with colors, adding extra embroidery, or adjusting sizes slightly. Over time, you will develop your own style and preferences.
By completing all six sets, you will gain a strong foundation in garment knitting and be able to confidently create your own custom baby outfits in the future.