
Spring brings soft winds, open skies, and the perfect opportunity to fly something you’ve made with your own hands. Paper kites are timeless — they’re colorful, creative, and can be made from simple materials you already have at home. This 6 Paper Kite for Spring Full Tutorial will guide you through six beautiful kite designs, each with its own character, shape, and flying style.
Each tutorial includes a full step-by-step process — measurements, cutting angles, folding, sticking, and decorating — so even beginners can make perfect, high-flying paper kites.
Materials You’ll Need for All Kites
Before starting, gather the following materials. These will be used throughout the six tutorials:
Basic Materials (for each kite):
- Lightweight paper (A4 or 12×12 inches): Craft paper, tissue paper, or kite paper
- 2 bamboo sticks or thin wooden dowels: Around 12–20 inches long
- Strong glue stick or craft glue
- Scissors
- Ruler and pencil
- String or thin thread (for flying line)
- Clear tape (optional, for reinforcement)
- Markers, paint, or colored pencils for decoration
- Paper streamers or ribbons (for tails)
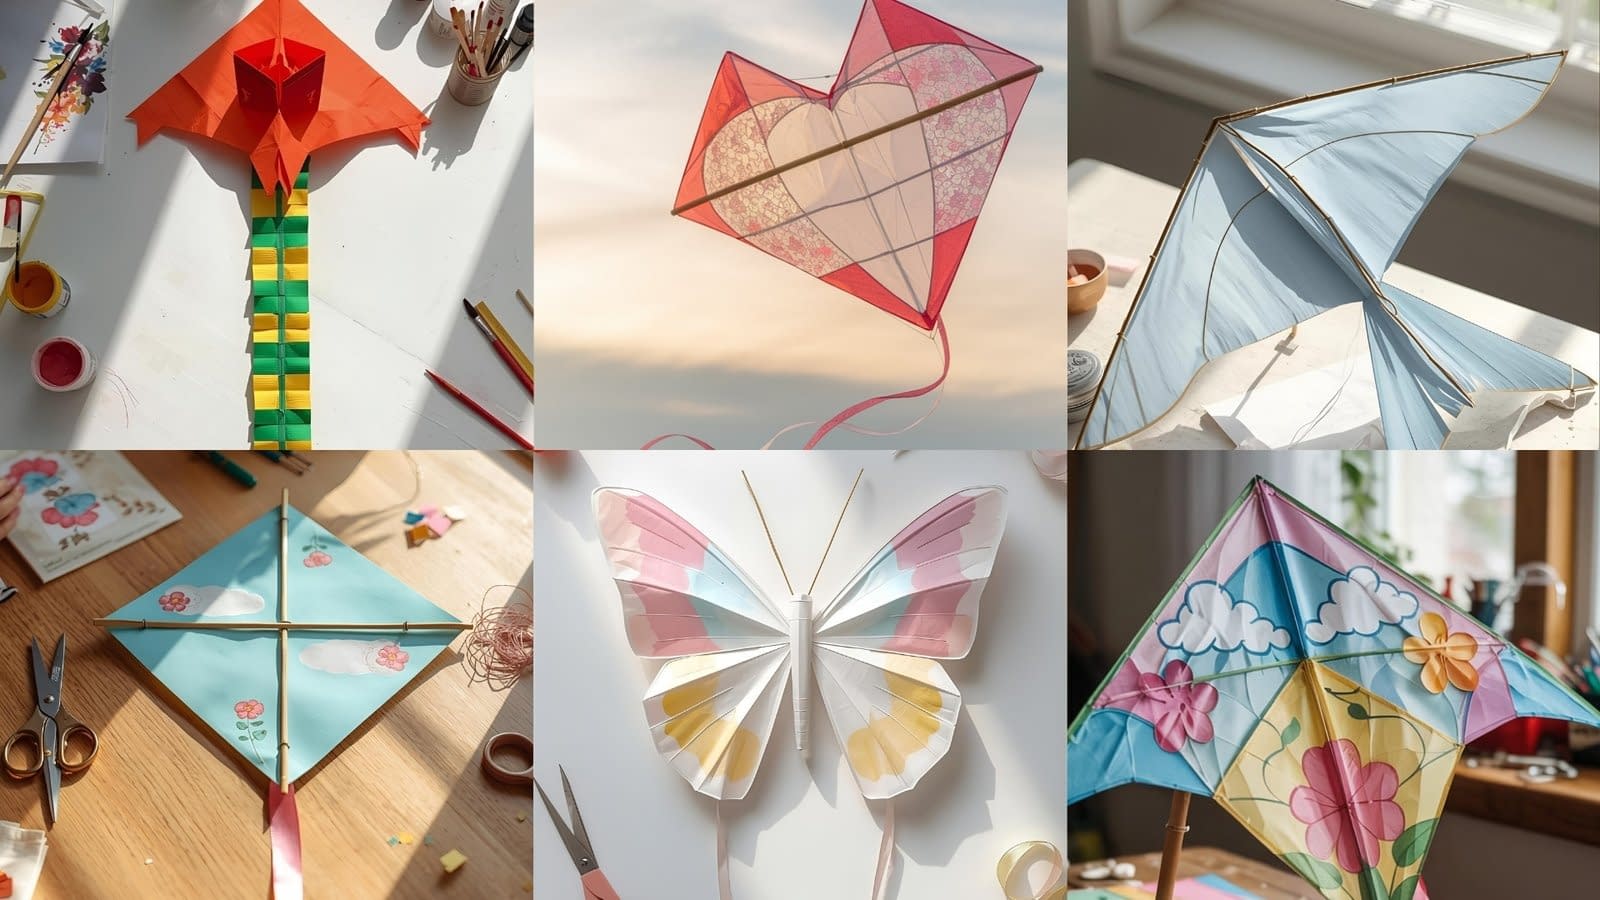
Kite 1: Classic Diamond Paper Kite
Style: Traditional, easy to make, great for beginners
Step 1: Prepare the Paper
Use a rectangular sheet about 12 inches wide and 16 inches tall.
Using your ruler, draw a diamond shape — mark the center at the top and bottom edges, and connect them with diagonal lines forming the diamond outline.
Step 2: Cut the Shape
Cut carefully along the lines. You’ll have a perfect diamond with pointed top and bottom ends.
Step 3: Make the Frame
Take two bamboo sticks — one should be as tall as your kite (16 inches) and the other slightly shorter (about 12 inches).
Lay the longer stick vertically through the center of the diamond. Place the shorter one horizontally about ⅔ of the way down from the top, forming a cross.
Step 4: Secure the Frame
Use glue at the crossing point, then wrap the intersection tightly with string. Let it dry for 2–3 minutes before moving on.
Step 5: Attach the Frame to the Paper
Apply glue along the edges of the sticks and gently press the paper over them.
Smooth with your fingers so the paper stays flat without wrinkles.
Step 6: Reinforce the Corners
Cut small 1-inch squares of tape or paper and stick them on each corner for extra durability.
Step 7: Attach the Tail
Cut a 2–3 ft long strip of ribbon or paper. Glue it to the bottom tip of your diamond.
This helps the kite balance and fly straight.
Step 8: Add the Flying Line
Poke a small hole where the two sticks cross. Tie your string through this hole, knotting it securely.
Step 9: Decorate
Use bright spring colors — paint sun rays, clouds, or flowers. Allow it to dry completely.
Ready to Fly: Test your kite outdoors in light wind. It should lift smoothly with minimal pull.
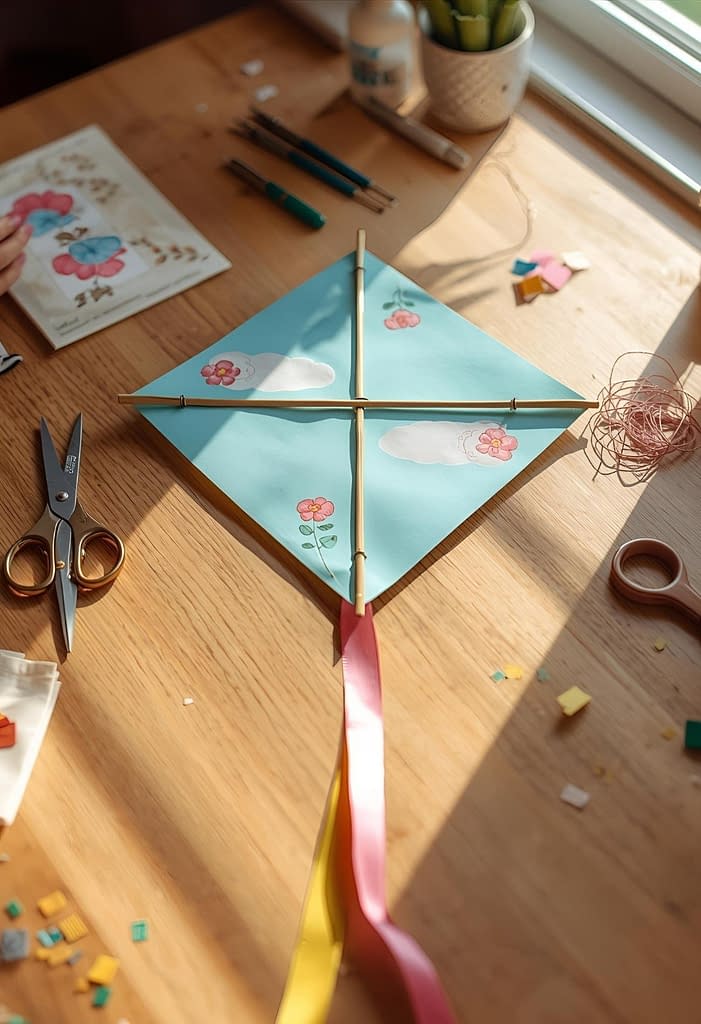
Kite 2: Butterfly Paper Kite
Style: Colorful and creative, ideal for spring displays and gentle wind
Step 1: Fold and Draw
Fold a large sheet of paper in half (8.5×11 inches or larger). On one half, draw one butterfly wing shape — start from the folded edge, curve out, and back in at the bottom.
Step 2: Cut and Unfold
Cut along your outline and unfold. You’ll have a symmetrical butterfly shape.
Step 3: Reinforce the Body
Cut a thin bamboo stick the length of the butterfly’s body (center from top to bottom).
Glue it along the fold line for stability.
Step 4: Add Wing Support
Glue two shorter sticks diagonally from the center toward each upper wing. This helps hold their shape while flying.
Step 5: Decorate the Wings
Before attaching string, decorate both sides. Paint or draw colorful spring designs — blue and yellow patterns, polka dots, or floral prints.
Step 6: Attach the String
Poke two small holes — one above the butterfly’s head and another just below the middle of the body. Tie your string through both and knot it at the back.
Step 7: Add Tails
Cut two 12-inch ribbons and glue one under each lower wing. These will flutter beautifully in the air.
Tip: Use lightweight paper and minimal glue so your butterfly can lift gently with the breeze.
Kite 3: Box Paper Kite
Style: 3D structure, stable in strong winds
Step 1: Cut Panels
Cut four rectangles of paper — each about 8 inches high and 12 inches wide.
Step 2: Build the Frame
Make two square frames using bamboo sticks. Each square should be 8×8 inches. Secure corners with string and glue.
Step 3: Connect the Frames
Place the two squares parallel to each other and join them using four vertical sticks, one on each corner. This creates a box shape.
Step 4: Wrap the Panels
Glue one rectangular paper panel around the top square (like wrapping a gift). Do the same for the bottom square, leaving the middle part open — this space lets air pass through.
Step 5: Attach the String
Tie your flying string at one corner of the upper frame and another corner diagonally across it. Knot them together in the middle; that’s your flying point.
Step 6: Decorate
Use bold stripes or pastel tones. Box kites look wonderful with geometric designs or spring flowers painted on each side.
Flight Tip: This kite needs moderate to strong wind. It’s very steady once airborne.
Kite 4: Heart-Shaped Paper Kite
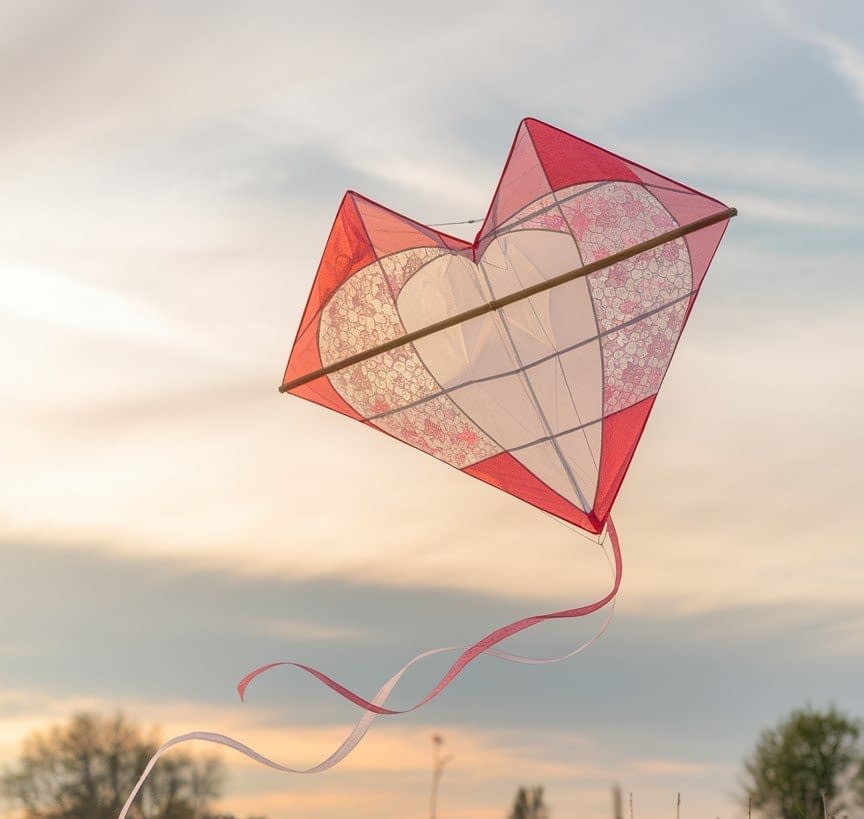
Style: Romantic, perfect for decorative or festive use
Step 1: Draw and Cut
On a large pink or red paper, draw a big heart (about 12 inches wide). Cut it neatly.
Step 2: Frame Support
Glue one stick vertically from the top center to the point at the bottom.
Add a second, shorter stick horizontally across the widest part of the heart.
Step 3: Reinforce the Middle
Add a little glue where the two sticks cross and wrap tightly with thread. Let dry.
Step 4: Add Tail and String
Attach a long tail (3 ft) to the bottom point of the heart. Tie your flying line just above the horizontal stick intersection.
Step 5: Decorate
Add white clouds, pastel hearts, or paper lace trim along the edges. You can even write your name in calligraphy at the center.
Step 6: Balance Check
Before flying, hold the kite by the string — it should hang evenly. Adjust the tail’s length if it tilts.
Kite 5: Bird-Inspired Paper Kite
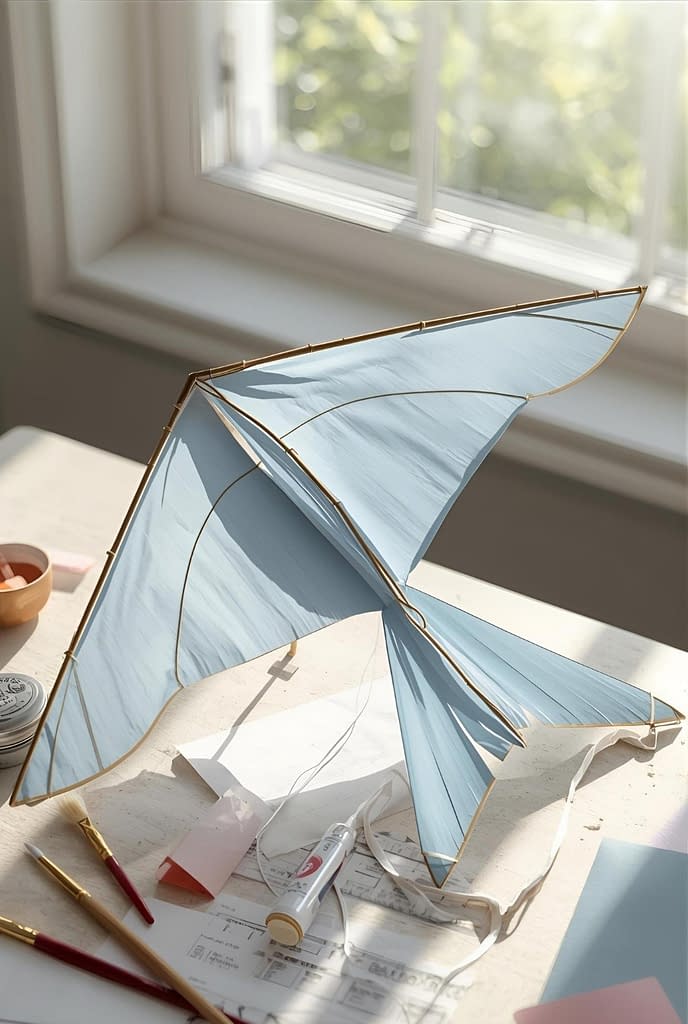
Style: Elegant, lifelike movement in the sky
Step 1: Outline and Cut
Draw a bird shape with wide wings and a narrow body — similar to a seagull.
Each wing should be about 8 inches long, and the total width around 16 inches. Cut carefully.
Step 2: Add Wing Support
Glue a long stick down the body’s center and one along each wing’s front edge.
Allow 5–10 minutes for the glue to set.
Step 3: Fold for Shape
Gently fold each wing upward at a slight 15-degree angle to create lift.
Step 4: Attach the Tail
Cut two thin paper strips (12 inches each) and glue them at the back as the bird’s tail.
Step 5: String Placement
Tie your string about one-third down from the top of the body — this gives the kite balance when the wings catch wind.
Step 6: Decoration
Draw feather lines, eyes, and gradient-colored wings. Pale blue, white, and yellow look natural for spring.
Flight Note: Works best in steady breeze; wings should “flap” lightly as it flies.
Kite 6: Long-Tailed Serpent Kite
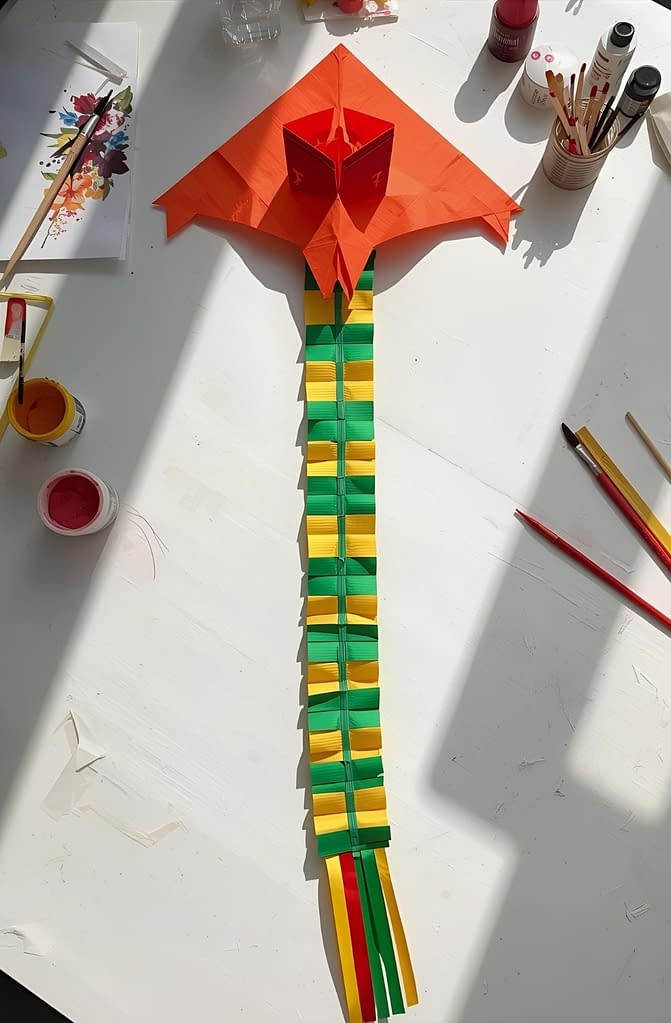
Style: Dramatic, flowing motion; perfect for outdoor festivals
Step 1: Body Layout
Cut a long rectangle — 6 inches wide and 24 inches long.
If your paper is short, glue two pieces end to end with slight overlap.
Step 2: Frame Support
Glue a bamboo stick the same length as the kite along its center.
Add two short sticks crossing near the top and bottom to keep the width even.
Step 3: Cut the Head
From another paper piece, cut a round or oval head. Decorate it with eyes, teeth, and a curved smile. Glue it firmly at the top of the body.
Step 4: Tail Creation
Cut five to six thin paper strips (each 2 ft long). Glue them to the bottom of the kite in layers so they flutter.
Step 5: Attach the String
Punch a small hole about 3 inches below the head and tie your string there.
Step 6: Decoration
Paint scales across the body, alternating between two spring colors like green and yellow.
Add dots or zigzags for texture.
Flight Note: This kite trails beautifully and dances in the air. Use longer tails for more stable flight.
Extra Tips for Perfect Spring Kite Flying
- Choose the right day: Gentle winds (5–10 mph) are ideal.
- Hold the string firmly: Keep tension to control movement.
- Avoid wet weather: Moisture weakens paper and glue.
- Repair before reuse: Small tears can be fixed with clear tape.
- Use natural open spaces: Parks, fields, or beaches are perfect.
Final Thoughts
Each design in this 6 Paper Kite for Spring Full Tutorial combines creativity, simplicity, and function. Whether you choose the classic diamond for traditional flight, the butterfly for color, or the serpent for drama — every kite brings a touch of spring joy to the sky.
Crafting them step by step lets you enjoy the process just as much as the final flight. Once finished, gather your family, head to an open field, and let your handmade paper kites soar — carrying your creativity into the bright blue sky.


