
A lightweight crochet crossbody bag is one of the most practical handmade accessories you can create. It keeps your hands free, feels comfortable against the body, and holds only the essentials, making it perfect for daily use, travel, walks, and casual outings. The concept of lightweight crochet also allows for breathable fabrics, flexible drape, and construction methods that are simple enough for beginners yet versatile enough for experienced crafters who enjoy exploring texture, shaping, and fiber combinations. The following seven patterns are written with clarity, detail, and long-form stitch descriptions to support crocheters of all levels. Each pattern includes skill level recommendations, finished measurements, material lists, shaping notes, strap instructions, and extensive step by step guidance.
Before beginning the first crossbody bag style, the example pattern you provided is placed here to serve as the formatting guide for all following patterns.
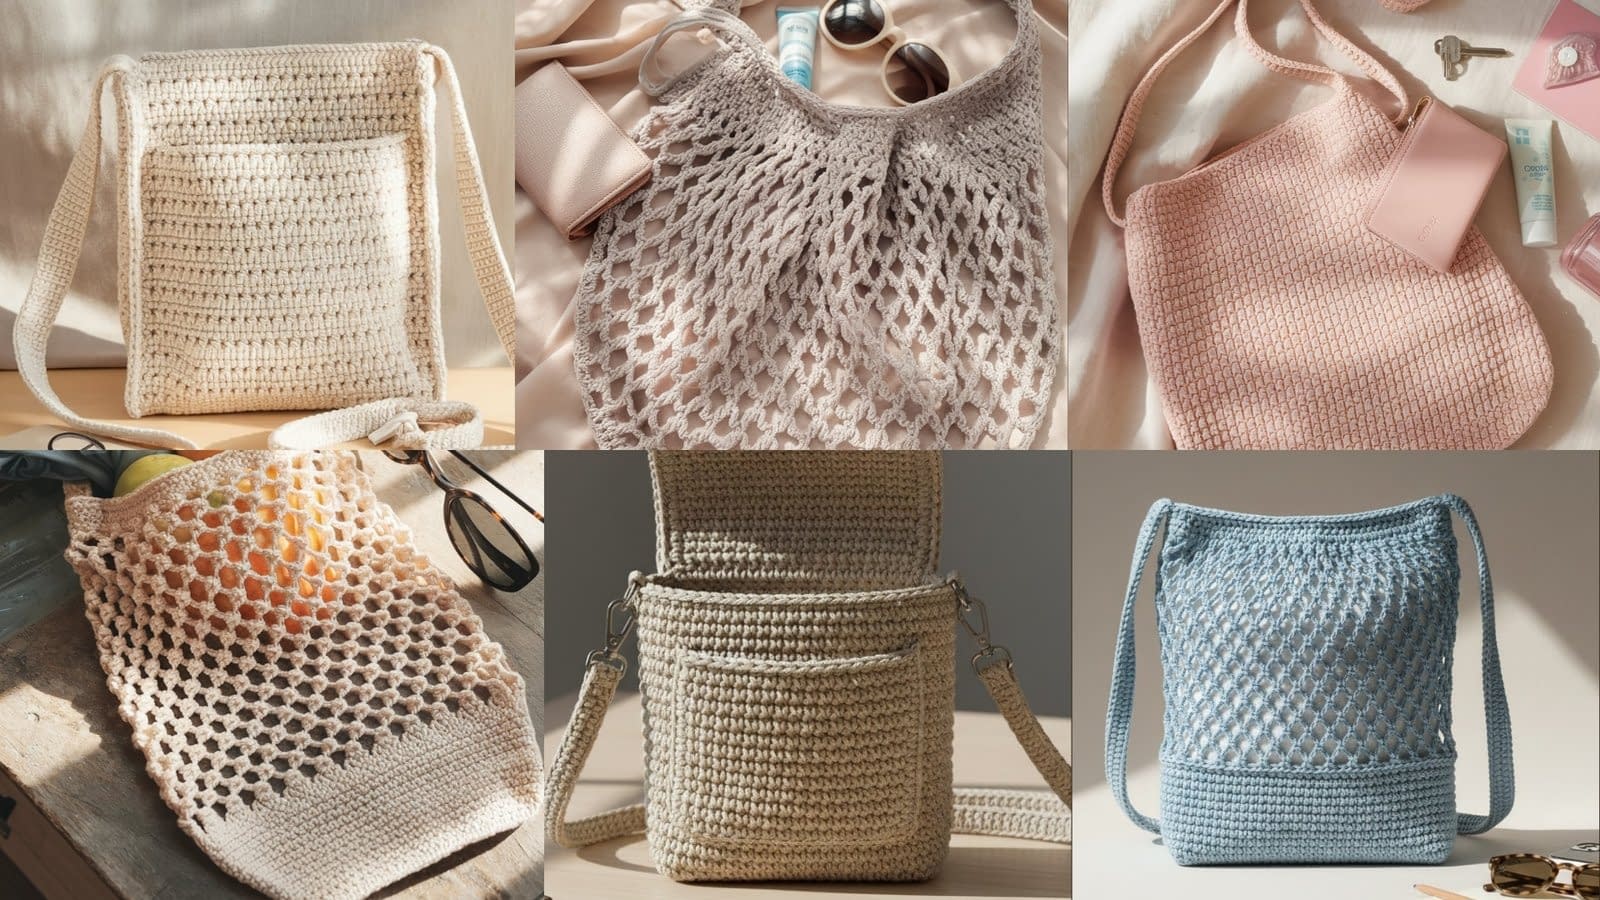
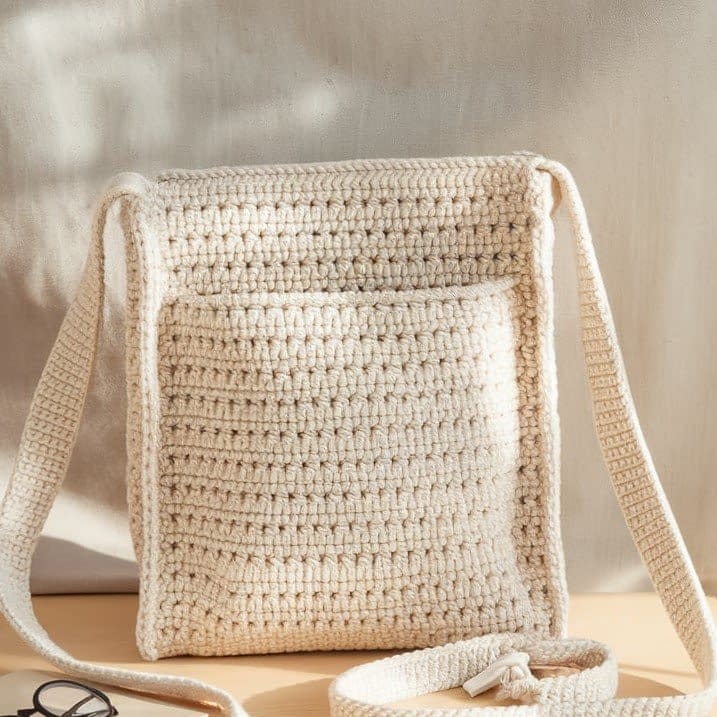
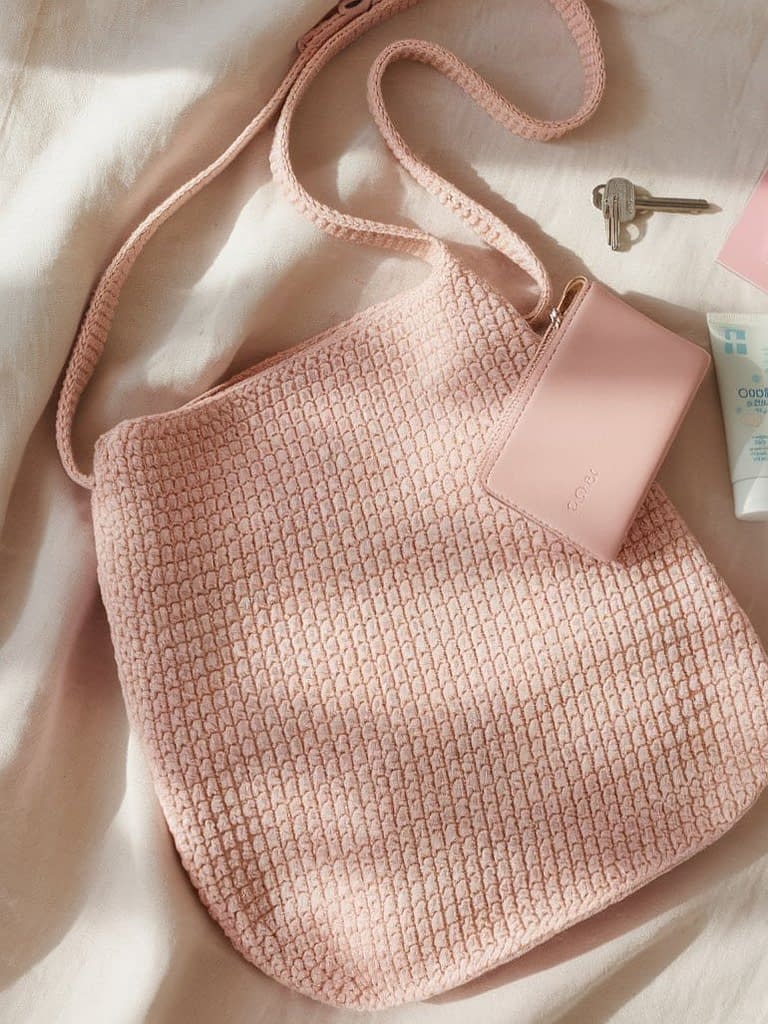
Pattern 1: Simple Everyday Flat-Panel Lightweight Crochet Crossbody Bag
Skill level: Confident beginner
Finished size: Approximately eight inches wide by nine inches tall (adjustable)
Construction style: Two flat rectangular panels seamed together
Best for: Beginners who want a lightweight, durable bag that is comfortable and easy to customize
Materials
• Worsted weight number three or light number four yarn
• Four millimeter or four and one-half millimeter crochet hook
• Yarn needle and scissors
• Optional button or magnetic snap
• Optional fabric lining
• Optional wooden or metal ring for strap attachment
Notes
This design uses two identical rectangles that are worked from the bottom up in simple stitches. The bag gets its lightweight feel from the open, breathable fabric structure. You can use a cotton blend for durability or an acrylic blend for softness and flexibility. The strap is made long so that it sits comfortably across the body, and you may adjust the length during or after construction.
Bag Front Panel
Starting foundation
Create a foundation chain that measures eight inches wide. For most worsted weight yarns, this is usually between twenty-eight and thirty-four chain stitches. Measure the chain to confirm width rather than relying on the number of stitches.
Once the chain reaches the desired width, place one single crochet stitch into the second chain from the hook. Continue placing one single crochet stitch into each chain across.
At the end of the row, chain one and turn.
Main body rows
For every row in this main panel, place one single crochet stitch into each stitch across. Maintain consistent tension so that the sides remain straight and even.
Continue repeating this row until the fabric measures nine inches tall. You may make the panel taller or shorter depending on preference.
If you want texture, you may occasionally alternate rows of single crochet stitches with rows of half double crochet stitches. For a more decorative appearance, you may also work a few rows of alternating front loop single crochet stitches and back loop single crochet stitches. Everything should be described in full stitch language for clarity so beginners can follow without difficulty.
Fasten off and leave a twelve inch tail for assembly.
Bag Back Panel
Repeat the entire front panel process to create a second rectangle that is identical in width and height. This helps ensure the bag seams match up perfectly during assembly.
Optional Pocket (Front Interior)
Creating the pocket panel
If you want a small internal pocket, create a foundation chain that measures four inches wide, then work single crochet rows until the pocket measures four inches tall. This creates a clean square pocket.
Attaching the pocket
Place the pocket square onto the right side of the front bag panel. Align the pocket so that it sits about two and one-half inches down from the top edge. Using a yarn needle, sew around the left, bottom, and right sides of the pocket, keeping the top edge open. Use small, tight backstitches so that the pocket is secure.
Assembly
Place the front and back rectangles together with the right sides facing inward. Ensure the edges are perfectly aligned. Using the long yarn tail or a new strand of yarn, sew the left side, bottom, and right side together with whipstitching or slip stitching. Keep stitches small so the seam is smooth.
Turn the bag right side out after sewing.
Strap Construction
Simple one-piece strap
Create a long foundation chain that measures the preferred crossbody length. Most people prefer between thirty-eight and fifty inches depending on height. Measure diagonally across your torso to find the right length.
Once you have your chain, place one single crochet stitch into the second chain from the hook and continue placing one single crochet stitch in each chain across. Chain one and turn. Work one single crochet row for three to five additional rows to create a firm strap that does not stretch excessively.
Attaching the strap
Sew one end of the strap securely to the top left corner of the bag and the other end to the top right corner. Reinforce each connection point with multiple rows of backstitching so the strap remains secure even with regular use.
Closure Options
Button loop
Create a chain of ten to twelve chain stitches. Attach each end of the chain to the top center back panel to form a loop. Sew a button on the front panel, aligning it with the loop.
Magnetic snap
If you prefer a magnetic snap, attach each side following the manufacturer’s instructions. This is easiest if you add a fabric lining, but it can also be attached directly to the crocheted fabric.
Pattern 2: Fold-Flat Lacy Mesh Lightweight Crochet Crossbody Bag

Skill level: Intermediate beginner
Finished size: Approximately nine inches wide by ten inches tall (adjustable)
Construction style: Single rectangular panel worked flat, folded in half and seamed
Best for: Lightweight, airy, and breathable everyday use
Materials
• Light worsted weight yarn, number three or four
• Four millimeter crochet hook
• Yarn needle and scissors
• Optional small button, toggle, or snap for closure
• Optional lining fabric to maintain bag shape
Notes
This design uses a lacy mesh pattern to achieve a lightweight and airy structure. The rectangular panel is folded in half to create the bag body. Mesh patterns reduce weight while still providing adequate structure for small to medium items. Lining can be added to prevent stretching over time.
Mesh Panel Foundation
Starting chain
Create a foundation chain measuring approximately nine inches wide. For worsted weight yarn, this is typically twenty-eight to thirty-two chain stitches, but always measure to confirm width.
First mesh row
Chain three to count as the first double crochet. Skip the first three stitches of the foundation chain. Place one double crochet into the fourth chain from the hook. Chain one, skip one stitch, double crochet into the next stitch. Repeat across the row, ending with a double crochet into the last stitch. Turn.
Subsequent rows
Chain three to count as first double crochet. Continue the mesh pattern by placing one double crochet into each double crochet stitch from the previous row, with a chain one space between each double crochet. Always maintain the chain one spacing to keep the mesh even. Turn at the end of each row.
Continue repeating this row pattern until the panel measures ten inches tall, or your desired bag height. Fasten off and leave a twelve inch tail for seaming.
Folding and Seaming
Forming the bag
Fold the completed mesh panel in half, bringing the bottom edge to align with the top edge. This forms the bag body with an open top.
Side seam
Using the long yarn tail and yarn needle, whipstitch the two side edges together. Use tight, even stitches to prevent stretching. Optional: reinforce by sewing a second line of stitches slightly inside the first.
Optional Flap
Creating a simple flap
If you want a top flap, fold the top edge of the front panel down about three inches toward the front. Sew along the sides only, leaving the top edge free to fold over. This flap can hold a button, toggle, or snap for closure.
Strap
Mesh strap
For a lightweight strap, create a chain that measures your preferred crossbody length (typically thirty-eight to fifty inches). Work a row of single crochet in each chain stitch, then two additional rows of single crochet. Sew one end of the strap to the top left corner and the other to the top right corner, reinforcing stitches as necessary.
Variations and Finishing
Optional lining
Cut a rectangular fabric panel slightly smaller than the bag dimensions. Hand sew or machine sew to the interior, leaving a small opening to turn inside out. The lining helps the bag maintain shape and protects the yarn from stretching over time.
Decorative edging
For a polished look, work a row of single crochet along the top opening and flap, or add a scalloped border by alternating single crochet and chain stitches along the edge.
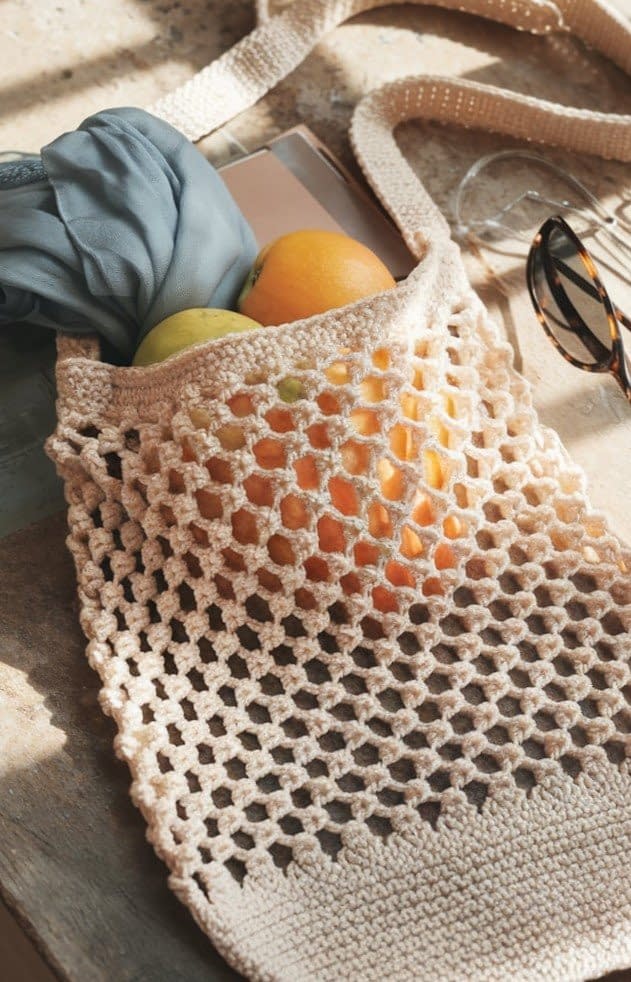
Pattern 3: Expandable Diamond-Mesh Produce Style Lightweight Crochet Crossbody Bag
Skill level: Intermediate
Finished size: Approximately ten inches wide by twelve inches tall (adjustable)
Construction style: Continuous diamond mesh rectangle, sides seamed, flexible expansion
Best for: Light grocery trips, casual outings, carrying medium items, lightweight and stretchable
Materials
• Cotton worsted weight yarn for stability and durability
• Four millimeter crochet hook
• Yarn needle and scissors
• Optional lining for smaller items
• Optional drawstring cord
Notes
This bag pattern is designed for stretch and expansion, using a diamond mesh pattern. It is ideal for lightweight carrying needs, providing both ventilation and flexibility. Cotton yarn is preferred for strength.
Diamond Mesh Foundation
Starting chain
Chain approximately ten inches wide (thirty to thirty-four chain stitches). Adjust as needed for your preferred width. Ensure the chain is not twisted before beginning.
Row 1
Chain four to count as first double crochet and chain one space. Skip the first chain, place a double crochet in the next chain. Chain one, skip one chain, double crochet in next chain. Continue across.
Row 2 and onward
Chain four to begin the row. Place a double crochet in the chain space from the previous row. Chain one, double crochet in the next chain space. Repeat across. Maintain the diamond mesh structure. Turn at the end of each row.
Continue until the panel reaches twelve inches tall. Fasten off leaving a twelve inch tail.
Forming the Bag Body
Folding and seaming
Fold the panel in half horizontally so that the bottom edge meets the top edge, forming a deep pocket. Sew the two side edges together using whipstitching, keeping the mesh alignment consistent. Ensure stitches are secure to prevent stretching during use.
Optional Drawstring
Creating drawstring casing
Chain a length sufficient to pass through the top row of mesh openings. Weave the chain through the top row, leaving equal ends to tie the bag closed.
Inserting drawstring
Thread the chain through the diamond mesh top row. Adjust the length so it can cinch the bag closed. Tie a knot or small bow to secure.
Strap
Simple adjustable strap
For a lightweight strap, create a chain measuring desired crossbody length. Work one row of single crochet stitches for thickness and stability. Sew securely to the top corners of the bag. If adjustable length is desired, create multiple buttonholes or loops along the strap.
Optional Lining and Variations
Lining
For carrying small items, sew in a cotton or linen lining. Secure along the top edge and optionally sew along the side seams.
Decorative edge
Add a scalloped, picot, or shell edging along the top of the bag and flap for a polished look.
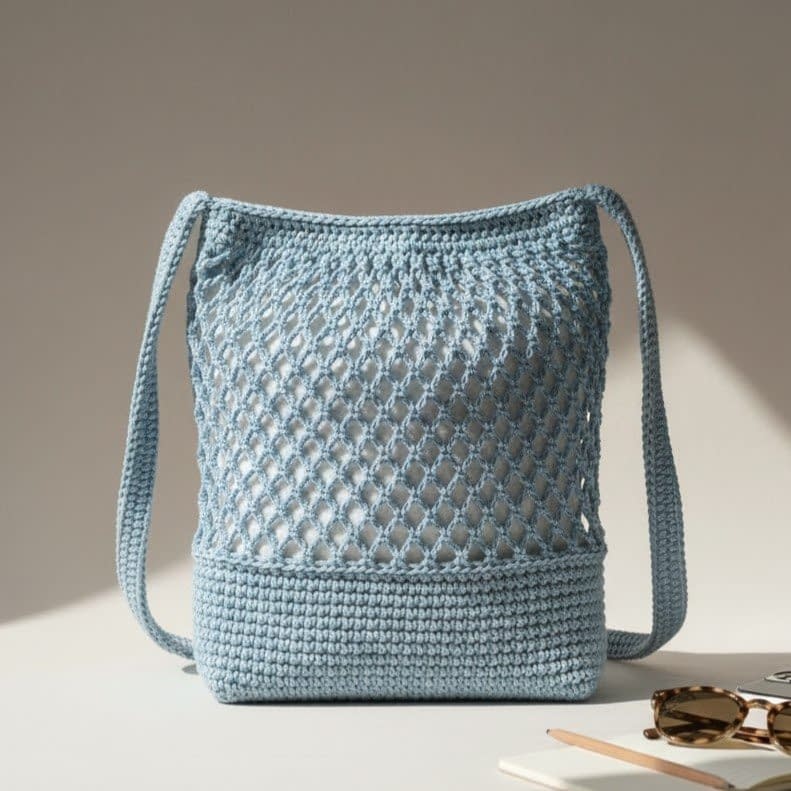
Pattern 4: Solid-Base Mesh Lightweight Crossbody Bag with Reinforced Corners
Skill level: Intermediate
Finished size: Approximately ten inches wide by eleven inches tall
Construction style: Solid rectangular bottom with mesh sides and reinforced corners
Best for: Lightweight everyday bag with extra durability at stress points
Materials
• Worsted weight cotton or cotton blend yarn
• Four millimeter crochet hook
• Yarn needle and scissors
• Optional lining and magnetic snap
Notes
This pattern combines a solid rectangle base with a breathable mesh body. Reinforced corners improve durability and help maintain the bag shape even when carrying heavier small items. Ideal for daily errands and casual outings.
Base Panel
Starting chain
Chain the desired width of the bag base, approximately ten inches. For worsted yarn, this is roughly thirty-two chain stitches.
Row 1
Single crochet in the second chain from the hook and in each chain across. Chain one and turn.
Rows 2 through 5
Work one single crochet stitch in each stitch across, chain one, turn at the end of each row. This creates a solid rectangular base approximately two inches tall. Fasten off and leave a long yarn tail for assembly.
Mesh Body
Attaching mesh
Join yarn to one corner of the base. Chain three to count as first double crochet, then work double crochet stitches with chain one spaces to continue mesh pattern across the top of the base. Turn at the end of each row and continue until mesh reaches approximately nine inches tall.
Reinforced Corners
Corner reinforcement
At each side seam, place additional single crochet stitches along the side mesh rows to add structure. Work one row of single crochet in back loop only to reinforce without distorting mesh pattern.
Side Seams
Sewing sides together
Fold the mesh panel so that left and right edges align. Use yarn needle and whipstitching to sew the sides securely. Reinforce corners with additional stitches as needed.
Strap
Wide strap
Create a chain measuring desired crossbody length. Work two rows of single crochet for thickness. Attach securely to top corners of bag. Reinforce attachment with backstitching for durability.
Optional Closure
Magnetic snap
Attach magnetic snap to top center for easy access. If preferred, add a small flap with button or toggle.
Optional Lining
Lining
Cut a rectangle slightly smaller than the bag interior. Sew lining inside bag, leaving opening for turning fabric. This stabilizes bag and prevents stretching.
Pattern 5: Rounded Bottom Lightweight Crochet Crossbody Bag
Skill level: Intermediate
Finished size: Approximately eight inches wide by nine inches tall with a rounded base
Construction style: Worked from the bottom up in the round with a single seam at the back
Best for: Everyday casual use with a soft, rounded structure
Materials
• Worsted weight yarn, number three or four
• Four millimeter crochet hook
• Yarn needle and scissors
• Optional lining fabric
• Optional button, toggle, or snap for closure
• Optional stitch markers for shaping rounds
Notes
This bag features a soft, rounded bottom, providing a casual and slightly structured silhouette. The design is worked in continuous rounds, then seamed at the back, with an adjustable strap attached at the sides. Rounded bottoms are ideal for small personal items and give the bag a softer, flexible shape compared to rigid rectangular bags.
Bottom Base
Starting magic ring
Begin with a magic ring using your main yarn. Chain two to act as the first half double crochet stitch. Work seven additional half double crochet stitches into the ring. Join with a slip stitch to the first half double crochet.
Increasing rounds
Round 2: Chain two, work two half double crochet stitches in each stitch around. Join with slip stitch.
Round 3: Chain two, work one half double crochet in the first stitch, two half double crochet stitches in the next stitch. Repeat around and join.
Round 4: Chain two, work one half double crochet in each of the first two stitches, two half double crochet stitches in the next stitch. Repeat around. Continue increasing evenly for additional rounds until the base measures approximately five inches in diameter. Use stitch markers to track rounds for consistent shaping.
Bag Body
Body rounds
Once the base reaches the desired diameter, begin working the bag body without increasing. Place one half double crochet stitch in each stitch around. Join with slip stitch and chain two at the beginning of each round. Continue working in rounds until the bag body reaches approximately nine inches tall. Fasten off leaving a twelve inch tail for seaming.
Back Seam
Seaming
Fold the bag so that the back edges align. Using yarn needle and whipstitching, sew the back seam from the base to the top edge. Keep stitches tight to maintain the shape and durability.
Optional Lining
Lining
Cut a rectangular piece of fabric slightly smaller than the height and width of the bag. Hand sew the lining to the interior edges of the bag, leaving an opening for turning. The lining stabilizes the rounded shape and provides protection for smaller items.
Strap
Strap construction
Chain the desired crossbody length (typically thirty-eight to fifty inches depending on height). Work two rows of single crochet along the chain for reinforcement. Attach each end to the top sides of the bag using multiple rows of backstitching to ensure the strap can hold weight securely.
Closure Options
Flap closure
If desired, crochet a rectangular flap to cover the opening. Attach to the back top edge of the bag. Secure with a button, toggle, or snap.
Magnetic snap
Alternatively, attach a magnetic snap at the center top for simple closure.
Variations and Finishing
Decorative edge
Work a row of single crochet or scallop stitches around the top edge and flap for a finished, polished look.
Optional color blocking
Use different yarn colors for the base, body, and strap to create a visually appealing, lightweight crossbody bag.
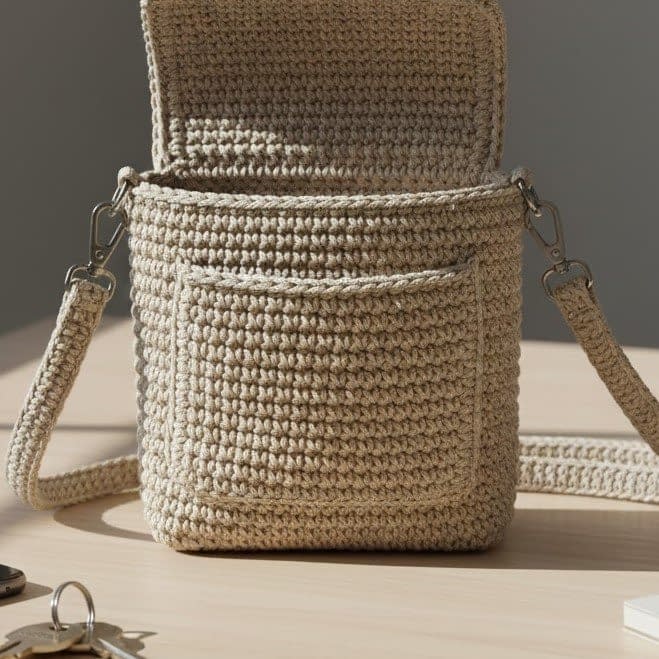
Pattern 6: Mini Convertible Lightweight Crochet Crossbody Bag with Flap and Pockets
Skill level: Intermediate
Finished size: Approximately seven inches wide by eight inches tall
Construction style: Worked flat with a flap, multiple small interior and exterior pockets, optional adjustable strap
Best for: Lightweight, functional everyday use, suitable for travel or errands
Materials
• Light worsted weight yarn, number three
• Four millimeter crochet hook
• Yarn needle and scissors
• Optional fabric lining for pocket reinforcement
• Optional small buttons or magnetic snap for flap closure
• Optional D-rings or metal loops for adjustable strap
Notes
This mini convertible bag features a flap, small pockets, and a lightweight body suitable for carrying essentials. The design can be made with or without lining depending on user preference. The small size makes it comfortable to wear as a crossbody while still providing functional organization.
Front Panel
Starting chain
Chain twenty-four stitches (adjustable for desired width). Work one single crochet in the second chain from the hook and continue across the chain. Chain one and turn.
Body rows
Work in single crochet stitches across each row. Continue repeating until the panel measures eight inches tall. For texture variation, alternate every fourth row with half double crochet stitches across the row. Fasten off leaving a long tail for assembly.
Back Panel
Repeat process
Create a back panel identical to the front panel, ensuring the same width and height for perfect alignment.
Pockets
Optional interior pocket
Create a small rectangle of approximately four inches wide by five inches tall. Work in single crochet stitches. Position on the right side of the front panel, about two inches from the top edge. Sew around three sides, leaving the top open.
Optional exterior pocket
For a small front pocket, repeat a similar rectangle and sew it on the front panel below the interior pocket position, leaving the top open.
Flap
Crocheting the flap
Chain twenty-four stitches, work single crochet in each chain for three to four rows to reach the desired flap length (approximately three inches). Attach the flap to the top edge of the back panel with slip stitches. Optionally, shape the flap into a slight curve by decreasing one stitch at each edge on alternating rows.
Assembly
Joining panels
Place front and back panels together with right sides facing. Sew sides and bottom edges using whipstitching. Turn the bag right side out. Ensure seams are tight for durability.
Strap
Adjustable strap
Chain the desired length for crossbody use. Work two rows of single crochet for firmness. If using D-rings or loops, attach strap ends through these hardware pieces for easy adjustment. Sew securely to top corners of bag.
Closure
Flap with button
Sew a small button onto the front panel and create a loop on the flap to secure closure. Alternatively, attach a magnetic snap at the center top.
Finishing Touches
Optional lining
Cut and sew a lightweight lining inside the bag for pocket reinforcement and overall durability.
Decorative edge
Add scallop stitches, single crochet border, or simple surface crochet design to embellish the flap or bag edges.
Conclusion
Creating a lightweight crochet crossbody bag is both rewarding and practical. Each of the seven patterns presented in this guide demonstrates a different approach to lightweight design, construction method, and functionality. From simple flat panels to mesh designs, expandable diamond mesh, reinforced corners, rounded bases, and mini convertible bags with pockets, there is a style suitable for every need and skill level.
By following these long-form, step-by-step instructions, crocheters can gain confidence in shaping, seaming, strap construction, and finishing techniques while learning how to combine aesthetics with practicality. Optional variations such as lining, decorative edges, flaps, buttons, toggles, and drawstrings allow each bag to be customized to personal preference. Whether you prefer airy mesh designs for summer, solid bases for durability, or compact mini bags for travel, these seven lightweight crochet crossbody bag patterns provide detailed guidance to create stylish, functional, and comfortable bags for everyday use.


