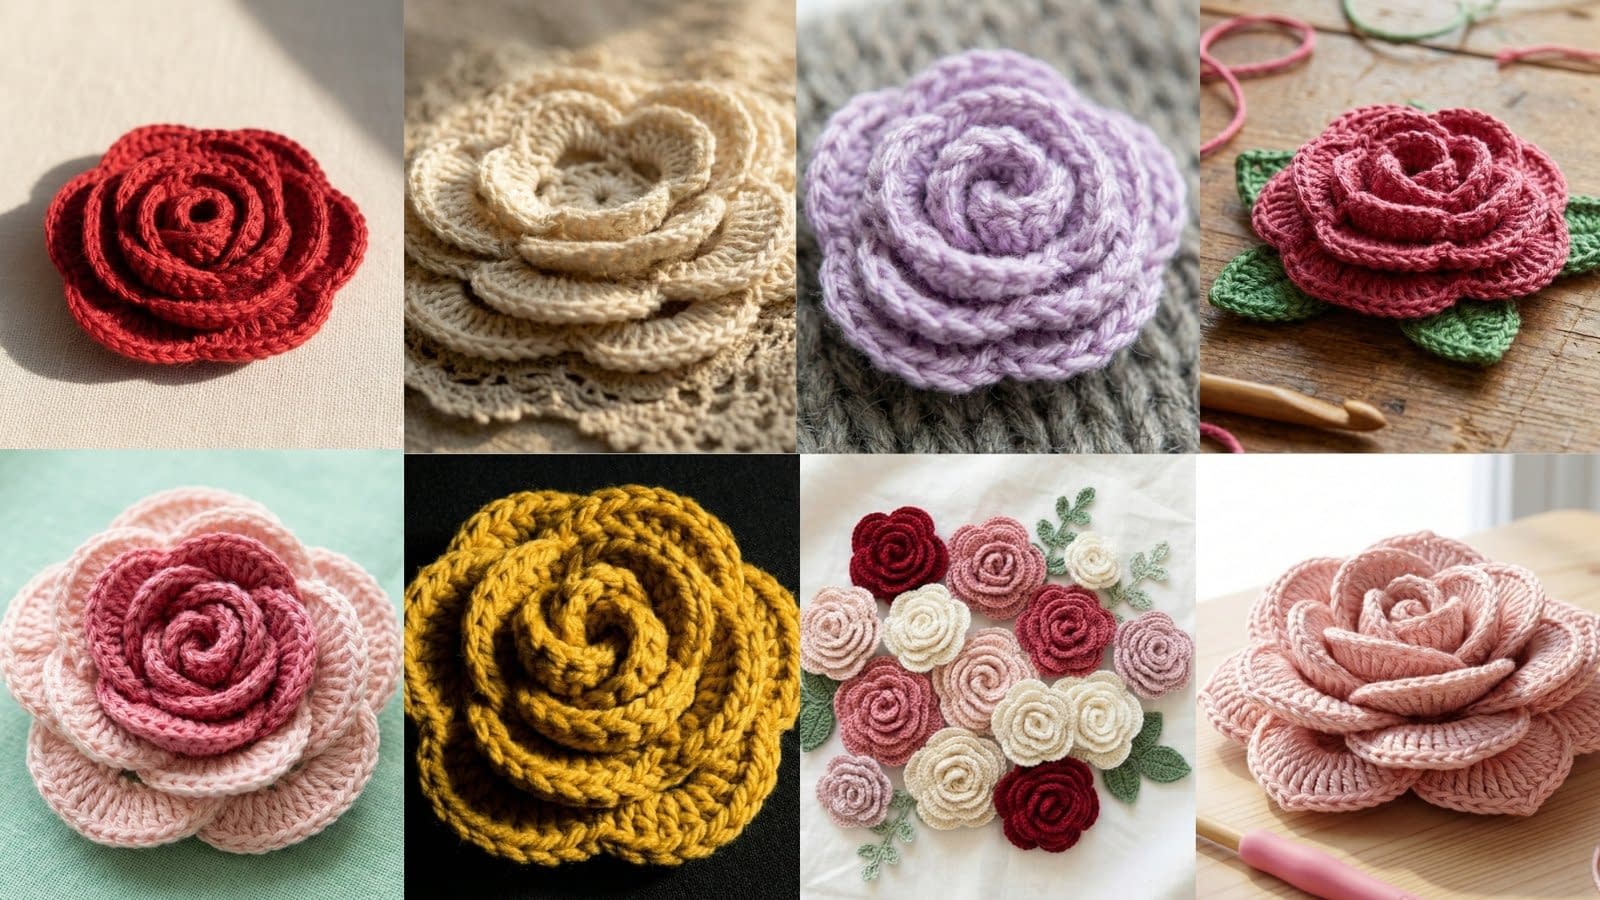
Creating delicate crocheted rings is a beautiful way to combine fine craftsmanship with wearable art. These tiny designs may look intricate, but with the right guidance, even beginners can create stunning results. In this detailed guide, you’ll learn the first three designs from this collection of 6 crocheted ring patterns, carefully explained step by step so nothing feels confusing or overwhelming.
Each tutorial is written to match the visual references you provided, ensuring that what you make aligns with what you see. From soft floral designs to simple leafy accents, these rings are lightweight, elegant, and perfect for everyday wear or handmade gifts.
Getting Started: Tools and Materials You’ll Need
Before beginning the first three crocheted ring patterns, prepare your materials. Working at such a small scale requires precision, so choosing the right tools makes a big difference.
Essential Materials
- Fine cotton crochet thread (size 10 or thinner for best detail)
- Steel crochet hook (1.0 mm – 1.5 mm)
- Adjustable ring base (metal, preferably with a flat pad)
- Tapestry needle (for weaving ends)
- Sharp embroidery scissors
- Fabric glue or strong craft adhesive
- Tweezers (optional but helpful for positioning tiny elements)
Preparation Tips
- Always cut your thread cleanly to avoid fraying.
- Keep your stitches tight but not stiff.
- Work in good lighting to clearly see each stitch.
- Before gluing, test placement of your crochet piece on the ring base.
Pattern 1: Tiny Lavender Flower Ring
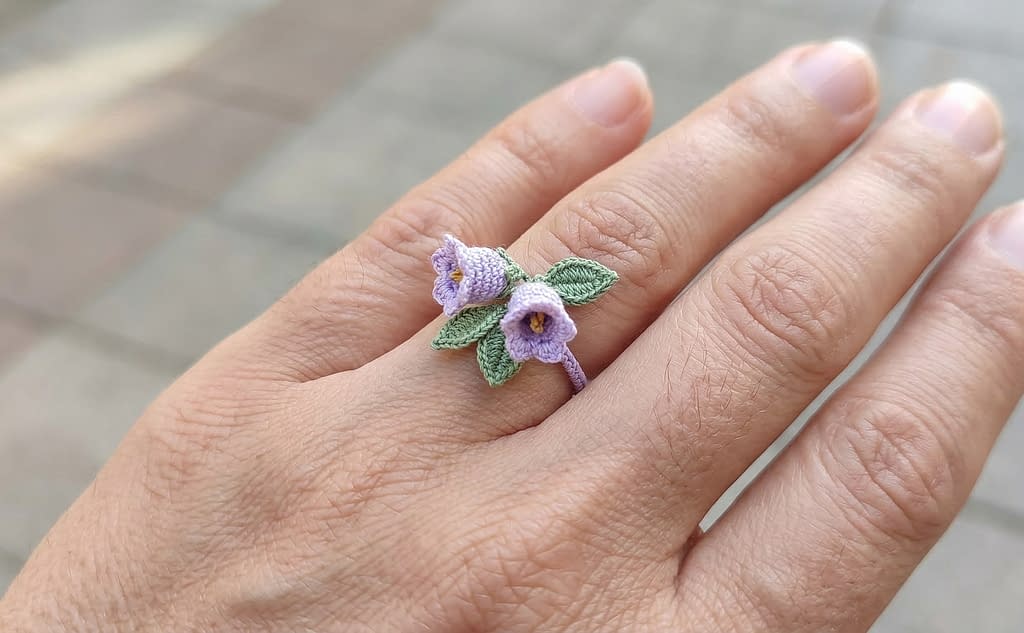
This design matches the soft purple double-flower ring with small green leaves. It has a natural, slightly curved shape that sits gently across the finger.
Understanding the Design
This ring features:
- Two small lavender flowers
- Slightly layered petals
- Two green leaves placed at an angle
The composition should feel organic, not perfectly symmetrical.
Step-by-Step Instructions
Creating the First Flower
Start with a magic ring. Wrap the thread around your finger once, creating a loop. Insert your hook into the loop and pull up a working loop.
Chain 1 to secure.
Work 6 single crochet stitches into the ring. Pull the tail gently to tighten the circle. Do not pull too hard or the center may pucker unevenly.
Slip stitch into the first stitch to close the round.
Now create petals:
- Chain 2
- Work 2 half double crochet stitches into the same stitch
- Chain 2, slip stitch into the same stitch
Repeat this petal pattern in each stitch around. You should get 5–6 small petals.
Fasten off, leaving a tail about 2–3 inches long.
Making the Second Flower
Repeat the exact same steps, but slightly loosen your tension for a softer look. This creates a natural variation between the two flowers.
Crocheting the Leaves
Using green thread:
- Chain 5
- Starting from second chain, work: 1 single crochet, 1 half double crochet, 1 double crochet, 1 half double crochet
- In the last chain, add 2 stitches to curve the shape slightly
- Work back along the opposite side
Fasten off and leave a tail.
Make a second leaf, slightly smaller by using chain 4 instead of 5.
Assembly
Place the two flowers slightly overlapping, with one positioned a bit higher.
Slide the leaves underneath at a diagonal angle so they peek out naturally.
Use a small drop of fabric glue:
- Apply glue to the flat pad of the ring base
- Gently press the flowers first
- Add leaves after positioning them carefully
Use tweezers if needed to adjust placement.
Hold everything in place for 30–60 seconds.
Let dry completely for at least 6 hours before wearing.
Pattern 2: Mini Blue Cluster Flower Ring
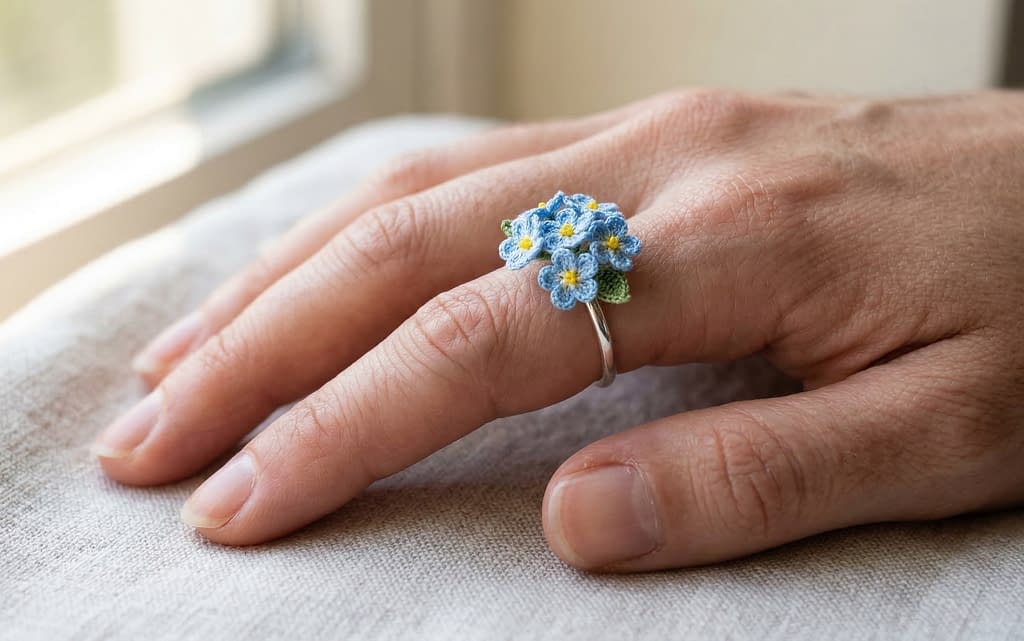
This design reflects the small cluster of blue flowers arranged tightly together. It resembles tiny forget-me-not style blooms grouped in a rounded shape.
Understanding the Design
This ring includes:
- Multiple tiny flowers (about 5–7)
- A clustered arrangement
- A slightly raised, rounded form
The key here is making very small flowers and grouping them closely.
Step-by-Step Instructions
Making Tiny Flowers
Start with a magic ring.
Chain 1 and work 5 single crochet stitches into the ring.
Pull the loop tight.
Slip stitch into the first stitch.
For petals:
- Chain 1
- In the same stitch: 1 single crochet, chain 1, slip stitch
Repeat in each stitch to create small, tight petals.
Fasten off, leaving a short tail.
Repeat this process to create 5–7 tiny flowers.
Creating the Cluster Base
Using thread, lightly tie or stitch the flowers together:
- Arrange them in a circular cluster
- Place one in the center and others around it
Use a needle to stitch them together from the back. Keep stitches hidden and tight.
Do not flatten the flowers; allow them to sit slightly raised for a natural look.
Adding a Hint of Leaves
Make 2–3 tiny leaves:
- Chain 3
- Work: slip stitch, single crochet, slip stitch
These should be very small and subtle.
Attach them behind the cluster.
Attaching to the Ring Base
Apply glue to the ring base pad.
Place the entire cluster onto the base.
Press gently but firmly.
Check from different angles to ensure the cluster looks balanced.
Allow to dry fully before handling.
Pattern 3: Simple Mint Daisy Ring
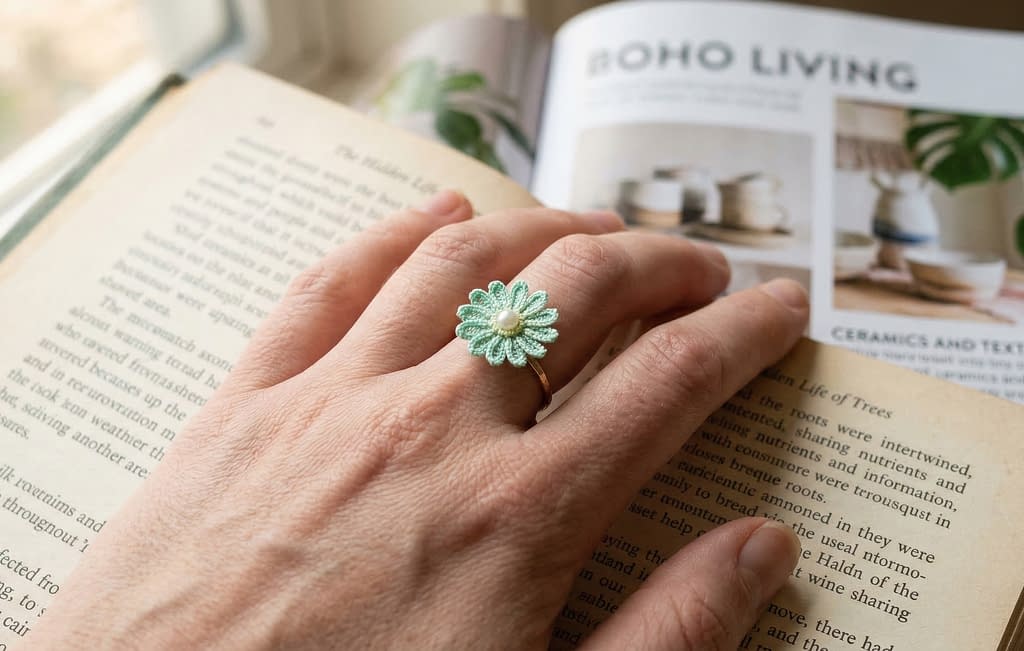
This pattern matches the single mint-green daisy with a clean, minimal look. It’s perfect for beginners because it focuses on one flower instead of multiple elements.
Understanding the Design
This ring includes:
- One daisy-style flower
- Evenly spaced petals
- A clean, centered placement
This is one of the easiest crocheted ring patterns but still looks elegant.
Step-by-Step Instructions
Creating the Center Base
Start with a magic ring.
Chain 1.
Work 8 single crochet stitches into the ring.
Pull tight and join with a slip stitch.
Making the Petals
Each petal is worked into one stitch.
For each stitch:
- Chain 3
- Work 1 double crochet
- Chain 3
- Slip stitch into the same stitch
Repeat all around.
This creates soft, rounded petals.
Fasten off and weave in the tail carefully using a tapestry needle.
Shaping the Flower
Use your fingers to gently spread out the petals evenly.
If needed, lightly dampen and shape, then let it dry flat.
Optional Center Detail
You can add a tiny knot or stitch in a contrasting color (like cream or yellow) in the center.
Do this by:
- Threading a needle with contrasting thread
- Making 2–3 small stitches in the center
Keep it subtle.
Attaching to the Ring
Apply a thin layer of glue to the ring base.
Place the flower directly in the center.
Press gently and hold.
Make sure it sits flat and even.
Let it dry completely before use.
Pattern 4: Minimal Leaf Ring
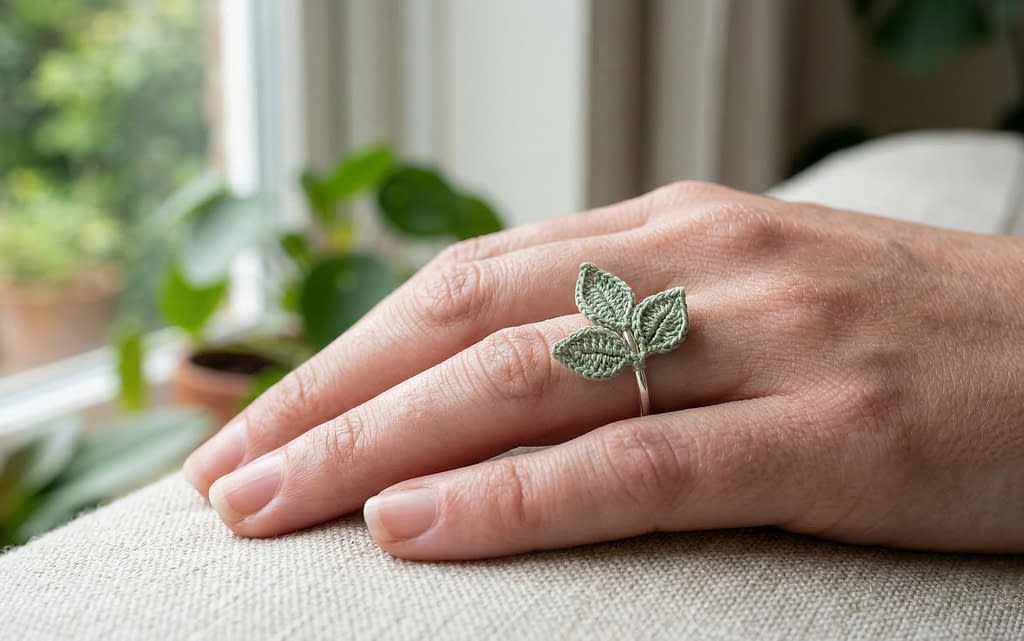
This design matches the simple green leaf ring from your image. It has a clean and elegant look, with three small leaves forming a soft, natural arrangement. This pattern is perfect if you want something subtle and easy to wear daily.
Understanding the Design
This ring includes:
- Three small leaves
- A slightly curved alignment
- No flowers, only foliage
The beauty of this design comes from neat shaping and precise placement rather than complexity.
Step-by-Step Instructions
Creating the First Leaf
Start with green thread.
Chain 5. This will form the base of your leaf.
Now begin working from the second chain from the hook:
- 1 single crochet
- 1 half double crochet
- 1 double crochet
- In the last chain, work 2 double crochet stitches
This creates a rounded tip.
Now rotate your work slightly and crochet along the opposite side of the chain:
- 1 double crochet
- 1 half double crochet
- 1 single crochet
Slip stitch into the base to close.
Fasten off, leaving a tail for assembly.
Making Two More Leaves
Repeat the same process two more times.
For a natural look:
- Make one leaf slightly smaller (chain 4 instead of 5)
- Keep one leaf the same size
- Slightly tighten your tension for the third leaf
This variation gives a more organic feel instead of identical shapes.
Shaping the Leaves
Use your fingers to gently press and shape each leaf.
If the edges curl too much:
- Lightly dampen them
- Press flat on a cloth
- Let them dry completely
Assembling the Leaves
Arrange the leaves so that:
- One sits in the center
- The other two angle outward slightly
Overlap the bases slightly so they look connected.
Use a needle and thread to stitch them together from the back. Keep stitches hidden.
Attaching to the Ring Base
Apply a small amount of glue to the ring pad.
Place the leaf arrangement carefully:
- The center leaf should align with the middle of the ring
- Side leaves should tilt slightly outward
Press gently for about 30 seconds.
Allow to dry completely before wearing.
Pattern 5: Pastel Multi-Flower Bouquet Ring
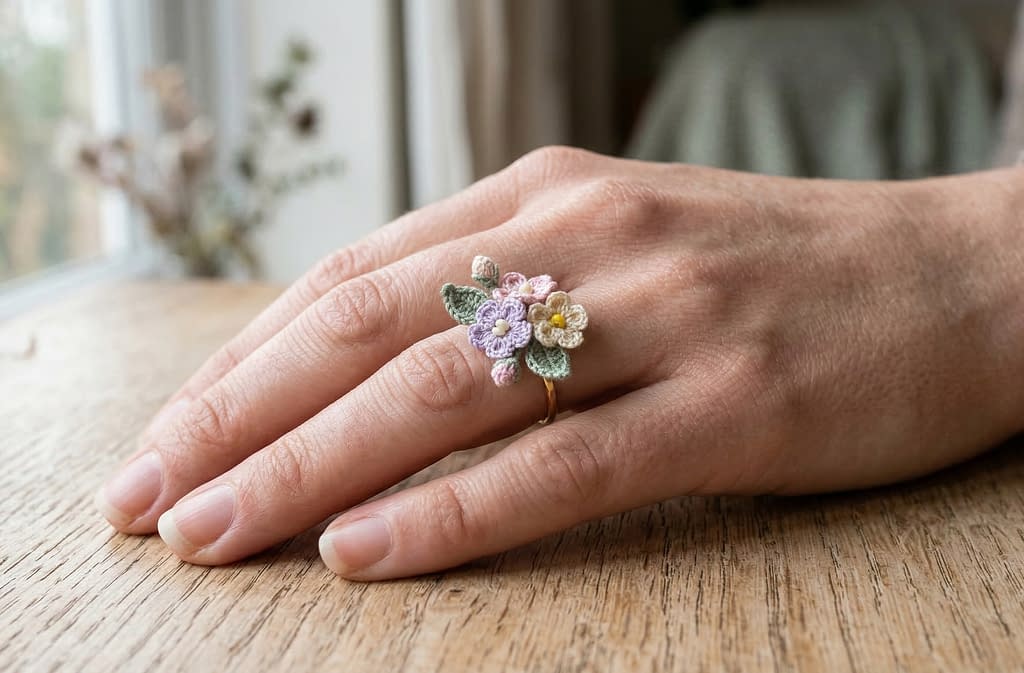
This design reflects the soft pastel ring with multiple tiny flowers grouped together. It combines lavender, yellow, and pink tones with green leaves for a fuller, decorative look.
Understanding the Design
This ring includes:
- 3–5 small flowers in different colors
- Tiny leaves for balance
- A bouquet-style arrangement
The key is layering and placement rather than making large pieces.
Step-by-Step Instructions
Creating Small Flowers
For each flower:
Start with a magic ring.
Chain 1 and work 5 single crochet stitches into the ring.
Pull tight and join with a slip stitch.
Now create petals:
- Chain 2
- Work 2 half double crochet in the same stitch
- Chain 2
- Slip stitch into the same stitch
Repeat for all stitches.
Fasten off and leave a small tail.
Make multiple flowers in different colors:
- 2 lavender
- 1 soft yellow
- 1 light pink
Creating Tiny Leaves
Using green thread:
Chain 4.
Work:
- 1 slip stitch
- 1 single crochet
- 1 half double crochet
- 1 slip stitch
Fasten off.
Make 2–3 leaves.
Building the Bouquet
Start arranging your flowers:
- Place one flower in the center
- Position others around it at slight angles
Do not align them in a perfect circle. Instead, create a loose cluster, like a natural bouquet.
Add leaves in small gaps between flowers.
Stitching the Pieces Together
Using a needle:
- Stitch flowers together from the back
- Keep stitches tight but hidden
Make sure the cluster holds together as one piece.
Attaching to the Ring
Apply glue to the ring base.
Place the bouquet slightly off-center for a natural look.
Press gently and adjust positioning before the glue sets.
Let it dry completely.
Pattern 6: Pink Blossom Ring
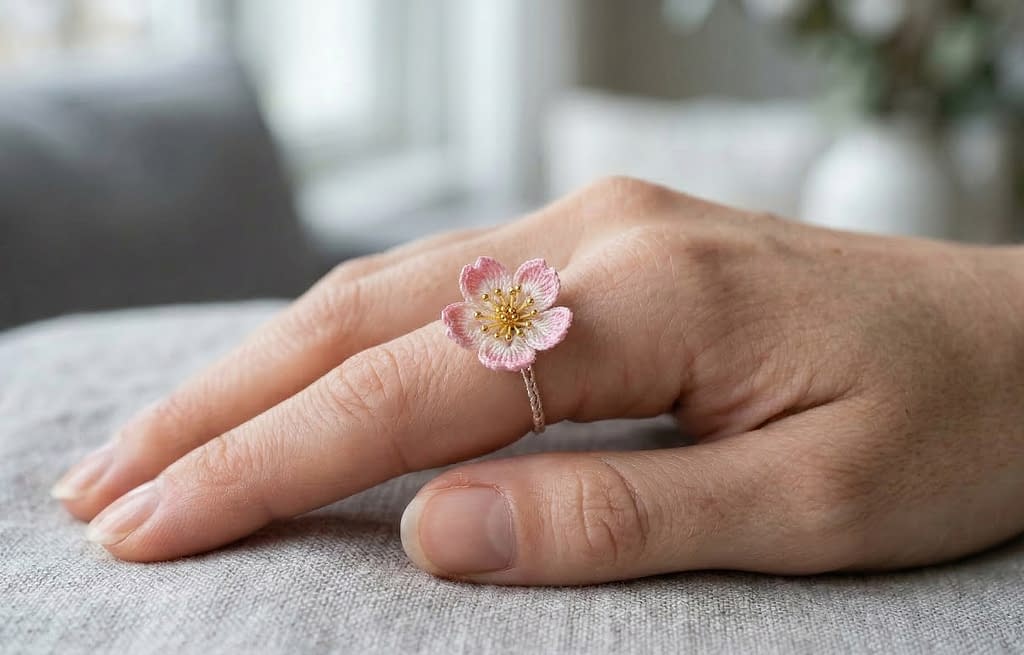
This final design matches the soft pink single flower ring with a delicate center. It has a more refined and slightly detailed appearance compared to the simple daisy.
Understanding the Design
This ring includes:
- One five-petal flower
- A defined center detail
- Slightly textured petals
This pattern focuses on clean stitching and neat finishing.
Step-by-Step Instructions
Creating the Flower Base
Start with pink thread.
Make a magic ring.
Chain 1 and work 6 single crochet stitches into the ring.
Pull tight and join with a slip stitch.
Forming the Petals
Each petal will be slightly fuller than the daisy pattern.
For each stitch:
- Chain 2
- Work 2 double crochet stitches
- Chain 2
- Slip stitch into the same stitch
Repeat around to form 6 petals.
Fasten off.
Adding the Center Detail
Using yellow or gold thread:
Thread a needle.
Insert it through the center of the flower.
Make small French knot-style stitches:
- Wrap the thread around the needle once or twice
- Insert back near the same spot
- Pull gently to form a small knot
Repeat 3–5 times to create a textured center.
Shaping the Petals
Gently press each petal outward.
If needed:
- Slightly dampen the flower
- Shape with your fingers
- Let dry flat
Attaching to the Ring Base
Apply a thin layer of glue to the ring base.
Place the flower directly in the center.
Hold gently in place.
Make sure the petals are evenly spaced before the glue sets.
Allow to dry fully.
Tips for Clean and Professional Results
Controlling Thread Tension
Keep your stitches consistent. If they’re too loose, the shape won’t hold. If too tight, the piece may curl unnaturally.
Cutting and Finishing
Always cut thread with sharp scissors at a slight angle to prevent fraying.
When weaving ends:
- Insert the needle through the back loops
- Avoid pulling too tightly to prevent distortion
Using Glue Properly
- Use a toothpick or pin to apply small amounts of glue
- Never overapply; excess glue can seep through stitches
- Always allow full drying time
Conclusion
These 6 crocheted ring patterns show how something very small can still carry a lot of detail, creativity, and personality. From the soft lavender flowers to the clean leaf design and the delicate pink blossom, each ring offers a different style while using the same basic crochet techniques.
If you followed along from the beginning, you’ve worked through shaping petals, forming tiny leaves, building clusters, and assembling multiple elements into a balanced design. More importantly, you’ve learned how to control tension, place details carefully, and finish your pieces in a way that looks neat and wearable.
One of the most valuable things about these patterns is how flexible they are. You can easily:
- Change colors to match outfits or seasons
- Adjust sizes by adding or reducing stitches
- Combine elements from different patterns to create your own designs
As you keep practicing, your stitches will become more consistent, your shaping more precise, and your overall finish more professional. Over time, you may even start designing your own crocheted rings based on the same techniques.
These rings are perfect for personal use, thoughtful handmade gifts, or even small items to sell. Because they require very little material, they’re also a great way to use leftover thread while still creating something beautiful.
Take your time with each piece, pay attention to the small details, and don’t rush the finishing process. That’s what truly makes these crocheted ring patterns stand out.
General Finishing Advice
Always check your work before attaching:
- Trim any loose threads neatly
- Ensure all pieces are securely stitched
- Test placement before applying glue
When storing your rings:
- Keep them in a dry place
- Avoid crushing them under heavy items
- If needed, reshape gently with your fingers
These crocheted rings are not just accessories—they are small handmade pieces of art. With patience and practice, your stitches will become cleaner, and your designs will look even more refined.