
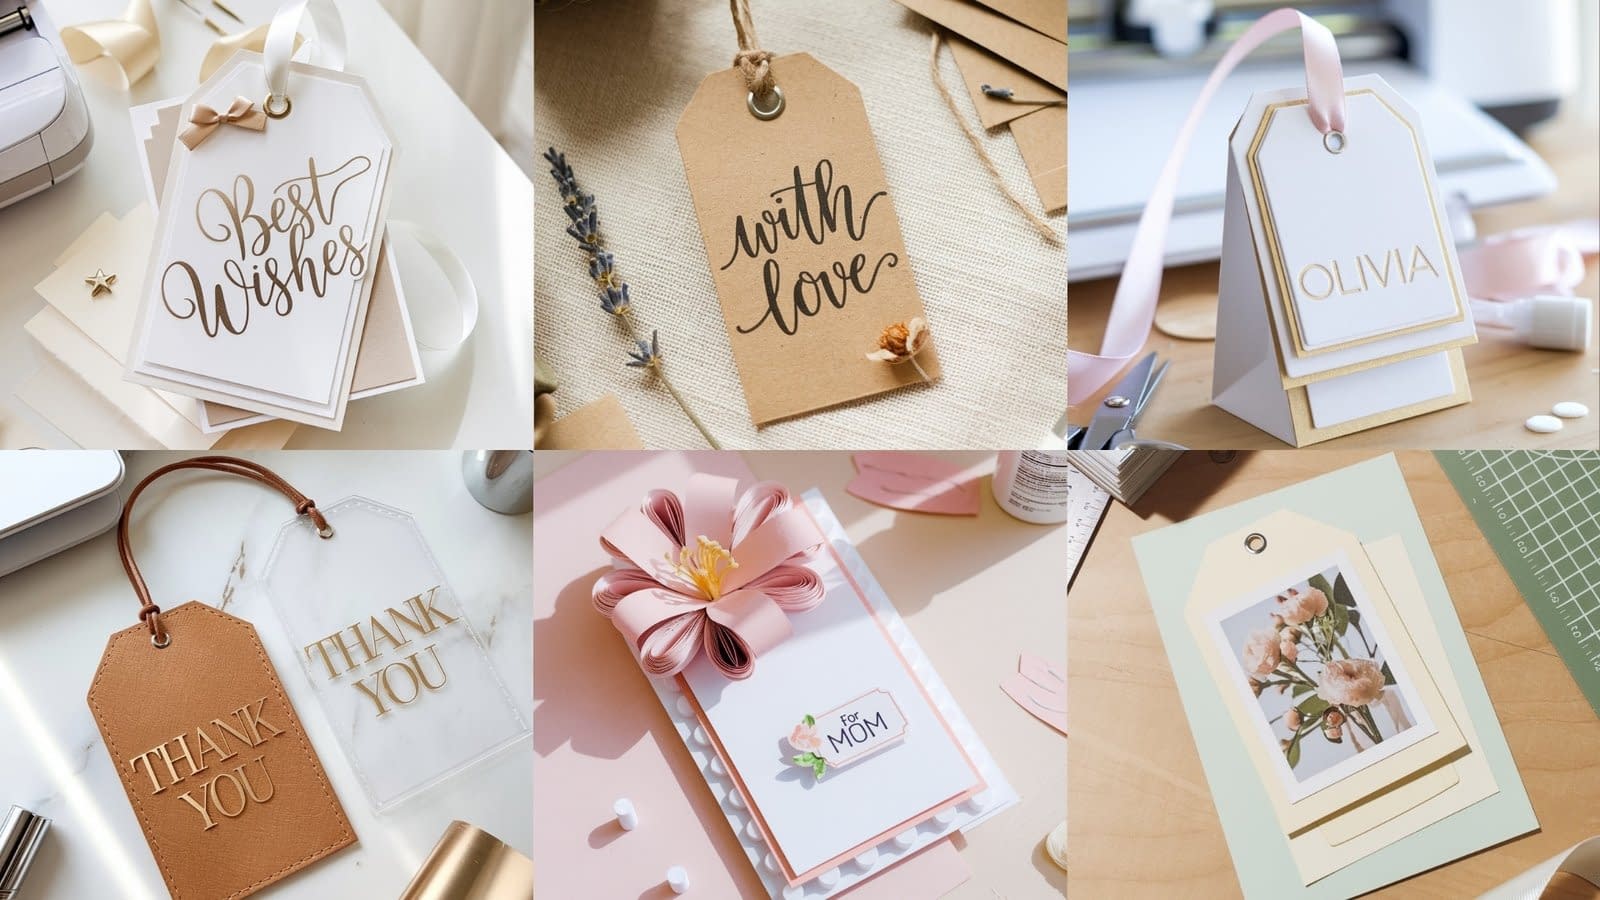
Gift-giving is an art, and sometimes, it’s the smallest details that make the biggest impression. A simple gift bag can turn into something special with a personalized tag that shows effort, creativity, and love. Whether you’re crafting for birthdays, weddings, holidays, or “just because” moments, these 6 Cricut gift bag tag tutorials will help you create custom designs that elevate every gift presentation.
In this full guide, you’ll learn everything from choosing the right materials and setting up your Cricut machine to designing, cutting, and assembling beautiful bag tags that look store-bought—but with your personal touch.
Tools, adhesives and materials — what to have on hand
Before starting, gather tools and choose adhesives carefully — the right glue and tools are the difference between sloppy and professional results.
Tools
- Cricut machine (Maker, Explore, or Joy)
- Fine-point blade (standard) and deep-point or rotary if using faux leather or acrylic
- StandardGrip cutting mat (Green) and LightGrip if using thin paper
- Weeding tools, tweezers
- Spatula and scraper
- Small scissors / micro-tip scissors
- Paper bone folder (or clean edge of a ruler) — essential for crisp folds
- Hole punch (1/8″ to 3/16″ for tags) or crop-a-dile for reinforced holes
- Pencil and small round dowel (to curl petals)
- Ruler and cutting trimmer (for straight edges)
- Small paintbrush (for spreading glue if needed)
Adhesives — choose per material
- PVA craft glue (white glue) — good for cardstock and paper layers; moderately fast drying, repositionable briefly.
- Tacky glue — thicker, more instant hold for heavier cardstock and after a few seconds set it’s firm.
- Double-sided adhesive tape (thin) — for flat layers where no ridge should show.
- Foam adhesive squares/dots — for creating dimension (3D layers).
- Hot glue (low temp) — for heavy embellishments (faux leather, thick felt, or acrylic). Use sparingly for cardstock (can show through).
- Super-thin glue pen — for detailed precision gluing of small pieces and vinyl transfer.
- Transfer tape for vinyl application.
Materials (examples & measurements)
- 65–110 lb cardstock in assorted colors
- Glitter or metallic cardstock (for accent layer)
- Kraft paper sheets (for rustic tags)
- Vinyl sheets (permanent or removable) for decals
- Faux leather, thin acrylic, or chipboard for deluxe tags
- Ribbon, twine, jute, baker’s twine
- Eyelets/grommets (optional) — 3mm–4mm inner diameter
- Photo paper (for print-then-cut tags)
General pre-cutting setup: templates, sizing & alignment
- Tag size: Standard gift bag tags range from 2.25″ × 3.5″ up to 3″ × 4.5″. I recommend making main tag dimensions between 2.5″ × 3.5″ — large enough to read, small enough to fit on most bags.
- Layer offsets: For layered tags, make a backing layer 0.125″ to 0.25″ larger than the top layer on all sides. Example: top tag = 2.5″ × 3.5″; backing = 2.75″ × 3.75″.
- Cut order: In Design Space sequence, cut the most delicate intricate pieces last so they don’t snag on the mat from earlier cuts. Cut backing layers first (sturdier, less detail), then top decorative layers.
- Test cut: Always perform a small test cut on the same paper to confirm pressure settings.
- Aligning text & shapes: Use “Attach” to lock writing/drawing with shape positions. For script fonts, “Weld” letters before cutting to avoid disconnected inner shapes.
Tag 1 — Layered Classic Name Tag (paper)

A step-by-step approach for perfect flat layers and clean folded reinforcements.
Materials
- Top cardstock (65–80 lb) — 2.5″ × 3.5″ cut
- Backing cardstock (80–100 lb) — 2.75″ × 3.75″ cut
- Foam adhesive dots (1–2 mm) or thin double-sided tape
- Ribbon or twine, 10–12″ length
Cutting
- In Design Space, place the top tag shape (rounded rectangle or scalloped) sized to 2.5″ × 3.5″. Add a text box for the name, center it vertically/horizontally.
- Create a duplicate shape, increase to 2.75″ × 3.75″ for the backing.
- Cut the backing first (StandardGrip; 80–100 lb), then the top layer.
Assembly (detailed)
- Edge burnish & fold (if adding a fold tab): If you want a fold-over tab (for a double-thickness top), cut an extra strip 0.5″ × width of tag. Use the bone folder to make a crisp 0.25″ fold line so the tab wraps to the back. This reinforces the hole.
- Hole reinforcement (optional): If using an eyelet, punch a hole centered 0.25″ from the top edge. Install eyelet following package instructions. If not, use the crop-a-dile to punch.
- Attach backing: Use thin double-sided tape around the outer edge of the backing (leave inner center free). Place top tag centered onto backing and press firmly for 10–20 seconds.
- Add dimension: Place small foam dots (one in each corner and one center) to raise the top layer slightly. Press together.
- Finish: Thread ribbon through hole and tie a neat knot. Trim ends at an angle.
Glue notes
- For foam dimension use foam adhesive. For flat tags use double-sided tape. Avoid PVA under thin cardstock layers or it will wrinkle.
Tag 2 — Holiday Themed with Vinyl Accents (layer + vinyl)

Materials
- Glitter cardstock base — 3″ × 4″
- White cardstock top layer with negative cutout for vinyl — 2.75″ × 3.75″
- Permanent vinyl decal (gold/silver)
- Transfer tape
Cutting & Prep
- Cut base glitter cardstock first with StandardGrip.
- Cut top layer but include a cut line for a window or text where vinyl will sit.
- Cut vinyl decal separately (mirror only if it’s iron-on — otherwise do not mirror).
Vinyl application (critical steps)
- Weed the vinyl decal carefully — remove excess vinyl leaving letters and small shapes only.
- Place transfer tape over the vinyl and burnish with scraper (apply even pressure).
- Lift the vinyl from its backing using the transfer tape. Place the vinyl precisely in the negative cutout area on your cardstock top layer.
- Burnish vinyl onto cardstock, then remove transfer tape slowly at a 45° angle.
Assembly
- Use thin double-sided tape to place top cardstock onto glitter base — glue only outer borders to avoid seeing adhesive through glitter.
- Optionally apply a small bow (hot glue small dab on the back of bow, press on for 5 seconds).
Gluing tips
- Use a glue pen for very small vinyl edges needing extra hold.
- For metallic/glitter cardstocks, avoid wet glues on top surfaces — they may show uneven patches.
Tag 3 — Kraft Minimalist Tag with Cricut Pen (draw + cut)

Materials
- Kraft cardstock — 3″ × 4″
- Cricut black or gold pen (0.4mm)
- Jute twine 12″
Design & Draw/Cut
- In Design Space, set tag shape and text to “Draw” with the Cricut Pen instrument — choose “Writing” style and appropriate font.
- Attach the draw text to the tag shape. Set machine to draw then cut.
- Cut/draw on the Kraft cardstock.
Folding & finishing (if adding fold tab)
- If you’re adding a folded top tab for reinforcement, cut a 0.5″ strip and glue the 0.25″ tab to the backside using tacky glue — hold for 15–20 seconds.
- Punch hole and thread jute twine.
When to fold
- Fold only after the ink from the pen is completely dry. On kraft, this can be 30–60 seconds for Cricut pens. Test with a corner to ensure no smearing.
Glue advice
- For attaching a small dried flower or leaf, use a 1–2mm dot of hot glue and press for 5 seconds. For paper attachments, use tacky glue applied with a toothpick for control.
Tag 4 — Photo Tag (Print-then-Cut)
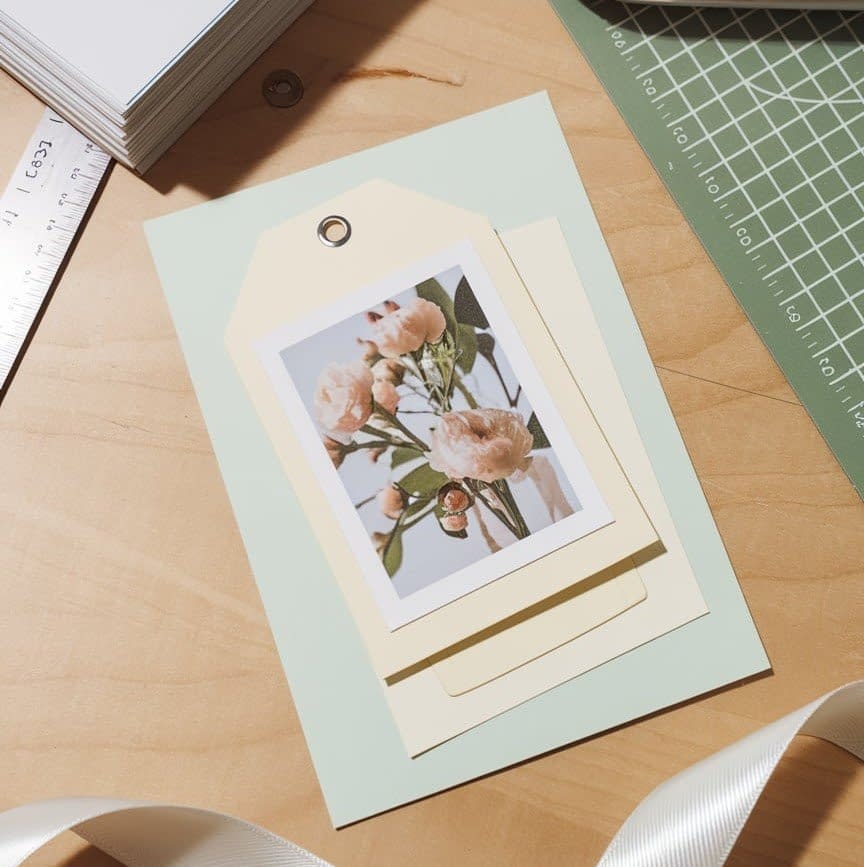
Materials
- Matte photo paper (for printing) or heavyweight sticker paper for print-and-cut
- Backing cardstock 3″ × 4″
- Double-sided adhesive (full sheet) or spray adhesive for large surface
Workflow
- In Design Space, set up a Print Then Cut file: photo inside a 2.5″ circle or rectangle with a 0.125″ border.
- Print on matte photo paper using your printer (highest quality). Let print dry 5–10 minutes to avoid smearing.
- Place print on StandardGrip mat aligning top left and perform the Cut step.
Assembly & backing
- Trim backing cardstock slightly larger (0.125″ border) and attach the photo tag with full-sheet double-sided adhesive for a flat, bubble-free attachment. If you don’t have full-sheet tape, apply thin lines of spray adhesive in a well-ventilated area.
- Optionally add a foam dot behind a corner for a popped look (only one dot so the tag lies mostly flat).
When to fold
- No folds are necessary for photo tags unless you’re making a tented pocket. If so, fold the pocket base before attaching the photo; glue pocket edges before pressing photo.
Tag 5 — Faux Leather or Acrylic Tag (deluxe, rigid)

Materials
- Faux leather piece or thin acrylic sheet prepped for Cricut Maker
- Deep-point blade or Knife Blade (Maker) for acrylic; fine-point for faux leather
- Gold vinyl for lettering
- Leather cord or satin ribbon
Cutting & safety
- For acrylic use the Maker + Knife Blade or a compatible acrylic-cutting process. Place protective masking on both sides of acrylic before cutting to prevent scratches.
- For faux leather use a StandardGrip mat and fine blade; set material type to “faux leather.”
Assembly (gluing & reinforcement)
- If adding vinyl lettering, weed and transfer as described earlier. For acrylic, use adhesive vinyl that adheres well to non-porous surfaces.
- For faux leather layers, use a thin line of contact cement or hot glue for immediate hold (press within 5–10 seconds).
- To finish hole edges on acrylic, drill or use a crop-a-dile to make hole; for faux leather the blade will cut hole when planned.
When to fold
- Do not fold acrylic. Faux leather can be gently folded at room temperature; score with a bone folder then bend slowly. Test on scrap first. Avoid heavy creasing.
Glue tip
- Use a tiny dab of hot glue to attach a decorative charm at the back of an eyelet — hold 8–10 seconds.
Tag 6 — Layered 3D Floral Tag (paper flowers with folding & curling)

This is the most complex tag — I’ll provide exact petal counts, fold points, glue points, and the full assembly sequence.
Materials
- 3–4 colors of cardstock for petals (65–80 lb)
- Base tag 3″ × 4″ (backing 3.25″ × 4.25″)
- Small foam adhesive squares (1–2 mm)
- Tacky glue for paper layers
- Pencil or dowel for curling petals
Cutting & petal sizes
- Pick a 3D flower design in Design Space with three petal layers: small (inner), medium, large. Typical petal sizes: inner petals 0.5″–0.75″, medium 0.75″–1.25″, large 1.25″–1.75″.
- Cut 3–4 copies of each layer for fullness (so 9–12 petals per flower total).
Folding & curling (step-by-step)
- For each petal, score a fold line at the petal base about 0.125″ from the bottom using the bone folder and ruler. This creates a tab to glue into the flower center.
- Gently use the round dowel to curl the petal edge: wrap the outside of the petal lightly around the dowel in one direction. The amount of curl decides how “open” the flower looks. For a bud look, curl more tightly.
- Slightly pinch the base of each petal with fingers to create a cup shape — don’t crease; just form.
Building the flower (order matters)
- Apply a thin dot of tacky glue to the petal tab (scored area). Work quickly but carefully — tacky glue sets in about 20–30 seconds, final hold in 2–5 minutes.
- Glue inner petals first: assemble three inner petals into a circular base, overlapping tabs slightly (about 1–2 mm overlap). Press together for 10 seconds and hold to set.
- Add medium petals around the inner cluster: offset each petal so seams do not line up with inner layer seams.
- Add large petals last, staggering placement so the flower looks full and balanced.
- Add a small foam dot or rolled paper center (a tiny rolled strip of contrasting cardstock glued into the center) for height and finished look.
Attaching the flower to tag
- Decide placement — usually top third of tag offset to one side. Mark location lightly with pencil.
- Apply a circular ring of tacky glue (about 10–12mm diameter) on the tag where the flower base will sit. Place the flower and hold for 30 seconds. Tacky glue bonds well to multiple paper layers.
- For extra hold, add a small drop of hot glue at the very center (under flower) but do this quickly and press—hot glue dries in 3–5 seconds.
When to fold petals
- Fold and curl petals before assembling the flower and before attaching to tag. Never try to fold petals after assembly — you’ll deform the flower.
Common problems & troubleshooting
- Warped cardstock: If a layer warps after gluing, place it under a heavy book for 10–15 minutes while glue cures.
- Ink smudging from Cricut pen: Let ink dry for 60+ seconds and test a scrap. Use heat set for pigment inks (very light pass with a heat tool at low temp) — test first.
- Vinyl peeling: Make sure surface is clean and dry; use transfer tape to burnish vinyl firmly, and avoid bending the vinyl surface until adhered.
- Holes tearing: Reinforce holes with a 0.25″ folded tab glued behind the hole, or install a metal eyelet.
- Acrylic edge chipping: Mask both sides and use shallow passes when cutting; for small delicate shapes avoid fine filigree on acrylic.
Styling and finishing suggestions
- Match ribbon color to top layer for cohesion. Trim ribbon ends at a 45° angle for a professional finish.
- Add small charms or tag-specific stickers — attach them to the ribbon before tying the final knot so they hang naturally.
- For batch production, cut all backing layers, then all top layers, then assemble in stations: cut → weed → fold tabs → glue → finish. This assembly-line approach saves time.
Packaging and storing your finished tags
- Stack flat tags between sheets of tissue paper for storage.
- For 3D tags, store individually in shallow boxes with tissue to prevent crushing.
- Label small self-adhesive bags by theme (holiday, birthday, rustic) for easy retrieval.
Final checklist before attaching to gifts
- Are edges cleanly trimmed? (Trim any stray fibers with micro-scissors.)
- Is the hole reinforced for repeated handling?
- Is the glue fully dry where it might affect the look?
- Does the ribbon length suit the bag handle? (Usually 10–12″ is correct.)
- Will the tag’s weight need a sturdier attachment method? (Use a small safety pin to attach heavier tags to bag tissue.)
Closing & next steps
You now have detailed, repeatable instructions for all six tag types: exactly when to fold, which adhesives to use and how much, how to arrange and stagger layers, step-by-step petal curling and gluing, and practical troubleshooting tips. If you’d like, I can do any of the following next (pick one and I’ll create it now):
- Provide printable templates (SVGs) sized to the measurements above for Design Space.
- Create a simplified one-page assembly cheat sheet you can print and keep at your craft table.
- Produce high-detail photo prompts or mockup visuals for each tag design so you can visualize blog images or produce AI images.


