
Creating earrings with faux leather is one of the most satisfying and beginner-friendly Cricut projects. The material is lightweight, affordable, and extremely versatile, allowing you to design anything from simple teardrops to layered geometric styles. These 6 Cricut Faux Leather Earrings tutorials walk you through every detail you need to know to make professional, gift-worthy earrings at home. Whether you are a complete beginner or already familiar with Cricut cutting, this long, structured guide covers everything from preparing your materials to assembling finished designs that look ready for a boutique display.
Working with faux leather requires patience and precision. Small details such as how you fold the material, the direction you lay it on the mat, and the way you apply glue can make a big difference in how polished the final piece looks. This is why each tutorial below includes in-depth instructions on cutting, handling, layering, shaping, gluing, and adding hardware, all written in a friendly yet professional tone aimed at helping you create perfect results every time.
Understanding Faux Leather for Cricut Earrings
Before jumping into the 6 Cricut Faux Leather Earrings tutorials, it’s essential to understand the material and how to handle it correctly. Faux leather comes in several types, including smooth, pebbled, textured, metallic, and glitter-backed varieties. Each type cuts slightly differently, and understanding those differences will help you avoid tearing, uneven cuts, or stretched edges.
Choosing the Correct Material Thickness
For Cricut earring projects, the ideal faux leather thickness is typically between 0.7 mm and 1.1 mm. Thinner materials can curl too easily, while thicker ones may not cut cleanly. When layering multiple pieces, consider using slightly thinner faux leather to avoid bulky earrings.
Which Cricut Machine Works Best?
Both the Cricut Explore series and the Cricut Maker series can cut faux leather. However, the Maker tends to handle textured or thicker faux leather more consistently. Use the Fine Point Blade for smooth faux leather and the Deep Point Blade for textured selections.
Preparing the Faux Leather Before Cutting
Because faux leather tends to curl during cutting, prep it properly:
- Lay it face down on a strong grip or standard grip mat, depending on stickiness.
- Use painter’s tape around all four edges to secure it.
- If the material is rolled, gently flatten it using your hands or place it under a book for ten minutes.
- Smooth out any bumps to ensure the blade moves evenly.
Adding a Backing
Some crafters choose to add a backing fabric or vinyl before cutting. This helps the earrings hold their shape. You can apply this using permanent adhesive vinyl or heat-bonded fabric. Each tutorial below will mention whether backing is recommended.
Tools and Supplies Needed for All Tutorials
You will need the following materials for each of the 6 Cricut Faux Leather Earrings tutorials:
- Faux leather sheets in your chosen colors
- Strong Grip or Standard Grip mat
- Painter’s tape for securing edges
- Fine Point Blade or Deep Point Blade depending on material
- Earring hooks
- Jump rings
- Jewelry pliers
- Fabric scissors for trimming edges
- Fabric glue or contact adhesive suitable for faux leather
- Hole punch tool (1 mm or 2 mm) if your Cricut design does not include holes
- Optional: Heat transfer vinyl or glitter sheets for decoration
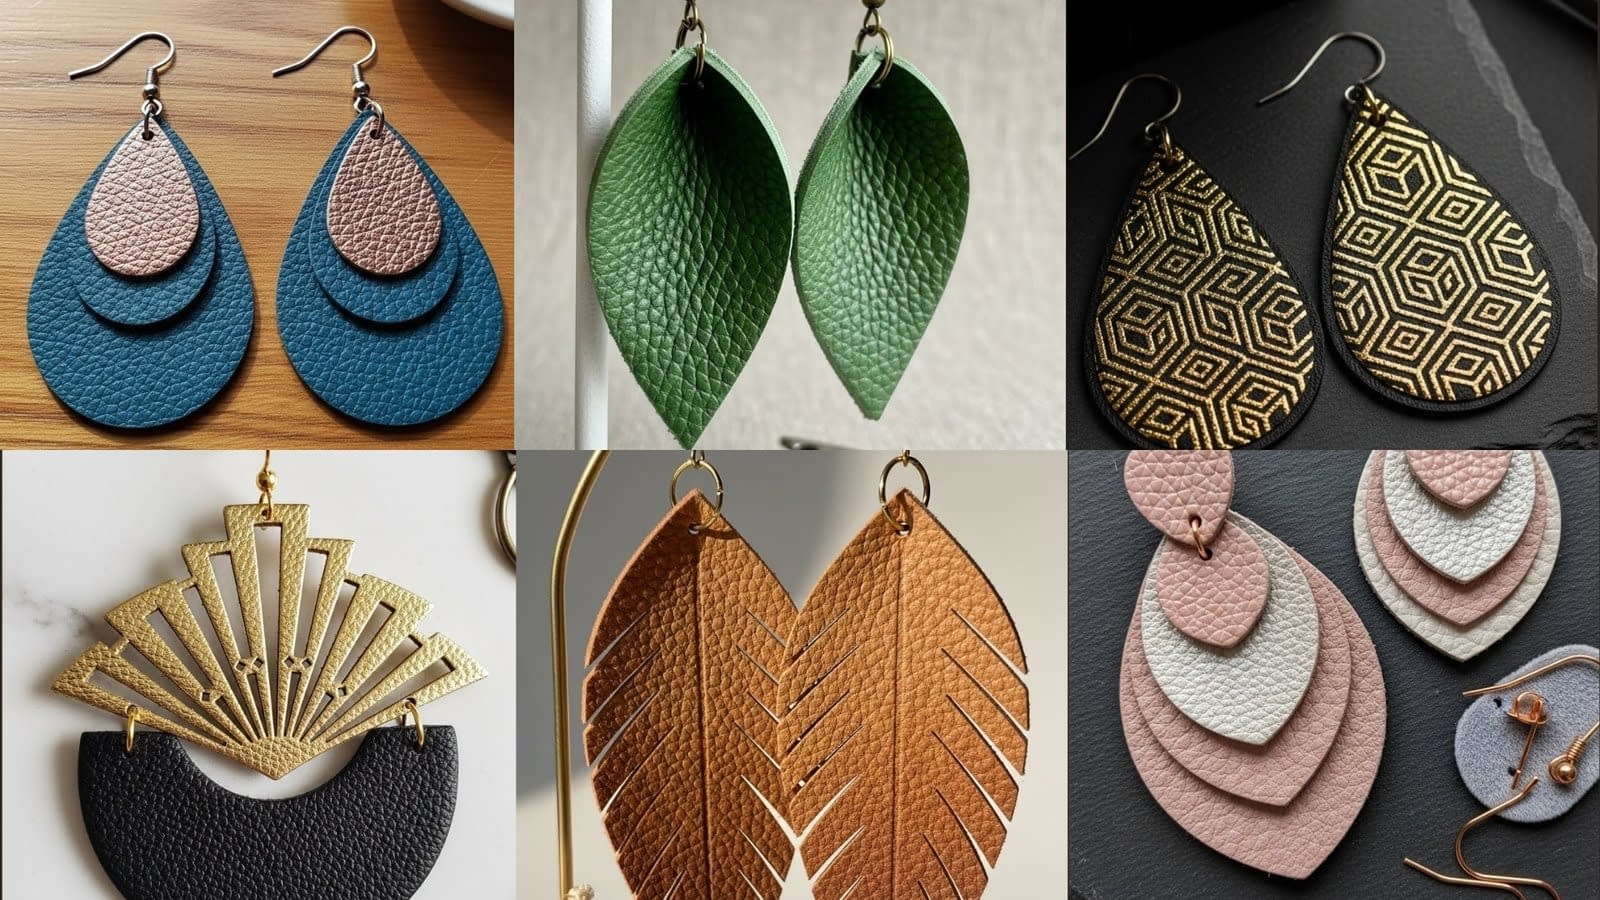
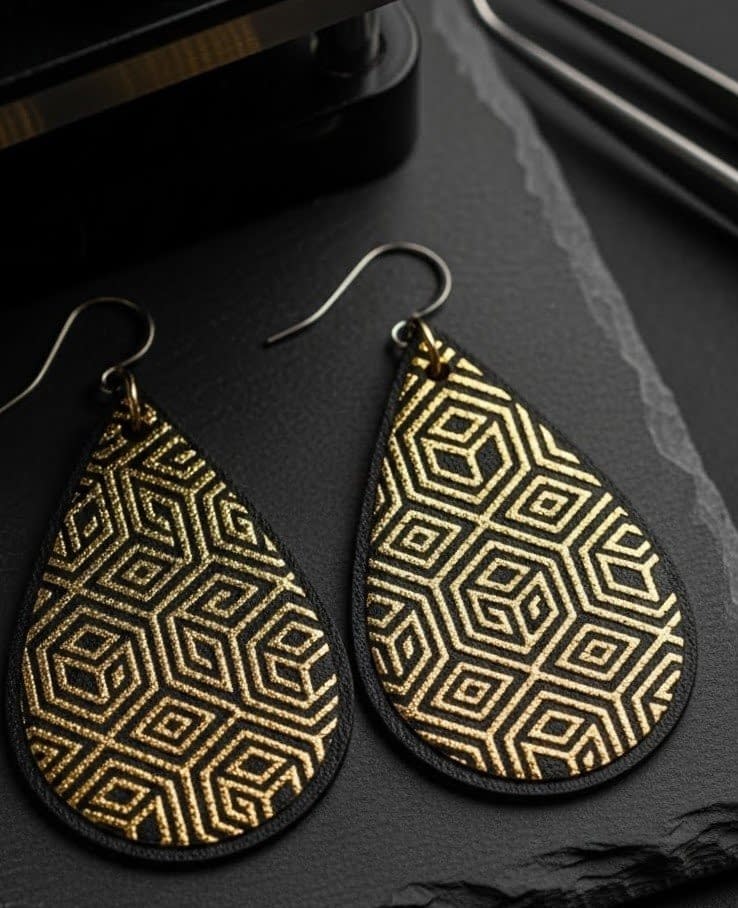
Tutorial 1: Simple Layered Teardrop Faux Leather Earrings
These earrings are perfect for beginners and provide a foundation for more advanced designs. The layered teardrop shape works beautifully with contrasting colors, textured pieces, or metallic accents.
Materials
Use one smooth faux leather sheet and one textured or glitter faux leather sheet.
Cutting Instructions
Place your faux leather face down on the mat. Tape all four sides to prevent movement. Load your teardrop SVG file into Cricut Design Space. You should cut two larger teardrops for the bottom layer and two smaller teardrops for the top layer.
Step-by-Step Assembly
Cutting the Shapes
Make sure both layers are cleanly cut. When removing them from the mat, gently bend the mat backward rather than pulling the faux leather upward. This helps prevent curling.
Preparing the Layers
Place the smaller teardrop on top of the larger one to check for alignment. Trim any uneven edges using fabric scissors.
Gluing the Layers
Apply a thin line of adhesive around the upper edge of the large teardrop. Do not apply glue near the hole area to avoid clogging it. Press the smaller teardrop on top, starting from the pointed end and smoothing downward. Hold for several seconds.
Punching or Cleaning the Hole
Use a small hole punch to clear any glue that may have seeped into the opening. Ensure the hole aligns perfectly through both layers.
Adding Hardware
Use pliers to open the jump ring. Thread it through the hole, attach the earring hook, and close it securely.
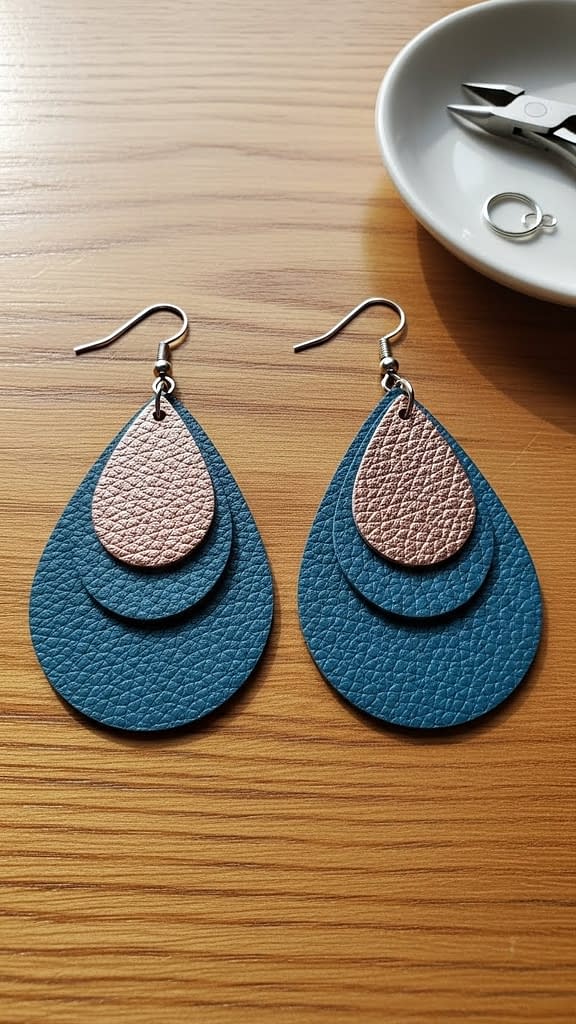
Tutorial 2: Folded Leaf Faux Leather Earrings
This tutorial creates a three-dimensional leaf shape that looks elegant yet remains lightweight. The fold gives the earrings structure and movement.
Materials
Choose a thin faux leather that bends smoothly when folded.
Cutting Instructions
Cut two long leaf shapes using your Cricut. Make sure the leaf design includes a center line for perfect symmetry.
Step-by-Step Assembly
Folding the Leaf
Once the shapes are removed from the mat, gently fold each leaf lengthwise down the center. Do not crease it sharply; instead, form a soft, curved fold.
Adding the Inner Fold Glue
Apply a narrow line of glue along the inside of the fold from the bottom and stopping about one inch from the top. Press the folded edges together gently. You want them attached but not flat.
Shaping the Bottom Point
Pinch the bottom ends together with your fingers to form a tapered shape. If the ends separate after glue sets, add a tiny dab of glue inside.
Creating the Hole
Punch the hole near the top, at the edge of the fold, ensuring you go through both layers.
Adding Hardware
Attach a jump ring and earring hook through the hole. Because of the fold, you may want to use a slightly larger jump ring so the earrings hang correctly.
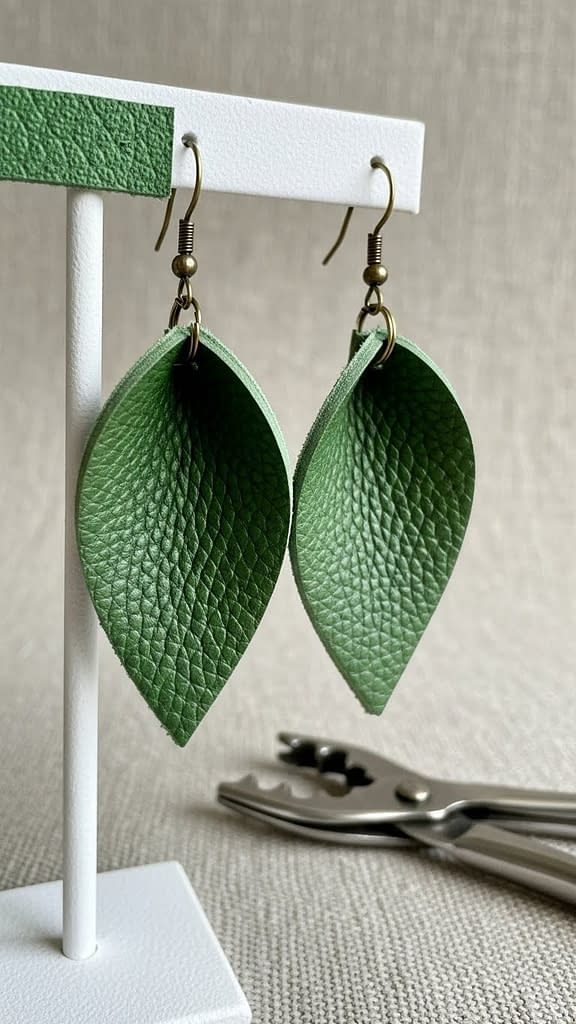
Tutorial 3: Layered Petal Faux Leather Earrings
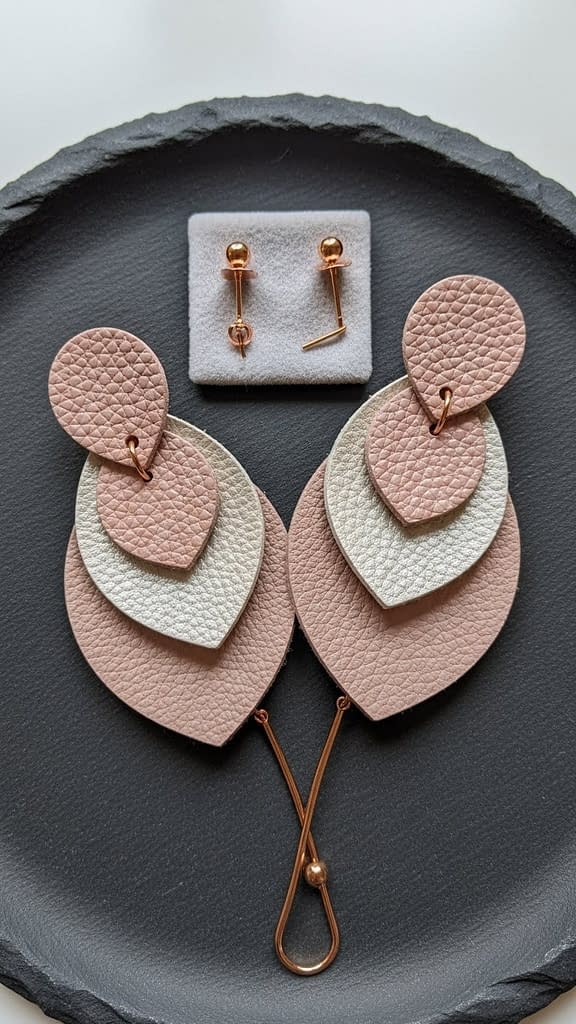
This design uses three or more layered petal shapes to create depth. It works well with ombre colors, metallic tones, or a mix of textured materials.
Cutting Instructions
Cut at least three sets of petals in different sizes. Lay each material face down and stabilize it with tape.
Step-by-Step Assembly
Arranging the Petals
Lay the largest petal at the bottom, then stack the medium and small petals above it. Arrange them so each layer peeks out clearly.
Gluing the Layers
Apply a small amount of glue only at the top portion of each layer so the bottom parts remain loose and natural. Press firmly and allow the glue to set for a few minutes.
Curling the Petal Tips
Use your fingers to bend the bottom tips slightly backward. Faux leather holds shape well once gently bent.
Punching Holes
Align all layers at the top and use a hole punch to create a clean opening through all pieces.
Adding Hardware
Attach a jump ring through the hole and connect the earring hook.
Tutorial 4: Wide Feather Faux Leather Earrings

Feather earrings made from faux leather look bold but remain extremely light. This tutorial includes detailed instructions for cutting slits and shaping the material to achieve a natural feather look.
Cutting Instructions
Upload a feather design that includes the main feather shape and optional slit guidelines. Place your material face down and cut carefully.
Step-by-Step Assembly
Creating the Feather Texture
Using small fabric scissors, cut narrow, angled slits along both sides of the feather. Space them evenly. Avoid cutting too close to the center spine.
Softening the Slits
Run your fingers down both sides to soften the slits, allowing the pieces to separate gently and create a feathered effect.
Curling the Edges
Hold the feather gently between your fingers and give the edges a slight outward curl. Do this slowly to avoid creasing.
Reinforcing the Top
If your material is thin, apply a small piece of backing fabric at the top where the hole will be punched.
Adding Hardware
Punch the hole, attach jump rings and hooks, and ensure the feather hangs straight.
Tutorial 5: Double-Sided Faux Leather Earrings
These earrings require precise assembly because both sides are visible. This technique is ideal for earrings that may flip while being worn.
Materials
Two faux leather pieces of identical size, plus fabric glue.
Cutting Instructions
Cut the shapes using your Cricut twice, once for each side. Make sure the design is mirrored if needed.
Step-by-Step Assembly
Matching the Shapes
Lay the two matching cutouts back to back to confirm perfect alignment. Trim any uneven pieces before gluing.
Applying Glue
Spread a thin, even layer of adhesive across the back of one piece, ensuring full coverage but avoiding excess glue near the edges. Press the second piece on top and smooth from center outward.
Sealing the Edges
Once assembled, gently pinch the edges all around to ensure they bond well. If you notice lifting areas, add a tiny amount of glue and press again.
Re-Punching the Hole
Once the glue dries, use a hole punch to clean the opening. Make sure it aligns through both layers.
Adding Hardware
Attach jump rings and hooks. Because the earrings are double-sided, you can use either side as the front.
Tutorial 6: Art Deco Fan-Crescent Faux Leather Earrings
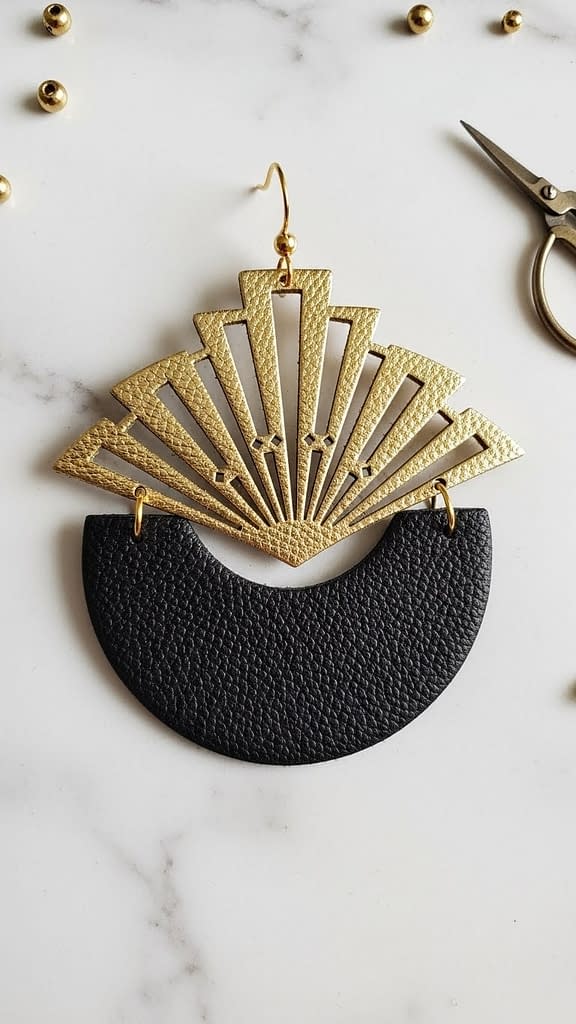
These earrings combine bold geometric lines with soft curves, inspired by classic Art Deco motifs. The layered fan-over-crescent structure gives them a luxurious look while still being simple to cut and assemble with Cricut.
Materials You’ll Need
Faux Leather & Findings:
- Metallic gold faux leather (thin, Cricut-friendly)
- Matte black faux leather
- Gold jump rings
- Gold earring hooks
Tools:
- Cricut Maker or Explore
- Standard Grip or Strong Grip mat
- Fine-Point Blade
- Hole punch (1.5–2 mm) if needed
- Jewelry pliers
- Fabric scissors (optional)
Design Overview
This design features:
- A smooth crescent base (bottom layer)
- A sharp-edged Art Deco fan shape layered on top
- Small, symmetrical cutouts that mimic Deco rays
- Gold–black contrast for a rich, architectural look
- Clean, modern geometry that stands apart from typical teardrops and feathers
Step-by-Step Tutorial
Step 1 — Prepare the Layers in Cricut Design Space
- Open Design Space and create a half-moon shape (a simple circle cut in half works).
- Resize the crescent to approximately 1.75 inches wide and 1 inch tall.
- Create the fan layer:
- Start with a triangular base.
- Add radiating thin rectangles to form “rays.”
- Merge them using Weld or Unite.
- Add 3–5 tiny diamond cutouts between the rays (classic Deco detail).
- Position the fan shape so it aligns perfectly above the crescent.
- Add a small circle cutout near the top for your jump ring.
- Duplicate to create the second earring.
Tip: If you want perfectly symmetrical rays, align everything using Align → Center Horizontally.
Step 2 — Cut the Faux Leather
- Place the faux leather face down on the mat (if it has a textured finish).
- Use painter’s tape around the edges to prevent lifting.
- Use the Fine-Point Blade and the “Faux Leather (Paper Thin)” setting.
- Cut the:
- Two black crescents
- Two gold Art Deco fan layers
Tip: If your gold faux leather is thicker, choose the “Faux Leather (Thick)” setting and do a second pass.*
Step 3 — Assemble the Earring Layers
- Lay the black crescent down first.
- Place the gold fan layer on top, ensuring the curve matches the crescent’s top arc.
- Use a small amount of fabric glue (optional) to keep the layers aligned — but you can also leave them unglued for a lightweight, layered effect.
- Press gently so the layers sit clean and flat.
Step 4 — Add the Hardware
- Using a small hole punch (if Design Space didn’t cut the hole cleanly), ensure the top hole is open.
- Attach a gold jump ring through the hole.
- Add your earring hook.
- Close the jump ring securely using pliers.
Tip: Make sure both hooks face the same direction before closing.*
Step 5 — Finishing Touches
- Trim any tiny frayed edges with sharp scissors.
- Slightly warm the faux leather with your fingers and bend it to give the earrings a smooth, natural curve.
- Wipe off any glue spots before they dry.
How to Customize This Design
Try different combinations to create multiple looks:
Color Options
- Rose gold fan + charcoal base
- Silver fan + deep navy base
- Copper fan + forest green base
Shape Tweaks
- Make the crescent larger for a dramatic geometric look
- Add more rays for a bolder Art Deco effect
- Replace diamond cutouts with tiny circular holes
Material Mixes
- Use glitter faux leather for the fan layer
- Add a third thin layer between the two for extra dimension
- Use engraved acetate instead of faux leather for a mixed-media style
What Makes This Pair Unique
Unlike common Cricut earrings like teardrops, feathers, fringes, or hearts, this design stands out because it features:
- Elegant jewelry-store aesthetic
- Architectural geometry
- Deco-inspired symmetry
- A balance of soft curves + sharp lines
- Luxe gold-over-black color pairing


