
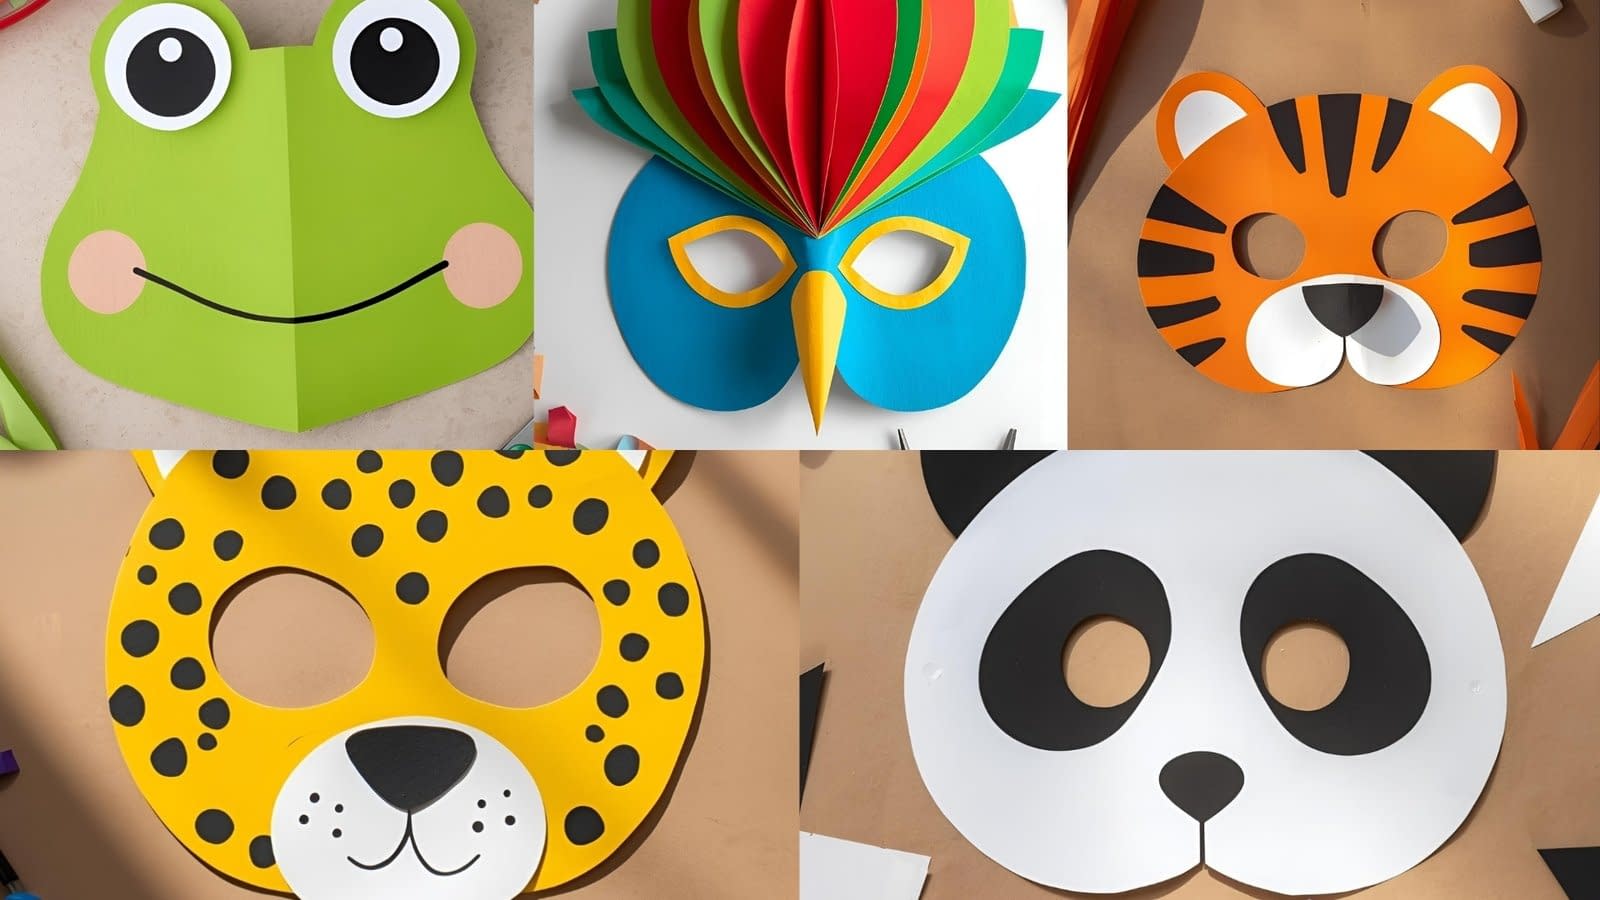
Colorful paper animal masks are one of the easiest and most enjoyable crafts for kids. They help children express creativity, develop coordination, and engage in imaginative storytelling — all while working with simple, safe materials.
In this detailed guide, you’ll learn how to make five fun paper animal masks — Leopard, Parrot, Panda, Tiger, and Frog — all designed in a clean, flat, and brightly colored paper-cut style. These masks are perfect for school projects, costume days, or fun afternoons at home.
Why Paper Masks Are Great for Kids
- Encourages creativity: Kids can personalize colors and patterns.
- Affordable materials: Made with paper, glue, and scissors.
- Skill building: Enhances fine motor skills and color recognition.
- Fun for group projects: Perfect for playdates or classroom art time.
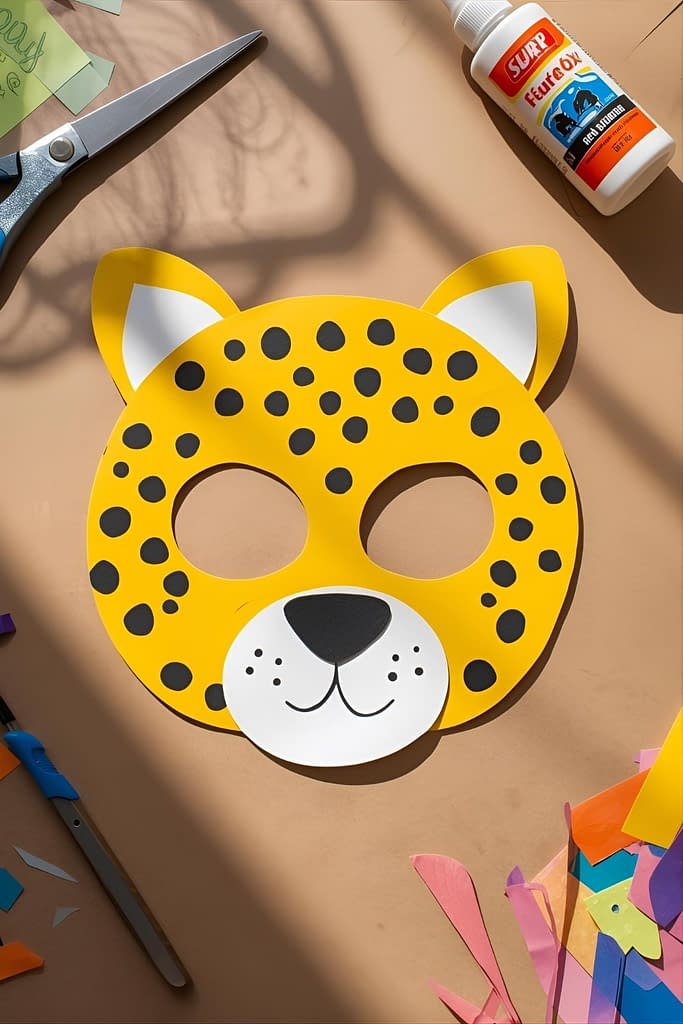
Tutorial 1: Paper Leopard Mask
Materials Needed
- Yellow cardstock or construction paper
- Black cardstock (for spots)
- White paper (for muzzle)
- Scissors
- Glue stick
- Black marker
- Elastic string or ribbon
Step-by-Step Instructions
Step 1:
Cut out a simple rounded mask base from yellow paper — shaped like a cat’s face with two small ear bumps on top.
Step 2:
Cut out two circular eye holes evenly spaced in the center.
Step 3:
Cut small black oval and round spots from black paper. Glue them randomly across the mask for the leopard’s fur pattern.
Step 4:
Cut a small white oval for the muzzle and glue it near the bottom center. Draw a black triangle nose and tiny whisker dots.
Step 5:
Punch small holes on both sides and attach an elastic string so kids can wear it comfortably.
Tutorial 2: Paper Parrot Mask

Materials Needed
- Blue, green, red, and yellow cardstock
- Scissors
- Glue stick
- Pencil
- Elastic string or paper straw handle
Step-by-Step Instructions
Step 1:
Cut a wide, rounded mask shape from blue cardstock. It should cover the upper half of the face with small notches for feathers on top.
Step 2:
Cut out two large eye holes near the center.
Step 3:
Cut feather shapes from red, green, and yellow paper. Glue them along the top edge of the mask, layering colors to create a vibrant crown of feathers.
Step 4:
Cut a small triangle from yellow paper and glue it under the eye holes to form the parrot’s beak.
Step 5:
Attach elastic or glue a paper straw handle to one side for easy holding.
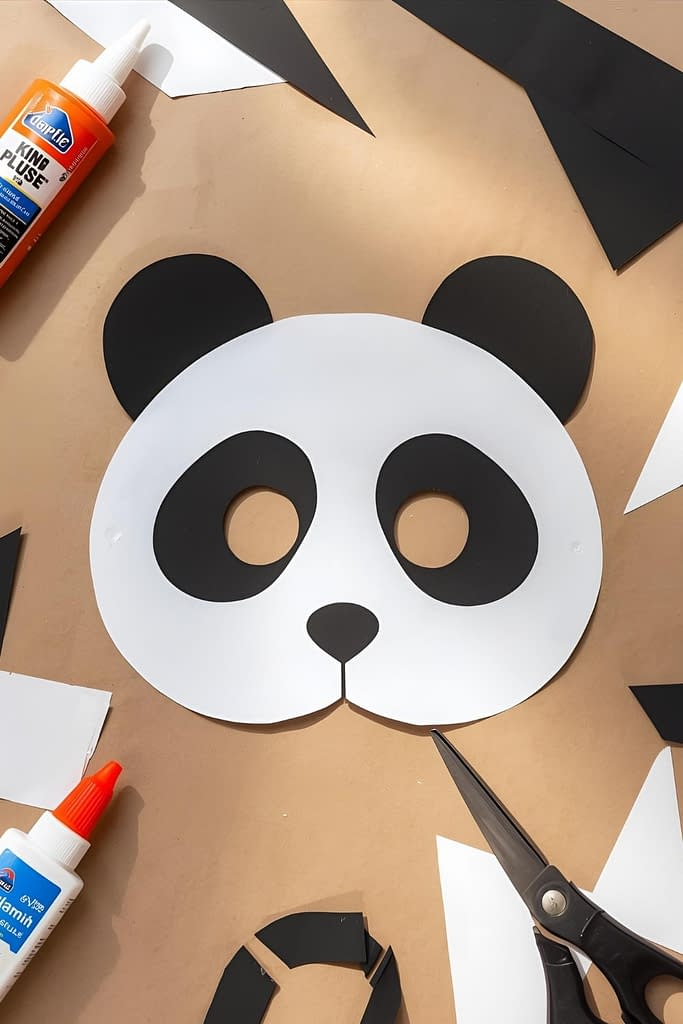
Tutorial 3: Paper Panda Mask
Materials Needed
- White cardstock or paper plate
- Black cardstock (for patches, ears, and nose)
- Scissors
- Glue stick
- Elastic string
Step-by-Step Instructions
Step 1:
Cut a circular face shape from white cardstock or a paper plate.
Step 2:
Cut two large black ovals for the eye patches. Glue them symmetrically on the upper half of the face.
Step 3:
Cut two circular holes inside the black patches for the eyes.
Step 4:
Add two rounded black ears at the top and a small black oval for the nose at the bottom center.
Step 5:
Attach elastic string through the sides so the mask fits comfortably on a child’s face.
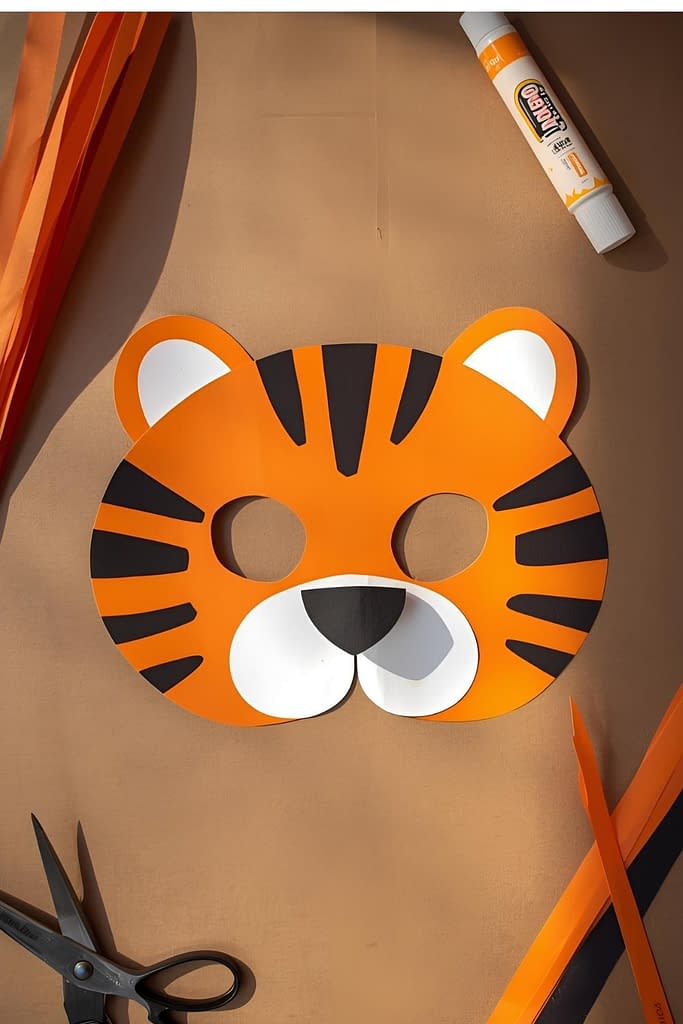
Tutorial 4: Paper Tiger Mask
Materials Needed
- Orange cardstock or construction paper
- Black cardstock or marker (for stripes)
- White paper (for muzzle)
- Scissors
- Glue stick
- Elastic string
Step-by-Step Instructions
Step 1:
Cut a rounded orange mask base with two ear shapes on top.
Step 2:
Cut two circular eye holes in the center.
Step 3:
Cut out several small, curved black stripes from cardstock and glue them onto the forehead and cheeks to form the tiger pattern.
Step 4:
Cut a small white oval for the muzzle area, glue it below the eyes, and draw a tiny black nose on it.
Step 5:
Attach an elastic string through side holes for wearing.
Tutorial 5: Paper Frog Mask
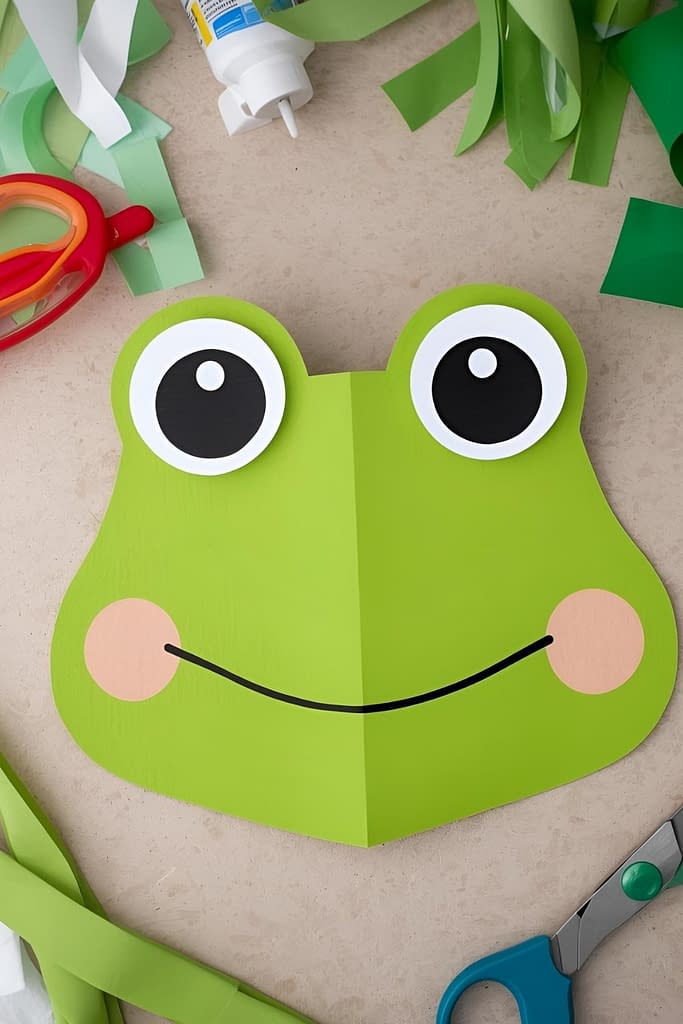
Materials Needed
- Green cardstock or construction paper
- White paper (for eyes)
- Black paper (for pupils and mouth)
- Glue stick
- Scissors
- Elastic band
Step-by-Step Instructions
Step 1:
Cut a wide, rounded green mask base with two bumps on top for the frog’s eyes.
Step 2:
Cut two medium circles from white paper and two smaller circles from black paper for pupils. Glue them onto the top bumps of the mask to create the frog’s big eyes.
Step 3:
Cut two circular eye holes below the raised eye shapes.
Step 4:
Use black paper or a marker to draw a cheerful curved smile.
Step 5:
Punch side holes and tie an elastic band for wearing.
Extra Tips for Parents and Teachers
- Pre-cut shapes for younger kids to make assembly easier.
- Use thick cardstock for sturdier masks.
- Add pops of glitter or foam stickers for extra fun.
- Turn it into a theme day: jungle animals, zoo friends, or tropical birds.
Final Thoughts
These 5 Paper Animal Masks Tutorials for Kids — Leopard, Parrot, Panda, Tiger, and Frog — are colorful, fun, and easy to make with everyday materials. The flat, bright paper style keeps crafting simple while giving kids plenty of room to be creative.
Perfect for classrooms, parties, or rainy days at home, these animal masks bring imagination to life — one playful paper face at a time.


