
There’s something undeniably comforting about pulling on a soft, stretchy ribbed beanie on a chilly day. Whether you’re heading out for a crisp morning walk, cozying up around a bonfire, or simply styling a casual winter outfit, a ribbed beanie is a timeless accessory that combines warmth, comfort, and style.
What makes ribbed beanies especially fun for crocheters is their versatility. The ribbed texture not only creates a snug fit but also adds classic knit-like stretch that works for all head sizes. From basic beginner-friendly beanies to slouchy modern designs and chunky statement pieces, ribbed patterns allow you to create hats that are as practical as they are stylish.
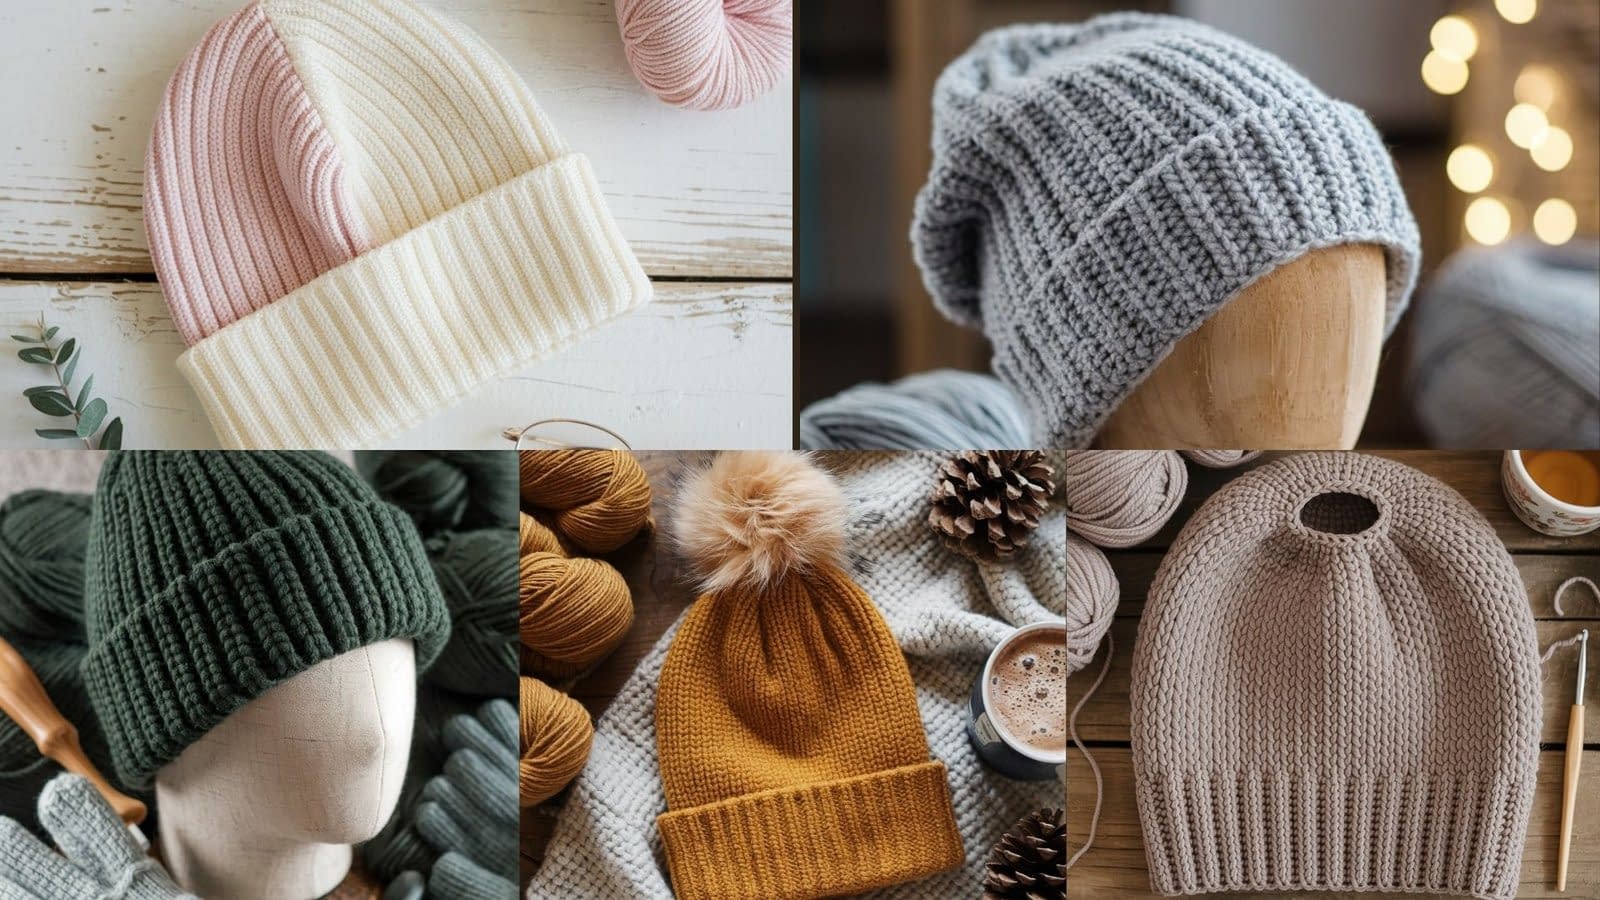
In this guide, we’ll walk through 5 ribbed beanie patterns, each designed with slightly different textures, finishes, and fits. Every pattern comes with a step-by-step tutorial, skill level, materials list, and finishing options—so no matter your crochet experience, you’ll find a project you can make (and wear!) with pride.
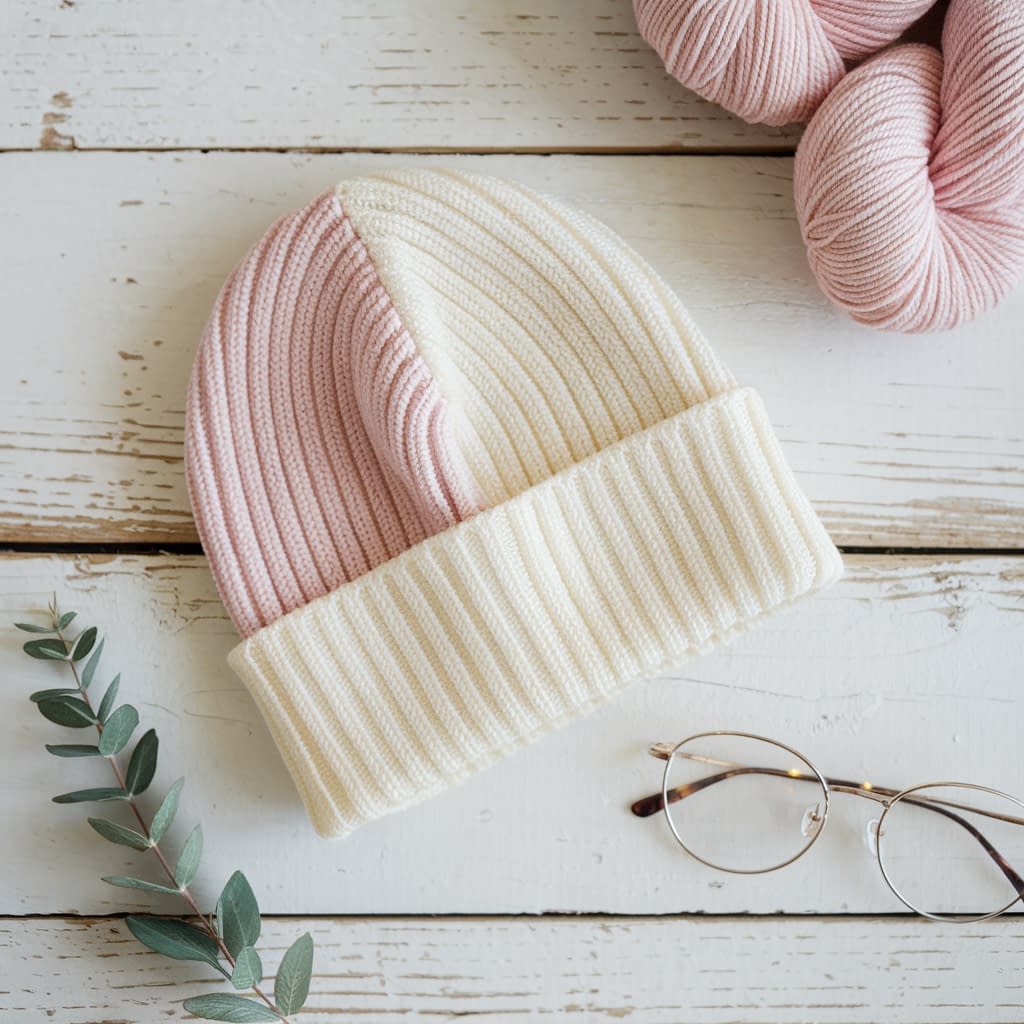
1. Classic Ribbed Fold-Over Beanie
Skill Level: Beginner (simple rows, seaming, and shaping)
Finished Size: About 9″ tall × 18″ around (unstretched), stretches to fit most teens and adults; adjust by adding rows for width and length for height.
Materials
- Worsted weight (#4) yarn (approx. 180–220 yards) — neutral or solid colors work beautifully.
- Crochet hook: 5.0 mm (H)
- Yarn needle and scissors
- Optional: pom-pom maker or pre-made faux-fur pom-pom
Notes
- This beanie is worked flat as a rectangle in rows of back-loop only (BLO) stitches, then seamed at the side and cinched at the top.
- The fold-over brim gives it extra warmth and style.
Instructions
Step 1: Foundation
- Ch 41 (for ~9″ tall hat, adjust height by chaining more or fewer).
Step 2: Row Work
- Row 1: Hdc in 2nd ch from hook and across. Turn.
- Row 2: Ch 1, hdc in BLO across. Turn.
- Repeat Row 2 until rectangle measures about 18″ wide (unstretched).
Step 3: Seaming
- Fold rectangle in half lengthwise.
- Use whip stitch or slip stitch through BLO to join short ends into a tube.
Step 4: Closing the Top
- Thread yarn needle with a long tail. Weave in and out around the top edge. Pull tight to cinch closed. Secure with extra stitches.
Step 5: Finishing
- Fold up bottom brim to desired height.
- Attach pom-pom if desired.
Variations
- Add stripes by changing colors every 6–8 rows.
- Make it slouchy by adding extra starting chains (taller hat).
- Use bulky yarn for a chunkier look.
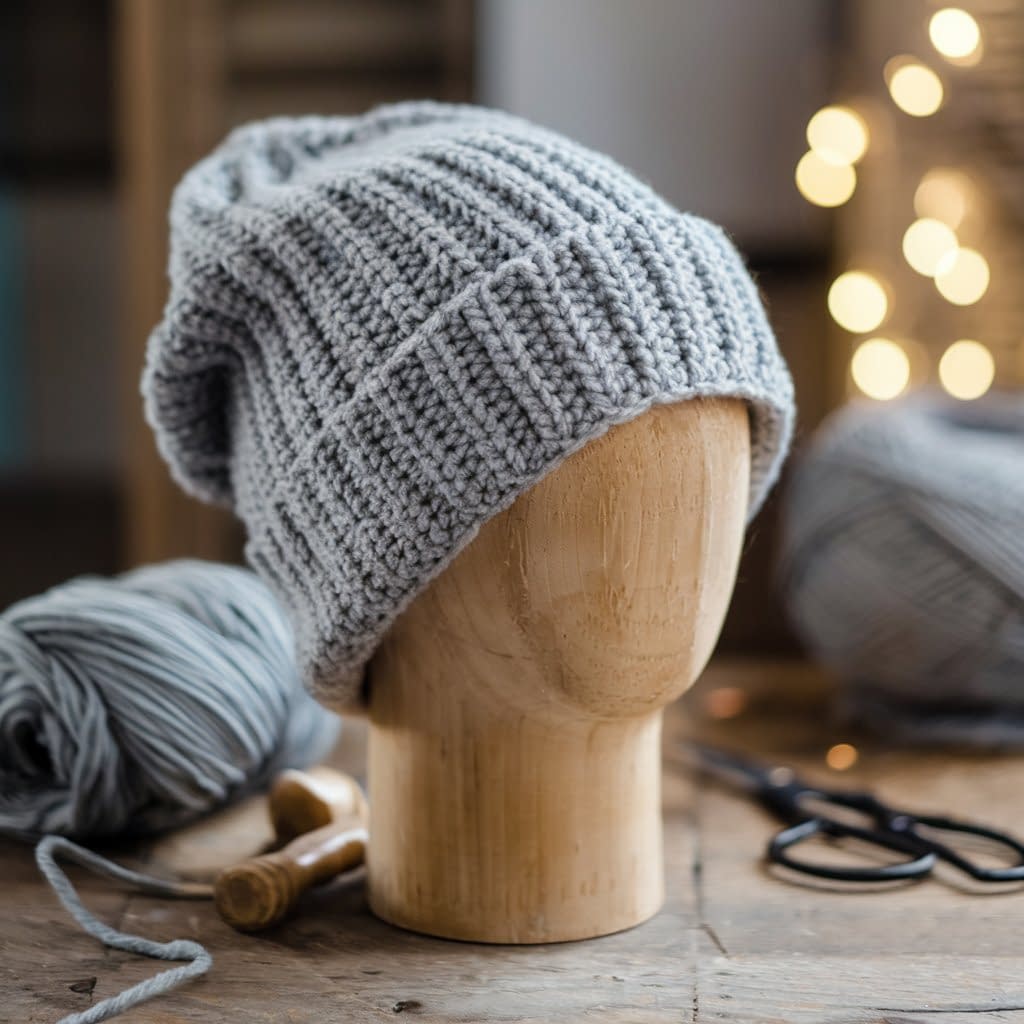
2. Slouchy Ribbed Beanie

Skill Level: Beginner–Intermediate (taller rectangle, shaping for slouch)
Finished Size: About 11″ tall × 19″ around; slouchy fit for adults.
Materials
- Worsted or light bulky (#4–5) yarn, approx. 250 yards.
- Crochet hook: 5.5 mm (I)
- Yarn needle, scissors.
Notes
- This is worked as a tall rectangle, seamed, and cinched like the classic version.
- Extra length creates the relaxed “slouch.”
Instructions
Step 1: Foundation
- Ch 51 (or more for extra slouch).
Step 2: Row Work
- Row 1: Hdc in 2nd ch and across. Turn.
- Row 2: Ch 1, hdc in BLO across. Turn.
- Continue until width measures ~19″.
Step 3: Seaming
- Join short ends with slip stitch or whip stitch.
Step 4: Closing the Top
- Weave yarn tail through top edge, pull tight, and secure.
Step 5: Finishing
- Leave brim unfolded for a relaxed drape.
- Add a yarn or faux-fur pom-pom for contrast.
Variations
- Use gradient yarn for a smooth color fade.
- Add texture by alternating hdc and sc rows.
- Try a ribbed band with a different stitch (front post/back post dc).
3. Chunky Ribbed Beanie
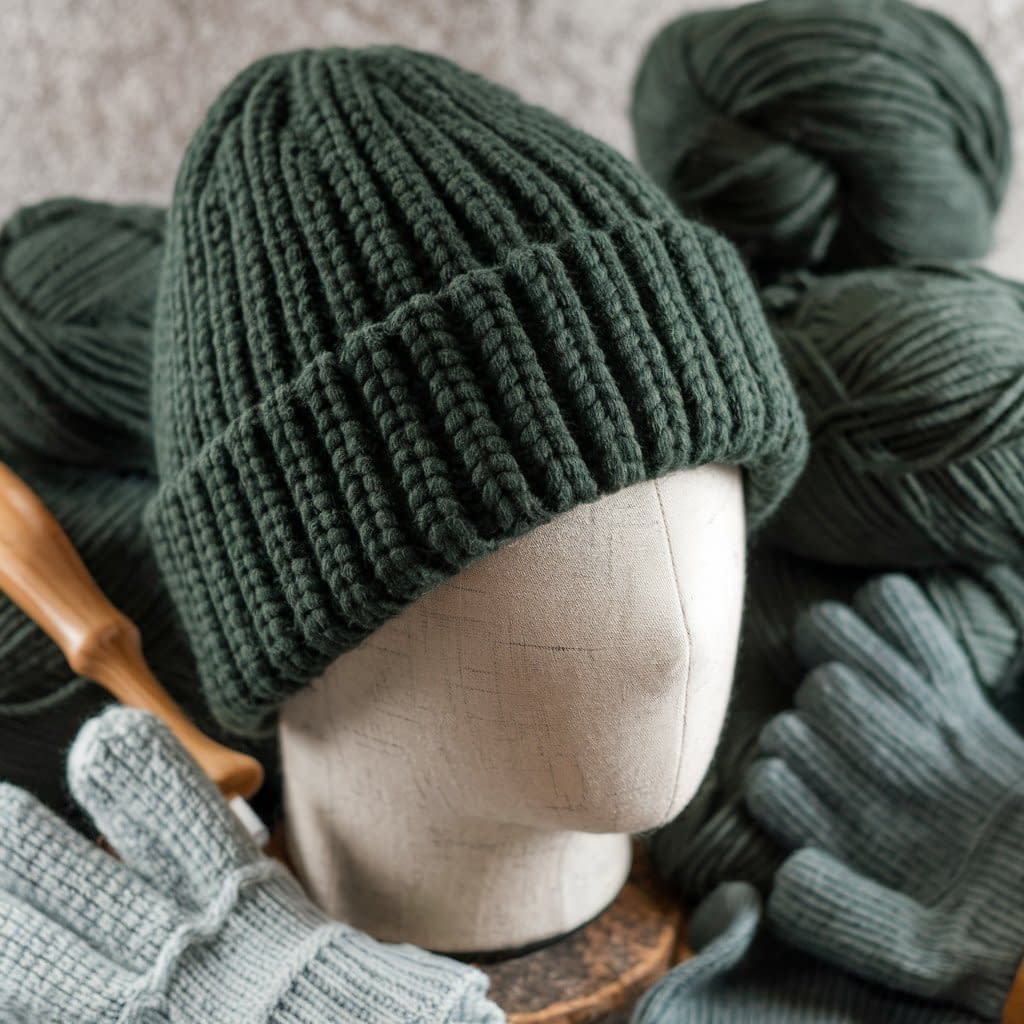
Skill Level: Beginner (fast, chunky stitches)
Finished Size: About 9″ tall × 20″ around (fits most adults).
Materials
- Bulky (#5) or super bulky (#6) yarn, approx. 120–140 yards.
- Crochet hook: 6.5 mm (K) or 8.0 mm (L), depending on yarn.
- Yarn needle and scissors.
Notes
- Worked flat in rows, fastened with fewer rows due to chunky yarn.
- Thick yarn makes this a quick project (1–2 hours).
Instructions
Step 1: Foundation
- Ch 31 for ~9″ tall beanie.
Step 2: Row Work
- Row 1: Hdc in 2nd ch and across. Turn.
- Row 2: Ch 1, hdc BLO across. Turn.
- Repeat until rectangle measures ~20″ wide.
Step 3: Seaming & Top
- Seam short ends.
- Cinch top closed with long tail.
Step 4: Finishing
- Fold brim once for a thick edge.
- Add oversized pom-pom for fun.
Variations
- Try marled yarn (two strands held together).
- Add horizontal stripes with leftover yarn scraps.
- Work in dc BLO for even chunkier ribs.
4. Beginner’s Ribbed Beanie with Seamless Join
Skill Level: Beginner (simple stitches, join-as-you-go seaming)
Finished Size: 8.5″ tall × 18–19″ around.
Materials
- Worsted weight (#4) yarn, ~200 yards.
- Crochet hook: 5.0 mm (H).
- Yarn needle, scissors.
Notes
- Instead of sewing after, this version joins the last stitch of each row into the first with slip stitch, creating a seamless tube.
Instructions
Step 1: Foundation
- Ch 41.
Step 2: Row Work & Join
- Row 1: Hdc in 2nd ch and across. Turn.
- Row 2: Ch 1, hdc BLO across. At end, sl st into first st of Row 1 to join.
- Continue working rows, joining each row into the first stitch.
- Work until piece measures ~18–19″ around.
Step 3: Closing the Top
- Weave tail through stitches at top. Pull tight and secure.
Step 4: Finishing
- Turn brim up for a snug fit.
Variations
- Work taller foundation chain for more slouch.
- Use self-striping yarn for easy color changes.
- Add a leather or faux-leather tag for a polished look.
5. Textured Ribbed Beanie (Front Post/Back Post Style)
Skill Level: Intermediate (requires front post/back post stitches)
Finished Size: 9″ tall × 20″ around.
Materials
- Worsted weight (#4) yarn, ~220 yards.
- Crochet hook: 5.5 mm (I).
- Yarn needle, scissors.
Notes
- Instead of working BLO only, this ribbing uses front post and back post dc for vertical stretch.
- The texture is thick, cozy, and looks almost knit.
Instructions
Step 1: Foundation
- Ch 70 and join to form a round (or fsc 70 for stretch).
Step 2: Ribbing Rounds
- Round 1: Dc in each st around. Join.
- Round 2: Fpdc in next st, bpdc in next st around. Join.
- Rounds 3–20: Repeat Round 2, continuing the ribbing.
Step 3: Shaping the Crown
- Round 21: Fpdc in next 2 sts, bpdc in next 2 sts, dc2tog — repeat.
- Round 22: Continue decreases until ~10 sts remain.
- Fasten off, weave through, and pull closed.
Step 4: Finishing
- Add faux-fur pom-pom if desired.
Variations
- Use chunky yarn for dramatic texture.
- Make it brimless for a sleek, fitted style.
- Alternate fpdc and bpdc in pairs for wider ribs.
Conclusion
Ribbed beanies are a must-have for any crocheter’s pattern library — they’re warm, stylish, and endlessly customizable. Whether you prefer the simplicity of the classic fold-over beanie, the laid-back vibe of a slouchy version, the chunky fast-finish style, or the textured front post/back post ribbing, there’s a design here to match every mood and skill level.


