
Tissue paper flower pom-poms are one of the most versatile and visually striking DIY decorations you can make with minimal supplies. Whether you are decorating for a birthday party, wedding, baby shower, festive celebration, or simply adding handmade charm to your home, these lightweight paper flowers offer endless creative possibilities. In this detailed guide, you will learn four complete tissue paper flower pom-poms tutorials, each with its own distinct shape, texture, and style.
This blog post is designed to be a complete learning resource. Instead of short summaries, each tutorial walks you through the entire process in depth, including how to fold the tissue paper correctly, how to cut different petal shapes, when and where to use glue, and how to fluff the pom-pom for the best final result. By the end, you will confidently be able to create professional-looking tissue paper flowers that hold their shape and look beautifully full.
Materials and Tools You Will Need for All Pom-Poms
Before starting the individual tutorials, it is important to gather your supplies. Having everything prepared will make the process smoother and help you focus on precision.
Basic Materials
- Tissue paper sheets (standard size 20 x 26 inches or similar)
- Floral wire or thin craft wire
- Sharp scissors
- Ruler or measuring tape
- Pencil for light marking
- Clear-drying craft glue or glue dots
- Transparent string or ribbon for hanging
Optional Tools for Better Results
- Bone folder or the back of a butter knife for crisp folds
- Small binder clips to hold folds temporarily
- Flat workspace such as a table or cutting mat
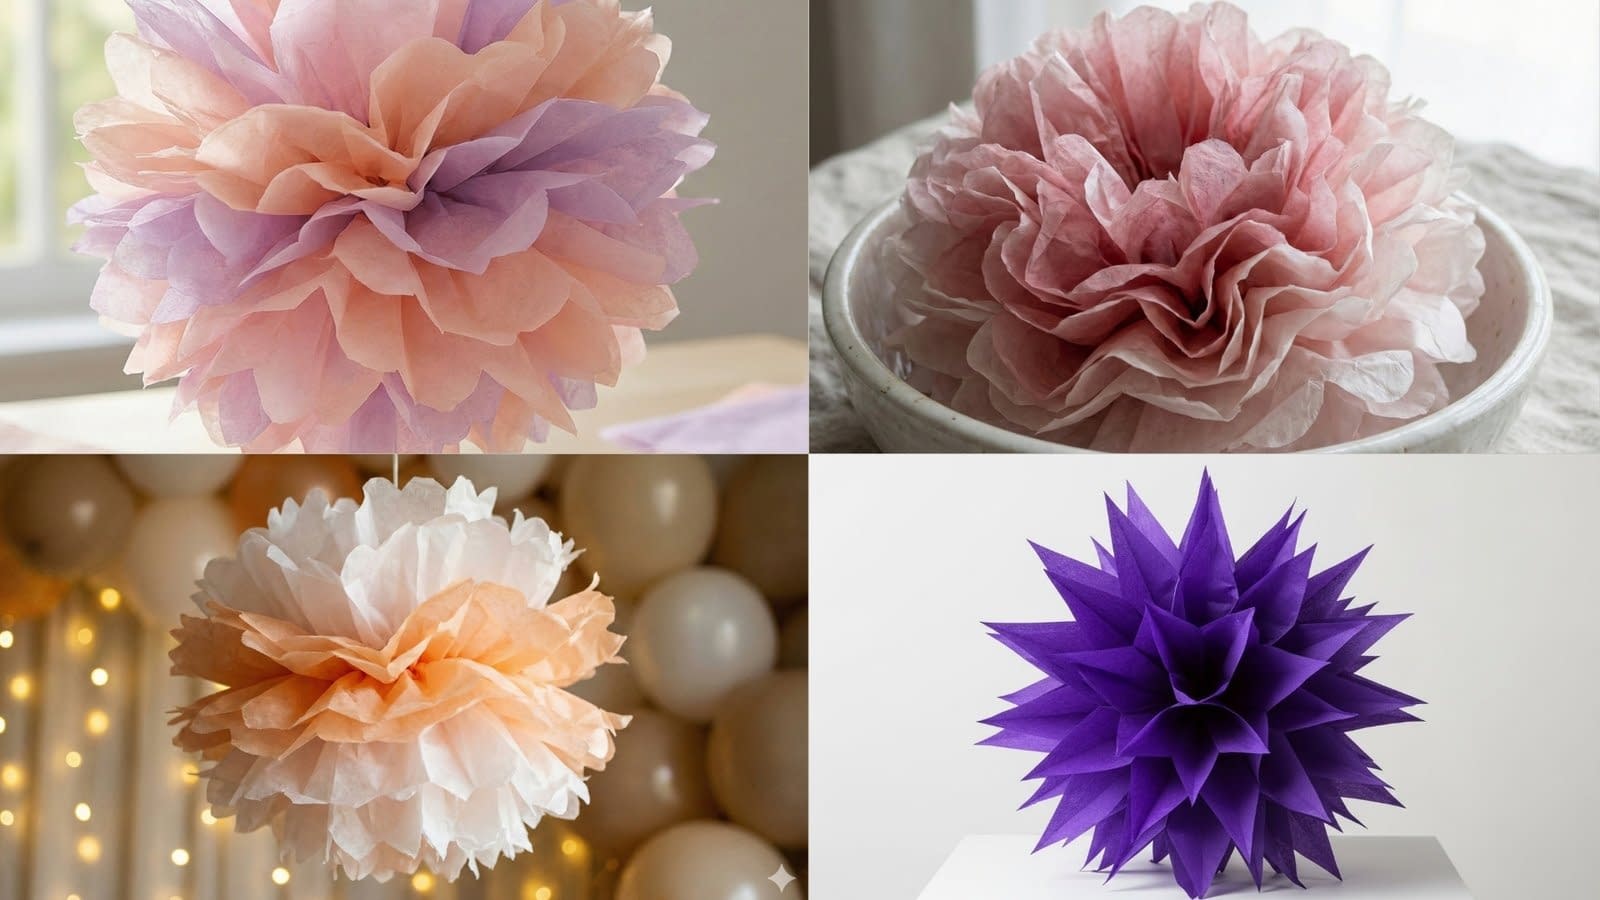
Tutorial 1: Classic Round Tissue Paper Flower Pom-Pom

The classic round tissue paper pom-pom is the most recognizable version of this craft. It forms a perfectly symmetrical sphere with soft, evenly spaced petals. This style works beautifully for pastel color palettes, baby showers, weddings, and elegant indoor décor.
Step-by-Step Instructions
Preparing the Tissue Paper
Start by stacking 8 to 12 sheets of tissue paper directly on top of each other. More sheets will result in a fuller pom-pom, while fewer sheets will create a lighter, airier look. Make sure all edges are aligned as neatly as possible.
Folding Technique
Place the stacked tissue paper horizontally in front of you. Begin folding from one short edge using an accordion fold. Each fold should be approximately 1 to 1.5 inches wide. Take your time to keep the folds even, as consistent folds are key to achieving a round, balanced shape.
Once the entire stack is folded, gently press down along the folds to flatten the paper. You can run a ruler or bone folder along the folds to sharpen them.
Securing the Center
Measure the folded strip and locate the exact center. Wrap floral wire tightly around this center point and twist it several times to secure it. Leave a small wire tail if you plan to hang the pom-pom.
Shaping the Edges
Using sharp scissors, round off both ends of the folded paper. The cut should resemble a soft half-circle. This rounded edge is what creates the classic fluffy look once the pom-pom is opened.
Opening and Fluffing
Gently separate each tissue paper layer one at a time, pulling it upward toward the center. Work slowly to avoid tearing. Alternate sides as you fluff so the pom-pom remains balanced. Continue until all layers are separated and the pom-pom forms a full sphere.
Final Touches
If needed, use a small amount of glue to secure any loose layers near the center. Attach string or ribbon to the wire for hanging.
Tutorial 2: Peony-Style Tissue Paper Flower Pom-Pom

The peony-style tissue paper pom-pom mimics the lush, layered appearance of real peony flowers. This design focuses on depth, irregular petal shapes, and soft color transitions, making it ideal for romantic or floral-themed décor.
Step-by-Step Instructions
Layering the Colors
Choose at least two shades of tissue paper, such as deep pink and pale blush. Stack the darker shades in the center and lighter shades on the outside. This color arrangement creates a natural gradient effect once the pom-pom is opened.
Folding the Stack
Fold the stacked tissue paper using the same accordion method as the classic pom-pom, keeping the folds slightly narrower at about 1 inch wide. Narrow folds help achieve the dense, layered look of a peony.
Securing the Center
Wrap floral wire around the center and twist firmly. Do not flatten the folds too much; slight looseness allows for more natural petal movement later.
Cutting the Petal Shape
Instead of rounding the edges evenly, cut each end into a soft, uneven scalloped shape. Vary the curves slightly to mimic natural petals. Avoid sharp angles for this style.
Opening the Layers
Carefully separate each layer, gently curling the tissue paper inward as you lift it. You can lightly pinch and curve the paper with your fingers to enhance the peony-like texture.
Adding Depth and Adjustment
If some areas appear flat, apply a small dot of glue between layers near the base to hold them in place. Adjust individual petals until the pom-pom looks full and organic.
Tutorial 3: Pointed Petal Tissue Paper Pom-Pom

This style creates a bold, dramatic flower with crisp, pointed petals arranged in a starburst pattern. It works especially well with jewel-tone tissue paper and modern or high-contrast décor themes.
Step-by-Step Instructions
Stacking and Folding
Stack 8 to 10 sheets of tissue paper and fold them into an accordion with precise, even folds. Consistency is especially important for this design to maintain symmetry.
Center Binding
Secure the center tightly with floral wire. The tighter the center, the sharper the final petal arrangement will appear.
Cutting Sharp Petals
Using scissors, cut both ends of the folded stack into a triangular point. The sharper the angle, the more defined the petals will be. Make sure both ends are identical to maintain balance.
Layer Separation
Open the layers slowly, pulling each one upward and slightly outward. Unlike round pom-poms, do not overly curl the paper. Let the pointed edges remain crisp and defined.
Structural Refinement
If necessary, apply small amounts of glue near the base of the petals to keep them upright. This is especially helpful if using heavier tissue paper.
Tutorial 4: Two-Tone Layered Tissue Paper Pom-Pom

The two-tone layered tissue paper pom-pom focuses on color harmony and visual contrast. Alternating layers create a soft blended effect that works beautifully for festive décor and party backdrops.
Step-by-Step Instructions
Alternating the Layers
Stack tissue paper by alternating colors, such as white and peach. Ensure the layers are evenly distributed so both colors appear throughout the pom-pom.
Folding Process
Fold the stack into an accordion with medium-width folds. Press gently to avoid crushing the tissue paper.
Center Tie and Edge Cutting
Secure the center with wire. Cut the edges into a rounded or slightly pointed shape depending on your preference. Rounded edges create a softer blend, while pointed edges add contrast.
Opening the Pom-Pom
Separate the layers one by one, alternating sides. This ensures even color distribution and a balanced appearance.
Hanging and Styling
Attach transparent string and hang the pom-pom in front of a softly lit background. Adjust the layers to highlight the two-tone effect.
Tips for Perfect Tissue Paper Pom-Poms
Preventing Tears
Always separate layers slowly and support the paper near the fold. If tearing occurs, minor imperfections can be hidden by adjusting surrounding petals.
Choosing the Right Tissue Paper
Thin, high-quality tissue paper produces the best results. Avoid overly stiff paper, which is harder to shape.
Storage and Reuse
Store pom-poms in large boxes to prevent crushing. They can be gently reshaped and reused for multiple events.
Conclusion
These four tissue paper flower pom-poms tutorials provide a complete foundation for creating beautiful, handcrafted decorations. By mastering folding techniques, precise cutting, and careful fluffing, you can create a wide range of styles suitable for any occasion. With practice, each pom-pom becomes easier to make and more refined in appearance, allowing you to customize colors, sizes, and shapes to suit your creative vision.


