
Paper stars have long been a timeless decoration for holidays, celebrations, and everyday home décor. With a Cricut machine, you can elevate traditional paper crafts into precise, detailed, and professional-looking 3D stars. Whether you’re crafting ornaments for Christmas, centerpieces for a party, or just adding charm to your home, these 3D paper stars are versatile, customizable, and surprisingly easy to make once you understand the process.
In this guide, we’ll explore 4 different styles of 3D Paper Stars with Cricut—from classic folded stars to intricate layered designs. Along the way, you’ll learn what materials to use, how to cut and assemble the pieces, and creative ways to display them.
Why Make 3D Paper Stars with Cricut?
Cricut machines are designed to cut paper with accuracy that scissors and manual cutting can’t always achieve. Making 3D stars by hand is possible, but intricate designs, symmetry, and precision folds are much easier with Cricut. Here’s why this craft is worth trying:
- Professional Precision: Cricut ensures each fold line and cut is perfectly aligned.
- Endless Customization: Choose your favorite colors, textures, and patterns.
- Budget-Friendly: Paper crafts are affordable and use simple supplies.
- Reusable Templates: Once you set up your design file, you can cut multiple stars in different styles and sizes.
- Versatile Uses: Stars work beautifully for holidays, birthdays, weddings, or as everyday décor.
Materials You’ll Need
Before diving into the star designs, let’s make sure you have everything prepared. Most of these supplies are simple, and you may already own them if you’re a regular Cricut crafter.
Basic Supplies:
- Cricut machine (Maker, Explore, or Joy depending on project size)
- StandardGrip cutting mat
- Cardstock (65 lb – 110 lb, depending on sturdiness desired)
- Cricut scoring stylus or scoring wheel (for fold lines)
- Glue stick, craft glue, or double-sided tape
- Ruler and bone folder (optional, for crisp folds)
- String, ribbon, or twine (if making hanging ornaments)
Optional Embellishments:
- Metallic or glitter cardstock for festive looks
- Stick-on gems, sequins, or rhinestones
- Ink or paint for edging details
- LED tea lights (for lantern-style stars)
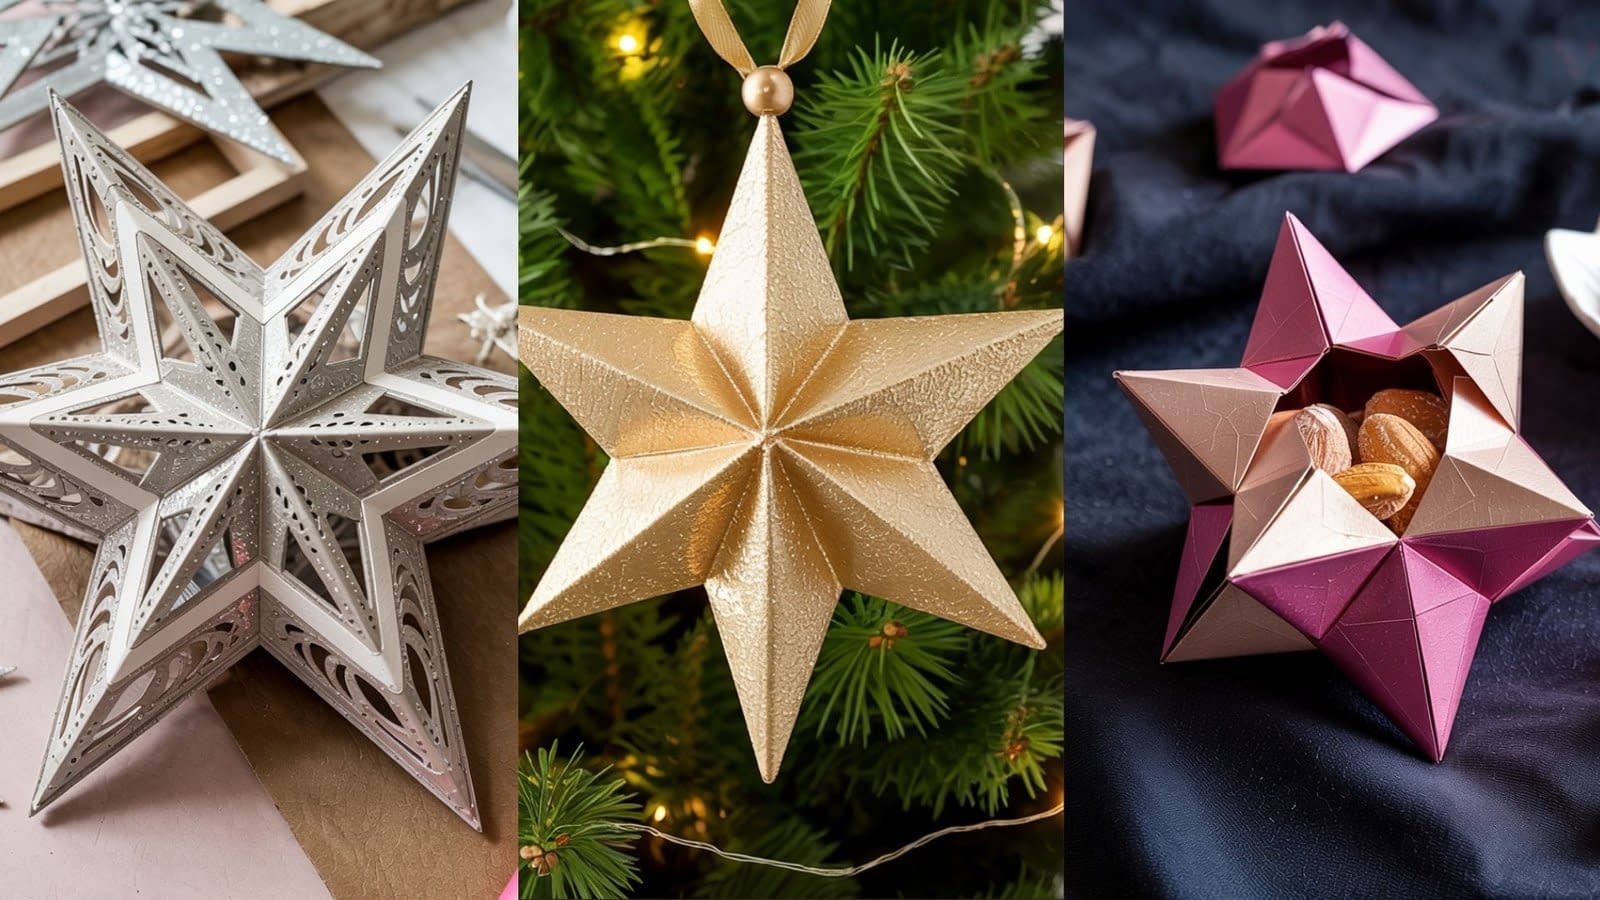
4 Types of 3D Paper Stars with Cricut
Let’s break down four unique star designs you can make. Each offers its own personality and decorative possibilities.
1. The Classic Folded 3D Paper Star
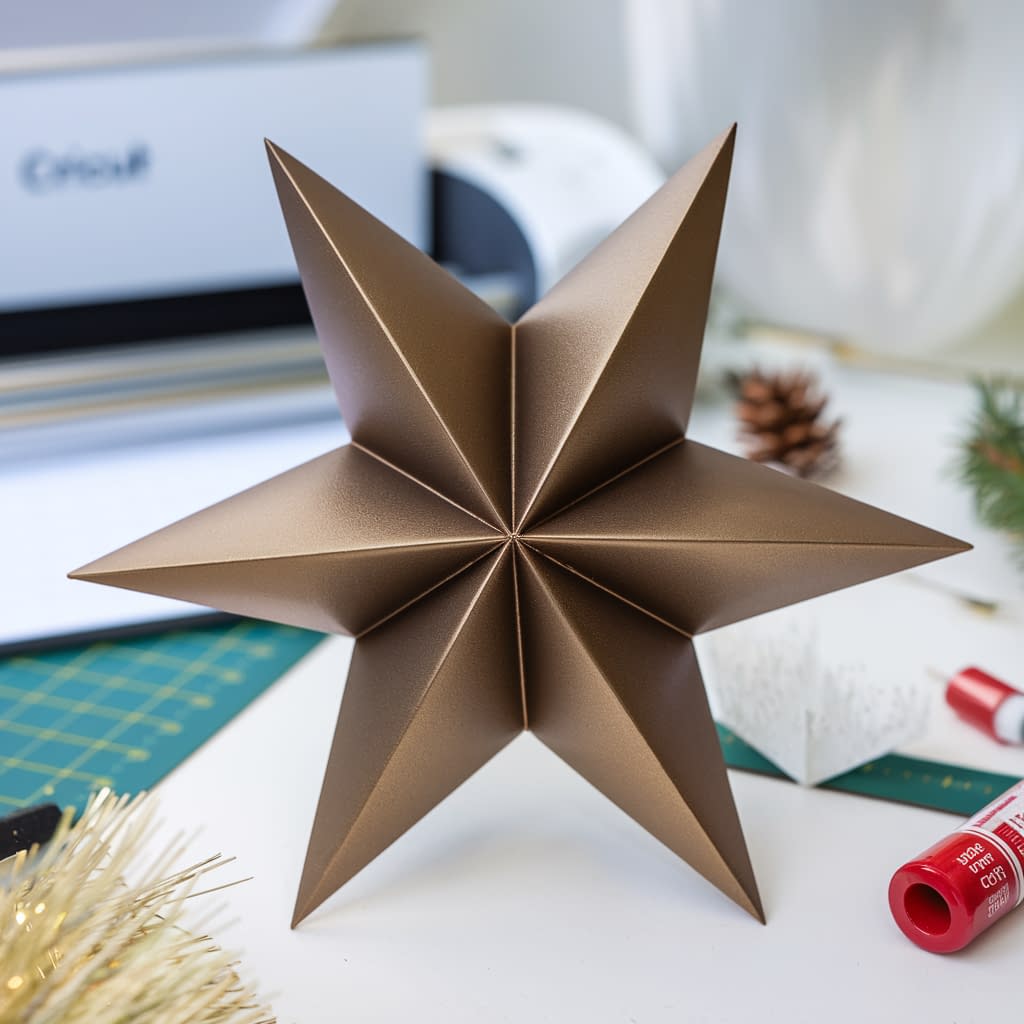
This is the most traditional and versatile star design. It features five or six points, with each section folded to give it dimension.
Steps:
- Upload a star SVG template into Cricut Design Space.
- Use the scoring tool to add fold lines along each star point.
- Cut the star shape from cardstock.
- Carefully fold along the score lines, pinching the center upward to form dimension.
- If you want a double-sided star, cut two identical pieces and glue them back-to-back.
Tips:
- Choose metallic cardstock for a festive holiday look.
- Use multiple sizes to create a layered star cluster.
Where to Use:
Perfect for tree ornaments, window decorations, or wall displays.
2. Layered Dimensional Paper Star
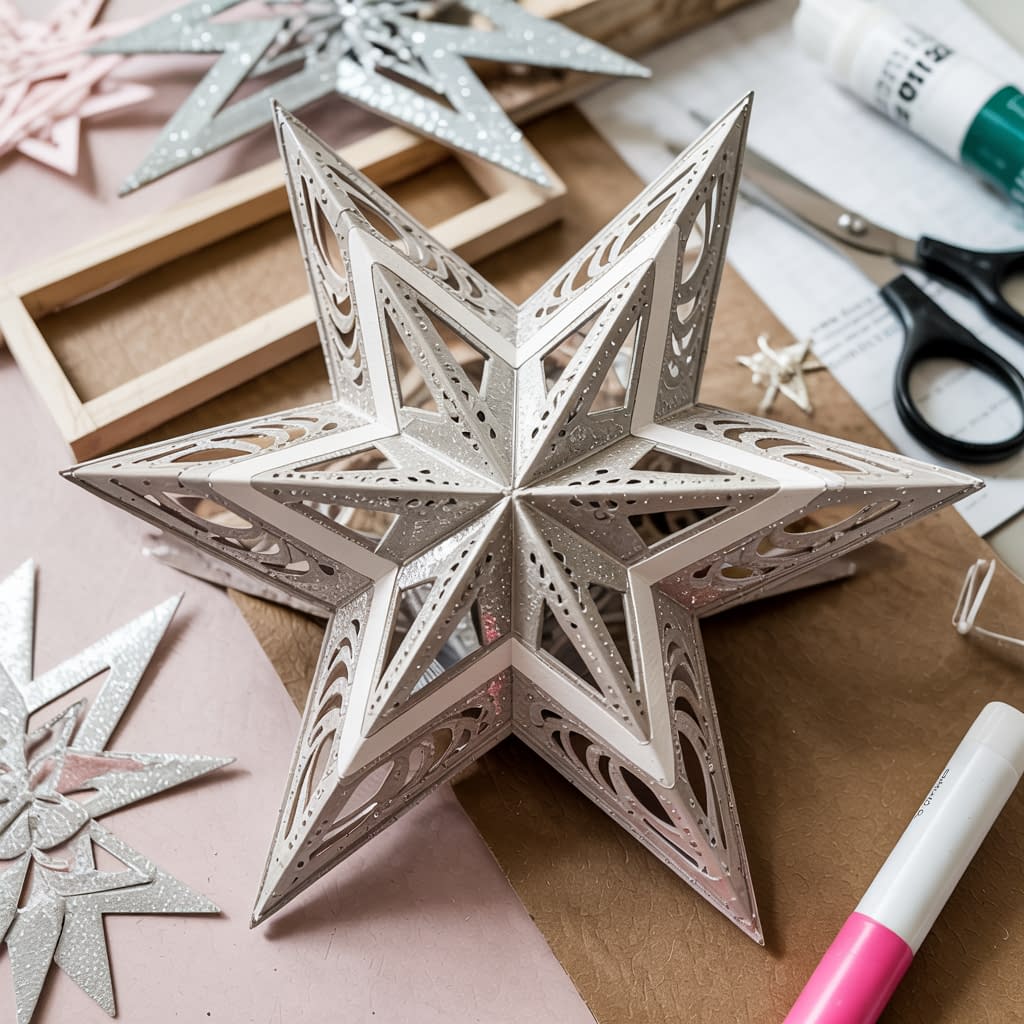
This design takes a classic star and builds it up with multiple layers for a textured, intricate look.
Steps:
- Select or design a star template with cut-out details in Cricut Design Space.
- Cut several layers in contrasting colors or finishes (such as glitter + matte cardstock).
- Stack the layers, securing them with glue dots or foam tape for a 3D effect.
- Slightly offset the layers for a fuller, more dramatic look.
Tips:
- Mixing metallics (gold + silver) creates a luxurious effect.
- Experiment with vellum or transparent layers for a lighter look.
Where to Use:
These are great as statement wall décor, table centerpieces, or layered garlands.
3. Hanging 3D Star Ornament

If you want a star that hangs beautifully on a tree or as part of a mobile, this is the style to try. These are typically two stars glued together with space inside for volume.
Steps:
- Cut two identical stars from thick cardstock.
- Score fold lines and crease them for dimension.
- Glue the stars back-to-back, leaving a small gap in the middle.
- Insert a string or ribbon loop before sealing them.
- Embellish with beads, sequins, or metallic paints.
Tips:
- Add a bead or tassel at the bottom for extra flair.
- Use glitter cardstock for sparkling Christmas ornaments.
Where to Use:
Ideal for party decorations or DIY garlands.
4. Origami-Inspired Geometric Paper Star

This design mimics the look of origami but is simplified with Cricut’s precision cuts. It often features faceted, gem-like shapes that can double as gift boxes.
Steps:
- Choose a faceted star SVG file with fold and glue tabs.
- Use Cricut’s scoring tool to prepare fold lines.
- Cut the design from cardstock.
- Fold along all lines and assemble using glue or double-sided tape.
- For extra function, leave an opening to use as a favor box.
Tips:
- Use shimmery cardstock for a jewel-like effect.
- Make larger stars to use as treat boxes for parties or weddings.
Where to Use:
Great for holiday gifts, party favors, or decorative garlands.
Display and Styling Ideas
Once you’ve made your 3D paper stars, the fun part is deciding how to use them. Here are a few creative suggestions:
- Holiday Décor: Hang different sizes on your Christmas tree, or use large stars for a modern tree topper.
- Party Backdrops: Create a wall of stars in a single color palette for birthdays, weddings, or New Year’s Eve.
- Table Centerpieces: Cluster different star sizes in the middle of your dining table for a festive touch.
- Gift Wrapping: Use mini stars as toppers on presents.
- Room Décor: Hang them in windows or across mantels for year-round charm.
Troubleshooting & Tips for Success
- Paper Choice Matters: Thicker cardstock holds shape better, but if folds are too stiff, try medium-weight paper.
- Score Before You Fold: Always use Cricut’s scoring tool for crisp, clean folds.
- Glue Carefully: Apply glue sparingly to avoid wrinkles or messy seams.
- Size Experimentation: Test small stars first before making larger ones.
- Batch Cutting: If you plan to decorate a full room, cut multiple stars at once to save time.
Final Thoughts
Crafting 3D Paper Stars with Cricut opens up endless possibilities for creative, personalized decorations. From classic folded stars to faceted origami-inspired designs, each style offers its own charm and versatility. With just paper, a Cricut machine, and a bit of imagination, you can transform simple materials into dazzling, professional-quality decorations.
Whether you’re preparing for the holidays, decorating a special event, or simply indulging in a creative hobby, these stars will bring beauty and personality to any space. Try out all four designs, mix colors and textures, and soon you’ll have a collection of stars as unique as your crafting style.


