
There is something universally uplifting about a sunflower. With its bold, open face and vibrant yellow petals, it stands as a symbol of happiness, warmth, and resilience. Bringing that energy into your home decor does not require a massive renovation or expensive art pieces. Sometimes, the smallest touches make the biggest impact. This is where the humble coaster comes in. A coaster is a functional necessity, protecting your wooden tables from water rings and heat damage, but it is also a canvas for creativity.
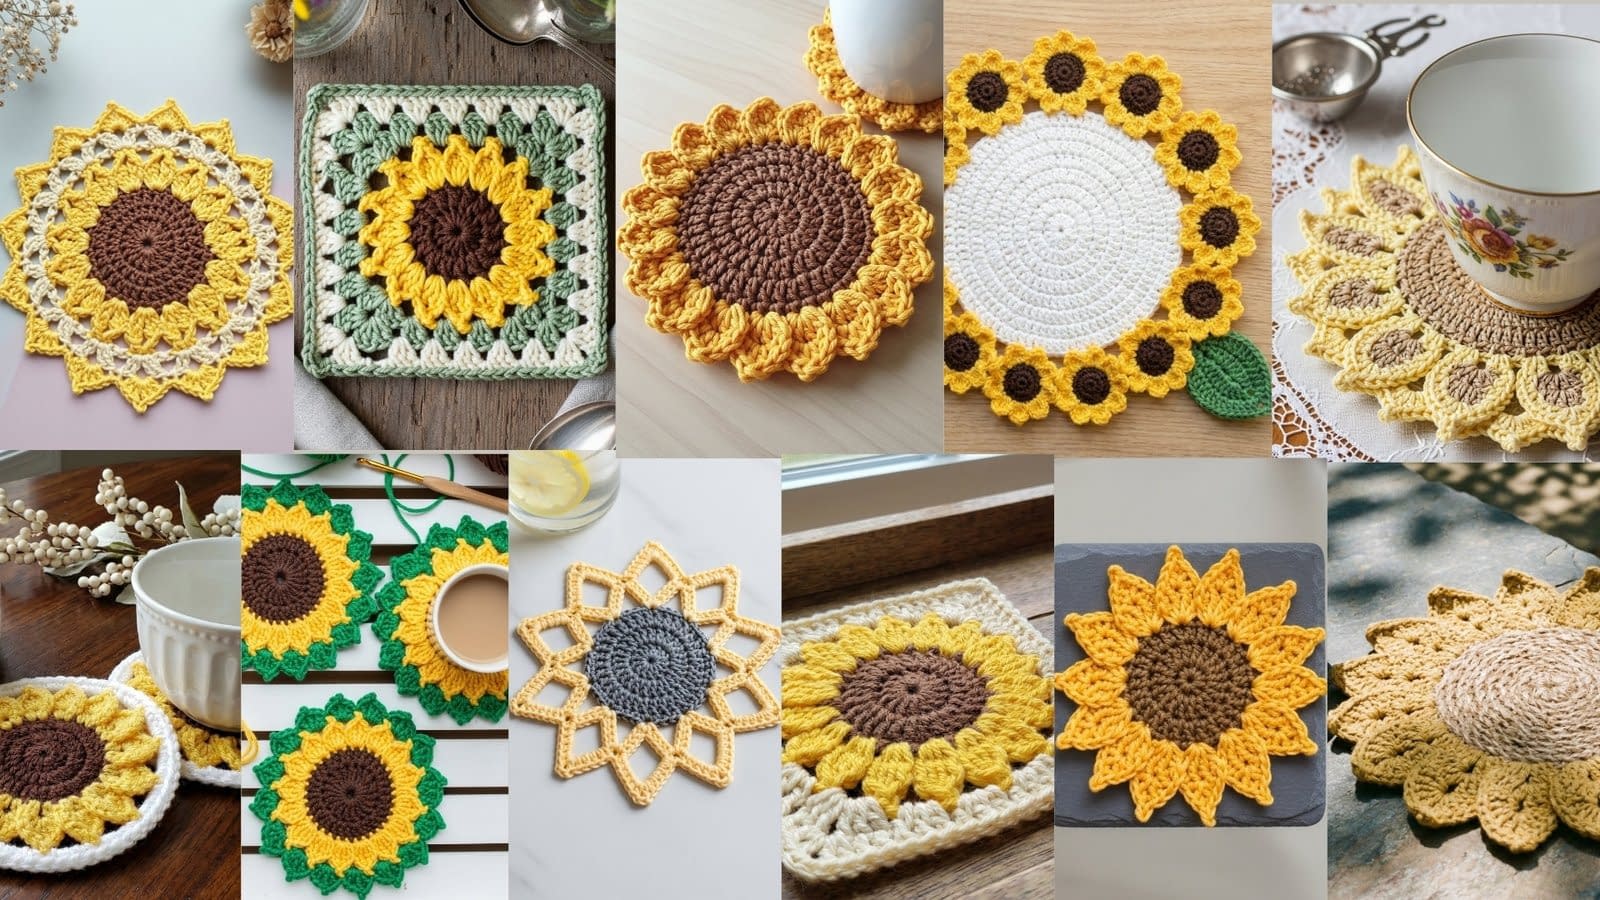
In this extensive guide, we are exploring 11 distinct crochet sunflower coaster patterns. We have curated a collection that ranges from the hyper-realistic to the abstract, and from the rustic bohemian to the clean modern aesthetic. Whether you are looking to create a cozy cottagecore vibe with vintage yarns or a sleek look with bamboo fibers, there is a project here for you.
We understand that reading crochet patterns can sometimes feel like deciphering a secret code. To make this guide as accessible and relaxing as possible, we have removed all abbreviations. You will not find cryptic short forms here. Every instruction is written out in full, plain English. This allows you to focus entirely on the rhythm of your hands and the formation of the stitches without constantly referencing a glossary. Whether you are a complete beginner holding a hook for the first time or a seasoned stitcher looking for inspiration, these detailed tutorials will guide you through every loop and pull. Let us pick up our yarn and start crocheting some sunshine.
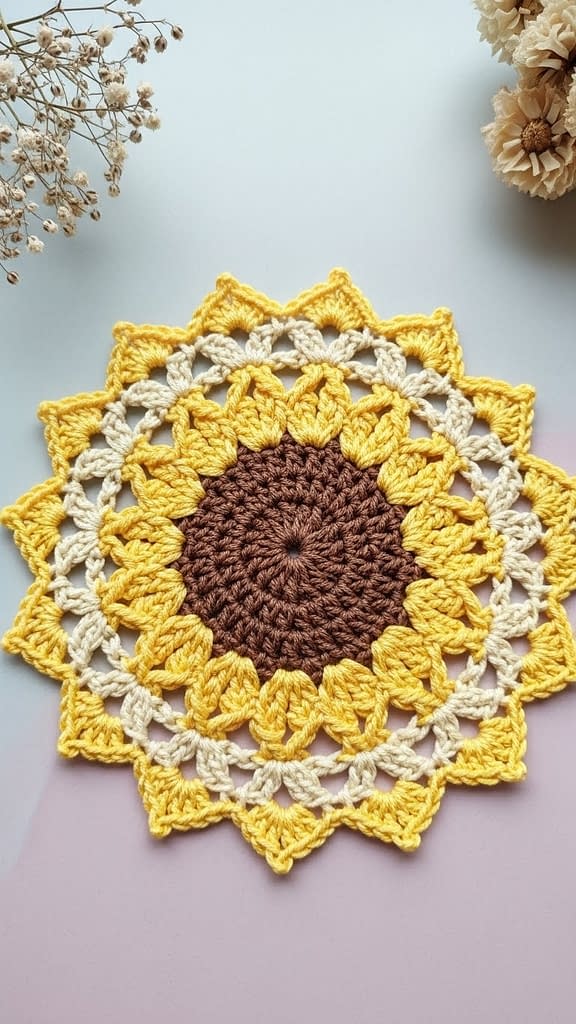
1. Classic Sunflower Coaster (Flat, Round Construction)

This design is the quintessential sunflower. It mimics the natural beauty of the flower with a textured, tight dark center and vibrant, radiating petals. The goal of this pattern is to achieve a perfectly flat circle that sits flush against your table surface. Many flower patterns tend to curl up at the edges, but by carefully managing our stitch increases, we ensure this coaster functions perfectly for your morning coffee mug. We use cotton yarn here because it is absorbent, durable, and handles heat well.
Skill Level
Beginner to Intermediate. This pattern requires knowledge of working in the round and basic stitch increases.
Finished Size
Approximately 4.5 inches in diameter.
Materials
Worsted weight cotton yarn in chocolate brown. Worsted weight cotton yarn in golden yellow. Crochet hook: size 4.0 mm or 4.5 mm depending on your tension. Yarn needle for weaving in ends. Scissors.
Notes
The center is worked in continuous rounds to avoid a visible seam, while the petals are worked round by round. Ensure you pull your starting ring very tight to close the center hole completely.
Instructions
Part 1: The Seed Center
Start with the chocolate brown yarn.
Foundation: Make a magic ring. This is a technique where you create a loop of yarn, work stitches into it, and then pull the tail to close the center tightly.
Round One: Chain two. These two chains count as your first half double crochet. Work eleven more half double crochet stitches into the center of the magic ring. You should have a total of twelve stitches. Pull the yarn tail firmly to close the ring so there is no gap in the middle. Join the round by making a slip stitch into the top of the beginning chain two.
Round Two: Chain two (counts as one half double crochet). Work one half double crochet into the same stitch where you joined. This creates an increase. Work two half double crochet stitches into every remaining stitch around the circle. At the end of this round, you should have twenty-four stitches. Join with a slip stitch to the top of the starting chain two.
Round Three: Chain two. Work one half double crochet in the same stitch. Work one half double crochet in the next stitch. Now, begin the repeating pattern: work two half double crochet stitches in the next stitch, followed by one half double crochet in the stitch after that. Repeat this pattern of “two stitches, then one stitch” all the way around. You should end with thirty-six stitches. Join with a slip stitch to the top of the starting chain two. Fasten off the brown yarn and weave in the end.
Part 2: The Petals
Join the golden yellow yarn to any stitch on the outer edge of the brown center using a slip stitch.
Round Four: Chain one. Work one single crochet into the same stitch where you joined. Work one single crochet into each stitch around the entire circle. This creates a solid yellow foundation for the petals. Join with a slip stitch to the first single crochet. You still have thirty-six stitches.
Round Five: This round creates the petals. Chain two. Work one double crochet into the same stitch. Into the next stitch, work one treble crochet. To make a point for the petal, chain two, then slip stitch into the second chain from your hook (this is called a picot). Work another treble crochet into that same stitch (the one that already has a treble crochet). Work one double crochet into the next stitch. Slip stitch into the next stitch.
You have just completed one petal. It covers four stitches of the base.
To make the next petal: Slip stitch into the next stitch. Chain two. Work one double crochet into the same stitch. In the next stitch, work one treble crochet, chain two, slip stitch in the second chain from hook, and work another treble crochet. Work one double crochet in the next stitch. Slip stitch into the next stitch.
Repeat this process around the entire circle. You should have nine distinct petals. Join with a slip stitch at the base of the first petal.
Assembly and Finishing
Cut the yarn, leaving a tail of about four inches. Thread the yarn needle and weave the tail through the back of the yellow stitches to hide it securely. Do the same with the brown center tail if you have not already. Lay the coaster flat and gently pull on the tip of each petal to sharpen the point. You can place a heavy book on it overnight to block it perfectly flat.
2. Granny-Style Sunflower Coaster (Square Finish)

The granny square is a cornerstone of crochet history. This pattern takes the round sunflower motif and frames it within a classic square shape. This design is particularly useful if you want to join multiple coasters together later to make a table runner or a placemat, but they look equally stunning individually on a rustic wooden tray. The transition from the round flower to the square border relies on using stitches of different heights—tall stitches in the corners and short stitches on the sides.
Skill Level
Intermediate. You need to be comfortable switching colors and understanding how stitch heights affect the shape of the fabric.
Finished Size
Approximately 4 inches by 4 inches.
Materials
Worsted weight yarn in dark brown. Worsted weight yarn in sunflower yellow. Worsted weight yarn in cream or beige. Crochet hook: size 4.5 mm. Tapestry needle.
Instructions
Part 1: The Center Circle
Start with the dark brown yarn.
Foundation: Create a magic ring.
Round One: Chain three (counts as the first double crochet). Work fifteen double crochet stitches into the ring. Pull the ring tight. Join with a slip stitch to the top of the starting chain three. You should have sixteen stitches total. Fasten off the brown yarn.
Part 2: The Petal Round
Join the sunflower yellow yarn in any space between the brown double crochet stitches.
Round Two: This round uses a “cluster stitch” to make the petals look puffy. Chain two. Yarn over, insert hook into the same space, pull up a loop, yarn over, pull through two loops (you have two loops on the hook). Yarn over, insert hook into same space, pull up a loop, yarn over, pull through two loops (you have three loops on the hook). Yarn over and pull through all three loops. This is your first cluster. Chain one.
Move to the next space between stitches. Work a full cluster: Yarn over, insert hook, pull up loop, pull through two. Repeat this two more times in the same space until you have four loops on your hook. Yarn over and pull through all four loops. Chain one.
Repeat this “cluster, chain one” pattern in every space around the circle. You should have sixteen yellow clusters separated by chain spaces. Join with a slip stitch to the top of the first cluster. Fasten off the yellow yarn.
Part 3: Squaring the Circle
Join the cream yarn in any chain-one space between two yellow petals.
Round Three: We will now turn the circle into a square. Start in a corner: Chain four (counts as a treble crochet). In the same space, work two more treble crochet stitches, chain two, and work three more treble crochet stitches. This is your first corner.
Side One: In the next chain-one space, work three double crochet stitches. In the next chain-one space, work three half double crochet stitches. In the next chain-one space, work three double crochet stitches.
Corner Two: In the next chain-one space, work three treble crochet stitches, chain two, and three treble crochet stitches.
Side Two: Work three double crochet stitches in the next space. Work three half double crochet stitches in the next space. Work three double crochet stitches in the next space.
Corner Three: In the next chain-one space, work three treble crochet stitches, chain two, and three treble crochet stitches.
Side Three: Work three double crochet stitches in the next space. Work three half double crochet stitches in the next space. Work three double crochet stitches in the next space.
Corner Four: In the next chain-one space, work three treble crochet stitches, chain two, and three treble crochet stitches.
Side Four: Work three double crochet stitches in the next space. Work three half double crochet stitches in the next space. Work three double crochet stitches in the next space.
Join with a slip stitch to the top of the starting chain four.
Finishing
Fasten off the cream yarn. Weave in all loose ends on the back of the work. If the corners look slightly rounded, gently pull them outward and pin them down on a blocking board or ironing board, spraying with a little water to set the square shape.
3. Lace-Edged Sunflower Coaster
For those who prefer a touch of elegance, this lace-edged coaster offers a lighter, more delicate aesthetic. The structure features a solid center for stability—essential for holding a cup—but finishes with an airy, decorative border that looks beautiful on a pastel tabletop or a glass surface. The “lace” effect is created using small chain spaces that leave open gaps, mimicking the look of vintage doilies but with a modern floral twist.
Skill Level
Intermediate. This requires good tension control to keep the lace loops even.
Finished Size
Approximately 5 inches in diameter.
Materials
Sport weight or lightweight cotton yarn in mocha brown. Sport weight or lightweight cotton yarn in bright yellow. Crochet hook: size 3.5 mm or 3.75 mm (a smaller hook keeps the lace neat). Scissors and needle.
Instructions
Part 1: Solid Center
Start with the mocha brown yarn.
Foundation: Chain four. Join with a slip stitch to the first chain to form a small ring.
Round One: Chain one. Work twelve single crochet stitches into the center of the ring. Join with a slip stitch to the first single crochet.
Round Two: Chain three (counts as one double crochet). Work one double crochet in the same stitch. Work two double crochet stitches in each stitch around. You should have twenty-four stitches. Join with a slip stitch to the top of the starting chain three. Fasten off brown.
Part 2: Petal Base
Join the bright yellow yarn to any stitch.
Round Three: Chain one. Work one single crochet in the same stitch. Chain three, skip one stitch, work one single crochet in the next stitch. Repeat this pattern (chain three, skip one, single crochet) all the way around. Join with a slip stitch to the first single crochet. You should have twelve chain-loops surrounding the brown center.
Part 3: The Lace Edging
Round Four: Slip stitch into the first chain-three loop. Chain one. Into this same loop, work the following combination: one half double crochet, three double crochet stitches, one half double crochet. This creates a scallop shape. In the next chain-three loop, simply work one single crochet. In the next loop, work the scallop combination again: one half double crochet, three double crochet stitches, one half double crochet. Repeat this pattern around: Scallop in one loop, single crochet in the next. Join with a slip stitch to the start.
Round Five (The Lace Finish): This round adds the airy definition. Slip stitch your way up to the center double crochet of the first scallop. Chain one, single crochet in that same stitch. Chain five. Skip the rest of the scallop and the dip where the single crochet is. Work a single crochet into the center double crochet of the next scallop. Repeat around: Chain five, single crochet in the top of the next petal. Join with a slip stitch to the first single crochet.
Round Six: Into each chain-five loop, work seven single crochet stitches. This thickens the lace arches. Join with a slip stitch at the end.
Finishing
Fasten off and weave in ends. This coaster benefits greatly from “blocking.” dampen the coaster, pin it out in a perfect circle on a towel or foam board, pinning out the lace loops so they are fully open, and let it dry completely.
4. The Vintage Granny Square Sunflower

This pattern is designed to evoke nostalgia. We are stepping away from the bright, primary yellows and moving toward muted, earthy tones like mustard, sage green, and antique cream. The construction is similar to a traditional granny square but with a specific color progression that creates a distinct sunflower motif in the center. The yarn choice is critical here; a matte cotton or a cotton-linen blend gives that authentic “worn” vintage look, perfect for a flat-lay photo composition with antique silverware.
Skill Level
Beginner. The granny square cluster is one of the easiest stitch patterns to master.
Finished Size
4.5 inches by 4.5 inches.
Materials
Matte cotton yarn in muted brown. Matte cotton yarn in mustard yellow. Matte cotton yarn in sage green. Matte cotton yarn in antique cream. Crochet hook: size 4.0 mm.
Instructions
Part 1: The Brown Center
Start with the muted brown yarn.
Foundation: Chain four, join with a slip stitch to form a ring.
Round One: Chain three (counts as first double crochet). Work two double crochet stitches into the ring. Chain one. Work three double crochet stitches into the ring, chain one. Repeat between the asterisks two more times. Join with a slip stitch to the top of the starting chain three. You should have four groups of three double crochets. Fasten off brown.
Part 2: The Mustard Petals
Join the mustard yellow yarn in any chain-one space (the corner space).
Round Two: Chain three. Work two double crochet stitches in the same space. Chain two. Work three double crochet stitches in the same space. This forms your first corner. Chain one. Move to the next chain-one space. Work: three double crochet, chain two, three double crochet. Chain one. Repeat this for the remaining two corners. Join with a slip stitch. Fasten off mustard yarn.
Part 3: The Sage Green Leaf Round
Join the sage green yarn in any chain-two corner space.
Round Three: Chain three. Work two double crochet stitches in the same space. Chain two. Work three double crochet stitches in the same space. Chain one. In the next space (the side space between corners), work three double crochet stitches. Chain one. In the next corner space, work: three double crochet, chain two, three double crochet. Chain one. Continue this pattern around: work corners (3 dc, ch 2, 3 dc) and work side clusters (3 dc). Join with a slip stitch. Fasten off sage green.
Part 4: The Cream Border with Shell Edge
Join the cream yarn in any corner space.
Round Four: Work a standard granny round. Corners get (3 dc, ch 2, 3 dc). Side spaces get (3 dc). Remember to chain one between groups. Join with a slip stitch.
Round Five (Shell Border): To give it that vintage doily finish, we will add a simple shell. Slip stitch to the second stitch of a 3-dc group. Chain one, single crochet in that stitch. Skip one stitch. Work five double crochet stitches into the chain-one space. Skip one stitch. Single crochet in the next stitch. Repeat this rhythm around the square. In the corners, work seven double crochet stitches to help it turn the corner smoothly. Join with a slip stitch to the start.
Finishing
Fasten off and weave in all ends securely. Because there are several color changes in this pattern, take your time weaving the tails in different directions to ensure they do not pop out during use. This coaster looks best when the stitches are slightly relaxed, so do not pull your yarn too tight.
5. The Boho-Rustic Jute & Yarn Coaster

This pattern departs from the traditional all-cotton approach to embrace a textural, bohemian aesthetic. By utilizing natural jute twine for the center, we create a coaster that is robust, heat-resistant, and visually striking. The rough, organic texture of the jute contrasts beautifully with the softness of the cotton petals, creating a piece that feels grounded and earthy. This design is perfect for outdoor dining, slate patio tables, or a home filled with succulents and terracotta. The slight imperfections in the jute fiber add to the charm, making each coaster uniquely “perfectly imperfect.”
Skill Level
Intermediate. While the stitches are simple, working with jute twine requires a bit more hand strength and tension control than soft yarn.
Finished Size
Approximately 5.5 inches in diameter.
Materials
- Natural jute twine (medium thickness, often found in hardware or craft stores).
- Organic cotton yarn in a muted mustard yellow (worsted weight).
- Crochet hook: size 5.0 mm or 5.5 mm (a larger hook is needed for the stiff twine).
- Sturdy scissors (jute can dull fine embroidery scissors).
- Large-eye tapestry needle.
Instructions
Part 1: The Rustic Center
Start with the natural jute twine.
Foundation: Create a magic ring. If the jute is too stiff to pull the ring tight, you can alternatively chain three and slip stitch to the first chain to form a ring.
Round One: Chain one. Work eight single crochet stitches into the center of the ring. Pull the tail end firmly to close the center hole. Join the round with a slip stitch to the first single crochet stitch.
Round Two: Chain one. Work two single crochet stitches into every stitch around the circle. The jute adds bulk, so we are keeping the stitch count lower than usual to prevent buckling. You should have sixteen stitches. Join with a slip stitch to the first single crochet.
Round Three: Chain one. Work one single crochet in the first stitch. Work two single crochet stitches in the next stitch. Repeat this pattern (one single crochet, then two single crochet) around the circle. You should have twenty-four stitches. Join with a slip stitch. Fasten off the jute twine. Secure the tail by weaving it through the back loops, or for extra security, use a small dab of fabric glue since jute knots can sometimes slip.
Part 2: The Organic Cotton Petals
Join the mustard yellow cotton yarn to any stitch on the edge of the jute circle.
Round Four: Chain one. Work one single crochet into every stitch around the jute center. This round acts as a “buffer” to transition from the rough twine to the soft yarn. Join with a slip stitch to the first single crochet.
Round Five (The Petals): We will create simple, rounded petals that do not distract from the texture. Chain two. In the same stitch, work one double crochet. In the next stitch, work two double crochet stitches. In the next stitch, work one double crochet, chain two, and slip stitch into the same stitch. This anchors the petal down. Slip stitch into the next stitch. Chain two, work one double crochet in the same stitch. Work two double crochet stitches in the next stitch. Work one double crochet, chain two, and slip stitch in the next stitch. Repeat the instructions between the asterisks around the coaster.
Finishing
Fasten off the cotton yarn and weave in the ends. Because jute can shed slightly, give the center a quick trim of any wild fibers sticking out, but leave enough to maintain the rustic look.
6. The Modern Minimalist Sunflower

For those who prefer sleek lines, monochromatic palettes, and a “less is more” philosophy, this Modern Minimalist Sunflower is the ideal choice. We strip away the bulk and the fluff, utilizing a fine bamboo yarn to create a flat, geometric profile. The center is a stark charcoal grey, and the petals are represented by sharp, defined triangles with openwork spaces between them. This coaster is designed to sit perfectly flat on a marble countertop or a glass desk, offering a sophisticated nod to nature without the country-style frills.
Skill Level
Intermediate. Precision is key here; the geometric shape relies on accurate stitch placement.
Finished Size
Approximately 4 inches in diameter.
Materials
- Bamboo or mercerized cotton yarn in charcoal grey (fine or sport weight).
- Bamboo or mercerized cotton yarn in pale, buttery yellow.
- Crochet hook: size 3.0 mm or 3.25 mm.
- Yarn needle.
Instructions
Part 1: The Geometric Center
Start with the charcoal grey yarn.
Foundation: Create a magic ring.
Round One: Chain two (does not count as a stitch). Work twelve double crochet stitches into the ring. Pull tight and join with a slip stitch to the first double crochet.
Round Two: Chain two. Work two double crochet stitches into each stitch around. You should have twenty-four stitches. Join with a slip stitch.
Round Three: Chain one. Work one single crochet in every stitch around. This creates a clean, defined rim for the center. Join with a slip stitch to the first single crochet. Fasten off the grey yarn.
Part 2: The Architectural Petals
Join the pale yellow yarn to any stitch.
Round Four: We will create distinct triangular spikes separated by chains. Chain four. Work one treble crochet into the same stitch where you joined. Chain two. Skip the next two stitches on the grey base. Slip stitch into the next stitch. This creates your first openwork triangle base.
Repeat around: Chain four, work one treble crochet in the same stitch, chain two, skip two stitches, slip stitch in the next. You should have eight triangular loops around the circle.
Round Five (Defining the Points): Into the first chain-four loop space, work the following combination to fill the triangle: Work three single crochet stitches. Chain two. Work three single crochet stitches. Move directly to the next chain loop space (skip the slip stitch on the base). Work three single crochet stitches, chain two, three single crochet stitches. Repeat this around all eight loops. The “chain two” at the top of each group creates the sharp point of the petal.
Finishing
Fasten off and weave in ends. This coaster requires “blocking” to look its best. Dampen the coaster, pin it to a board—placing a pin in the tip of every yellow triangle to stretch it into a sharp point—and let it dry. This step solidifies the geometric shape.
7. The Delicate Picot-Edge Teacup Coaster

This pattern is inspired by fine china and high tea. It is designed to be paired with a porcelain teacup, featuring intricate details that resemble a vintage doily. The yarn choice is paramount; a lustrous Egyptian cotton in pale yellow and tan gives the coaster a subtle sheen and superior definition. The hallmark of this design is the “picot” edge—tiny decorative loops of chain stitches that create a frilled, lace-like perimeter. It is feminine, intricate, and an elegant addition to any table setting.
Skill Level
Advanced Intermediate. Working with finer yarn and small hooks requires patience and good eyesight.
Finished Size
Approximately 4.5 inches in diameter.
Materials
- Egyptian cotton or mercerized cotton (fingering weight) in tan.
- Egyptian cotton or mercerized cotton (fingering weight) in pale lemon yellow.
- Crochet hook: size 2.5 mm or 2.75 mm.
- Small embroidery needle.
Instructions
Part 1: The Fine Center
Start with the tan yarn.
Foundation: Chain five. Join with a slip stitch to form a ring.
Round One: Chain three (counts as first double crochet). Work seventeen double crochet stitches into the ring. You will have eighteen stitches total. Join with a slip stitch to the top of the chain three.
Round Two: Chain four (counts as double crochet plus chain one). Work one double crochet in the next stitch, chain one. Repeat from asterisk around. You are creating a “wagon wheel” effect with spokes. Join with a slip stitch to the third chain of the starting chain four. Fasten off tan yarn.
Part 2: The Lacy Petals
Join the pale lemon yellow yarn in any chain-one space.
Round Three: Chain one. Work two single crochet stitches in the same space. Skip the double crochet post, work two single crochet stitches in the next chain-one space. Repeat around. Join with a slip stitch.
Round Four: Chain three. Work one double crochet in the same stitch. Work one double crochet in the next stitch. Chain two. Skip one stitch. Work one double crochet in the next stitch, work two double crochet stitches in the next stitch. Repeat around. This groups the stitches into small petal clusters.
Round Five (The Picot Edge): This is the final decorative row. Slip stitch into the center of the first double crochet group. Chain three. Slip stitch into the first chain you just made (this creates the picot bump). Chain three again. Skip the gap space and slip stitch into the middle stitch of the next double crochet group. Repeat this pattern around the entire circumference. You will end up with a ring of delicate loops and tiny knots (picots) that frame the center like a halo.
Finishing
Fasten off and weave in the fine threads carefully. Lay the coaster flat and gently press it with a steam iron (using a cloth between the iron and the yarn) to flatten the picots and open up the lace work.
8. The Delicate Sunflower Border Coaster

This design flips the script on the traditional sunflower coaster. Instead of a brown center surrounded by yellow, we create a clean, solid white center—acting as a canvas—and frame it with a ring of miniature sunflowers. The visual focus is the contrast between the crisp white interior and the vibrant, complex border. This is a decorative piece that looks incredible on a light oak table, catching the morning light. It feels modern yet intricate, blending the utility of a solid coaster with the beauty of a floral wreath.
Skill Level
Advanced. The border requires working multiple color changes or special stitches to create the “mini flower” effect.
Finished Size
Approximately 5 inches in diameter.
Materials
- Cotton yarn in bright white.
- Cotton yarn in dark brown.
- Cotton yarn in bright yellow.
- Crochet hook: size 3.5 mm.
Instructions
Part 1: The Canvas Center
Start with the white yarn.
Foundation: Create a magic ring.
Round One: Chain two (counts as half double crochet). Work eleven half double crochet stitches into the ring. Join with slip stitch. (12 stitches).
Round Two: Chain two. Work one half double crochet in the same stitch. Work two half double crochet stitches in each stitch around. Join. (24 stitches).
Round Three: Chain two. Work one half double crochet in same stitch. Work one half double crochet in next stitch, work two half double crochet in next stitch. Repeat around. Join. (36 stitches).
Round Four: Chain one. Work one single crochet in each stitch around. This gives a firm edge to the white circle. Fasten off white yarn.
Part 2: The Seed Border
Join the dark brown yarn to any stitch on the white edge.
Round Five: We are creating the centers for the tiny sunflowers. Chain one. Work one single crochet in the same stitch. Chain two. Skip two stitches. Work one single crochet in the next stitch. Chain two. Skip two stitches. Repeat this around. You are creating small loops or “bridges” where the yellow petals will live, anchored by the brown single crochets. Join with a slip stitch to the first single crochet. Fasten off brown.
Part 3: The Floral Wreath
Join the bright yellow yarn in any chain-two space (the loop created in the previous round).
Round Six: In the chain-two space, we will work a “Shell Stitch” to mimic a flower. Work the following into the single chain-two space: One half double crochet, three double crochet stitches, one half double crochet. Slip stitch into the brown single crochet stitch that separates the spaces. Move to the next chain-two space: Work one half double crochet, three double crochet stitches, one half double crochet. Slip stitch into the next brown single crochet.
Repeat this around the entire border. Each chain space becomes a small, scalloped sunflower, with the brown stitch acting as the separation between blooms.
Finishing
Fasten off and weave in ends. Because of the heavy border, you may need to gently stretch the white center outward and block it to ensure the coaster lies perfectly flat and does not bowl up. The result is a stunning ring of flowers protecting your table.
9. The Framed Sunflower with Matching Holder

There is something incredibly satisfying about a matching set. This pattern moves beyond the solitary coaster to create a complete, gift-ready collection. The design features a classic sunflower “framed” by a cream-colored outer ring. This frame not only tames the wildness of the petals, giving the coaster a polished, uniform circle shape, but it also adds stability. To complete the aesthetic, we include instructions for a matching high-walled storage basket. When the coasters are stacked inside the white crochet basket, they look organized and elegant—perfect for a housewarming gift or a tidy coffee table.
Skill Level
Intermediate. The coaster requires working in front and back loops to create distinct borders, and the basket requires working in a continuous spiral.
Finished Size
Coaster: 4.5 inches in diameter. Holder: 5 inches in diameter (base) with 2-inch high walls.
Materials
- Cotton yarn in deep brown.
- Cotton yarn in sunflower yellow.
- Cotton yarn in cream or bright white (enough for coasters and basket).
- Crochet hook: size 4.0 mm.
- Stitch marker.
Instructions
Part 1: The Framed Coaster
The Center: Start with deep brown yarn. Round One: Make a magic ring. Chain two (counts as half double crochet). Work eleven half double crochet stitches into the ring. Join with a slip stitch. (12 stitches). Round Two: Chain two. Work one half double crochet in the same stitch. Work two half double crochet stitches in every stitch around. Join. (24 stitches). Fasten off brown.
The Petals: Join yellow yarn. Round Three: Chain two. Work one double crochet in the same stitch. Work two double crochet stitches in the next stitch. Work one double crochet in the next stitch, work two double crochet stitches in the next stitch. Repeat around. Join. (36 stitches). Round Four: To create the petal look without making them stick out too much (so we can frame them), we will use a shell texture. Chain one. Skip one stitch, work five double crochet stitches into the next stitch, skip one stitch, slip stitch into the next stitch. Repeat this pattern around. You should have nine distinct shells. Fasten off yellow.
The Cream Frame: Join the cream yarn to the center stitch of any yellow shell (the middle of the five double crochets). Round Five: Chain one. Single crochet in the same stitch. Chain three. Work a long double crochet (yarn over, insert hook into the slip stitch between the yellow shells from the previous row, and pull the loop up tall so it doesn’t squish the petal) into the dip between petals. Chain three. Single crochet into the top of the next yellow petal. Repeat around: Chain three, long double crochet in the dip, chain three, single crochet in top of petal. Join to first single crochet. Round Six: Work three single crochet stitches into every chain-three space, and one single crochet into every stitch (the tops of petals and the long double crochets). This fills in the frame and creates a solid, creamy white rim. Join and fasten off.
Part 2: The Matching Storage Basket
Start with cream/white yarn. Round One: Make a magic ring. Work six single crochet stitches into the ring. Do not join; we will work in a spiral. Place a stitch marker in the first stitch of each round. Round Two: Work two single crochet stitches in each stitch around. (12 stitches). Round Three: Work one single crochet in the next stitch, work two single crochet stitches in the next stitch. Repeat around. (18 stitches). Round Four through Eight: Continue increasing by six stitches each round (e.g., Round 4 is “single crochet two, increase one”) until the base measures slightly larger than your finished coaster (approx. 5 inches wide). Round Nine (The Wall Turn): Work one single crochet in each stitch around, inserting your hook only into the back loop of the stitches. This creates a ridge that makes the wall stand up straight. Rounds Ten through Fifteen: Work one single crochet in both loops of each stitch around. Continue until the walls reach your desired height (usually about 1.5 to 2 inches). Round Sixteen: Slip stitch in each stitch around for a sturdy finished edge. Fasten off and weave in ends.
10. The Deep Green Leafy Border Coaster

Most sunflower patterns focus entirely on the yellow bloom, but the beauty of the flower also lies in its contrast with the deep greens of the garden. This pattern captures that naturalistic look by adding a final, bold border of “leaves.” The center is a standard brown and yellow motif, but it is finished with a round of dark green serrated stitches. These jagged edges mimic the foliage of a sunflower stem. When placed on a white tray, the pop of green makes the coaster feel fresh, vibrant, and alive.
Skill Level
Intermediate. The leaf border uses “picots” to create sharp points.
Finished Size
Approximately 5.5 inches in diameter (including leaf tips).
Materials
- Worsted weight cotton in dark brown.
- Worsted weight cotton in bright yellow.
- Worsted weight cotton in forest green or dark leaf green.
- Crochet hook: size 4.0 mm or 4.5 mm.
Instructions
Part 1: The Flower Head
Start with dark brown. Round One: Chain four, join to form a ring. Chain three (counts as double crochet). Work eleven double crochet stitches into the ring. Join. (12 stitches). Round Two: Chain three. Work one double crochet in the same stitch. Work two double crochet stitches in each stitch around. Join. (24 stitches). Fasten off brown.
Join bright yellow. Round Three: Chain one. Work one single crochet in the same stitch. Chain three, skip one stitch, work one single crochet in the next stitch. Repeat around. You are creating loops for the petals. Round Four: Into each chain-three loop, work: one half double crochet, three double crochet stitches, one half double crochet. This creates rounded yellow petals. Slip stitch into the single crochet between loops. Repeat around. Fasten off yellow.
Part 2: The Leafy Green Border
Join the forest green yarn in any slip stitch between two yellow petals. Round Five: We want the green leaves to peek out from behind the yellow petals. Chain four (counts as a double crochet plus a chain one). Work one double crochet in the same spot where you joined. This creates a “V” shape between the petals. Chain three to bridge behind the yellow petal. Work a “V-stitch” (one double crochet, chain one, one double crochet) into the next slip stitch between petals. Repeat around: Chain three behind the petal, work V-stitch between petals. Join to the third chain of the start.
Round Six (The Serrated Leaves): Now we work into the green V-stitches. Slip stitch into the chain-one space of the first V-stitch. Chain three (counts as double crochet). Work one double crochet in the same space. The Picot Point: Chain three, then slip stitch into the first chain you just made. This creates a sharp little knot at the top. Work two more double crochet stitches into the same V-stitch space. You have created a pointed leaf group (2 dc, picot, 2 dc). Work a single crochet into the middle of the chain-three bridge behind the yellow petal to anchor the leaf down. Move to the next V-stitch and repeat the leaf group: Two double crochet, picot, two double crochet. Single crochet in the bridge. Repeat around. Fasten off and weave in ends. Block the coaster by pulling on the picot points to make the leaves look sharp and jagged.
11. The Modern Minimalist Flat-Stitch

This coaster is the antithesis of the chunky, textured granny square. It is designed for the modern workspace—sleek, clinical, and perfectly flat so your laptop or glass of water sits securely. Using fine-gauge bamboo yarn gives it a silky sheen and a thinner profile. The design is geometric, using simple stitches to create a “sunburst” effect rather than a literal flower. The petals are pointed triangles in a bold mustard yellow, radiating from a clean center. It is understated and sophisticated.
Skill Level
Beginner to Intermediate. The focus here is on very even tension to maintain the sleek look.
Finished Size
4 inches in diameter (very thin profile).
Materials
- Bamboo yarn or mercerized cotton (Sport or Fine weight) in black or charcoal.
- Bamboo yarn or mercerized cotton in mustard yellow.
- Crochet hook: size 3.0 mm (keeps stitches tight and flat).
Instructions
Part 1: The Flat Disc
Start with black/charcoal yarn. Round One: Make a magic ring. Chain two (counts as half double crochet). Work nine half double crochet stitches into the ring. Pull tight and join. (10 stitches). Round Two: Chain two. Work one half double crochet in the same stitch. Work two half double crochet stitches in each stitch around. Join. (20 stitches). Round Three: Chain two. Work one half double crochet in same stitch. Work one half double crochet in next stitch, work two in next. Repeat around. Join. (30 stitches). Fasten off black. This creates a small, perfectly flat coin shape.
Part 2: The Solar Rays
Join the mustard yellow yarn. We will create flat, pointed rays using a combination of stitches of different heights. Round Four: Chain one. Single crochet in the same stitch. In the next stitch, work a “Pointed Group”: One half double crochet, one double crochet, chain two, slip stitch into the second chain from hook (picot), one double crochet, one half double crochet (all in the same stitch). Single crochet in the next stitch. Repeat around: Work Pointed Group in next stitch, single crochet in next stitch. This creates fifteen sharp, triangular rays radiating from the center.
Round Five (Optional Edging for Crispness): If you want the edges even sharper, slip stitch loosely in every stitch around the entire perimeter of the rays. This reinforces the shape.
Finishing
Fasten off. Wet block this coaster aggressively. Pin it down on a blocking board, placing a pin in the tip of every mustard ray to stretch it flat. Allow it to dry completely. This will ensure the bamboo yarn lays like a sheet of paper, perfectly suited for a modern desk.
Conclusion
Whether you are sipping tea from fine china or grabbing a coffee mug on your way out the door, there is a sunflower coaster pattern here to match your moment. We have journeyed through the nostalgia of the Vintage Granny Square, the earthiness of the Boho-Rustic Jute, and the sharp precision of the Modern Minimalist.
Crochet is a medium of endless possibility. By simply changing your yarn from a matte cotton to a silky bamboo, or by altering the height of a stitch, you can transform a simple flower motif into a piece of art that defines your space. We hope these 11 detailed patterns inspire you to pick up your hook, experiment with texture and color, and scatter a little bit of handmade sunshine across your tables. Happy crocheting!


