
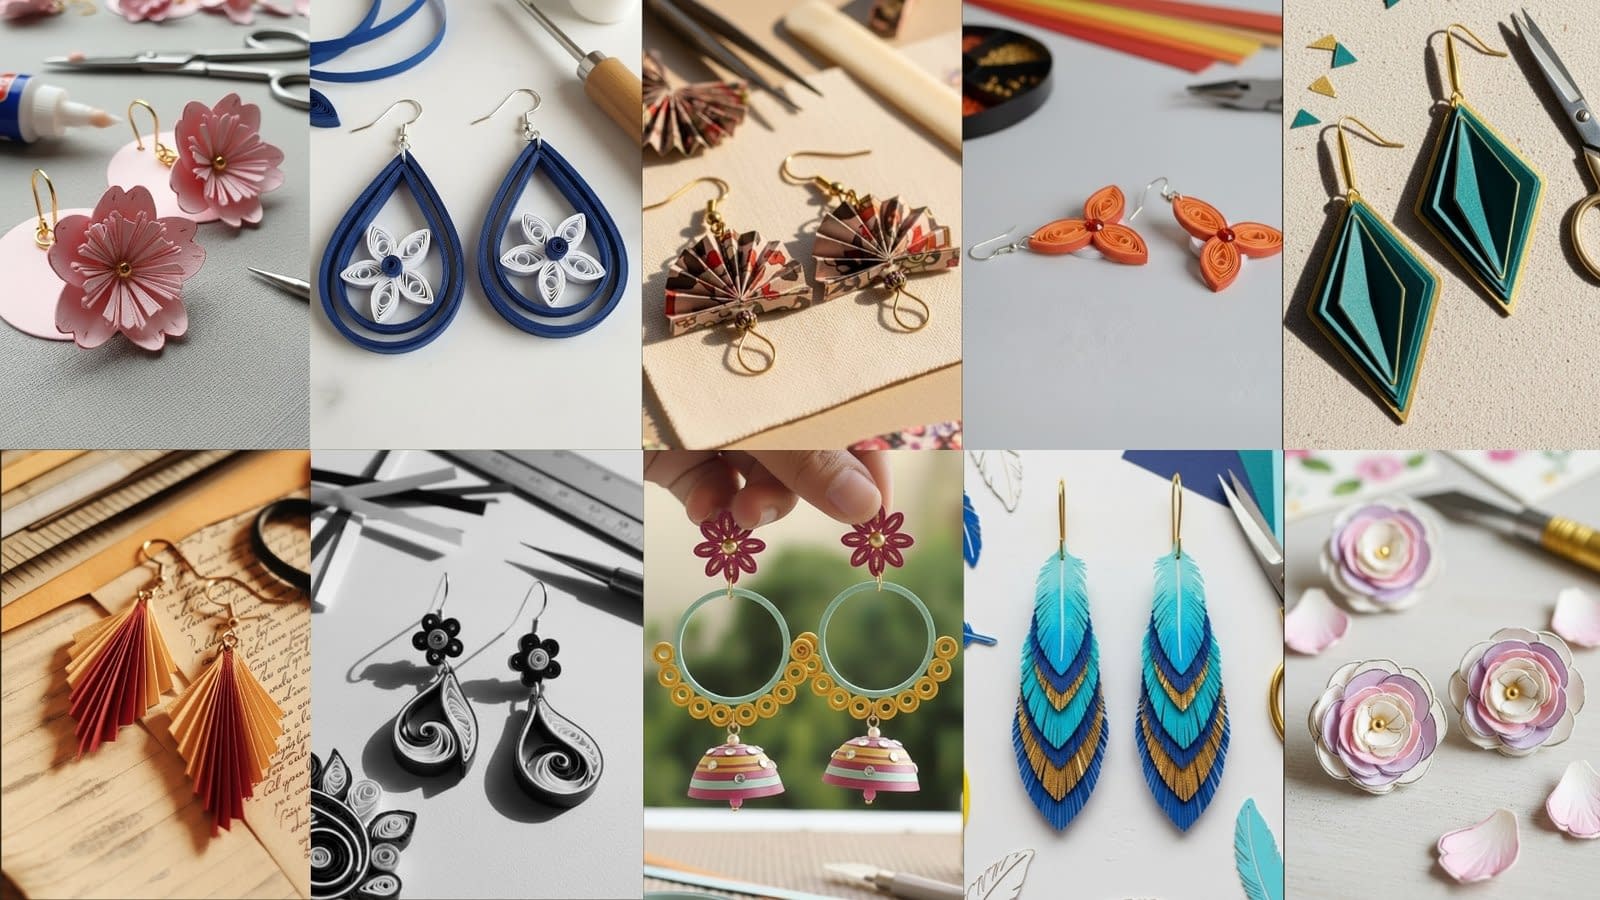
Paper earrings are one of the most accessible and rewarding crafts for beginners and experienced makers alike. They are lightweight, customizable, budget-friendly, and surprisingly durable when sealed properly. Whether you prefer elegant floral designs, bold geometric shapes, or colorful folded elements, paper earrings offer endless creative possibilities without requiring complicated tools or expensive materials.
This guide, titled 10 DIY Paper Earrings: Simple Tutorials for Unique Pieces, is designed to help readers create eight distinct earring styles inspired by the images you provided. Each design is broken down into clear, step-by-step instructions that walk you through materials, preparation techniques, shaping methods, assembling, sealing, and finishing touches.
To keep everything beginner-friendly, each tutorial avoids shorthand and uses full descriptive language. Nothing is rushed or summarized. Every detail is explained in a long-form format to ensure crafters of all levels can confidently follow along and achieve professional results.
Pink Sakura Paper Flower Earrings Tutorial
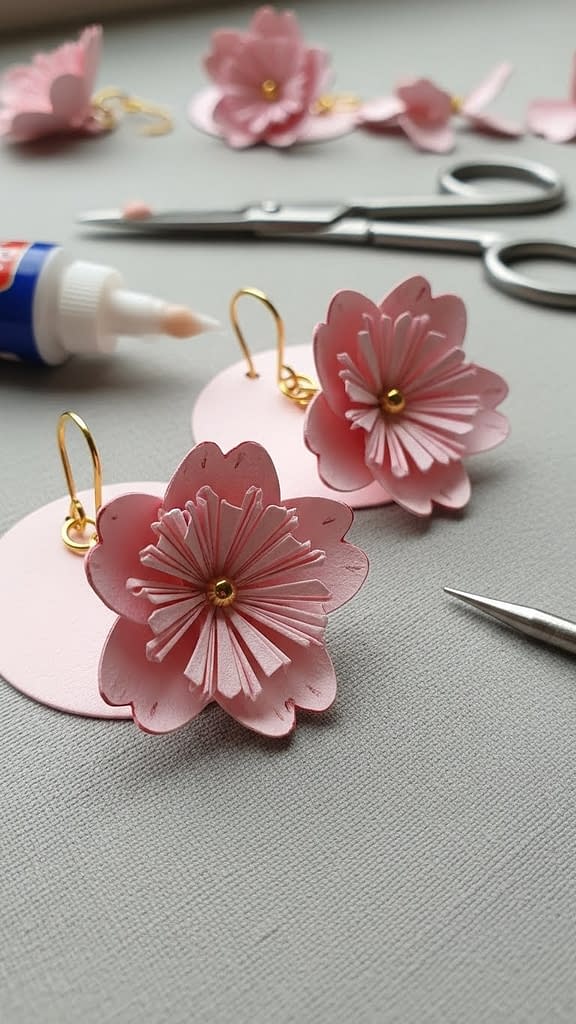
This pair features delicate, soft pink paper petals arranged into a sakura-style flower. The design creates a gentle, feminine look that resembles handcrafted fabric accessories, but made entirely from folded paper. The petals are shaped to mimic natural curves, and a small bead is placed in the center for a polished finish. This tutorial will guide you from cutting the petal pieces to assembling the flower and attaching the earring findings.
Materials
• Thin, lightweight pink paper
• Small gold or pearl beads for the center
• Strong craft glue or tacky glue
• Needle or fine-point tool for shaping
• Scissors
• Small circle base (paper or cardstock)
• Jump rings
• Earring hooks
• Round-nose pliers
• Clear sealant or varnish for protection
Notes Before Starting
This design involves creating several identical petals, so take your time to measure and cut evenly. Use lightweight paper so the petals curl softly rather than stiffly. Work on a clean, dry surface to avoid creases or unwanted glue marks.
Preparing the Petals
Cutting the Petals
Cut five or six identical squares of pink paper, each approximately one inch by one inch. You may adjust the size depending on how large or small you want the finished flower to be. Each square will become one petal.
Folding the Petals
Fold each square diagonally to form a triangle. Fold the left and right corners upward so that the points meet at the top, forming a kite shape. Fold the outer edges inward once more to create a slimmer petal shape.
Shaping the Petals
Use scissors to round the top of the folded shape. This rounded cut gives the petal its smooth, natural finish. Open the folds slightly, then pinch the bottom point to create a slight crease that allows the petal to curve inward, giving the flower its dimensional look.
Repeat this process for all the petals.
Building the Sakura Flower
Creating the Flower Base
Cut a small circular base from cardstock. This circle should be slightly smaller than the overall flower so it will not be visible once the petals are glued on.
Attaching the Petals
Apply a thin line of craft glue to the bottom edge of each petal. Press each petal onto the base, arranging them evenly in a circular formation with the rounded edges pointing outward. Hold each petal in place for a few seconds before adding the next to maintain stability.
After completing the first layer, you may add a second slightly overlapping layer for a fuller effect. This is optional but creates a more realistic sakura appearance.
Adding the Center Bead
Place a small bead in the center of the flower using a dot of glue. Press lightly and allow it to dry completely.
Attaching the Earring Findings
Use a needle or hole punch to make a tiny hole at the top of the flower. Insert a jump ring through the hole using round-nose pliers. Attach the jump ring to the earring hook, and close the jump ring securely.
Optional Sealing
Apply a thin coat of clear sealant to protect the petals from moisture and strengthen the structure. Allow the earrings to dry completely before wearing.
Blue Teardrop Paper Quilling Earrings Tutorial
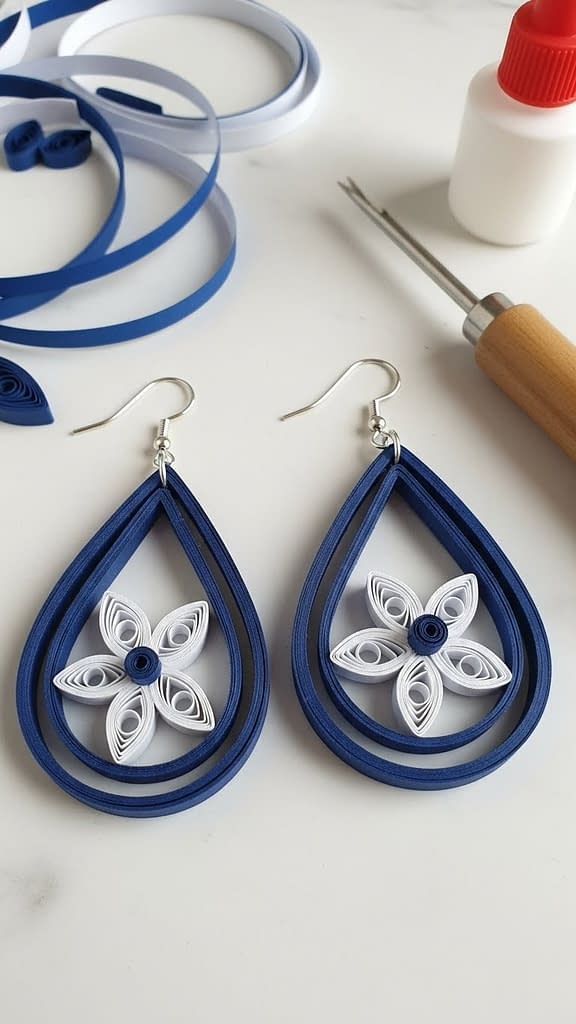
This design uses a teardrop-shaped frame made from paper quilling strips, with a delicate five-petal quilled flower placed inside. The look is elegant, light, and modern, suitable for both casual wear and special occasions.
Materials
• Dark blue paper quilling strips
• White quilling strips for the inner flower
• Paper quilling tool
• Scissors
• Craft glue
• Earring hooks
• Jump rings
• Round-nose pliers
• Clear varnish or paper sealant
Notes Before Starting
Quilling requires gentle handling. Make sure your strips are consistent in width, and keep your rolling pressure even so the shapes are uniform.
Creating the Teardrop Frame
Rolling the Outer Strip
Take a long dark blue quilling strip. Instead of rolling it tightly, you will form it into a teardrop shape by soft bending. Fold the strip gently in half to mark the top point, then curve the ends downward and around to form the rounded bottom and pointed top.
Glue the ends together neatly and hold until secured.
Strengthening the Frame
Cut another dark blue strip and glue it along the inside edge of the first frame to double the thickness. This keeps the teardrop sturdy and prevents bending.
Creating the White Quilled Flower
Making the Petals
Roll five tight coils using white quilling strips. Once rolled, release each coil slightly to allow it to expand into a loose shape. Pinch one side of each coil to form a teardrop shape. These five teardrop coils will become the flower petals.
Forming the Flower
Arrange the five teardrop-shaped coils in a circular pattern with the pointed ends meeting in the center. Glue each petal to the next until the flower is complete. Add a small dark bead or tiny rolled coil to the center if desired.
Assembling the Earring
Glue the completed flower inside the teardrop frame. Press gently to ensure it adheres firmly to the frame edges.
Allow to dry completely before attaching findings.
Attaching the Findings
Create a small hole or loop at the top of the teardrop shape using a needle or by attaching a small paper loop. Add a jump ring through the hole and connect it to an earring hook.
Seal the entire structure with clear varnish to protect it.
Mini Fan Fold Paper Earrings Tutorial
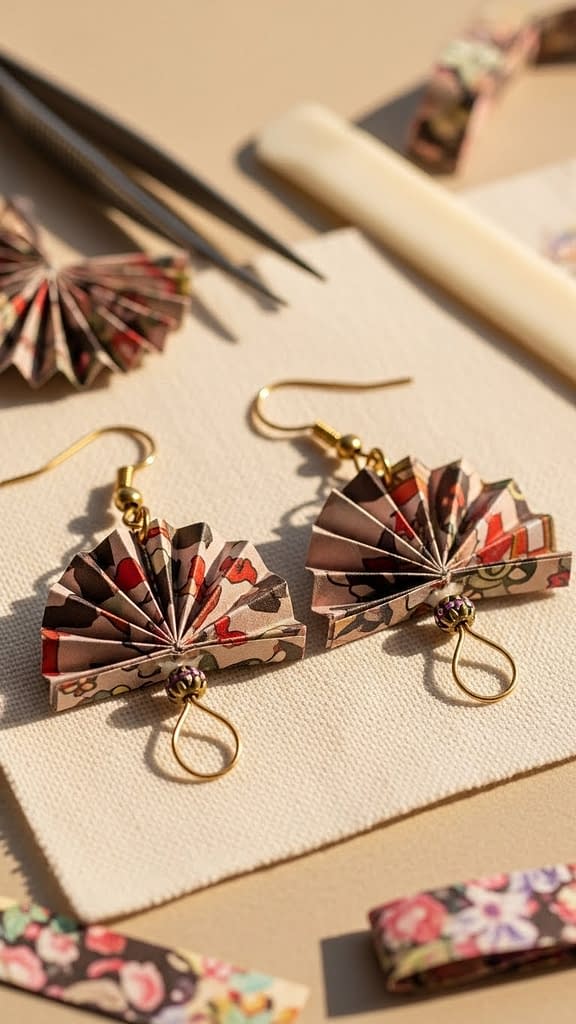
This design uses small, colorful paper fans crafted from patterned paper. These earrings are vibrant and eye-catching, making them perfect for playful or modern outfits.
Materials
• Lightweight patterned paper
• Scissors
• Wood or glass beads for decoration
• Thin wire or headpins
• Craft glue
• Jump rings
• Earring hooks
• Round-nose pliers
• Sealant
Preparing the Fan Panels
Cut two rectangles of patterned paper, approximately two inches by three inches. Fold each rectangle accordion-style, making small, even pleats along the width.
Shaping the Fan
Fold the pleated strip in half so that both ends meet. Apply glue along the inside fold and press together until the shape resembles a small, half-circle fan.
Hold until secure.
Adding a Decorative Bead
Insert a thin wire or headpin through the center fold of the fan. Add a small bead above the fan to enhance the appearance and help secure the paper structure. Bend the top of the wire into a loop using pliers.
Attaching the Hook
Connect the loop to a jump ring and then attach the jump ring to an earring hook. Seal the paper lightly for added durability.
Orange Petal Paper Quilling Earrings Tutorial
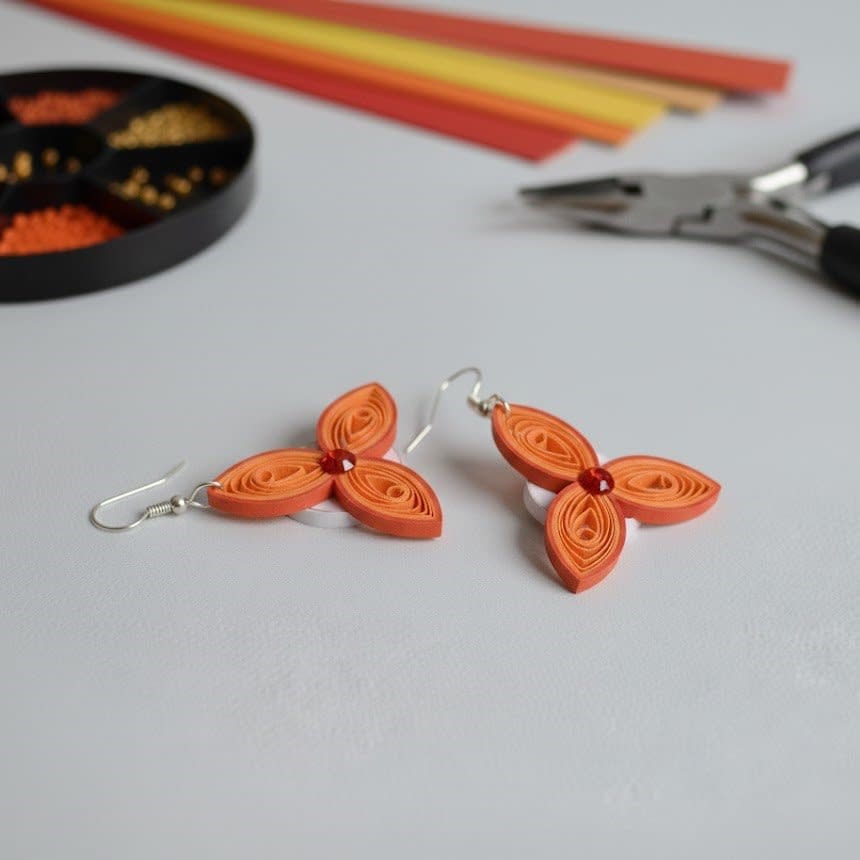
This pair features elongated orange quilled petals arranged in a circular formation. The design is bright, bold, and perfect for anyone who enjoys vibrant statement pieces. Each petal is shaped using standard quilling techniques, then arranged symmetrically to form a polished geometric flower.
Materials
• Orange quilling strips
• Small beads or tight paper coils for the center
• Scissors
• Paper quilling tool
• Craft glue
• Cardstock base (small circle)
• Jump rings
• Earring hooks
• Clear varnish
• Round-nose pliers
Preparing the Orange Petals
Cut several orange quilling strips to equal lengths. Roll each strip into a tight coil, then allow it to open slightly. Once loosened, pinch one end to form a pointed teardrop shape. This creates the long petal effect.
Make six identical teardrop-shaped petals for each earring.
Creating the Base Structure
Cut a small circular piece of cardstock to act as the foundation. This circle should be just large enough to hold the petal arrangement but small enough to remain hidden once the petals are glued on.
Apply a thin line of glue around the outer edge of the circle.
Attaching the Petals
Place each petal onto the glued area, spacing them evenly. The pointed ends should meet at the center, while the rounded ends create the outer shape. Be sure to press each petal down firmly for a secure bond.
Adding the Center Detail
Place a small bead or tiny tight coil in the center where all the pointed ends meet. This hides any gaps and adds a professional finish.
Allow the design to dry completely before moving on.
Adding the Earring Findings
Create a small hole at the top using a needle or attach a small paper loop to the back. Insert a jump ring through the hole and attach the earring hook.
Seal with clear varnish to maintain durability.
Black and White Swirl Paper Quilling Earrings Tutorial

This design features a smooth swirl pattern made from black and white strips curled together. The effect is bold and modern, perfect for monochrome outfits and minimalistic styles. The swirling coils create a hypnotic, elegant look that appears more complicated than it actually is.
Materials
• Black and white quilling strips
• Paper quilling tool
• Craft glue
• Scissors
• Jump rings
• Earring hooks
• Clear sealant
• Round-nose pliers
Creating the Swirl Pattern
Cut one black strip and one white strip. Glue the ends together so the two strips form one longer strip with two colors.
Insert the joined end into the quilling tool and roll the strip into a tight coil. Once rolled, release it slightly to allow it to expand into a looser shape.
You will notice the black and white layers forming the swirl pattern as the coil expands.
Shaping the Swirl
Pinch one side of the coil lightly to transform it into a soft triangular or teardrop shape. The swirl of colors should remain clearly visible along the edges.
Make two identical swirl pieces.
Reinforcing the Structure
To increase durability, add a thin layer of glue along the outer edge of each swirl. This helps the paper layers maintain their shape.
Let them dry fully before attaching the findings.
Adding the Findings
Use a needle to make a small hole at the top or attach a small paper loop. Insert a jump ring and connect it to an earring hook. Seal with clear varnish for longevity.
Big Circular Paper Jhumka Style Earrings Tutorial
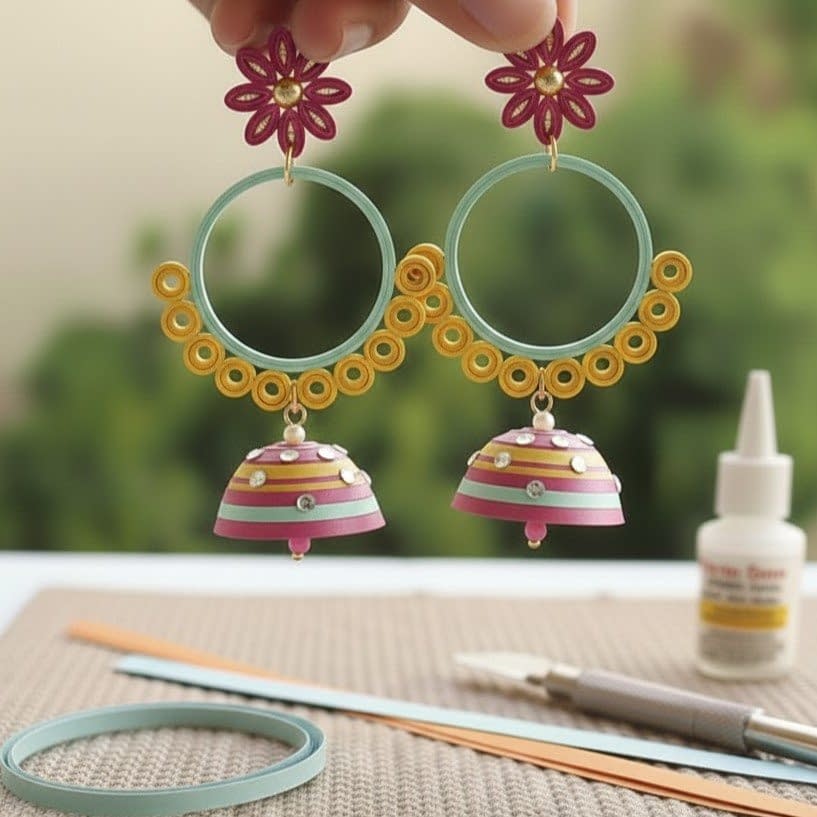
This design resembles a traditional jhumka shape but made entirely from rolled paper. It features a large circular fan-like structure that stands out due to its shape and size. This pair is ideal for festive occasions or bold statement looks.
Materials
• Wide paper strips in the color of your choice
• Paper quilling tool
• Craft glue
• Scissors
• Small bead for the bottom center
• Jump rings
• Earring hooks
• Round-nose pliers
• Clear varnish
Creating the Large Circular Base
Cut a long, wide paper strip. Roll it into a tight coil using the quilling tool. Once rolled, allow the coil to expand slightly into a thick, open coil.
Press gently in the center of the coil with your finger to create a dome shape. This forms the traditional jhumka-style curve.
Maintaining the Jhumka Shape
Apply glue along the inner layers of the dome to secure the shape. Hold the dome in place until the structure becomes firm.
Adding the Bottom Decoration
Glue a small bead at the bottom center of the dome. This enhances the jhumka appearance and adds weight for better hanging.
Adding the Findings
Attach a paper loop or make a small hole at the top of the dome. Insert a jump ring and connect it to the earring hook.
Seal with clear varnish and allow it to dry thoroughly.
Red and Yellow Leaf Fold Paper Earrings Tutorial
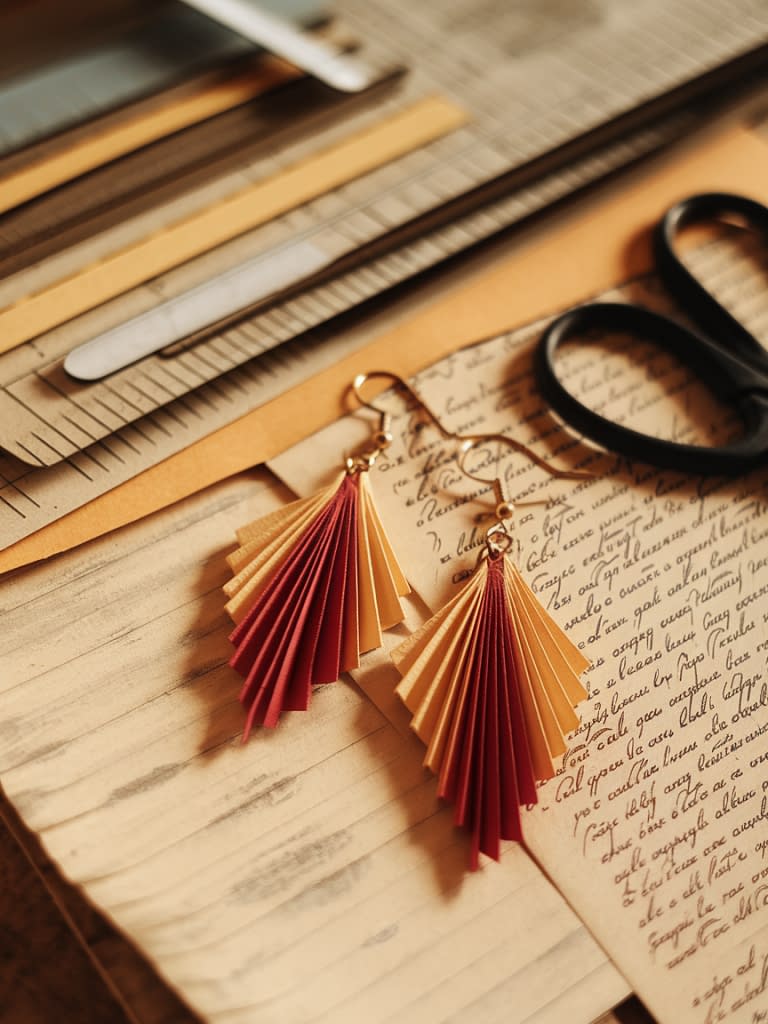
This pair features leaf-like shapes made from folded red and yellow paper strips. The design is vibrant, layered, and reminiscent of natural leaf textures. The color contrast between red and yellow gives the earrings a warm and lively appearance.
Materials
• Red paper strips
• Yellow paper strips
• Scissors
• Craft glue
• Jump rings
• Earring hooks
• Round-nose pliers
• Clear sealant
Preparing the Leaf Layers
Cut identical lengths of red and yellow strips. Apply glue along one of the strips and attach the second strip on top so the edges are aligned perfectly.
Allow the double strip to dry slightly before shaping.
Folding the Leaf Shape
Fold the layered strip in half lengthwise. Make small diagonal folds along both sides to create the ridged, leaf-like texture. Keep each fold even and symmetrical.
Once folded completely, pinch the bottom end firmly to secure the structure.
Shaping the Leaf Tip
Trim the top end with scissors to form a pointed leaf tip. Adjust the folds to ensure the leaf curves naturally.
Create two matching leaves.
Adding the Findings
Attach a small paper loop or pierce the top gently with a needle. Insert a jump ring and connect it to an earring hook.
Seal lightly with clear varnish.
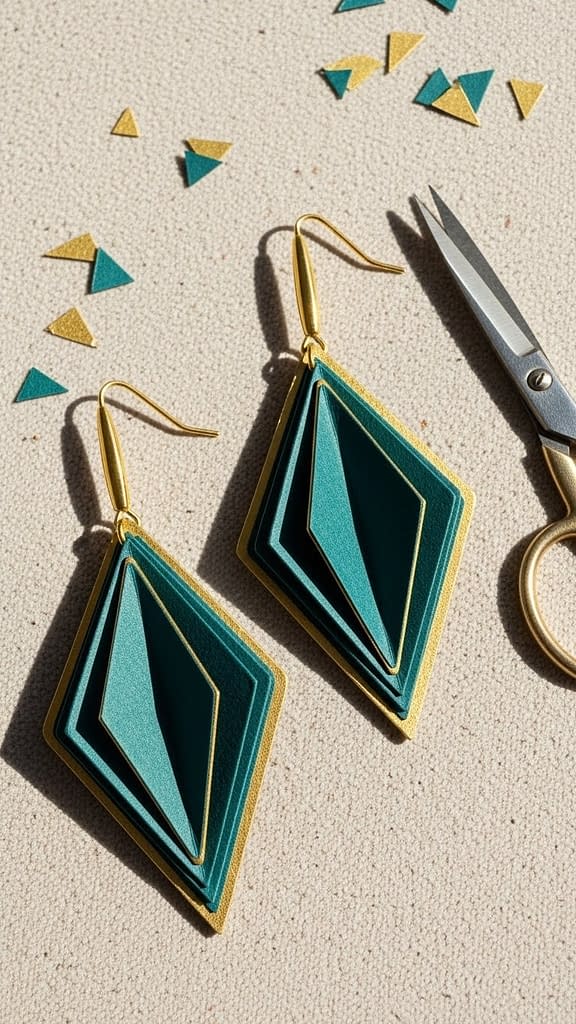
Geometric Diamond Paper Earrings
Materials
- High-quality cardstock sheets in deep teal, gold, or any preferred accent colors
- Precision craft knife or sharp scissors
- Metal earring hooks in gold tone
- Jump rings
- Jewelry pliers
- Cutting mat to protect surfaces
- Paper glue or strong tacky adhesive
- Optional sealant such as matte Mod Podge or clear-drying varnish
- Ruler and pencil
- Optional fine-tip scoring tool for crisp folds
Overview
These geometric diamond paper earrings combine clean lines, precise symmetry, and a modern minimalist aesthetic. The layered cardstock design adds depth while maintaining a smooth matte finish. Although they appear delicate, the careful layering creates a surprisingly sturdy structure that feels high-end.
Creating the Diamond Panels
Designing the Diamond Shape
- Begin by drawing a symmetrical diamond shape onto the back of your cardstock. You may draw it freehand or use a ruler for a perfectly angular appearance.
- Ensure that each side mirrors the opposite side. A simple way to achieve this is to fold your paper in half, draw half of the shape along the fold, and cut through both layers.
- Once you have your first perfect diamond shape, use it as a tracing template to ensure the remaining pieces are identical.
Cutting the Layers
- Cut at least three to four identical diamond shapes from your deep teal cardstock. These layers will form the foundation of your earring.
- For the gold accents, cut slightly smaller diamond shapes or outline strips that will be glued on top of the teal layers.
- Use a precision knife to achieve clean edges. This is especially important for geometric designs, as imperfect cuts are easily noticeable.
Creating Crisp Folds and Symmetry
- If your design includes inner geometric lines, lightly score them using a scoring tool or the back of your craft knife.
- Gently fold along these scored lines to create clean, dimensional angles.
- Keep the folds shallow; the goal is to create subtle depth without warping the paper.
Assembling and Layering
- Take your first teal diamond base and apply a thin layer of clear-drying adhesive.
- Press your second identical layer directly on top, aligning the edges precisely.
- Repeat until you have a thick, sturdy diamond panel with a clean matte finish.
- Add the gold accent pieces last, arranging them in symmetrical patterns.
This may include thin diagonal strips, smaller inner diamonds, or corner trims.
Attaching the Hardware
- Use a precision needle or small hole punch to create a clean hole at the top of the diamond.
- Insert a jump ring and attach it to the gold earring hook.
- Use jewelry pliers to tighten the jump ring securely so the earring hangs smoothly and does not slip.
Sealing for Durability
- Choose a matte or satin finish sealant depending on your preferred aesthetic.
- Apply a very thin coat to avoid visible brush strokes.
- Allow the earrings to dry completely before wearing or packaging.
Creative Variations
- Use holographic paper for futuristic shine.
- Incorporate layered negative space by cutting out interior windows.
- Create minimalist linework using metallic gel pens.
- Add texture with embossed cardstock.
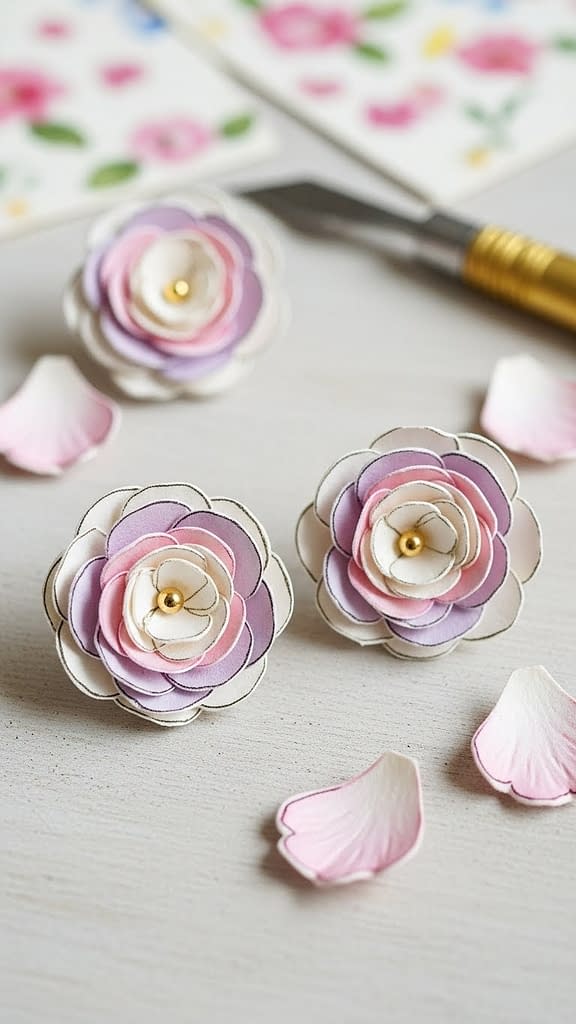
Floral Layered Paper Stud Earrings
Materials
- Smooth cardstock in pastel pink, lavender, and creamy white
- Craft knife and scissors
- Small gold beads for centers
- Strong craft glue
- Lightweight stud earring posts
- Cutting mat
- Tweezers for small pieces
- Optional soft ink pads for shading petal edges
- Sealant for protection
Overview
These floral layered paper stud earrings have a romantic handmade appearance with gentle pastel tones and carefully shaped petals. Their delicate structure comes from stacking many small flower layers, each slightly offset to mimic real botanical depth.
Cutting the Petals
Creating Your Petal Templates
- Begin by drawing a simple five-petal flower shape on a piece of scrap paper.
- Refine the design until you are satisfied with the smoothness of each curve.
- Cut it out and use this as your template for the remaining layers.
Making Multiple Layers
- Trace your template several times onto your cardstock.
Create at least four to six layers per earring for a full flower. - Vary the sizes slightly by reducing or enlarging the template to add dimension.
- Cut out each flower carefully, using small scissors for tight curves.
Adding Shading and Texture
- If you want softer realism, lightly brush ink onto the edges of each petal.
- Gently curl the petals upward using the edge of your scissors or your fingertip.
- This curvature gives the flower a natural, lifelike form.
Stacking the Layers
- Begin with the largest flower shape as the base.
- Apply a small dab of glue to the center.
- Place the second layer directly on top but slightly rotated so that the petals do not align perfectly.
- Continue stacking increasingly smaller layers in the same manner.
- Once all layers are glued, press gently in the center to secure.
Adding the Gold Bead Center
- Place a tiny drop of glue in the center of the flower.
- Use tweezers to position the gold bead accurately.
- Allow it to dry completely before attaching the stud hardware.
Attaching the Stud Posts
- Apply a small circle of glue to the back of your flower.
- Press the flat side of the stud post directly into the adhesive.
- Let it cure fully so the earring is stable and strong.
Optional Sealing
- Use a matte spray sealant to protect the petals without adding weight.
- Allow to dry thoroughly before wearing.
Creative Variations
- Use contrasting ink shades for dramatic petals.
- Replace the gold bead with a rhinestone or tiny pearl.
- Combine multiple small flowers to form a floral cluster.
- Use textured papers such as handmade or cotton-blend sheets.
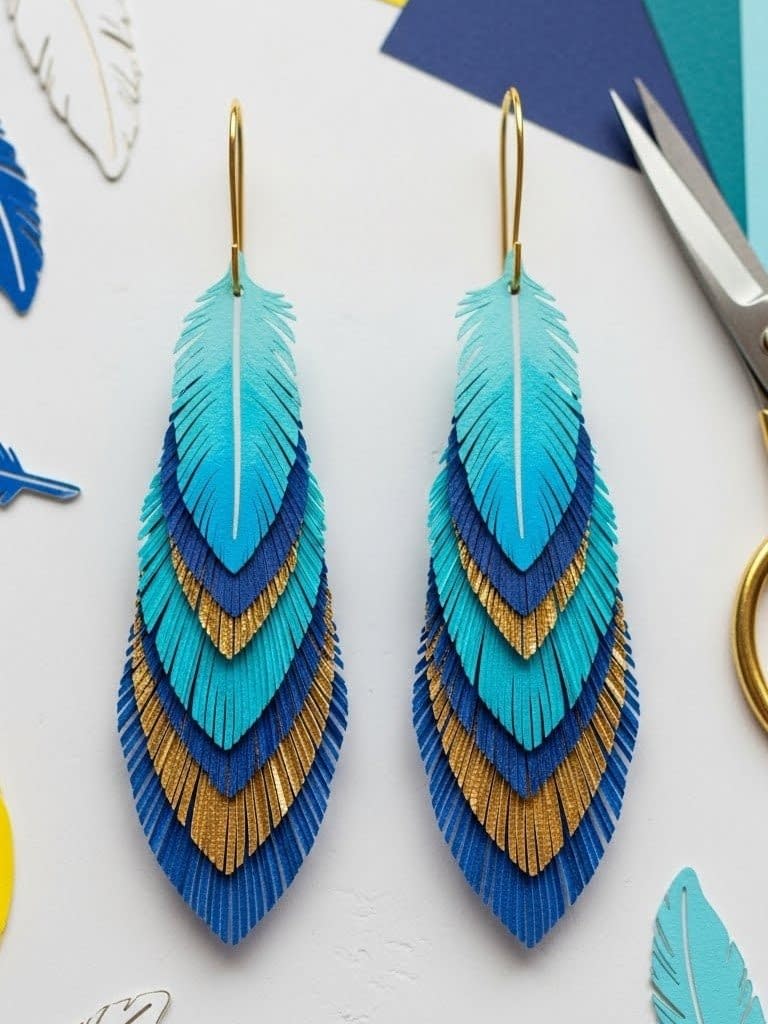
Layered Feather Paper Earrings
Materials
- Cardstock in turquoise, deep blue, and metallic gold
- Fine-tip craft scissors
- Craft knife
- Gold hook earrings and jump rings
- Precision cutting mat
- Glue suitable for paper layering
- Optional metallic pens
- Clear-drying sealant for long-lasting wear
Overview
These layered feather-shaped paper earrings are inspired by nature, yet they retain a modern flair through their color palette and metallic accents. Each feather is composed of multiple layers cut with fine fringed edges to mimic realistic feather texture. The result is an elegant and lightweight accessory suitable for both everyday wear and special occasions.
Cutting the Feather Base
Designing the Feather Template
- Draw a long, slightly curved feather shape with a pointed tip and wider center.
- Add a thin central spine running from top to bottom.
- Once satisfied with the silhouette, cut out your template.
Creating Multiple Layers
- Trace your feather template onto turquoise, deep blue, and metallic gold cardstock.
- Cut out at least three to five feathers for each earring, varying the size slightly so the layers create a natural staggered effect.
Adding Realistic Fringed Texture
- Beginning at the outer edge of each feather, make many short, close-spaced cuts toward the central spine.
- Keep cuts thin and consistent to maintain realism.
- Alternate the lengths occasionally to create more natural feather variation.
- Avoid cutting too deeply toward the center to maintain structural integrity.
Layering the Feathers
- Begin with the largest feather as your base.
- Glue the next slightly smaller feather on top, aligning the spines while letting the feather tips spread outward.
- Continue layering the remaining feathers, switching colors for contrast.
- Add thin metallic gold accents using small cut strips or delicate overlay pieces.
Attaching the Hook Hardware
- Punch or pierce a small hole near the top of the layered feather stack.
- Insert a jump ring and attach it to the gold hook earring.
- Ensure the earrings can swing freely without twisting awkwardly.
Finishing Touches
- Apply a very light coat of sealant to protect the fringes without clumping them.
- Allow the earrings to dry fully before handling.
Creative Variations
- Add hand-painted gold lines along the spine for elegance.
- Create ombre layers by blending colors gradually.
- Introduce textured or marbled paper for depth.
- Make double-sided feather earrings by layering mirrored feather shapes.
Conclusion
Paper earrings are a versatile and accessible craft that lets you create impressive handmade accessories using simple tools and easy-to-learn techniques. From quilling and folding to shaping and layering, each method offers a unique look and texture that can be adapted to suit different personal styles. The eight tutorials in this guide showcase a variety of approaches, from delicate floral elements and swirl designs to bold jhumka shapes and colorful layered leaves.
The key to achieving durable, professional-looking paper earrings lies in consistent cutting, clean folds, careful glue application, and proper sealing. Taking the time to shape each component with intention results in sturdy, lightweight earrings that can be worn comfortably or gifted to others.
As you continue practicing, you can experiment with new color combinations, different paper thicknesses, and additional embellishments. Whether you prefer soft floral pieces or modern geometric elements, paper earrings offer endless creative possibilities for crafters at every skill level.


